Lubricating or replacing door lock components is crucial for maintaining the security and functionality of your Mercedes-Benz. This comprehensive guide from MERCEDES-DIAGNOSTIC-TOOL.EDU.VN, provides detailed steps and insights for both processes. Understanding these procedures can save you time and money while ensuring your vehicle’s security. This article also covers essential topics like automotive maintenance and the benefits of using a Mercedes diagnostic tool.
Contents
- 1. Understanding the Importance of Door Lock Maintenance
- 1.1. Why Door Locks Fail
- 1.2. Common Signs of Door Lock Problems
- 2. Tools and Materials Needed for Door Lock Maintenance
- 2.1. Essential Tools
- 2.2. Optional but Helpful Tools
- 2.3. Replacement Parts
- 3. Step-by-Step Guide to Lubricating Door Lock Components
- 3.1. Preparing the Door
- 3.2. Applying Lubricant
- 3.3. Cleaning the Key
- 3.4. Testing the Lock
- 4. Step-by-Step Guide to Replacing Door Lock Components
- 4.1. Removing the Door Panel
- 4.2. Accessing the Door Lock Mechanism
- 4.3. Replacing the Door Lock Actuator
- 4.4. Replacing the Door Lock Cylinder
- 4.5. Replacing the Door Handle
- 4.6. Reassembling the Door
- 5. Advanced Troubleshooting and Tips
- 5.1. Central Locking System Issues
- 5.2. Key Fob Problems
- 5.3. Misaligned Doors
- 6. When to Seek Professional Help
- 6.1. Complex Electrical Issues
- 6.2. Security Concerns
- 6.3. Lack of Experience
- 7. Maintaining Door Locks in Different Weather Conditions
- 7.1. Hot Weather
- 7.2. Cold Weather
- 7.3. Wet Weather
- 8. Choosing the Right Lubricant for Door Locks
- 8.1. Silicone-Based Lubricants
- 8.2. Penetrating Oils
- 8.3. Graphite Lubricants
- 8.4. How to Apply Lubricant Effectively
- 9. Understanding Mercedes-Benz Door Lock Systems
- 9.1. Central Locking System
- 9.2. Remote Locking System
- 9.3. Anti-Theft System
- 10. Using a Mercedes Diagnostic Tool for Door Lock Issues
- 10.1. What is a Mercedes Diagnostic Tool?
- 10.2. How to Use a Diagnostic Tool
- 10.3. Common Door Lock Fault Codes
- 10.4. Benefits of Using a Diagnostic Tool
- 11. Preventing Future Door Lock Problems
- 11.1. Regular Lubrication
- 11.2. Keep the Key Clean
- 11.3. Avoid Forcing the Lock
- 11.4. Inspect Regularly
- 11.5. Address Problems Promptly
- 12. Key Takeaways
- 13. FAQ About Lubricating and Replacing Door Lock Components
- 13.1. What is the best lubricant for car door locks?
- 13.2. How often should I lubricate my car door locks?
- 13.3. Can I use WD-40 on my car door locks?
- 13.4. What are the signs that my door lock actuator needs to be replaced?
- 13.5. How do I know if my key fob battery is dead?
- 13.6. What is a door lock cylinder?
- 13.7. How do I remove a door panel?
- 13.8. What is a central locking system?
- 13.9. How can a Mercedes diagnostic tool help with door lock issues?
- 13.10. What should I do if my door lock is frozen?
- 14. Conclusion: Keeping Your Mercedes-Benz Door Locks in Top Condition
1. Understanding the Importance of Door Lock Maintenance
Maintaining your Mercedes-Benz door locks is essential for both security and convenience. Over time, door lock components can become stiff, corroded, or simply wear out. Regular maintenance can prevent these issues, ensuring that your doors lock and unlock smoothly and reliably. According to a study by the National Institute for Automotive Service Excellence (ASE), routine maintenance can significantly extend the lifespan of vehicle components, including door locks.
1.1. Why Door Locks Fail
Several factors can lead to door lock failure:
- Wear and Tear: Constant use can wear down the internal mechanisms.
- Corrosion: Moisture and environmental factors can cause rust and corrosion.
- Debris: Dirt and debris can accumulate inside the lock, causing it to stick.
- Misalignment: Doors that are not properly aligned can put extra stress on the locking mechanism.
1.2. Common Signs of Door Lock Problems
Recognizing the signs of door lock issues early can prevent more significant problems. Here are some common indicators:
- Sticking Locks: The key is difficult to insert or turn.
- Difficulty Locking/Unlocking: The door doesn’t lock or unlock with ease.
- Key Doesn’t Turn: The key turns, but the lock doesn’t engage.
- Strange Noises: Grinding or clicking sounds when using the lock.
- Remote Inactivity: The remote key fob does not lock or unlock the doors.
2. Tools and Materials Needed for Door Lock Maintenance
Before you begin, gather the necessary tools and materials. Having everything on hand will make the process smoother and more efficient.
2.1. Essential Tools
- Screwdrivers: Both Phillips head and flathead screwdrivers in various sizes.
- Socket Set: A set of sockets and a ratchet for removing and installing bolts.
- Pliers: Needle-nose pliers for small components and general-purpose pliers.
- Hammer: For gently tapping components into place.
- Penetrating Oil: Such as WD-40, to loosen corroded parts.
- Silicone-Based Lubricant: To lubricate the lock mechanism.
- Clean Rags: For wiping away dirt and excess lubricant.
- Safety Glasses: To protect your eyes from debris.
- Gloves: To protect your hands.
2.2. Optional but Helpful Tools
- Multimeter: To test electrical components if the problem is related to the central locking system.
- Door Panel Removal Tool: To remove the door panel without damaging it.
- Mechanic’s Mirror: To see hard-to-reach areas inside the door.
- Work Light: To provide better visibility.
2.3. Replacement Parts
- Door Lock Actuator: If the existing one is faulty.
- Door Lock Cylinder: If the key is not working properly.
- Door Handle: If the handle is damaged or broken.
- Fasteners: Replacement screws and bolts.
3. Step-by-Step Guide to Lubricating Door Lock Components
Lubrication is often the first step in resolving door lock issues. It can free up sticky mechanisms and prevent further wear.
3.1. Preparing the Door
- Open the Door: Ensure the door is open and stable.
- Protect the Area: Place a clean rag or drop cloth beneath the door to catch any drips.
- Inspect the Lock: Examine the lock mechanism, looking for signs of rust, dirt, or damage.
3.2. Applying Lubricant
- Use Penetrating Oil: If there’s rust or corrosion, start by applying penetrating oil to the lock cylinder and any moving parts. Let it sit for 10-15 minutes to loosen the corrosion.
- Wipe Away Excess: Use a clean rag to wipe away any excess penetrating oil.
- Apply Silicone Lubricant: Spray silicone-based lubricant into the keyhole, door handle mechanism, and latch. Silicone lubricant is ideal because it won’t attract dirt and debris.
- Work the Lock: Insert the key and turn it several times. Open and close the door handle to distribute the lubricant throughout the mechanism.
- Repeat if Necessary: If the lock is still stiff, repeat the lubrication process.
3.3. Cleaning the Key
- Inspect the Key: Check the key for any dirt or damage.
- Clean the Key: Use a wire brush to gently clean the key, removing any debris.
- Lubricate the Key: Spray a small amount of silicone lubricant on the key and wipe off the excess.
3.4. Testing the Lock
- Lock and Unlock: Test the lock several times to ensure it operates smoothly.
- Check the Door Handle: Make sure the door handle moves freely and returns to its original position.
- Evaluate: If the lock still doesn’t work properly, move on to the next steps.
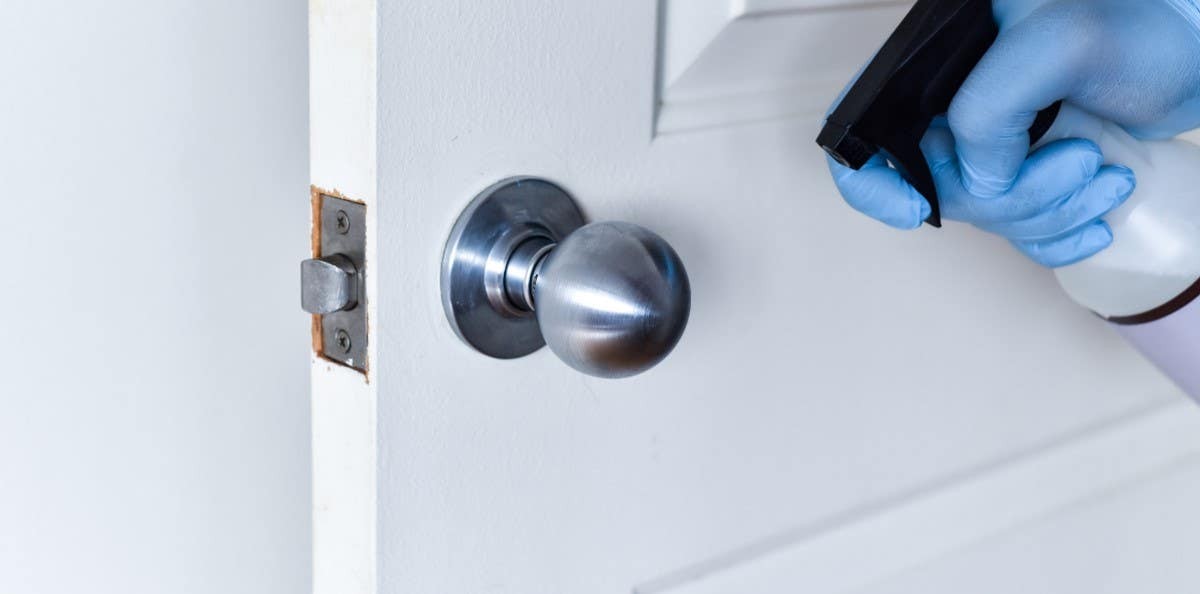 Lubricating a car door lock mechanism with silicone spray, ensuring smooth operation
4. Step-by-Step Guide to Replacing Door Lock Components
If lubrication doesn’t solve the problem, replacing the faulty components may be necessary. This section provides a detailed guide on how to replace common door lock parts.
4.1. Removing the Door Panel
- Locate Screws: Find and remove all screws holding the door panel in place. These are typically located around the edges of the panel, in the door handle recess, and near the armrest.
- Pry Off the Panel: Use a door panel removal tool or a flathead screwdriver (covered with tape to prevent damage) to gently pry the panel away from the door frame. Start at the bottom and work your way around the edges.
- Disconnect Wiring: Carefully disconnect any wiring harnesses connected to the door panel, such as those for the power windows, door locks, and speakers.
- Remove the Panel: Lift the door panel up and away from the door frame.
4.2. Accessing the Door Lock Mechanism
- Remove the Vapor Barrier: Carefully peel back the plastic vapor barrier that covers the inside of the door. This may be held in place with adhesive.
- Locate the Lock Mechanism: Identify the door lock actuator, lock cylinder, and connecting rods.
4.3. Replacing the Door Lock Actuator
The door lock actuator is responsible for electrically locking and unlocking the door.
- Disconnect the Actuator: Disconnect the wiring harness connected to the actuator.
- Remove Mounting Bolts: Remove the bolts or screws that hold the actuator in place.
- Remove the Actuator: Carefully remove the actuator from the door.
- Install the New Actuator: Install the new actuator in the reverse order, ensuring all connections are secure.
- Test the Actuator: Before reassembling the door, test the new actuator to make sure it locks and unlocks the door properly.
4.4. Replacing the Door Lock Cylinder
The door lock cylinder is where you insert the key to manually lock and unlock the door.
- Remove Retaining Clip: Locate and remove the retaining clip that holds the lock cylinder in place. This may require using needle-nose pliers.
- Remove the Cylinder: Gently push the lock cylinder out of the door.
- Install the New Cylinder: Insert the new lock cylinder into the door.
- Secure with Retaining Clip: Secure the cylinder with the retaining clip.
- Test the Cylinder: Insert the key and test the lock to make sure it operates smoothly.
4.5. Replacing the Door Handle
The door handle can sometimes break or become damaged, requiring replacement.
- Remove Connecting Rods: Disconnect any connecting rods that link the door handle to the lock mechanism.
- Remove Mounting Screws: Remove the screws that hold the door handle in place.
- Remove the Handle: Carefully remove the door handle from the door.
- Install the New Handle: Install the new door handle in the reverse order, ensuring all connections are secure.
- Test the Handle: Make sure the door handle operates smoothly and engages the lock mechanism properly.
4.6. Reassembling the Door
- Replace Vapor Barrier: Carefully replace the vapor barrier, ensuring it is properly sealed to prevent moisture from entering the door.
- Reconnect Wiring: Reconnect all wiring harnesses to the door panel.
- Attach Door Panel: Align the door panel with the door frame and gently push it into place.
- Install Screws: Reinstall all screws that hold the door panel in place.
- Test Everything: Test the power windows, door locks, and speakers to make sure everything is working properly.
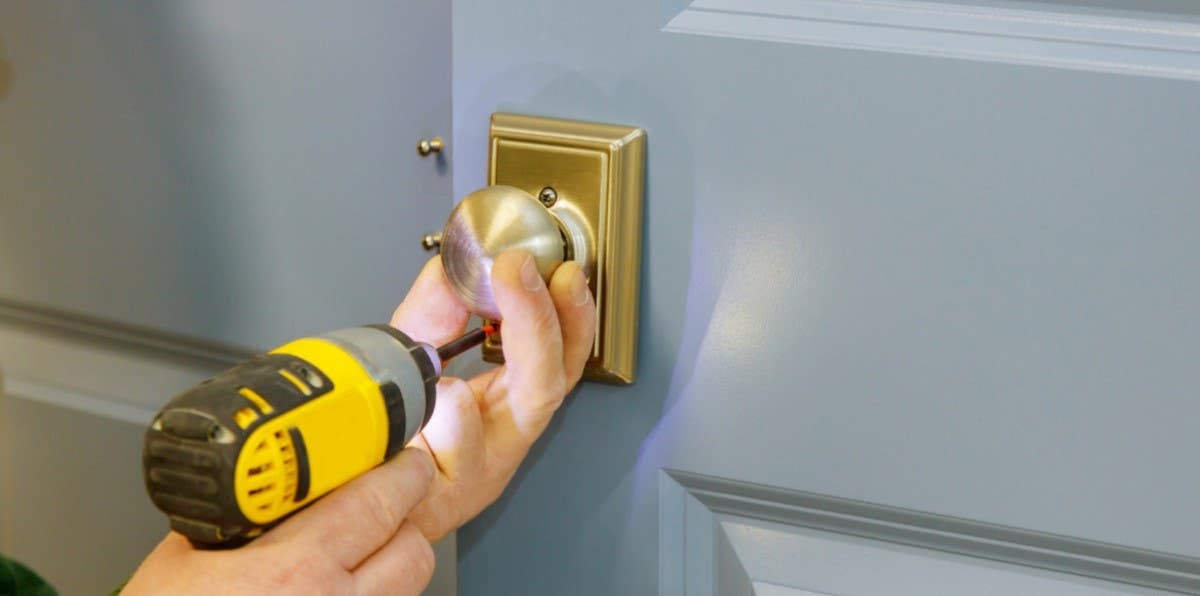 Replacing a car door lock actuator inside the door panel, ensuring secure locking and unlocking
5. Advanced Troubleshooting and Tips
Sometimes, door lock problems can be more complex and require advanced troubleshooting techniques.
5.1. Central Locking System Issues
If none of the doors lock or unlock, the problem may lie with the central locking system.
- Check the Fuse: Start by checking the fuse for the central locking system. Replace the fuse if it is blown.
- Test the Relay: The central locking system uses a relay to control the door locks. Use a multimeter to test the relay and replace it if it is faulty.
- Inspect Wiring: Look for any damaged or corroded wires in the central locking system. Repair or replace any damaged wiring.
5.2. Key Fob Problems
If the key fob isn’t working, try these steps:
- Replace the Battery: Replace the battery in the key fob.
- Resync the Fob: Follow the manufacturer’s instructions to resync the key fob with the car. This usually involves pressing a series of buttons in a specific sequence.
- Check the Receiver: The car has a receiver that picks up the signal from the key fob. If the receiver is faulty, the key fob won’t work. A mechanic can test and replace the receiver.
5.3. Misaligned Doors
If the door is misaligned, it can put extra stress on the lock mechanism.
- Inspect the Door Hinges: Check the door hinges for wear or damage. Replace the hinges if necessary.
- Adjust the Striker Plate: The striker plate is the metal plate on the door frame that the door latch engages with. Loosen the screws holding the striker plate in place and adjust its position so that the door latch engages smoothly.
6. When to Seek Professional Help
While many door lock issues can be resolved with DIY maintenance, some problems require professional help.
6.1. Complex Electrical Issues
If the problem involves complex electrical issues, such as a faulty central locking system or a malfunctioning key fob receiver, it’s best to consult a professional mechanic.
6.2. Security Concerns
If you’re concerned about the security of your vehicle, it’s best to have a professional locksmith or mechanic handle the repairs. They can ensure that the lock is properly installed and functioning correctly.
6.3. Lack of Experience
If you’re not comfortable working on your car’s door locks, it’s always best to seek professional help. This can prevent further damage and ensure that the job is done correctly.
7. Maintaining Door Locks in Different Weather Conditions
Weather conditions can significantly impact the performance of your car’s door locks. Taking proactive measures can help prevent issues.
7.1. Hot Weather
- Lubricate Regularly: High temperatures can cause lubricants to dry out. Lubricate the door locks more frequently during hot weather.
- Avoid Parking in Direct Sunlight: Parking in the shade can help prevent the lock mechanism from overheating.
7.2. Cold Weather
- Use De-Icer: In freezing temperatures, use a de-icer to prevent the locks from freezing.
- Apply Water Repellent: Apply a water repellent to the door seals to prevent them from sticking.
7.3. Wet Weather
- Dry the Locks: After rain or snow, dry the locks to prevent rust and corrosion.
- Use Corrosion Inhibitor: Apply a corrosion inhibitor to protect the lock mechanism from moisture.
8. Choosing the Right Lubricant for Door Locks
Selecting the right lubricant is crucial for the longevity and performance of your door locks.
8.1. Silicone-Based Lubricants
- Pros: Silicone lubricants are excellent for door locks because they don’t attract dirt and debris. They also provide long-lasting lubrication.
- Cons: They may not be as effective at penetrating rust and corrosion as penetrating oils.
- Best Use: General lubrication of door locks, latches, and hinges.
8.2. Penetrating Oils
- Pros: Penetrating oils are designed to loosen rust and corrosion. They can penetrate tight spaces and free up sticky mechanisms.
- Cons: They can attract dirt and debris, which can cause the lock to become sticky over time.
- Best Use: Loosening corroded or rusted door locks.
8.3. Graphite Lubricants
- Pros: Graphite lubricants are dry lubricants that don’t attract dirt. They are effective in extreme temperatures.
- Cons: They may not provide as much lubrication as silicone-based lubricants.
- Best Use: Lubricating door locks in dusty or extreme temperature conditions.
8.4. How to Apply Lubricant Effectively
- Clean the Area: Before applying lubricant, clean the area to remove any dirt or debris.
- Apply Sparingly: Use lubricant sparingly to avoid attracting dirt.
- Work the Mechanism: After applying lubricant, work the lock mechanism to distribute the lubricant evenly.
- Wipe Away Excess: Wipe away any excess lubricant to prevent it from attracting dirt.
9. Understanding Mercedes-Benz Door Lock Systems
Mercedes-Benz vehicles often feature advanced door lock systems, including central locking, remote locking, and anti-theft features. Understanding these systems can help you troubleshoot issues more effectively.
9.1. Central Locking System
The central locking system allows you to lock and unlock all doors simultaneously using a button on the key fob or a switch inside the car.
- Components: The central locking system includes a control module, door lock actuators, and wiring.
- Troubleshooting: If the central locking system isn’t working, check the fuse, relay, and wiring.
9.2. Remote Locking System
The remote locking system allows you to lock and unlock the doors from a distance using the key fob.
- Components: The remote locking system includes a key fob, a receiver in the car, and the central locking system.
- Troubleshooting: If the remote locking system isn’t working, replace the battery in the key fob, resync the key fob, and check the receiver.
9.3. Anti-Theft System
Many Mercedes-Benz vehicles include an anti-theft system that prevents the car from being started without the correct key.
- Components: The anti-theft system includes a transponder in the key, a receiver in the car, and the engine control unit (ECU).
- Troubleshooting: If the anti-theft system is preventing the car from starting, try using a different key. If that doesn’t work, consult a professional mechanic.
10. Using a Mercedes Diagnostic Tool for Door Lock Issues
A Mercedes diagnostic tool can help you identify and troubleshoot door lock issues more effectively.
10.1. What is a Mercedes Diagnostic Tool?
A Mercedes diagnostic tool is a device that connects to your car’s onboard diagnostic (OBD) port and reads data from the car’s computer. This data can help you identify problems with various systems, including the door locks.
10.2. How to Use a Diagnostic Tool
- Connect the Tool: Plug the diagnostic tool into the OBD port, which is typically located under the dashboard.
- Turn on the Ignition: Turn on the ignition, but don’t start the car.
- Follow the Instructions: Follow the instructions on the diagnostic tool to read the car’s fault codes.
- Interpret the Codes: Use the fault codes to identify the problem with the door locks.
10.3. Common Door Lock Fault Codes
- B107A: Door lock actuator motor circuit open.
- B107B: Door lock actuator motor circuit short to ground.
- B107C: Door lock actuator motor circuit short to battery.
- B1080: Central locking system fault.
10.4. Benefits of Using a Diagnostic Tool
- Accurate Diagnosis: A diagnostic tool can provide an accurate diagnosis of the problem.
- Save Time and Money: By identifying the problem quickly, you can save time and money on repairs.
- Prevent Further Damage: By addressing the problem early, you can prevent further damage to the door locks.
MERCEDES-DIAGNOSTIC-TOOL.EDU.VN offers comprehensive diagnostic tools and support to help you maintain your Mercedes-Benz door locks effectively.
11. Preventing Future Door Lock Problems
Preventive maintenance is key to avoiding future door lock issues.
11.1. Regular Lubrication
Lubricate the door locks regularly to keep them operating smoothly.
11.2. Keep the Key Clean
Keep the key clean and free of debris.
11.3. Avoid Forcing the Lock
Never force the lock. If the key doesn’t turn easily, try lubricating the lock or consult a professional.
11.4. Inspect Regularly
Inspect the door locks regularly for signs of wear or damage.
11.5. Address Problems Promptly
Address any problems promptly to prevent them from becoming more serious.
12. Key Takeaways
- Maintaining your Mercedes-Benz door locks is essential for security and convenience.
- Lubrication is often the first step in resolving door lock issues.
- Replacing faulty components may be necessary if lubrication doesn’t solve the problem.
- A Mercedes diagnostic tool can help you identify and troubleshoot door lock issues more effectively.
- Preventive maintenance is key to avoiding future door lock problems.
13. FAQ About Lubricating and Replacing Door Lock Components
13.1. What is the best lubricant for car door locks?
Silicone-based lubricants are generally the best choice for car door locks because they don’t attract dirt and provide long-lasting lubrication.
13.2. How often should I lubricate my car door locks?
You should lubricate your car door locks at least twice a year, or more frequently if you live in an area with extreme weather conditions.
13.3. Can I use WD-40 on my car door locks?
Yes, WD-40 can be used to loosen corroded parts, but it’s best to follow up with a silicone-based lubricant to provide long-lasting lubrication.
13.4. What are the signs that my door lock actuator needs to be replaced?
Signs that your door lock actuator needs to be replaced include the door not locking or unlocking with the remote, the door locking or unlocking randomly, or a clicking sound coming from the door when you try to lock or unlock it.
13.5. How do I know if my key fob battery is dead?
If your key fob battery is dead, the remote locking system won’t work, and you may have to use the key manually to unlock the door.
13.6. What is a door lock cylinder?
The door lock cylinder is the part of the door lock where you insert the key.
13.7. How do I remove a door panel?
To remove a door panel, you need to remove all screws holding the panel in place, pry off the panel using a door panel removal tool, and disconnect any wiring harnesses connected to the panel.
13.8. What is a central locking system?
The central locking system allows you to lock and unlock all doors simultaneously using a button on the key fob or a switch inside the car.
13.9. How can a Mercedes diagnostic tool help with door lock issues?
A Mercedes diagnostic tool can read fault codes from the car’s computer, which can help you identify problems with the door locks.
13.10. What should I do if my door lock is frozen?
If your door lock is frozen, you can use a de-icer or warm water to thaw it. Never use hot water, as it can damage the lock.
14. Conclusion: Keeping Your Mercedes-Benz Door Locks in Top Condition
Maintaining your Mercedes-Benz door locks is a crucial aspect of vehicle ownership. Regular lubrication, timely replacement of worn components, and using diagnostic tools can keep your door locks functioning optimally, ensuring your vehicle’s security and your peace of mind. Whether you’re dealing with a sticky lock, a malfunctioning actuator, or a frozen cylinder, following the steps outlined in this guide will help you address the issue effectively.
Remember, MERCEDES-DIAGNOSTIC-TOOL.EDU.VN is here to provide you with the tools and information you need to keep your Mercedes-Benz in top condition.
Need expert advice or assistance with your Mercedes-Benz door locks? Contact us today for personalized support and solutions. Visit our website at MERCEDES-DIAGNOSTIC-TOOL.EDU.VN or reach out via WhatsApp at +1 (641) 206-8880. Our address is 789 Oak Avenue, Miami, FL 33101, United States. We are here to help you with all your Mercedes-Benz diagnostic and repair needs. Don’t hesitate, let us help you ensure your vehicle’s security and reliability.