The OBD2 to OBD1 jumper harness simplifies the process of connecting older OBD1-equipped Mercedes-Benz models to modern OBD2 diagnostic tools. MERCEDES-DIAGNOSTIC-TOOL.EDU.VN provides comprehensive information and support, ensuring seamless integration and accurate diagnostics for a wide range of Mercedes-Benz vehicles. This conversion harness enhances diagnostic capabilities, saves time, and ensures compatibility across different systems, and facilitates the use of newer diagnostic equipment.
Contents
- 1. What is an OBD2 to OBD1 Jumper Harness?
- 1.1. Understanding OBD1 and OBD2 Systems
- 1.1.1. OBD1: The Original Diagnostic System
- 1.1.2. OBD2: The Standardized Successor
- 1.2. Why the Need for Conversion?
- 1.3. Types of Jumper Harnesses
- 1.4. When and Why Should You Use a Jumper Harness?
- 1.5. Benefits of Using an OBD2 to OBD1 Jumper Harness
- 2. Identifying the Right Jumper Harness for Your Mercedes-Benz
- 2.1. Determining Your Mercedes-Benz Model and Year
- 2.2. Identifying the OBD Type
- 2.3. Connector Types and Pinouts
- 2.4. Researching Compatible Jumper Harnesses
- 2.5. Key Considerations When Choosing a Jumper Harness
- 2.6. Verifying Compatibility
- 2.7. Additional Tips
- 3. Step-by-Step Guide: Using an OBD2 to OBD1 Jumper Harness on Your Mercedes-Benz
- 3.1. Gathering Necessary Tools and Equipment
- 3.2. Preparing Your Mercedes-Benz for Diagnostics
- 3.3. Connecting the Jumper Harness
- 3.4. Powering Up the Diagnostic Tool
- 3.5. Initiating the Diagnostic Process
- 3.6. Interpreting Diagnostic Trouble Codes (DTCs)
- 3.7. Clearing DTCs (If Necessary)
- 3.8. Disconnecting the Jumper Harness
- 3.9. Tips for a Smooth Diagnostic Process
- 3.10. Common Issues and Troubleshooting
- 4. Benefits of Using an OBD2 Diagnostic Tool on an Older Mercedes-Benz
- 4.1. Enhanced Diagnostic Capabilities
- 4.2. Cost-Effectiveness
- 4.3. Time Savings
- 4.4. Access to a Wider Range of Information
- 4.5. Improved Vehicle Performance and Longevity
- 4.6. Environmental Benefits
- 4.7. Peace of Mind
- 4.8. Staying Up-to-Date with Technology
- 4.9. Enhanced Resale Value
- 5. Common Issues and Troubleshooting Tips When Using an OBD2 to OBD1 Jumper Harness
- 5.1. No Connection or Communication Errors
- 5.2. Incorrect Diagnostic Trouble Codes (DTCs)
- 5.3. Intermittent Issues
- 5.4. Jumper Harness Problems
- 5.5. Diagnostic Tool Limitations
- 5.6. Other Tips and Considerations
- 6. Maintaining Your OBD2 to OBD1 Jumper Harness for Longevity
- 6.1. Proper Storage
- 6.2. Regular Inspection
- 6.3. Cleaning and Maintenance
- 6.4. Proper Handling
- 6.5. Preventive Measures
- 6.6. Troubleshooting Tips
- 7. Advanced Diagnostic Techniques Using an OBD2 to OBD1 Jumper Harness
- 7.1. Live Data Monitoring
- 7.2. Component Testing
- 7.3. Freeze Frame Data Analysis
- 7.4. Graphing and Charting
- 7.5. Bi-Directional Control
- 7.6. Custom Parameter Identification (PID)
- 7.7. Data Interpretation and Analysis
- 7.8. Common Applications of Advanced Techniques
- 8. Jumper Harness OBD2 to OBD1: Benefits for Mercedes-Benz Owners and Technicians
- 8.1. For Mercedes-Benz Owners
- 8.2. For Automotive Technicians
- 8.3. Overall Benefits
- 9. Expert Insights: Tips from Seasoned Mercedes-Benz Technicians
1. What is an OBD2 to OBD1 Jumper Harness?
An OBD2 to OBD1 jumper harness is an adapter cable that allows you to connect an OBD2 (On-Board Diagnostics II) diagnostic tool to an older vehicle equipped with an OBD1 (On-Board Diagnostics I) system. This conversion is essential for mechanics, technicians, and car enthusiasts who need to diagnose and troubleshoot older vehicles using modern diagnostic equipment.
- Why is it needed? Older cars use the OBD1 system, while newer diagnostic tools are designed for the OBD2 system. A jumper harness bridges this gap, enabling communication between the tool and the vehicle’s computer.
- Key Function: The primary role of an OBD2 to OBD1 jumper harness is to facilitate the connection between an older vehicle’s OBD1 system and a modern OBD2 diagnostic tool. This enables users to access and interpret diagnostic information from older vehicles using current technology.
1.1. Understanding OBD1 and OBD2 Systems
To fully appreciate the purpose of a jumper harness, it’s crucial to understand the fundamental differences between OBD1 and OBD2 systems.
1.1.1. OBD1: The Original Diagnostic System
OBD1 was the first generation of on-board diagnostic systems in vehicles. It was implemented in the early 1980s and varied significantly between manufacturers.
- Lack of Standardization: One of the biggest drawbacks of OBD1 was the lack of standardization. Each car manufacturer used their own diagnostic connectors, protocols, and error codes.
- Limited Data: OBD1 systems provided limited data compared to today’s standards. They primarily focused on emissions-related issues.
- Difficult Diagnostics: Diagnosing issues with OBD1 vehicles often required specialized tools and knowledge specific to each make and model.
1.1.2. OBD2: The Standardized Successor
In the mid-1990s, the OBD2 system was introduced to provide a standardized approach to vehicle diagnostics. It became mandatory in the United States in 1996 and soon followed in other countries.
- Standardized Connector: OBD2 uses a standard 16-pin Data Link Connector (DLC), making it easier to connect diagnostic tools to any OBD2-compliant vehicle.
- Comprehensive Data: OBD2 systems monitor a wide range of vehicle parameters, including emissions, engine performance, and more.
- Standardized Codes: OBD2 employs standardized Diagnostic Trouble Codes (DTCs), which are the same across all makes and models, simplifying the diagnostic process.
- Enhanced Capabilities: OBD2 offers real-time data monitoring, allowing technicians to observe vehicle performance under various conditions.
1.2. Why the Need for Conversion?
The transition from OBD1 to OBD2 brought significant improvements, but it also created a challenge. Many older vehicles with OBD1 systems are still on the road, and their owners or technicians need to diagnose and repair them efficiently. This is where the OBD2 to OBD1 jumper harness comes into play.
- Using Modern Tools on Older Cars: An OBD2 to OBD1 jumper harness allows you to use the latest diagnostic tools, which are designed for OBD2 systems, on older cars with OBD1 systems.
- Accessing Enhanced Diagnostics: While OBD1 systems provide limited information, using an OBD2 scanner with a jumper harness can sometimes unlock additional diagnostic capabilities, depending on the vehicle.
- Saving Time and Money: Instead of investing in outdated OBD1 tools or relying on complex manual diagnostic methods, technicians can use a modern OBD2 scanner with a jumper harness to quickly identify and resolve issues.
1.3. Types of Jumper Harnesses
There are several types of OBD2 to OBD1 jumper harnesses available, each designed to work with specific vehicle makes and models. It’s essential to choose the correct harness for your particular application.
- Generic Harnesses: These are designed to work with a wide range of vehicles and may include multiple connectors to accommodate different OBD1 systems.
- Vehicle-Specific Harnesses: These are designed for specific makes and models, ensuring a perfect fit and reliable connection.
- Custom-Made Harnesses: In some cases, you may need to create a custom harness if a suitable off-the-shelf option is not available.
1.4. When and Why Should You Use a Jumper Harness?
There are several scenarios where using an OBD2 to OBD1 jumper harness can be beneficial.
- Diagnosing Older Vehicles: If you own or work on older cars with OBD1 systems, a jumper harness is essential for diagnosing and repairing them efficiently.
- Retrofitting Modern Components: When retrofitting modern components, such as an aftermarket ECU, into an older vehicle, a jumper harness may be needed to connect the new component to the existing OBD1 system.
- Data Logging: If you want to log data from an older vehicle using a modern data logger, a jumper harness can facilitate the connection.
1.5. Benefits of Using an OBD2 to OBD1 Jumper Harness
- Cost-Effectiveness: Purchasing a jumper harness is typically more cost-effective than investing in outdated OBD1 diagnostic tools.
- Time-Saving: Using a modern OBD2 scanner with a jumper harness can significantly reduce diagnostic time compared to manual methods.
- Versatility: A jumper harness allows you to use a single OBD2 scanner to diagnose a wide range of vehicles, both old and new.
- Access to Advanced Features: Depending on the vehicle and scanner, you may be able to access advanced diagnostic features, such as live data monitoring and component testing.
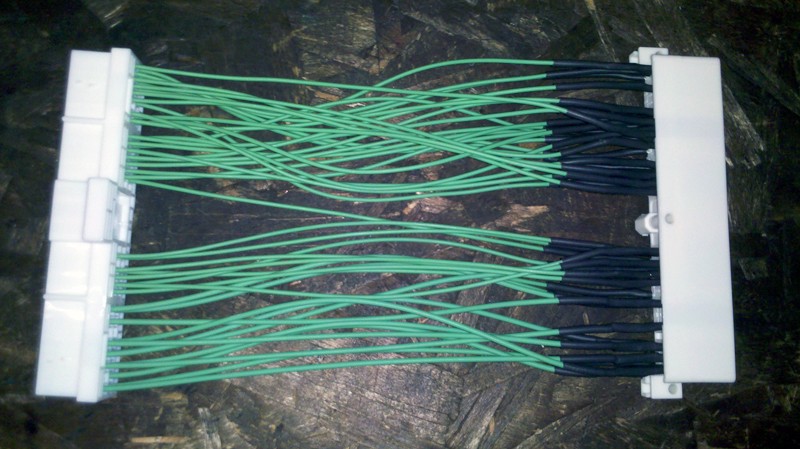 OBD2 to OBD1 Jumper Harness Prototype
2. Identifying the Right Jumper Harness for Your Mercedes-Benz
Choosing the correct OBD2 to OBD1 jumper harness for your Mercedes-Benz is vital for ensuring seamless diagnostics and preventing potential damage. Here’s a comprehensive guide to help you select the appropriate harness.
2.1. Determining Your Mercedes-Benz Model and Year
The first step in selecting the right jumper harness is to accurately identify the model and year of your Mercedes-Benz. This information is crucial because different models and years may use different OBD1 connectors and wiring configurations.
- Check Your Vehicle’s Documents: Refer to your vehicle’s registration, title, or insurance documents for accurate model and year information.
- Locate the VIN: The Vehicle Identification Number (VIN) can be found on the dashboard (visible through the windshield) or on the driver’s side doorjamb. You can use the VIN to decode your vehicle’s specific information, including the model year.
- Consult a Mercedes-Benz Parts Catalog: Online Mercedes-Benz parts catalogs can help you verify the model and year based on the VIN.
2.2. Identifying the OBD Type
Next, determine whether your Mercedes-Benz uses OBD1 or OBD2. Generally:
- OBD1: Typically found in Mercedes-Benz models manufactured before 1996. These systems have varied connectors, often located in the engine compartment.
- OBD2: Standard in models manufactured from 1996 onwards. OBD2 connectors are typically located under the dashboard on the driver’s side and are standardized 16-pin connectors.
2.3. Connector Types and Pinouts
Mercedes-Benz used several types of OBD1 connectors. Identifying the correct connector type is crucial for selecting the right jumper harness.
- 38-Pin Round Connector: Common in many Mercedes-Benz models from the late 1980s to mid-1990s. This connector is usually found in the engine compartment.
- 16-Pin Rectangular Connector: Some early OBD2-compliant Mercedes-Benz models used a 16-pin connector that is different from the standard OBD2 connector.
- Proprietary Connectors: Certain models may have proprietary connectors unique to Mercedes-Benz.
To identify the correct pinout:
- Consult a Service Manual: Refer to the service manual for your specific Mercedes-Benz model. The manual will provide detailed diagrams of the connector pinouts.
- Use Online Resources: Websites and forums dedicated to Mercedes-Benz vehicles often have detailed information on connector types and pinouts.
2.4. Researching Compatible Jumper Harnesses
Once you know your Mercedes-Benz model, year, and connector type, research the available OBD2 to OBD1 jumper harnesses.
- Online Retailers: Websites like Amazon, eBay, and specialty automotive parts retailers offer a variety of jumper harnesses. Read customer reviews to gauge the quality and compatibility of the harnesses.
- Specialty Automotive Parts Stores: Visit local automotive parts stores that specialize in European vehicles. They can provide expert advice and recommend the correct jumper harness for your Mercedes-Benz.
- Mercedes-Benz Forums: Online forums dedicated to Mercedes-Benz owners are great resources for finding information on compatible jumper harnesses. Members often share their experiences and recommendations.
2.5. Key Considerations When Choosing a Jumper Harness
- Quality of Materials: Ensure the jumper harness is made from high-quality materials that can withstand the harsh conditions of the engine compartment. Look for harnesses with durable connectors and wiring.
- Wiring and Pinout Accuracy: Verify that the wiring and pinouts of the jumper harness match your Mercedes-Benz’s OBD1 connector. Incorrect wiring can damage your vehicle’s ECU or the diagnostic tool.
- Shielding: Opt for a jumper harness with proper shielding to minimize interference and ensure accurate data transmission.
- Length: Choose a harness that is long enough to comfortably reach between your vehicle’s OBD1 connector and the OBD2 diagnostic tool.
2.6. Verifying Compatibility
Before purchasing a jumper harness, it’s essential to verify its compatibility with your Mercedes-Benz.
- Check the Product Description: Read the product description carefully to ensure the harness is designed for your specific Mercedes-Benz model and year.
- Contact the Seller: If you’re unsure about compatibility, contact the seller and provide them with your vehicle’s VIN. They can verify whether the harness is suitable for your Mercedes-Benz.
- Read Customer Reviews: Look for customer reviews that mention the specific Mercedes-Benz model you own. This can provide valuable insights into the harness’s compatibility and performance.
2.7. Additional Tips
- Take Photos: Before disconnecting any connectors, take photos of the existing setup. This will help you remember how to reconnect everything properly.
- Label Connectors: Label each connector to avoid confusion during installation.
- Double-Check Wiring: Before plugging in the jumper harness, double-check the wiring and pinouts to ensure they match your vehicle’s specifications.
- Use a Multimeter: If you’re unsure about the wiring, use a multimeter to test the continuity of each wire in the harness.
By following these detailed steps, you can confidently select the right OBD2 to OBD1 jumper harness for your Mercedes-Benz, ensuring accurate diagnostics and preventing potential damage. At MERCEDES-DIAGNOSTIC-TOOL.EDU.VN, we provide expert guidance and support to help you make the right choice for your vehicle.
3. Step-by-Step Guide: Using an OBD2 to OBD1 Jumper Harness on Your Mercedes-Benz
Once you have the correct OBD2 to OBD1 jumper harness for your Mercedes-Benz, it’s essential to know how to use it properly. This step-by-step guide will walk you through the process.
3.1. Gathering Necessary Tools and Equipment
Before you begin, ensure you have all the necessary tools and equipment.
- OBD2 Diagnostic Tool: A compatible OBD2 scanner or code reader.
- OBD2 to OBD1 Jumper Harness: The correct harness for your Mercedes-Benz model and year.
- Vehicle’s Service Manual: To reference connector locations and pinouts.
- Safety Gloves: To protect your hands.
- Safety Glasses: To protect your eyes.
- Flashlight or Work Light: To illuminate the work area.
3.2. Preparing Your Mercedes-Benz for Diagnostics
- Park Your Vehicle: Park your Mercedes-Benz on a level surface in a well-lit area.
- Turn Off the Ignition: Ensure the ignition is turned off to prevent any electrical issues during the diagnostic process.
- Locate the OBD1 Connector: Refer to your vehicle’s service manual to find the OBD1 connector. It’s often located in the engine compartment or under the dashboard.
- Inspect the Connector: Check the OBD1 connector for any signs of damage or corrosion. Clean the connector if necessary.
3.3. Connecting the Jumper Harness
-
Attach the OBD1 End: Connect the OBD1 end of the jumper harness to your Mercedes-Benz’s OBD1 connector. Ensure it fits snugly and securely.
-
Connect the OBD2 End: Plug the OBD2 end of the jumper harness into your OBD2 diagnostic tool. Again, ensure a secure connection.
3.4. Powering Up the Diagnostic Tool
- Turn On the Diagnostic Tool: Power on your OBD2 diagnostic tool. Some tools may require an external power source, while others are powered through the OBD2 connection.
- Verify Power: Ensure the diagnostic tool is receiving power and is ready to communicate with the vehicle.
3.5. Initiating the Diagnostic Process
- Turn On the Ignition: Turn the ignition to the “ON” position, but do not start the engine.
- Select the Correct Vehicle Information: On your diagnostic tool, select the correct make, model, and year of your Mercedes-Benz.
- Start the Diagnostic Scan: Initiate the diagnostic scan. The tool will begin communicating with the vehicle’s computer to retrieve diagnostic trouble codes (DTCs) and other data.
3.6. Interpreting Diagnostic Trouble Codes (DTCs)
- View DTCs: Once the scan is complete, the diagnostic tool will display any stored DTCs.
- Record DTCs: Write down the DTCs and their descriptions.
- Refer to the Service Manual: Use your vehicle’s service manual or online resources to understand the meaning of each DTC and potential causes.
- Troubleshoot Issues: Based on the DTCs, begin troubleshooting the identified issues. This may involve inspecting sensors, wiring, or other components.
3.7. Clearing DTCs (If Necessary)
- Resolve Issues: After addressing the issues indicated by the DTCs, you may want to clear the codes to see if they reappear.
- Clear Codes: Use the diagnostic tool to clear the DTCs.
- Verify Clearance: Confirm that the DTCs have been successfully cleared.
- Re-scan: Perform another diagnostic scan to ensure no new DTCs have been stored.
3.8. Disconnecting the Jumper Harness
- Turn Off the Ignition: Turn off the ignition.
- Disconnect the Diagnostic Tool: Disconnect the OBD2 diagnostic tool from the jumper harness.
- Remove the Jumper Harness: Disconnect the jumper harness from your Mercedes-Benz’s OBD1 connector.
- Store the Harness: Store the jumper harness in a safe place for future use.
3.9. Tips for a Smooth Diagnostic Process
- Read the Manuals: Familiarize yourself with the manuals for both the diagnostic tool and the jumper harness.
- Check Connections: Always double-check all connections to ensure they are secure.
- Use Quality Tools: Invest in a high-quality OBD2 diagnostic tool and jumper harness for reliable performance.
- Stay Safe: Wear safety gloves and glasses to protect yourself during the diagnostic process.
- Consult Professionals: If you are unsure about any step of the diagnostic process, consult a qualified mechanic or technician.
3.10. Common Issues and Troubleshooting
- No Connection: If the diagnostic tool fails to connect to the vehicle, check all connections and ensure the jumper harness is compatible with your Mercedes-Benz.
- Incorrect DTCs: If the diagnostic tool displays incorrect DTCs, verify that you have selected the correct vehicle information.
- Communication Errors: Communication errors can occur due to electrical interference. Ensure the jumper harness is properly shielded.
By following this step-by-step guide, you can confidently use an OBD2 to OBD1 jumper harness to diagnose your Mercedes-Benz and keep it running smoothly. At MERCEDES-DIAGNOSTIC-TOOL.EDU.VN, we are dedicated to providing you with the knowledge and tools you need to maintain your vehicle effectively.
4. Benefits of Using an OBD2 Diagnostic Tool on an Older Mercedes-Benz
Employing an OBD2 diagnostic tool on an older Mercedes-Benz, facilitated by an OBD2 to OBD1 jumper harness, offers numerous advantages that enhance vehicle maintenance and repair.
4.1. Enhanced Diagnostic Capabilities
Modern OBD2 diagnostic tools provide more extensive diagnostic capabilities compared to older OBD1 systems.
- Comprehensive Data: OBD2 tools can access a wider range of vehicle parameters, including live sensor data, engine performance metrics, and emissions information.
- Standardized Codes: OBD2 systems use standardized Diagnostic Trouble Codes (DTCs), making it easier to identify and understand issues.
- Advanced Testing: Many OBD2 tools offer advanced testing features, such as component testing and actuator control.
4.2. Cost-Effectiveness
Investing in an OBD2 diagnostic tool and a jumper harness can be more cost-effective than relying on outdated OBD1 tools or dealership services.
- Reduced Repair Costs: Accurate diagnostics can help you identify and fix issues early, preventing costly repairs down the road.
- DIY Repairs: With the right tools and information, you can perform many repairs yourself, saving on labor costs.
- Avoid Unnecessary Services: A diagnostic tool can help you avoid unnecessary services by providing clear information about what needs to be fixed.
4.3. Time Savings
Using an OBD2 diagnostic tool can significantly reduce diagnostic time compared to manual methods.
- Faster Code Retrieval: OBD2 tools can quickly retrieve DTCs, helping you pinpoint issues in minutes.
- Real-Time Data Monitoring: Live data monitoring allows you to observe vehicle performance under various conditions, speeding up the troubleshooting process.
- Efficient Repairs: Accurate diagnostics lead to more efficient repairs, getting your Mercedes-Benz back on the road faster.
4.4. Access to a Wider Range of Information
OBD2 diagnostic tools often come with access to a wealth of information that can help you diagnose and repair your Mercedes-Benz.
- Online Databases: Many tools provide access to online databases with DTC definitions, repair procedures, and technical service bulletins (TSBs).
- Community Forums: Online forums dedicated to Mercedes-Benz vehicles can provide valuable insights and tips from other owners and technicians.
- Repair Manuals: Digital repair manuals offer detailed instructions and diagrams for performing various repairs.
4.5. Improved Vehicle Performance and Longevity
Regular diagnostics with an OBD2 tool can help you maintain your Mercedes-Benz in top condition, improving its performance and longevity.
- Early Issue Detection: Identifying and addressing issues early can prevent them from escalating into major problems.
- Optimized Engine Performance: Monitoring engine performance metrics can help you optimize fuel efficiency and power.
- Extended Vehicle Life: Proper maintenance and timely repairs can extend the life of your Mercedes-Benz.
4.6. Environmental Benefits
Using an OBD2 diagnostic tool can also contribute to environmental protection.
- Emissions Control: Identifying and fixing emissions-related issues can help reduce your vehicle’s environmental impact.
- Fuel Efficiency: Optimizing engine performance can improve fuel efficiency, reducing fuel consumption and emissions.
4.7. Peace of Mind
Knowing that you can quickly diagnose and address issues with your Mercedes-Benz can provide peace of mind.
- Confidence on the Road: Regular diagnostics can help you avoid unexpected breakdowns and ensure your vehicle is safe to drive.
- Informed Decisions: Having access to accurate diagnostic information empowers you to make informed decisions about vehicle maintenance and repairs.
4.8. Staying Up-to-Date with Technology
Using an OBD2 diagnostic tool on an older Mercedes-Benz allows you to leverage modern technology to maintain and repair your vehicle.
- Software Updates: Many OBD2 tools receive regular software updates, ensuring compatibility with the latest vehicles and diagnostic protocols.
- Advanced Features: Modern tools offer advanced features, such as wireless connectivity and smartphone integration, that simplify the diagnostic process.
4.9. Enhanced Resale Value
Maintaining your Mercedes-Benz with regular diagnostics and timely repairs can enhance its resale value.
- Detailed Maintenance Records: Keeping detailed records of diagnostics and repairs can demonstrate to potential buyers that your vehicle has been well-maintained.
- Improved Condition: A well-maintained vehicle is more attractive to buyers and commands a higher price.
At MERCEDES-DIAGNOSTIC-TOOL.EDU.VN, we are committed to helping you unlock the full potential of your Mercedes-Benz. By using an OBD2 diagnostic tool with an OBD2 to OBD1 jumper harness, you can enjoy these benefits and keep your vehicle running smoothly for years to come.
5. Common Issues and Troubleshooting Tips When Using an OBD2 to OBD1 Jumper Harness
While an OBD2 to OBD1 jumper harness can greatly simplify diagnostics on older Mercedes-Benz vehicles, you may encounter some common issues. Here are troubleshooting tips to help you resolve them.
5.1. No Connection or Communication Errors
One of the most common issues is the diagnostic tool failing to connect to the vehicle or displaying communication errors.
- Check Connections: Ensure that the jumper harness is securely connected to both the OBD1 connector on your Mercedes-Benz and the OBD2 connector on the diagnostic tool.
- Inspect Connectors: Examine the connectors for any signs of damage, corrosion, or bent pins. Clean or replace the connectors if necessary.
- Verify Compatibility: Confirm that the jumper harness is compatible with your specific Mercedes-Benz model and year.
- Power Supply: Ensure that the diagnostic tool is receiving adequate power. Some tools require an external power source, while others are powered through the OBD2 connection.
- Ignition Switch: Make sure the ignition switch is in the “ON” position (but do not start the engine) when attempting to connect.
- Software Updates: Ensure that your diagnostic tool has the latest software updates installed.
- Shielding: Electrical interference can cause communication errors. Ensure that the jumper harness is properly shielded.
- Grounding: A poor ground connection can also cause communication issues. Check the ground connections in your vehicle’s electrical system.
5.2. Incorrect Diagnostic Trouble Codes (DTCs)
In some cases, the diagnostic tool may display incorrect or misleading DTCs.
- Verify Vehicle Information: Double-check that you have selected the correct make, model, and year of your Mercedes-Benz on the diagnostic tool.
- Cross-Reference DTCs: Use multiple sources, such as your vehicle’s service manual and online databases, to cross-reference the DTCs and their descriptions.
- Check Sensor Data: Compare the sensor data displayed by the diagnostic tool with the specifications in your vehicle’s service manual.
- Inspect Sensors and Wiring: Inspect the sensors and wiring related to the DTCs for any signs of damage or malfunction.
- Clear and Re-scan: Clear the DTCs and perform another diagnostic scan to see if the same codes reappear.
5.3. Intermittent Issues
Intermittent issues can be challenging to diagnose.
- Check Wiring and Connectors: Inspect the wiring and connectors for any loose or damaged connections.
- Monitor Sensor Data: Use the diagnostic tool to monitor sensor data while driving or operating the vehicle under various conditions.
- Use Freeze Frame Data: If the diagnostic tool supports freeze frame data, use it to capture the conditions when the DTC was stored.
- Test Components: Use the diagnostic tool to perform component tests and actuator control to isolate the issue.
5.4. Jumper Harness Problems
The jumper harness itself may be the source of the problem.
- Inspect Wiring: Examine the wiring for any signs of damage, such as cuts, abrasions, or exposed wires.
- Test Continuity: Use a multimeter to test the continuity of each wire in the harness.
- Check Pinouts: Verify that the pinouts of the jumper harness match your Mercedes-Benz’s OBD1 connector.
- Replace Harness: If you suspect the jumper harness is faulty, replace it with a new one.
5.5. Diagnostic Tool Limitations
Keep in mind that even the best diagnostic tools have limitations.
- Software Compatibility: Some diagnostic tools may not be fully compatible with all Mercedes-Benz models or systems.
- Data Accuracy: The accuracy of the data displayed by the diagnostic tool depends on the quality of the sensors and the accuracy of the vehicle’s computer.
- Advanced Systems: Diagnosing advanced systems, such as ABS, SRS, and transmission control, may require a more sophisticated diagnostic tool.
5.6. Other Tips and Considerations
- Consult Professionals: If you are unable to resolve the issue yourself, consult a qualified mechanic or technician.
- Use Quality Tools: Invest in a high-quality OBD2 diagnostic tool and jumper harness for reliable performance.
- Read the Manuals: Familiarize yourself with the manuals for both the diagnostic tool and the jumper harness.
- Safety First: Always follow safety precautions when working on your vehicle.
By following these troubleshooting tips, you can overcome common issues and ensure accurate diagnostics on your older Mercedes-Benz using an OBD2 to OBD1 jumper harness. At MERCEDES-DIAGNOSTIC-TOOL.EDU.VN, we are dedicated to providing you with the knowledge and support you need to maintain your vehicle effectively.
6. Maintaining Your OBD2 to OBD1 Jumper Harness for Longevity
Proper maintenance of your OBD2 to OBD1 jumper harness is essential to ensure its longevity and reliability. Here are some tips to help you keep your harness in top condition.
6.1. Proper Storage
- Keep It Clean: Before storing the harness, wipe it down with a clean, dry cloth to remove any dirt, grease, or moisture.
- Avoid Extreme Temperatures: Store the harness in a cool, dry place away from direct sunlight and extreme temperatures.
- Protect from Moisture: Moisture can cause corrosion and damage the wiring. Store the harness in a sealed plastic bag or container with a desiccant to absorb any moisture.
- Prevent Tangling: Coil the harness loosely and secure it with a zip tie or Velcro strap to prevent tangling and damage to the wiring.
- Store Away from Chemicals: Keep the harness away from chemicals, such as solvents, cleaners, and battery acid, as they can damage the insulation and connectors.
6.2. Regular Inspection
- Visual Inspection: Regularly inspect the harness for any signs of damage, such as cuts, abrasions, or exposed wires.
- Check Connectors: Examine the connectors for any signs of damage, corrosion, or bent pins.
- Test Continuity: Use a multimeter to test the continuity of each wire in the harness.
- Inspect Insulation: Check the insulation for any cracks, brittleness, or signs of deterioration.
6.3. Cleaning and Maintenance
- Clean Connectors: Clean the connectors with a specialized electrical contact cleaner to remove any dirt, grease, or corrosion.
- Protect Terminals: Apply a thin layer of dielectric grease to the terminals to protect them from moisture and corrosion.
- Repair Damage: Repair any damaged wiring or connectors as soon as possible to prevent further damage.
- Replace Worn Parts: Replace any worn or damaged parts, such as connectors or wiring, with high-quality replacements.
6.4. Proper Handling
- Avoid Pulling: Avoid pulling on the harness or connectors when disconnecting them.
- Use Proper Tools: Use proper tools, such as connector pliers, to disconnect connectors without damaging them.
- Handle with Care: Handle the harness with care to avoid bending, twisting, or kinking the wiring.
- Avoid Overloading: Do not overload the harness by using it to power devices that exceed its rated capacity.
6.5. Preventive Measures
- Use Protective Sleeving: Use protective sleeving or conduit to protect the harness from abrasion and damage.
- Secure the Harness: Secure the harness to prevent it from rubbing against sharp edges or moving parts.
- Avoid Extreme Bending: Avoid bending the harness at sharp angles, as this can damage the wiring.
- Protect from Heat: Protect the harness from extreme heat, such as exhaust manifolds or engine components.
6.6. Troubleshooting Tips
- No Connection: If the diagnostic tool fails to connect to the vehicle, check the harness for any signs of damage or corrosion.
- Intermittent Issues: Intermittent issues can be caused by loose or damaged connections. Inspect the harness for any signs of damage.
- Incorrect Readings: Incorrect readings can be caused by damaged wiring or connectors. Test the harness with a multimeter to check for continuity.
By following these maintenance tips, you can extend the life of your OBD2 to OBD1 jumper harness and ensure reliable performance for years to come. At MERCEDES-DIAGNOSTIC-TOOL.EDU.VN, we are dedicated to providing you with the knowledge and support you need to maintain your vehicle effectively.
7. Advanced Diagnostic Techniques Using an OBD2 to OBD1 Jumper Harness
Beyond basic code reading, an OBD2 to OBD1 jumper harness opens the door to advanced diagnostic techniques for older Mercedes-Benz vehicles.
7.1. Live Data Monitoring
- Real-Time Analysis: Monitor live data streams from various sensors and systems in real-time.
- Performance Evaluation: Evaluate engine performance, fuel efficiency, and emissions output under different operating conditions.
- Sensor Analysis: Analyze sensor readings to identify anomalies or out-of-range values.
- Data Logging: Record live data for later analysis and comparison.
7.2. Component Testing
- Actuator Control: Activate and control various actuators, such as fuel injectors, solenoids, and relays, to test their functionality.
- Sensor Simulation: Simulate sensor signals to test the response of the vehicle’s computer.
- Circuit Testing: Test the continuity and resistance of electrical circuits to identify faults.
7.3. Freeze Frame Data Analysis
- Snapshot of Conditions: Capture a snapshot of the vehicle’s operating conditions at the moment a Diagnostic Trouble Code (DTC) was stored.
- Troubleshooting Aid: Use freeze frame data to help diagnose intermittent issues and identify the root cause of problems.
- Analysis of Parameters: Analyze parameters such as engine speed, load, temperature, and fuel trim to understand the context of the DTC.
7.4. Graphing and Charting
- Visual Representation: Visualize live data streams and sensor readings using graphs and charts.
- Trend Analysis: Identify trends and patterns in the data to diagnose intermittent issues and performance problems.
- Comparative Analysis: Compare data from different sensors or systems to identify discrepancies and anomalies.
7.5. Bi-Directional Control
- System Activation: Activate and control various vehicle systems, such as ABS, SRS, and transmission control, to test their functionality.
- Calibration and Adjustment: Perform calibrations and adjustments to optimize system performance.
- Troubleshooting: Use bi-directional control to isolate and diagnose issues within specific systems.
7.6. Custom Parameter Identification (PID)
- Access to Specific Data: Access specific data parameters that are not available through standard OBD2 protocols.
- Advanced Diagnostics: Use custom PIDs to perform advanced diagnostics and troubleshooting.
- Data Logging: Log custom PIDs for later analysis and comparison.
7.7. Data Interpretation and Analysis
- Understanding Data: Interpret the data displayed by the diagnostic tool and use it to make informed decisions about vehicle maintenance and repairs.
- Consult Resources: Consult your vehicle’s service manual, online databases, and community forums to understand the meaning of the data.
- Seek Expert Advice: Seek advice from qualified mechanics or technicians if you are unsure about the data.
7.8. Common Applications of Advanced Techniques
- Engine Performance Tuning: Optimize engine performance and fuel efficiency.
- Emissions Testing: Ensure compliance with emissions regulations.
- ABS/SRS Diagnostics: Diagnose and repair ABS and SRS systems.
- Transmission Diagnostics: Diagnose and repair transmission issues.
- Electrical System Troubleshooting: Troubleshoot electrical system problems.
By mastering these advanced diagnostic techniques, you can unlock the full potential of your OBD2 to OBD1 jumper harness and keep your older Mercedes-Benz running smoothly for years to come. At MERCEDES-DIAGNOSTIC-TOOL.EDU.VN, we are dedicated to providing you with the knowledge and support you need to maintain your vehicle effectively.
8. Jumper Harness OBD2 to OBD1: Benefits for Mercedes-Benz Owners and Technicians
The Jumper Harness Obd2 To Obd1 offers distinct advantages for both Mercedes-Benz owners and professional technicians, bridging the gap between older and newer diagnostic technologies.
8.1. For Mercedes-Benz Owners
- Cost-Effective Diagnostics: Enables the use of modern, affordable OBD2 scanners on older Mercedes-Benz models, avoiding expensive dealership diagnostic fees.
- DIY Repairs: Empowers owners to perform their own diagnostics and basic repairs, saving money on labor costs.
- Informed Decision-Making: Provides access to accurate diagnostic information, allowing owners to make informed decisions about vehicle maintenance and repairs.
- Preventive Maintenance: Facilitates regular diagnostics to identify and address issues early, preventing costly breakdowns.
- Vehicle Longevity: Contributes to the longevity of older Mercedes-Benz vehicles by enabling proper maintenance and timely repairs.
- Access to Information: Opens up access to a wealth of online resources, including forums, repair manuals, and technical service bulletins.
- Community Support: Connects owners with a community of Mercedes-Benz enthusiasts who can offer advice and support.
8.2. For Automotive Technicians
- Versatile Diagnostic Tool: Allows technicians to use a single OBD2 scanner to diagnose a wide range of Mercedes-Benz vehicles, both old and new.
- Efficient Diagnostics: Speeds up the diagnostic process, enabling technicians to identify and resolve issues quickly.
- Accurate Diagnostics: Provides access to accurate diagnostic information, reducing the risk of misdiagnosis and unnecessary repairs.
- Enhanced Troubleshooting: Offers advanced troubleshooting capabilities, such as live data monitoring and component testing.
- Customer Satisfaction: Improves customer satisfaction by providing efficient, accurate, and cost-effective diagnostic services.
- Competitive Advantage: Gives technicians a competitive advantage by enabling them to service older Mercedes-Benz vehicles that other shops may not be able to handle.
- Increased Revenue: Increases revenue by expanding the range of services that technicians can offer.
- Training and Education: Provides opportunities for technicians to expand their knowledge and skills in Mercedes-Benz diagnostics.
8.3. Overall Benefits
- Bridging the Technology Gap: Bridges the technology gap between older and newer Mercedes-Benz vehicles, allowing them to be diagnosed and repaired using modern tools.
- Promoting Sustainability: Promotes sustainability by enabling the continued use of older Mercedes-Benz vehicles.
- Economic Benefits: Offers economic benefits to both owners and technicians by reducing diagnostic and repair costs.
- Environmental Benefits: Contributes to environmental protection by enabling proper maintenance and repair of emissions-related systems.
The jumper harness OBD2 to OBD1 is a valuable tool for both Mercedes-Benz owners and technicians, providing a range of benefits that enhance vehicle maintenance, reduce costs, and promote sustainability. At MERCEDES-DIAGNOSTIC-TOOL.EDU.VN, we are committed to providing you with the knowledge and support you need to maintain your vehicle effectively.
9. Expert Insights: Tips from Seasoned Mercedes-Benz Technicians
To provide you with the best information, we’ve gathered insights from seasoned Mercedes-Benz technicians