Is your check engine light on, and you suspect an issue with your O2 sensor? Diagnosing an O2 sensor with an OBD2 scanner is an efficient way to pinpoint problems and maintain your vehicle’s performance, and with the help of MERCEDES-DIAGNOSTIC-TOOL.EDU.VN, you can accurately assess the health of your Mercedes-Benz. By using an OBD2 scanner, you can read sensor data, interpret trouble codes, and ensure your engine runs smoothly. Let’s dive into how to diagnose O2 sensor problems with OBD2, oxygen sensor testing, automotive diagnostics, and Mercedes-Benz maintenance.
Contents
- 1. Understanding the O2 Sensor and Its Function
- 1.1 What is an O2 Sensor?
- 1.2 How Does an O2 Sensor Work?
- 1.3 Types of O2 Sensors
- 1.4 Location of O2 Sensors
- 2. Preparing for O2 Sensor Diagnosis
- 2.1 Essential Tools for Diagnosis
- 2.2 Locating the OBD2 Port
- 2.3 Starting Your Vehicle
- 2.4 Connecting the OBD2 Scanner
- 3. Using an OBD2 Scanner to Read O2 Sensor Data
- 3.1 Navigating the OBD2 Scanner Menu
- 3.2 Accessing Live Data for O2 Sensors
- 3.3 Interpreting Voltage Readings
- 3.4 Monitoring Response Time
- 3.5 Checking Fuel Trim Values (STFT and LTFT)
- 4. Understanding O2 Sensor-Related Trouble Codes
- 4.1 Retrieving Trouble Codes
- 4.2 Common O2 Sensor Trouble Codes
- 4.3 Interpreting Trouble Codes
- 4.4 Diagnosing Based on Trouble Codes
- 4.5 Clearing Trouble Codes
- 5. Common Causes of O2 Sensor Failure
- 5.1 Contamination
- 5.2 Physical Damage
- 5.3 Aging and Wear
- 5.4 Electrical Issues
- 5.5 Exhaust Leaks
- 6. Step-by-Step Guide to Diagnosing an O2 Sensor
- 6.1 Step 1: Gather Necessary Tools and Equipment
- 6.2 Step 2: Locate the OBD2 Port and Connect the Scanner
- 6.3 Step 3: Start the Vehicle and Warm Up the Engine
- 6.4 Step 4: Retrieve Trouble Codes
- 6.5 Step 5: Record and Interpret Trouble Codes
- 6.6 Step 6: Access Live Data for O2 Sensors
- 6.7 Step 7: Monitor Voltage Readings and Response Time
- 6.8 Step 8: Check Fuel Trim Values
- 6.9 Step 9: Perform Additional Tests as Needed
- 6.10 Step 10: Clear Trouble Codes and Retest
- 7. Advanced Diagnostic Techniques
- 7.1 Using a Multimeter to Test O2 Sensor Output
- 7.2 Testing the O2 Sensor Heater Circuit
- 7.3 Vacuum Leak Testing
- 7.4 Fuel Pressure Testing
- 8. Tips for Preventing O2 Sensor Problems
- 8.1 Regular Maintenance
- 8.2 Use Quality Fuel
- 8.3 Avoid Short Trips
- 8.4 Address Engine Issues Promptly
- 8.5 Inspect Exhaust System
- 9. When to Replace an O2 Sensor
- 9.1 Age and Mileage
- 9.2 Persistent Trouble Codes
- 9.3 Poor Fuel Economy
- 9.4 Failed Emissions Test
- 9.5 Sluggish Response Time
- 10. Choosing the Right Replacement O2 Sensor
- 10.1 Check Vehicle Specifications
- 10.2 OEM vs. Aftermarket
- 10.3 Sensor Type
- 10.4 Brand Reputation
- 11. O2 Sensor Diagnosis for Mercedes-Benz Vehicles
- 11.1 Specific Mercedes-Benz Codes
- 11.2 Advanced Diagnostic Tools
- 11.3 Common Mercedes-Benz O2 Sensor Issues
- 11.4 Resetting Adaptations
- 12. Benefits of Using MERCEDES-DIAGNOSTIC-TOOL.EDU.VN
- 13. Conclusion
- 14. FAQs
- 14.1 How do I know if my O2 sensor is bad?
- 14.2 Can a bad O2 sensor affect engine performance?
- 14.3 How often should I replace my O2 sensors?
- 14.4 Can I drive with a bad O2 sensor?
- 14.5 How much does it cost to replace an O2 sensor?
- 14.6 What is the difference between upstream and downstream O2 sensors?
- 14.7 Can a vacuum leak cause O2 sensor problems?
- 14.8 What tools do I need to diagnose an O2 sensor?
- 14.9 How do I clear trouble codes after replacing an O2 sensor?
- 14.10 Where can I find more information about diagnosing and repairing my Mercedes-Benz?
- 15. You Might Also Like
1. Understanding the O2 Sensor and Its Function
The oxygen (O2) sensor is a critical component in your vehicle’s emission control system, playing a vital role in engine management. It monitors the amount of oxygen in the exhaust gases to help the engine control unit (ECU) regulate the air-fuel mixture.
1.1 What is an O2 Sensor?
An O2 sensor, also known as an oxygen sensor, measures the oxygen content in the exhaust stream. This data is crucial for the ECU to adjust the fuel injection for optimal combustion. According to the Environmental Protection Agency (EPA), properly functioning O2 sensors can improve fuel efficiency by up to 40%.
1.2 How Does an O2 Sensor Work?
The O2 sensor generates a voltage signal based on the oxygen levels in the exhaust. A lean mixture (too much oxygen) produces a low voltage (around 0.1V), while a rich mixture (too little oxygen) produces a high voltage (around 0.9V). The ECU uses this information to fine-tune the air-fuel ratio, ensuring efficient combustion and reducing emissions.
1.3 Types of O2 Sensors
There are primarily two types of O2 sensors:
- Zirconia Sensors: These are the most common type, relying on a zirconia element to measure oxygen levels.
- Titania Sensors: Less common, these sensors use a titania element and measure changes in resistance based on oxygen concentration.
1.4 Location of O2 Sensors
Most modern vehicles have multiple O2 sensors:
- Upstream Sensor(s): Located before the catalytic converter, these sensors directly measure the exhaust gases coming from the engine.
- Downstream Sensor(s): Positioned after the catalytic converter, these sensors monitor the converter’s efficiency.
2. Preparing for O2 Sensor Diagnosis
Before you start diagnosing your O2 sensor, ensure you have the necessary tools and understand the basic steps involved. This preparation will make the process smoother and more accurate.
2.1 Essential Tools for Diagnosis
To diagnose an O2 sensor with an OBD2 scanner, you will need:
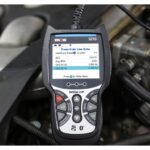
- OBD2 Scanner: This tool plugs into your vehicle’s OBD2 port and retrieves diagnostic trouble codes (DTCs) and live sensor data. Foxwell NT909 is a popular choice.
- Multimeter: A multimeter is useful for testing the sensor’s heater circuit and verifying voltage signals.
- Vehicle Repair Manual: A repair manual provides specific information about your vehicle’s O2 sensor locations and specifications.
- Safety Gloves and Glasses: Protect yourself from potential hazards while working on your vehicle.
2.2 Locating the OBD2 Port
The OBD2 port is typically located under the dashboard on the driver’s side. It is usually near the steering column or in the center console area. Consult your vehicle’s manual if you are unsure of its exact location.
2.3 Starting Your Vehicle
To get accurate readings, start your vehicle and allow it to run for a few minutes. This warms up the engine and O2 sensors, providing more reliable data.
2.4 Connecting the OBD2 Scanner
Plug the OBD2 scanner into the OBD2 port. Turn the ignition key to the “ON” position without starting the engine. The scanner should power on and display a menu.
Alt text: Connecting an OBD2 scanner to the OBD2 port for vehicle diagnostics
3. Using an OBD2 Scanner to Read O2 Sensor Data
Once your OBD2 scanner is connected, you can begin reading the O2 sensor data. This involves navigating the scanner’s menu and understanding the displayed information.
3.1 Navigating the OBD2 Scanner Menu
Each OBD2 scanner has a slightly different menu structure, but most include the following options:
- Read Codes: This option retrieves diagnostic trouble codes (DTCs) stored in the ECU.
- Live Data: This allows you to view real-time data from various sensors, including the O2 sensors.
- O2 Sensor Test: Some scanners have a dedicated O2 sensor test function that provides specific readings and diagnostic information.
For example, the FOXWELL NT909 features an intuitive user interface that provides easy access to live data from O2 sensors, regardless of your prior experience.
3.2 Accessing Live Data for O2 Sensors
Select the “Live Data” option and scroll through the list of available sensors until you find the O2 sensors. They are usually labeled as “O2 Sensor 1,” “O2 Sensor 2,” etc.
3.3 Interpreting Voltage Readings
A functioning O2 sensor should show fluctuating voltage readings between 0.1V and 0.9V. The voltage should change rapidly as the engine adjusts the air-fuel mixture.
- Low Voltage (around 0.1V): Indicates a lean mixture (too much oxygen).
- High Voltage (around 0.9V): Indicates a rich mixture (too little oxygen).
- Steady Voltage: A steady voltage reading, without fluctuation, can indicate a faulty sensor.
According to a study by the National Institute for Automotive Service Excellence (ASE), a sluggish O2 sensor can reduce fuel economy by as much as 20%.
3.4 Monitoring Response Time
The response time of the O2 sensor is also crucial. A healthy sensor should quickly switch between high and low voltage. A slow response time indicates that the sensor is degrading and may need replacement.
3.5 Checking Fuel Trim Values (STFT and LTFT)
In addition to voltage readings, check the Short-Term Fuel Trim (STFT) and Long-Term Fuel Trim (LTFT) values. These values indicate how the ECU is adjusting the fuel mixture to compensate for deviations from the ideal air-fuel ratio.
- High Positive Fuel Trim Values: Indicate a lean condition (the ECU is adding more fuel).
- High Negative Fuel Trim Values: Indicate a rich condition (the ECU is reducing fuel).
Excessive fuel trim values can point to a faulty O2 sensor or other engine problems.
4. Understanding O2 Sensor-Related Trouble Codes
Diagnostic trouble codes (DTCs) provide valuable information about potential issues with your O2 sensors. Understanding these codes is essential for accurate diagnosis and repair.
4.1 Retrieving Trouble Codes
Use your OBD2 scanner to retrieve any stored DTCs. Select the “Read Codes” option from the main menu. The scanner will display a list of codes, if any are present.
4.2 Common O2 Sensor Trouble Codes
Here are some common O2 sensor-related trouble codes:
- P0130: O2 Sensor Circuit Malfunction (Bank 1, Sensor 1)
- P0131: O2 Sensor Circuit Low Voltage (Bank 1, Sensor 1)
- P0132: O2 Sensor Circuit High Voltage (Bank 1, Sensor 1)
- P0133: O2 Sensor Circuit Slow Response (Bank 1, Sensor 1)
- P0134: O2 Sensor Circuit No Activity Detected (Bank 1, Sensor 1)
- P0135: O2 Sensor Heater Circuit Malfunction (Bank 1, Sensor 1)
- P0171: System Too Lean (Bank 1)
- P0174: System Too Lean (Bank 2)
4.3 Interpreting Trouble Codes
Each trouble code provides specific information about the nature and location of the problem.
- Bank 1: Refers to the side of the engine that contains cylinder number 1.
- Bank 2: Refers to the opposite side of the engine.
- Sensor 1: Usually the upstream O2 sensor (before the catalytic converter).
- Sensor 2: Usually the downstream O2 sensor (after the catalytic converter).
For example, code P0130 indicates a general malfunction in the circuit of the upstream O2 sensor on Bank 1.
4.4 Diagnosing Based on Trouble Codes
Once you have identified the trouble codes, you can begin the diagnostic process. Here are some steps to follow:
- P0130: Inspect the wiring and connectors associated with the O2 sensor. Look for signs of damage, corrosion, or loose connections.
- P0135: Test the O2 sensor heater circuit using a multimeter. Check for continuity to ensure the heater is functioning correctly.
- P0171/P0174: These codes can be caused by a faulty O2 sensor, vacuum leaks, or fuel delivery problems. Conduct a thorough inspection of the engine and related systems.
4.5 Clearing Trouble Codes
After addressing the underlying issue, clear the trouble codes using your OBD2 scanner. Select the “Clear Codes” option from the main menu. This resets the ECU and turns off the check engine light.
5. Common Causes of O2 Sensor Failure
Understanding the common causes of O2 sensor failure can help you prevent future problems and maintain your vehicle’s performance.
5.1 Contamination
O2 sensors can be contaminated by various substances, including:
- Oil: Oil leaks can foul the O2 sensor and reduce its accuracy.
- Coolant: Coolant leaks can also damage the sensor.
- Silicone: Silicone-based sealants can release fumes that contaminate the sensor.
- Fuel Additives: Some fuel additives contain chemicals that can harm the O2 sensor.
5.2 Physical Damage
Physical damage can also cause O2 sensor failure. This includes:
- Impact Damage: Road debris or accidents can damage the sensor.
- Wiring Damage: Damaged or corroded wiring can disrupt the sensor’s signal.
- Thermal Stress: Extreme temperature fluctuations can degrade the sensor over time.
5.3 Aging and Wear
Like any component, O2 sensors degrade over time due to normal wear and tear. The sensing element can become less responsive, leading to inaccurate readings.
5.4 Electrical Issues
Electrical problems can also affect O2 sensor performance:
- Open Circuits: A break in the wiring can prevent the sensor from sending a signal.
- Short Circuits: A short circuit can cause the sensor to send incorrect readings.
- Grounding Issues: Poor grounding can interfere with the sensor’s operation.
5.5 Exhaust Leaks
Exhaust leaks near the O2 sensor can introduce additional oxygen into the exhaust stream, causing the sensor to read incorrectly and generate false trouble codes.
6. Step-by-Step Guide to Diagnosing an O2 Sensor
This comprehensive step-by-step guide will walk you through the process of diagnosing an O2 sensor using an OBD2 scanner.
6.1 Step 1: Gather Necessary Tools and Equipment
Ensure you have the following:
- OBD2 scanner
- Multimeter
- Vehicle repair manual
- Safety gloves and glasses
6.2 Step 2: Locate the OBD2 Port and Connect the Scanner
Find the OBD2 port in your vehicle (usually under the dashboard) and plug in the OBD2 scanner.
6.3 Step 3: Start the Vehicle and Warm Up the Engine
Start your vehicle and let it run for a few minutes to warm up the engine and O2 sensors.
6.4 Step 4: Retrieve Trouble Codes
Use the OBD2 scanner to retrieve any stored trouble codes. Select the “Read Codes” option.
6.5 Step 5: Record and Interpret Trouble Codes
Record any trouble codes that are displayed and interpret their meaning using your vehicle repair manual or online resources.
6.6 Step 6: Access Live Data for O2 Sensors
Select the “Live Data” option and scroll through the list of sensors until you find the O2 sensors.
6.7 Step 7: Monitor Voltage Readings and Response Time
Monitor the voltage readings and response time of the O2 sensors. Look for fluctuations between 0.1V and 0.9V and a quick response time.
6.8 Step 8: Check Fuel Trim Values
Check the Short-Term Fuel Trim (STFT) and Long-Term Fuel Trim (LTFT) values to see how the ECU is adjusting the fuel mixture.
6.9 Step 9: Perform Additional Tests as Needed
If you suspect a problem with the O2 sensor heater circuit, use a multimeter to test for continuity.
6.10 Step 10: Clear Trouble Codes and Retest
After addressing any issues, clear the trouble codes using the OBD2 scanner and retest to ensure the problem has been resolved.
7. Advanced Diagnostic Techniques
In some cases, basic diagnostic procedures may not be sufficient to identify the root cause of an O2 sensor problem. These advanced techniques can help you pinpoint more elusive issues.
7.1 Using a Multimeter to Test O2 Sensor Output
A multimeter can be used to directly measure the voltage output of the O2 sensor. This can help you verify the accuracy of the readings displayed by the OBD2 scanner.
- Connect the Multimeter: Connect the positive lead of the multimeter to the O2 sensor’s signal wire and the negative lead to a good ground.
- Start the Engine: Start the engine and let it warm up.
- Monitor Voltage: Monitor the voltage reading on the multimeter. It should fluctuate between 0.1V and 0.9V.
7.2 Testing the O2 Sensor Heater Circuit
The O2 sensor heater circuit helps the sensor reach operating temperature quickly. To test the heater circuit:
- Disconnect the Sensor: Disconnect the O2 sensor from its wiring harness.
- Check Resistance: Use a multimeter to measure the resistance between the heater circuit terminals.
- Compare to Specifications: Compare the measured resistance to the specifications in your vehicle repair manual. An open circuit indicates a faulty heater.
7.3 Vacuum Leak Testing
Vacuum leaks can cause lean conditions that trigger O2 sensor-related trouble codes. To test for vacuum leaks:
- Visual Inspection: Inspect vacuum hoses and connections for signs of cracks or damage.
- Smoke Test: Use a smoke machine to introduce smoke into the intake system and look for leaks.
- Carburetor Cleaner Test: Spray carburetor cleaner around vacuum hoses and connections. If the engine speed changes, it indicates a vacuum leak.
7.4 Fuel Pressure Testing
Low fuel pressure can also cause lean conditions. To test fuel pressure:
- Connect Fuel Pressure Gauge: Connect a fuel pressure gauge to the fuel rail.
- Start the Engine: Start the engine and let it idle.
- Monitor Fuel Pressure: Monitor the fuel pressure reading. Compare it to the specifications in your vehicle repair manual.
8. Tips for Preventing O2 Sensor Problems
Preventing O2 sensor problems can save you time and money on repairs. Here are some tips to follow:
8.1 Regular Maintenance
Follow your vehicle’s recommended maintenance schedule, including:
- Oil Changes: Regular oil changes prevent oil contamination of the O2 sensor.
- Air Filter Replacement: A clean air filter ensures proper air-fuel mixture and prevents contaminants from entering the engine.
- Spark Plug Replacement: Worn spark plugs can cause misfires that damage the O2 sensor.
8.2 Use Quality Fuel
Use high-quality fuel from reputable gas stations. Avoid using fuel additives that can harm the O2 sensor.
8.3 Avoid Short Trips
Short trips can prevent the O2 sensor from reaching its operating temperature, leading to carbon buildup and reduced performance.
8.4 Address Engine Issues Promptly
Address any engine issues, such as misfires or rough idling, promptly to prevent damage to the O2 sensor.
8.5 Inspect Exhaust System
Regularly inspect your exhaust system for leaks. Repair any leaks promptly to prevent false O2 sensor readings.
Alt text: Inspecting the exhaust system for leaks and damage
9. When to Replace an O2 Sensor
Knowing when to replace an O2 sensor is crucial for maintaining your vehicle’s performance and fuel efficiency.
9.1 Age and Mileage
O2 sensors typically last between 60,000 and 100,000 miles. Replace your O2 sensors proactively if they are approaching this mileage, even if they are not showing any symptoms.
9.2 Persistent Trouble Codes
If you are consistently getting O2 sensor-related trouble codes, even after addressing potential causes, it may be time to replace the sensor.
9.3 Poor Fuel Economy
A significant drop in fuel economy can indicate a failing O2 sensor. If you notice a decrease in MPG, have your O2 sensors checked.
9.4 Failed Emissions Test
A failed emissions test is a clear sign that your O2 sensors are not functioning correctly and need to be replaced.
9.5 Sluggish Response Time
If your OBD2 scanner shows a slow response time for the O2 sensor, it is likely degrading and should be replaced.
10. Choosing the Right Replacement O2 Sensor
Selecting the correct replacement O2 sensor is crucial for ensuring proper performance and compatibility with your vehicle.
10.1 Check Vehicle Specifications
Consult your vehicle repair manual or a trusted auto parts store to determine the correct O2 sensor for your vehicle.
10.2 OEM vs. Aftermarket
You can choose between OEM (Original Equipment Manufacturer) and aftermarket O2 sensors. OEM sensors are made by the same manufacturer that supplied the original sensor and are typically more expensive but offer guaranteed compatibility and performance.
10.3 Sensor Type
Ensure you are purchasing the correct type of O2 sensor for your vehicle (e.g., zirconia or titania).
10.4 Brand Reputation
Choose O2 sensors from reputable brands known for quality and reliability.
11. O2 Sensor Diagnosis for Mercedes-Benz Vehicles
Mercedes-Benz vehicles often have more sophisticated diagnostic systems. Here’s what you need to know when diagnosing O2 sensors in these vehicles.
11.1 Specific Mercedes-Benz Codes
Mercedes-Benz vehicles may have specific diagnostic codes that are unique to the brand. Consult a Mercedes-Benz repair manual or diagnostic database for accurate code interpretations.
11.2 Advanced Diagnostic Tools
Consider using advanced diagnostic tools that are specifically designed for Mercedes-Benz vehicles. These tools can provide more detailed information and diagnostic capabilities.
11.3 Common Mercedes-Benz O2 Sensor Issues
Common O2 sensor issues in Mercedes-Benz vehicles include:
- Oil Contamination: Mercedes-Benz engines are known for potential oil leaks, which can contaminate O2 sensors.
- Catalytic Converter Problems: Issues with the catalytic converter can affect O2 sensor readings.
- Wiring Harness Damage: The complex wiring harnesses in Mercedes-Benz vehicles are susceptible to damage.
11.4 Resetting Adaptations
After replacing an O2 sensor in a Mercedes-Benz vehicle, it may be necessary to reset the engine adaptations using a diagnostic tool. This helps the ECU learn the new sensor’s characteristics.
12. Benefits of Using MERCEDES-DIAGNOSTIC-TOOL.EDU.VN
MERCEDES-DIAGNOSTIC-TOOL.EDU.VN provides detailed information, expert guidance, and resources to help you diagnose and repair your Mercedes-Benz vehicle. Our services include:
- Comprehensive Diagnostic Guides: Step-by-step guides for diagnosing various issues, including O2 sensor problems.
- Expert Advice: Access to experienced technicians who can provide personalized advice and support.
- Tool Recommendations: Recommendations for the best diagnostic tools and equipment for Mercedes-Benz vehicles.
- Repair Procedures: Detailed repair procedures and instructions for common Mercedes-Benz issues.
- Community Support: A community forum where you can connect with other Mercedes-Benz owners and share your experiences.
By using MERCEDES-DIAGNOSTIC-TOOL.EDU.VN, you can save time and money on repairs, maintain your vehicle’s performance, and enjoy the peace of mind that comes with knowing your Mercedes-Benz is in good hands.
13. Conclusion
Diagnosing an O2 sensor with an OBD2 scanner is a straightforward process that can save you time and money. By understanding the function of the O2 sensor, interpreting trouble codes, and following our step-by-step guide, you can accurately diagnose and address O2 sensor problems. Remember to perform regular maintenance and address engine issues promptly to prevent future O2 sensor failures. With the help of MERCEDES-DIAGNOSTIC-TOOL.EDU.VN, you have the knowledge and resources to keep your Mercedes-Benz running smoothly.
Don’t let a faulty O2 sensor compromise your Mercedes-Benz’s performance. Contact MERCEDES-DIAGNOSTIC-TOOL.EDU.VN today for expert guidance, tool recommendations, and detailed repair procedures. Our team of experienced technicians is ready to assist you with all your diagnostic needs. Reach out to us at 789 Oak Avenue, Miami, FL 33101, United States, or via WhatsApp at +1 (641) 206-8880. Visit our website at MERCEDES-DIAGNOSTIC-TOOL.EDU.VN for more information. We’re here to help you keep your Mercedes-Benz in top condition with our superior expertise in automotive diagnostics, Mercedes-Benz maintenance, and oxygen sensor testing.
14. FAQs
14.1 How do I know if my O2 sensor is bad?
Common signs of a bad O2 sensor include poor fuel economy, a rough idle, the check engine light coming on, failed emissions tests, engine misfires, and hesitation during acceleration.
14.2 Can a bad O2 sensor affect engine performance?
Yes, a bad O2 sensor can significantly affect engine performance. It can cause the engine to run too lean or too rich, leading to reduced power, poor fuel economy, and increased emissions.
14.3 How often should I replace my O2 sensors?
O2 sensors should typically be replaced every 60,000 to 100,000 miles, depending on the vehicle and sensor type.
14.4 Can I drive with a bad O2 sensor?
While you can drive with a bad O2 sensor, it is not recommended. A faulty O2 sensor can cause damage to other engine components and lead to poor fuel economy and increased emissions.
14.5 How much does it cost to replace an O2 sensor?
The cost to replace an O2 sensor can vary depending on the vehicle and sensor type. Generally, the cost ranges from $100 to $300, including parts and labor.
14.6 What is the difference between upstream and downstream O2 sensors?
Upstream O2 sensors are located before the catalytic converter and measure the exhaust gases coming directly from the engine. Downstream O2 sensors are located after the catalytic converter and monitor the converter’s efficiency.
14.7 Can a vacuum leak cause O2 sensor problems?
Yes, vacuum leaks can cause lean conditions that trigger O2 sensor-related trouble codes.
14.8 What tools do I need to diagnose an O2 sensor?
To diagnose an O2 sensor, you will need an OBD2 scanner, a multimeter, a vehicle repair manual, safety gloves, and glasses.
14.9 How do I clear trouble codes after replacing an O2 sensor?
After replacing an O2 sensor, use your OBD2 scanner to clear the trouble codes. Select the “Clear Codes” option from the main menu.
14.10 Where can I find more information about diagnosing and repairing my Mercedes-Benz?
Visit MERCEDES-DIAGNOSTIC-TOOL.EDU.VN for comprehensive diagnostic guides, expert advice, and detailed repair procedures for Mercedes-Benz vehicles. Our team of experienced technicians is ready to assist you with all your diagnostic needs.
15. You Might Also Like
- Mercedes-Benz Diagnostic Tools: A Comprehensive Guide
- How to Unlock Hidden Features on Your Mercedes-Benz
- Mercedes-Benz Maintenance Tips: Keeping Your Car in Top Condition