Is your 2003 Acura Tl Obd2 port not working, preventing you from diagnosing car problems? At MERCEDES-DIAGNOSTIC-TOOL.EDU.VN, we specialize in helping you troubleshoot and fix OBD2 connection issues, offering solutions ranging from simple fixes to more complex immobilizer problems, and we also delve into enhanced diagnostic capabilities. Discover reliable solutions to get your Acura TL back on the road with confidence.
Contents
- 1. Understanding the Importance of a Functional OBD2 Port
- 2. Identifying Common OBD2 Problems in the 2003 Acura TL
- 2.1. Blown Fuses
- 2.2. Wiring Issues
- 2.3. Faulty Scan Tool
- 2.4. Immobilizer Problems
- 2.5. PCM Issues
- 3. Step-by-Step Guide to Troubleshooting OBD2 Port Issues
- 3.1. Check the Fuses
- 3.2. Inspect the Wiring
- 3.3. Verify the Scan Tool
- 3.4. Check the Immobilizer System
- 3.5. Inspect the PCM
- 4. Advanced Diagnostic Tools and Techniques
- 4.1. Using a Multimeter
- 4.2. Using an Oscilloscope
- 5. Understanding Diagnostic Trouble Codes (DTCs)
- 5.1. Common DTCs for the 2003 Acura TL
- 5.2. Interpreting DTCs
- 5.3. Clearing DTCs
- 6. The Role of the Immobilizer System
- 6.1. Understanding the Immobilizer
- 6.2. Common Immobilizer Problems
- 6.3. Troubleshooting Immobilizer Issues
- 7. Maintaining Your 2003 Acura TL’s Electrical System
- 7.1. Regular Inspections
- 7.2. Battery Maintenance
- 7.3. Professional Check-ups
- 8. When to Seek Professional Help
- 8.1. Complex Electrical Issues
- 8.2. PCM Problems
- 8.3. Immobilizer Issues
- 9. Benefits of Using MERCEDES-DIAGNOSTIC-TOOL.EDU.VN Resources
- 9.1. Detailed Guides and Tutorials
- 9.2. Expert Advice
- 9.3. Diagnostic Tools and Equipment
- 9.4. Community Support
- 10. Why Choose MERCEDES-DIAGNOSTIC-TOOL.EDU.VN?
- 10.1. Expertise and Experience
- 10.2. Comprehensive Resources
- 10.3. Commitment to Quality
- 10.4. Customer Satisfaction
- 11. Enhancing Your Diagnostic Capabilities
- 11.1. Advanced Scan Tools
- 11.2. Software and Apps
- 11.3. Training and Education
- 12. Common Mistakes to Avoid
- 12.1. Neglecting the Basics
- 12.2. Using Incompatible Scan Tools
- 12.3. Ignoring Warning Signs
- 12.4. Improper Repairs
- 13. Latest Innovations in OBD2 Technology
- 13.1. Wireless OBD2 Adapters
- 13.2. Cloud-Based Diagnostics
- 13.3. AI-Powered Diagnostics
- 14. Real-World Examples and Case Studies
- 14.1. Case Study 1: Blown Fuse
- 14.2. Case Study 2: Damaged Wiring
- 14.3. Case Study 3: Immobilizer Issue
- 15. The Future of Automotive Diagnostics
- 15.1. Remote Diagnostics
- 15.2. Predictive Maintenance
- 15.3. Augmented Reality (AR)
- 16. Maximizing Your Car’s Performance
- 16.1. Regular Monitoring
- 16.2. Addressing Issues Promptly
- 16.3. Professional Maintenance
- 17. Understanding OBD2 Port Pinout
- 18. Verifying Voltage on Pin 14
- 18.1. How to Check Voltage on Pin 14:
- 18.2. Interpreting the Results:
- 19. Addressing a Flashing Green Key
- 19.1. Understanding the Immobilizer System:
- 19.2. Troubleshooting Steps:
- 20. Detailed Steps to Check Voltage at Pins 7, 9, and 14
- 20.1. Preparing for the Test:
- 20.2. Checking Voltage at Pin 7 (ISO 9141-2 K Line):
- 20.3. Checking Voltage at Pin 9 (Undefined):
- 20.4. Checking Voltage at Pin 14 (CAN Low):
- 20.5. Interpreting the Results:
- 21. Has the Scan Tool Worked on This Vehicle Before?
- 21.1. If the Scan Tool Has Never Worked:
- 21.2. If the Scan Tool Previously Worked:
- 22. Common False Beliefs About the OBD2 Port
- 22.1. Myth: The OBD2 Port Only Provides Engine Codes
- 22.2. Myth: Any Scan Tool Will Work with Any Vehicle
- 22.3. Myth: Clearing Codes Will Fix the Problem
- 22.4. Myth: The OBD2 Port Can Be Used to Unlock Hidden Features
- 22.5. Myth: All OBD2 Ports Are the Same
- 23. Enhanced Diagnostic Capabilities with Advanced Tools
- 23.1. Bi-Directional Control
- 23.2. Live Data Streaming
- 23.3. Component Testing
- 23.4. Key Programming
- 24. How to Handle Intermittent OBD2 Connection Problems
- 24.1. Check Connections:
- 24.2. Monitor Wiring:
- 24.3. Use Contact Cleaner:
- 24.4. Test Under Different Conditions:
- 24.5. Consult a Professional:
- 25. OBD2 Port Security Considerations
- 25.1. Physical Access:
- 25.2. Software Updates:
- 25.3. Reputable Tools:
- 25.4. Secure Connections:
- 25.5. Monitor for Suspicious Activity:
- 26. OBD2 vs. OBD1: Key Differences
- 26.1. Standardization:
- 26.2. Diagnostic Codes:
- 26.3. Data Availability:
- 26.4. Communication Protocols:
- 26.5. Environmental Monitoring:
- 27. Frequently Asked Questions (FAQs)
- 27.1. What does it mean when my OBD2 port is not working?
- 27.2. How do I check if my OBD2 port has power?
- 27.3. Can a bad PCM cause OBD2 port issues?
- 27.4. What is the green key light on my dashboard?
- 27.5. How can I fix a flashing green key light?
- 27.6. What should the voltage be at pin 14 of the OBD2 port?
- 27.7. What should I do if my scan tool is not compatible with my car?
- 27.8. Can a blown fuse cause the OBD2 port to stop working?
- 27.9. How often should I have my car’s electrical system checked?
- 27.10. Is it safe to use wireless OBD2 adapters?
Here’s a comprehensive guide to troubleshoot and fix OBD2 problems in your 2003 Acura TL:
1. Understanding the Importance of a Functional OBD2 Port
The On-Board Diagnostics II (OBD2) port in your 2003 Acura TL is a crucial gateway for accessing your car’s computer system. A functional OBD2 port allows mechanics and car owners to read diagnostic trouble codes (DTCs), monitor engine performance, and ensure the vehicle is running efficiently. However, when the OBD2 port fails to establish a link with a scanner, diagnosing issues becomes challenging.
 2003 Acura TL OBD2 Port Location
2. Identifying Common OBD2 Problems in the 2003 Acura TL
Several factors can cause OBD2 port malfunction in a 2003 Acura TL. Identifying these issues is the first step toward resolving them:
2.1. Blown Fuses
A blown fuse is a common cause of OBD2 port failure. The OBD2 port shares a fuse with other vehicle systems, and a short circuit can cause this fuse to blow.
2.2. Wiring Issues
Damaged, corroded, or loose wiring can disrupt the connection between the OBD2 port and the vehicle’s computer.
2.3. Faulty Scan Tool
Sometimes, the issue isn’t with the car but with the scan tool itself. An outdated or malfunctioning scan tool may fail to establish a connection.
2.4. Immobilizer Problems
The immobilizer system, which prevents the car from starting without the correct key, can sometimes interfere with the OBD2 port’s functionality.
2.5. PCM Issues
The Powertrain Control Module (PCM) is the car’s main computer. If the PCM is faulty, it can prevent the OBD2 port from working correctly.
3. Step-by-Step Guide to Troubleshooting OBD2 Port Issues
Follow these steps to diagnose and fix OBD2 port problems in your 2003 Acura TL.
3.1. Check the Fuses
- Locate the Fuse Box: Consult your Acura TL’s owner manual to find the location of the fuse box. Typically, it’s under the dashboard or in the engine compartment.
- Identify the OBD2 Fuse: Check the fuse box diagram for the fuse associated with the OBD2 port or the cigarette lighter, as they often share the same fuse.
- Inspect the Fuse: Remove the fuse and visually inspect it. If the filament inside is broken, the fuse is blown.
- Replace the Fuse: Replace the blown fuse with a new one of the same amperage.
- Test the OBD2 Port: Plug in your scan tool and check if it now connects to the vehicle.
3.2. Inspect the Wiring
- Locate the OBD2 Port: The OBD2 port is usually located under the dashboard on the driver’s side.
- Check for Visible Damage: Look for any signs of damage to the OBD2 port and the surrounding wiring. This includes frayed wires, corrosion, or loose connections.
- Test the Wiring: Use a multimeter to check the continuity and voltage of the wires connected to the OBD2 port. Refer to a wiring diagram for your 2003 Acura TL to identify the correct pins and their functions.
- Repair or Replace Damaged Wires: If you find any damaged wires, repair them with electrical tape or replace them entirely. Ensure all connections are secure.
3.3. Verify the Scan Tool
- Test on Another Vehicle: Try using your scan tool on another vehicle to see if it connects properly. If it does, the issue is likely with your Acura TL. If it doesn’t, the scan tool may be faulty.
- Update the Scan Tool Software: Ensure your scan tool has the latest software updates. Outdated software can cause connectivity issues.
- Try a Different Scan Tool: If possible, try using a different scan tool to see if it can connect to your Acura TL.
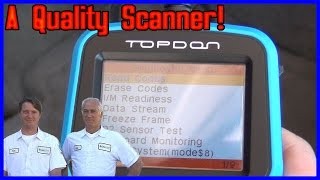
Different Types of Scan Tools
3.4. Check the Immobilizer System
- Observe the Green Key Light: If the green key light on your dashboard is flashing, it indicates an issue with the immobilizer system.
- Check the Key: Ensure you are using the correct key for the vehicle. Try using a spare key to see if the problem persists.
- Consult a Professional: If the immobilizer system is still causing problems, consult a professional mechanic or locksmith who specializes in immobilizer systems.
3.5. Inspect the PCM
- Locate the PCM: The PCM is typically located under the dashboard or in the engine compartment. Consult your Acura TL’s owner manual for the exact location.
- Check for Physical Damage: Look for any signs of physical damage to the PCM, such as corrosion or water damage.
- Test PCM Voltage: Use a multimeter to check the voltage at pins 7, 9, and 14 on the OBD2 port. These pins are connected to the PCM and should have the correct voltage readings.
- Consult a Professional: If you suspect the PCM is faulty, consult a professional mechanic for further diagnosis and possible replacement.
4. Advanced Diagnostic Tools and Techniques
For more complex issues, consider using advanced diagnostic tools and techniques to pinpoint the problem.
4.1. Using a Multimeter
A multimeter is an essential tool for diagnosing electrical problems. Here’s how to use it to check the OBD2 port:
- Check for Power: Verify that pin 16 of the OBD2 port has 12V power. This is the power supply for the scan tool.
- Check the Ground: Ensure that pins 4 and 5 are properly grounded.
- Check Continuity: Test the continuity of the data lines (pins 7, 9, and 14) to ensure they are not broken or shorted.
4.2. Using an Oscilloscope
An oscilloscope can be used to analyze the data signals on the OBD2 port. This can help identify issues with the PCM or other electronic components.
- Connect the Oscilloscope: Connect the oscilloscope to the data lines (pins 7, 9, and 14) of the OBD2 port.
- Analyze the Waveforms: Observe the waveforms on the oscilloscope. Look for any irregularities or missing signals.
- Interpret the Results: Compare the waveforms to known good waveforms to identify any issues with the PCM or other components.
5. Understanding Diagnostic Trouble Codes (DTCs)
When the OBD2 port is working correctly, it can retrieve Diagnostic Trouble Codes (DTCs) that provide valuable information about the car’s problems.
5.1. Common DTCs for the 2003 Acura TL
Here are some common DTCs you might encounter and their possible causes:
| DTC | Description | Possible Causes |
|---|---|---|
| P0171 | System Too Lean (Bank 1) | Vacuum leak, faulty MAF sensor, fuel pump issue |
| P0300 | Random Misfire Detected | Spark plugs, ignition coils, fuel injectors |
| P0420 | Catalyst System Efficiency Below Threshold | Faulty catalytic converter, oxygen sensors |
| P0740 | Torque Converter Clutch Circuit Malfunction | Faulty solenoid, transmission issues |
| B1001 | Option Package Identification Error | This code indicates a mismatch in the vehicle’s option packages. It may be due to incorrect programming or a faulty control module. |
| B1002 | ECU Configuration Incomplete | This means the electronic control unit (ECU) has not been properly configured, often after a replacement or reprogramming. |
| B1003 | EEPROM Error | This code refers to an error in the Electrically Erasable Programmable Read-Only Memory (EEPROM), which stores critical vehicle settings. |
| B1004 | LIN Bus Error | This indicates a problem with the Local Interconnect Network (LIN) bus, which is used for communication between various components in the vehicle. |
| B1005 | CAN Bus Error | This suggests there is an issue with the Controller Area Network (CAN) bus, the primary communication network in modern vehicles. |
| B1006 | Undefined Fault | This means there is an unspecified error that requires further diagnosis to identify the root cause. |
5.2. Interpreting DTCs
Use a scan tool to read the DTCs stored in the PCM. Refer to a repair manual or online database to understand the meaning of each code and its possible causes.
5.3. Clearing DTCs
After addressing the underlying issue, use the scan tool to clear the DTCs from the PCM. This will turn off the check engine light.
6. The Role of the Immobilizer System
The immobilizer system is a security feature that prevents the car from being started without the correct key. If the immobilizer system malfunctions, it can also interfere with the OBD2 port’s functionality.
6.1. Understanding the Immobilizer
The immobilizer system consists of a transponder chip in the key, an antenna around the ignition switch, and the PCM. When the key is inserted into the ignition, the antenna reads the transponder chip and sends the information to the PCM. If the PCM recognizes the key, it allows the car to start.
6.2. Common Immobilizer Problems
- Faulty Transponder Chip: If the transponder chip in the key is damaged or not programmed correctly, the immobilizer system will not recognize the key.
- Antenna Issues: If the antenna around the ignition switch is damaged or not working correctly, it may not be able to read the transponder chip.
- PCM Problems: If the PCM is faulty, it may not be able to recognize the key even if the transponder chip and antenna are working correctly.
6.3. Troubleshooting Immobilizer Issues
- Check the Key: Ensure you are using the correct key for the vehicle. Try using a spare key to see if the problem persists.
- Check the Battery: Ensure the key fob battery is not dead. Replace if necessary.
- Consult a Professional: If the immobilizer system is still causing problems, consult a professional mechanic or locksmith who specializes in immobilizer systems.
7. Maintaining Your 2003 Acura TL’s Electrical System
Preventive maintenance can help avoid many electrical issues, including OBD2 port failures.
7.1. Regular Inspections
Regularly inspect the wiring and connections in your car’s electrical system. Look for any signs of damage or corrosion.
7.2. Battery Maintenance
Ensure your car’s battery is in good condition. A weak battery can cause various electrical problems.
7.3. Professional Check-ups
Have your car’s electrical system checked by a professional mechanic during routine maintenance.
8. When to Seek Professional Help
While many OBD2 port issues can be resolved with DIY troubleshooting, some problems require professional attention.
8.1. Complex Electrical Issues
If you are not comfortable working with electrical systems, it’s best to seek professional help.
8.2. PCM Problems
Diagnosing and replacing a faulty PCM requires specialized equipment and knowledge.
8.3. Immobilizer Issues
Immobilizer systems are complex, and troubleshooting them often requires specialized tools and expertise.
9. Benefits of Using MERCEDES-DIAGNOSTIC-TOOL.EDU.VN Resources
At MERCEDES-DIAGNOSTIC-TOOL.EDU.VN, we provide comprehensive resources to help you diagnose and fix OBD2 port issues in your 2003 Acura TL.
9.1. Detailed Guides and Tutorials
Access our detailed guides and tutorials for step-by-step instructions on troubleshooting OBD2 port problems.
9.2. Expert Advice
Get expert advice from our team of experienced mechanics and technicians.
9.3. Diagnostic Tools and Equipment
Find recommendations for the best diagnostic tools and equipment for your Acura TL.
9.4. Community Support
Join our community forum to connect with other Acura TL owners and share your experiences and solutions.
10. Why Choose MERCEDES-DIAGNOSTIC-TOOL.EDU.VN?
Choosing MERCEDES-DIAGNOSTIC-TOOL.EDU.VN means accessing reliable and accurate information to keep your Acura TL running smoothly.
10.1. Expertise and Experience
Our team has years of experience in automotive diagnostics and repair.
10.2. Comprehensive Resources
We offer a wide range of resources, including guides, tutorials, and expert advice.
10.3. Commitment to Quality
We are committed to providing high-quality information and solutions that you can trust.
10.4. Customer Satisfaction
Your satisfaction is our top priority. We are here to help you resolve your OBD2 port issues and get your Acura TL back on the road.
11. Enhancing Your Diagnostic Capabilities
Beyond basic OBD2 troubleshooting, there are ways to enhance your diagnostic capabilities for your 2003 Acura TL.
11.1. Advanced Scan Tools
Invest in an advanced scan tool that can perform more in-depth diagnostics, such as live data streaming, component testing, and bi-directional control.
11.2. Software and Apps
Utilize diagnostic software and apps on your smartphone or tablet to access additional information and perform advanced functions.
11.3. Training and Education
Consider taking automotive diagnostic courses to improve your skills and knowledge.
12. Common Mistakes to Avoid
When troubleshooting OBD2 port issues, avoid these common mistakes:
12.1. Neglecting the Basics
Don’t overlook the basics, such as checking the fuses and wiring. These simple steps can often resolve the problem.
12.2. Using Incompatible Scan Tools
Ensure that your scan tool is compatible with your 2003 Acura TL.
12.3. Ignoring Warning Signs
Pay attention to any warning signs, such as a flashing check engine light or unusual behavior from the car.
12.4. Improper Repairs
Avoid making improper repairs that can cause further damage to your car’s electrical system.
13. Latest Innovations in OBD2 Technology
Stay updated with the latest innovations in OBD2 technology to enhance your diagnostic capabilities.
13.1. Wireless OBD2 Adapters
Wireless OBD2 adapters allow you to connect your smartphone or tablet to your car’s computer wirelessly.
13.2. Cloud-Based Diagnostics
Cloud-based diagnostic platforms provide access to vast databases of diagnostic information and expert support.
13.3. AI-Powered Diagnostics
AI-powered diagnostic tools can analyze data from your car and provide insights into potential problems.
14. Real-World Examples and Case Studies
Here are some real-world examples of OBD2 port issues and their solutions:
14.1. Case Study 1: Blown Fuse
An Acura TL owner reported that their OBD2 port was not working. After checking the fuses, they found that the fuse for the cigarette lighter (which also powered the OBD2 port) was blown. Replacing the fuse resolved the issue.
14.2. Case Study 2: Damaged Wiring
An Acura TL owner noticed that their OBD2 port was not connecting to the scan tool. Upon inspection, they found that the wiring to the OBD2 port was damaged due to corrosion. Repairing the damaged wiring fixed the problem.
14.3. Case Study 3: Immobilizer Issue
An Acura TL owner experienced a flashing green key light on the dashboard, and the OBD2 port was not working. After consulting a professional, it was determined that the immobilizer system was faulty. Reprogramming the immobilizer system resolved the issue.
15. The Future of Automotive Diagnostics
The future of automotive diagnostics is evolving rapidly, with new technologies and tools being developed all the time.
15.1. Remote Diagnostics
Remote diagnostics allow mechanics to diagnose and repair cars remotely, using telematics and remote access tools.
15.2. Predictive Maintenance
Predictive maintenance uses data analysis and machine learning to predict when a car will need maintenance, helping to avoid breakdowns.
15.3. Augmented Reality (AR)
Augmented reality (AR) can be used to provide mechanics with step-by-step instructions and visual aids for diagnosing and repairing cars.
16. Maximizing Your Car’s Performance
Ensuring your OBD2 port is functional is crucial for maximizing your car’s performance. A working OBD2 port allows you to monitor your car’s engine, identify potential problems, and ensure that your car is running efficiently.
16.1. Regular Monitoring
Regularly monitor your car’s performance using a scan tool. This can help you identify potential problems early on.
16.2. Addressing Issues Promptly
Address any issues promptly. Ignoring warning signs can lead to more serious problems down the road.
16.3. Professional Maintenance
Have your car professionally maintained on a regular basis. This can help ensure that your car is running smoothly and efficiently.
17. Understanding OBD2 Port Pinout
The OBD2 port has a standardized pinout that allows scan tools to communicate with the vehicle’s computer. Here’s a brief overview of the pin functions:
| Pin | Function |
|---|---|
| 2 | J1850 Bus Positive |
| 4 | Chassis Ground |
| 5 | Signal Ground |
| 6 | CAN High (J-2284) |
| 7 | ISO 9141-2 K Line |
| 10 | J1850 Bus Negative |
| 14 | CAN Low (J-2284) |
| 15 | ISO 9141-2 L Line |
| 16 | Battery Power |
18. Verifying Voltage on Pin 14
As suggested by the expert, checking the voltage on pin 14 of the OBD2 port is crucial. This pin is part of the CAN (Controller Area Network) bus, which is essential for communication between various electronic control units in the vehicle.
18.1. How to Check Voltage on Pin 14:
- Prepare Your Multimeter: Set your multimeter to measure DC voltage.
- Locate Pin 14: Identify pin 14 on the OBD2 port. Refer to the pinout diagram above.
- Connect the Multimeter: Connect the positive (+) lead of the multimeter to pin 14 and the negative (-) lead to a known good ground (e.g., the vehicle’s chassis).
- Read the Voltage: Turn the ignition key to the “ON” position without starting the engine. The multimeter should read approximately 2.5V.
18.2. Interpreting the Results:
- Approximately 2.5V: This indicates that the CAN bus is functioning correctly.
- 0V or Significantly Different Voltage: This suggests a problem with the CAN bus, potentially due to a faulty PCM, wiring issue, or other component.
19. Addressing a Flashing Green Key
The flashing green key symbol typically indicates an issue with the immobilizer system. Here’s how to address it:
19.1. Understanding the Immobilizer System:
The immobilizer system is a security feature that prevents the car from starting without the correct key. It involves a transponder chip in the key, an antenna around the ignition switch, and the PCM.
19.2. Troubleshooting Steps:
- Verify Key Compatibility: Ensure you are using the correct, programmed key for the vehicle.
- Check Key Fob Battery: Replace the battery in the key fob, as a weak battery can sometimes cause issues with the immobilizer.
- Inspect the Ignition Switch Antenna: Check the antenna ring around the ignition switch for any damage or loose connections.
- Consult a Professional: If the problem persists, consult a professional mechanic or locksmith who specializes in immobilizer systems. They may need to reprogram the key or diagnose a fault within the PCM.
20. Detailed Steps to Check Voltage at Pins 7, 9, and 14
Checking the voltage at pins 7, 9, and 14 can provide valuable insights into the communication between the PCM and other vehicle systems.
20.1. Preparing for the Test:
- Gather Your Tools: You will need a multimeter and the wiring diagram for your 2003 Acura TL.
- Set Up the Multimeter: Set the multimeter to measure DC voltage.
- Locate the Pins: Identify pins 7, 9, and 14 on the OBD2 port.
20.2. Checking Voltage at Pin 7 (ISO 9141-2 K Line):
- Connect the Multimeter: Connect the positive (+) lead of the multimeter to pin 7 and the negative (-) lead to a known good ground.
- Turn On the Ignition: Turn the ignition key to the “ON” position without starting the engine.
- Read the Voltage: The voltage should be around 5V to 7V. A significant deviation from this range indicates a problem with the K line or the PCM.
20.3. Checking Voltage at Pin 9 (Undefined):
- Consult the Wiring Diagram: Since pin 9 is often undefined or manufacturer-specific, refer to the wiring diagram for your 2003 Acura TL to determine its function.
- Connect the Multimeter: Connect the positive (+) lead of the multimeter to pin 9 and the negative (-) lead to a known good ground.
- Turn On the Ignition: Turn the ignition key to the “ON” position without starting the engine.
- Read the Voltage: The expected voltage will vary depending on the function of pin 9. Compare the reading to the specifications in the wiring diagram.
20.4. Checking Voltage at Pin 14 (CAN Low):
- Connect the Multimeter: Connect the positive (+) lead of the multimeter to pin 14 and the negative (-) lead to a known good ground.
- Turn On the Ignition: Turn the ignition key to the “ON” position without starting the engine.
- Read the Voltage: The voltage should be around 2.5V. A significant deviation indicates a potential issue with the CAN bus.
20.5. Interpreting the Results:
- Voltage within Expected Range: This suggests that the PCM and related systems are functioning correctly.
- Voltage Outside Expected Range: This indicates a potential issue with the PCM, wiring, or other components connected to the respective pins. Further diagnosis is needed to pinpoint the exact cause.
21. Has the Scan Tool Worked on This Vehicle Before?
Determining whether the scan tool has successfully connected to the 2003 Acura TL in the past is a critical step in troubleshooting OBD2 issues.
21.1. If the Scan Tool Has Never Worked:
- Compatibility Check: Ensure the scan tool is compatible with the 2003 Acura TL. Some scan tools may not support all vehicle makes and models.
- Software Updates: Verify that the scan tool has the latest software updates installed. Outdated software can cause connectivity issues.
- Hardware Issues: Inspect the scan tool cable and connectors for any signs of damage.
21.2. If the Scan Tool Previously Worked:
- Recent Changes: Consider any recent changes to the vehicle, such as repairs or modifications, that may have affected the OBD2 system.
- Connection Issues: Check the OBD2 port for any physical damage or debris that may be preventing a proper connection.
- System Faults: Investigate potential system faults, such as a blown fuse or wiring issue, that may be preventing the scan tool from connecting.
22. Common False Beliefs About the OBD2 Port
There are several misconceptions about the OBD2 port that can hinder the diagnostic process. Here are a few to be aware of:
22.1. Myth: The OBD2 Port Only Provides Engine Codes
- Reality: While the OBD2 port is commonly used to retrieve engine-related diagnostic codes, it also provides access to other vehicle systems, such as the transmission, ABS, and airbag systems.
22.2. Myth: Any Scan Tool Will Work with Any Vehicle
- Reality: Not all scan tools are compatible with all vehicles. Some scan tools are designed for specific makes and models, while others may require additional adapters or software updates to work correctly.
22.3. Myth: Clearing Codes Will Fix the Problem
- Reality: Clearing diagnostic trouble codes (DTCs) only removes the symptoms of the problem, not the underlying cause. The issue will likely return if the root cause is not addressed.
22.4. Myth: The OBD2 Port Can Be Used to Unlock Hidden Features
- Reality: While some advanced scan tools and software can be used to customize certain vehicle settings, the OBD2 port is primarily designed for diagnostic and monitoring purposes.
22.5. Myth: All OBD2 Ports Are the Same
- Reality: While the physical connector of the OBD2 port is standardized, the communication protocols and data available can vary depending on the vehicle make, model, and year.
23. Enhanced Diagnostic Capabilities with Advanced Tools
To delve deeper into vehicle diagnostics, consider using enhanced tools that offer advanced functionalities.
23.1. Bi-Directional Control
Bi-directional scan tools allow you to send commands to the vehicle’s computer and control various components. This can be useful for testing actuators, solenoids, and other devices.
23.2. Live Data Streaming
Live data streaming allows you to monitor various parameters in real-time, such as engine RPM, coolant temperature, and oxygen sensor readings. This can help you identify performance issues and diagnose intermittent problems.
23.3. Component Testing
Component testing features allow you to test individual components, such as sensors and actuators, to verify their functionality. This can save time and effort by pinpointing faulty components quickly.
23.4. Key Programming
Some advanced scan tools offer key programming capabilities, allowing you to program new keys and key fobs for your vehicle. This can be useful if you lose your keys or need to replace a faulty key fob.
24. How to Handle Intermittent OBD2 Connection Problems
Intermittent OBD2 connection problems can be frustrating, as they are difficult to diagnose. Here are some tips for handling these issues:
24.1. Check Connections:
Inspect the OBD2 port and scan tool connectors for any loose or corroded connections.
24.2. Monitor Wiring:
Check the wiring harness for any signs of damage, such as frayed wires or loose connections.
24.3. Use Contact Cleaner:
Apply electrical contact cleaner to the OBD2 port and scan tool connectors to improve the connection.
24.4. Test Under Different Conditions:
Try connecting the scan tool under different conditions, such as when the engine is cold or hot, to see if the problem occurs under specific circumstances.
24.5. Consult a Professional:
If the problem persists, consult a professional mechanic who has experience diagnosing intermittent electrical issues.
25. OBD2 Port Security Considerations
The OBD2 port can be a potential entry point for cyberattacks. Here are some security considerations to keep in mind:
25.1. Physical Access:
Prevent unauthorized physical access to the OBD2 port. Consider using a locking OBD2 port cover to deter tampering.
25.2. Software Updates:
Keep your scan tool software up to date to protect against known vulnerabilities.
25.3. Reputable Tools:
Use scan tools and software from reputable vendors to minimize the risk of malware or malicious software.
25.4. Secure Connections:
Avoid connecting to unknown or untrusted networks when using wireless OBD2 adapters.
25.5. Monitor for Suspicious Activity:
Be vigilant for any suspicious activity, such as unauthorized access to your vehicle’s systems.
26. OBD2 vs. OBD1: Key Differences
Understanding the differences between OBD2 and OBD1 can help you appreciate the advancements in automotive diagnostics.
26.1. Standardization:
OBD2 is a standardized system, meaning that all vehicles manufactured after 1996 are required to use the same connector and communication protocols. OBD1, on the other hand, was not standardized, and each manufacturer used their own proprietary system.
26.2. Diagnostic Codes:
OBD2 uses standardized diagnostic trouble codes (DTCs), making it easier to identify and diagnose problems. OBD1 used proprietary codes, which could be difficult to interpret without the manufacturer’s documentation.
26.3. Data Availability:
OBD2 provides access to a wider range of data parameters compared to OBD1. This allows for more comprehensive diagnostics and monitoring.
26.4. Communication Protocols:
OBD2 uses more advanced communication protocols, such as CAN (Controller Area Network), which allows for faster and more reliable data transfer.
26.5. Environmental Monitoring:
OBD2 includes enhanced environmental monitoring capabilities, allowing for better detection of emissions-related problems.
27. Frequently Asked Questions (FAQs)
Here are some frequently asked questions about OBD2 port issues:
27.1. What does it mean when my OBD2 port is not working?
It means the diagnostic scanner can’t communicate with your car’s computer, which can be due to blown fuses, wiring problems, a faulty scan tool, or PCM issues.
27.2. How do I check if my OBD2 port has power?
Use a multimeter to check for 12V power at pin 16 of the OBD2 port.
27.3. Can a bad PCM cause OBD2 port issues?
Yes, a faulty PCM can prevent the OBD2 port from working correctly.
27.4. What is the green key light on my dashboard?
It indicates an issue with the immobilizer system, which may prevent the car from starting and interfere with the OBD2 port.
27.5. How can I fix a flashing green key light?
Try using a spare key or consulting a professional mechanic or locksmith who specializes in immobilizer systems.
27.6. What should the voltage be at pin 14 of the OBD2 port?
The voltage at pin 14 (CAN Low) should be around 2.5V.
27.7. What should I do if my scan tool is not compatible with my car?
Ensure the scan tool is compatible with your car’s make, model, and year. You may need to update the software or use a different scan tool.
27.8. Can a blown fuse cause the OBD2 port to stop working?
Yes, a blown fuse is a common cause of OBD2 port failure. Check and replace any blown fuses.
27.9. How often should I have my car’s electrical system checked?
Have your car’s electrical system checked by a professional mechanic during routine maintenance, or at least once a year.
27.10. Is it safe to use wireless OBD2 adapters?
Use wireless OBD2 adapters from reputable vendors and avoid connecting to unknown or untrusted networks to minimize security risks.
Troubleshooting OBD2 port issues on your 2003 Acura TL can seem daunting, but with the right knowledge and tools, you can diagnose and resolve many common problems. Remember to follow the steps outlined in this guide, and don’t hesitate to seek professional help when needed. At MERCEDES-DIAGNOSTIC-TOOL.EDU.VN, we are committed to providing you with the resources and support you need to keep your Acura TL running smoothly.
Is your 2003 Acura TL giving you trouble? Don’t wait any longer. Contact us today at MERCEDES-DIAGNOSTIC-TOOL.EDU.VN or call us at +1 (641) 206-8880 for expert advice, diagnostic tools, and comprehensive repair solutions. Visit us at 789 Oak Avenue, Miami, FL 33101, United States, and let our team at MERCEDES-DIAGNOSTIC-TOOL.EDU.VN get you back on the road with confidence. Send us a message on Whatsapp +1 (641) 206-8880