An Obd2 Swap involves replacing the original engine management system in your Mercedes-Benz with a newer, more advanced OBD2 (On-Board Diagnostics II) system. MERCEDES-DIAGNOSTIC-TOOL.EDU.VN provides the resources and expertise to ensure a successful OBD2 swap, enhancing your vehicle’s performance, diagnostics, and overall driving experience. With our comprehensive guides and support, you can unlock hidden features and optimize your Mercedes-Benz.
Contents
- 1. Understanding OBD2 Swaps
- 1.1. What Is an OBD2 Swap?
- 1.2. Benefits of an OBD2 Swap
- 1.3. Drawbacks of an OBD2 Swap
- 2. Prerequisites for an OBD2 Swap
- 2.1. Necessary Tools and Equipment
- 2.2. Required Parts
- 2.3. Expertise and Knowledge
- 3. Step-by-Step Guide to Performing an OBD2 Swap
- 3.1. Preparation
- 3.2. Disconnecting the Original System
- 3.3. Installing the OBD2 System
- 3.4. Wiring and Connections
- 3.5. Software and Programming
- 3.6. Testing and Troubleshooting
- 4. Advanced Considerations for OBD2 Swaps
- 4.1. Integrating Additional Sensors
- 4.2. Custom Tuning
- 4.3. Legal and Regulatory Compliance
- 5. Common Issues and Troubleshooting
- 5.1. Diagnostic Errors
- 5.2. Compatibility Problems
- 5.3. Performance Issues
- 6. OBD2 Swap for Specific Mercedes-Benz Models
- 6.1. OBD2 Swap for Mercedes-Benz C-Class
- 6.2. OBD2 Swap for Mercedes-Benz E-Class
- 6.3. OBD2 Swap for Mercedes-Benz S-Class
- 7. Cost Analysis of an OBD2 Swap
- 7.1. Parts Costs
- 7.2. Labor Costs
- 7.3. Additional Expenses
- 8. Optimizing Your Mercedes-Benz After an OBD2 Swap
- 8.1. Performance Tuning
- 8.2. Diagnostic Monitoring
- 8.3. Regular Maintenance
- 9. Case Studies and Success Stories
- 9.1. Real-World Examples of OBD2 Swaps
- 9.2. Lessons Learned
- 10. Frequently Asked Questions (FAQ) about OBD2 Swaps
- 11. Call to Action
Table of Contents
1. Understanding OBD2 Swaps
1.1. What Is an OBD2 Swap?
1.2. Benefits of an OBD2 Swap
1.3. Drawbacks of an OBD2 Swap
2. Prerequisites for an OBD2 Swap
2.1. Necessary Tools and Equipment
2.2. Required Parts
2.3. Expertise and Knowledge
3. Step-by-Step Guide to Performing an OBD2 Swap
3.1. Preparation
3.2. Disconnecting the Original System
3.3. Installing the OBD2 System
3.4. Wiring and Connections
3.5. Software and Programming
3.6. Testing and Troubleshooting
4. Advanced Considerations for OBD2 Swaps
4.1. Integrating Additional Sensors
4.2. Custom Tuning
4.3. Legal and Regulatory Compliance
5. Common Issues and Troubleshooting
5.1. Diagnostic Errors
5.2. Compatibility Problems
5.3. Performance Issues
6. OBD2 Swap for Specific Mercedes-Benz Models
6.1. OBD2 Swap for Mercedes-Benz C-Class
6.2. OBD2 Swap for Mercedes-Benz E-Class
6.3. OBD2 Swap for Mercedes-Benz S-Class
7. Cost Analysis of an OBD2 Swap
7.1. Parts Costs
7.2. Labor Costs
7.3. Additional Expenses
8. Optimizing Your Mercedes-Benz After an OBD2 Swap
8.1. Performance Tuning
8.2. Diagnostic Monitoring
8.3. Regular Maintenance
9. Case Studies and Success Stories
9.1. Real-World Examples of OBD2 Swaps
9.2. Lessons Learned
10. Frequently Asked Questions (FAQ) about OBD2 Swaps
11. Call to Action
1. Understanding OBD2 Swaps
1.1. What Is an OBD2 Swap?
An OBD2 swap is the process of replacing an older engine management system in a vehicle with a more modern On-Board Diagnostics II (OBD2) system. This upgrade involves changing the engine control unit (ECU), wiring harness, sensors, and other related components to meet OBD2 standards. According to the Environmental Protection Agency (EPA), OBD2 was mandated in the United States for all cars manufactured after 1996 to standardize emissions monitoring and diagnostics.
1.2. Benefits of an OBD2 Swap
Performing an OBD2 swap offers numerous advantages. Improved diagnostics, enhanced performance, increased compatibility, and access to advanced tuning options are just a few of the benefits.
- Improved Diagnostics: OBD2 systems provide standardized diagnostic trouble codes (DTCs) and real-time data, making it easier to identify and resolve issues.
- Enhanced Performance: Modern ECUs can optimize engine performance by precisely controlling fuel delivery, ignition timing, and other parameters.
- Increased Compatibility: OBD2 systems are compatible with a wide range of scan tools and software, allowing for comprehensive vehicle monitoring and customization.
- Access to Advanced Tuning Options: With an OBD2 system, you can access advanced tuning parameters to fine-tune your engine’s performance to your specific needs.
1.3. Drawbacks of an OBD2 Swap
Despite the benefits, an OBD2 swap also has potential drawbacks. It can be complex, costly, and may require significant modifications to your vehicle.
- Complexity: Swapping engine management systems involves intricate wiring and programming, which can be challenging.
- Cost: The cost of parts, labor, and tuning can add up, making it an expensive upgrade.
- Modifications: Depending on the vehicle, an OBD2 swap may require extensive modifications to the engine bay, wiring, and other systems.
2. Prerequisites for an OBD2 Swap
2.1. Necessary Tools and Equipment
Before starting an OBD2 swap, it’s essential to gather the necessary tools and equipment. This includes diagnostic tools, wiring equipment, and basic mechanical tools.
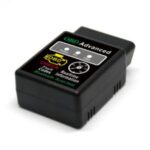
- Diagnostic Tools: An OBD2 scanner or diagnostic interface is crucial for reading trouble codes and monitoring engine parameters.
- Wiring Equipment: A multimeter, soldering iron, wire strippers, and crimpers are essential for modifying and connecting wiring harnesses.
- Basic Mechanical Tools: Wrenches, sockets, screwdrivers, and pliers are needed for removing and installing components.
2.2. Required Parts
The specific parts needed for an OBD2 swap depend on the vehicle and the donor system. However, some common components include the ECU, wiring harness, sensors, and diagnostic port.
- Engine Control Unit (ECU): The brain of the OBD2 system, responsible for controlling engine functions.
- Wiring Harness: Connects the ECU to the various sensors and actuators throughout the engine.
- Sensors: Including oxygen sensors, temperature sensors, and pressure sensors, provide data to the ECU.
- Diagnostic Port: Allows you to connect an OBD2 scanner to read diagnostic information.
2.3. Expertise and Knowledge
Performing an OBD2 swap requires a solid understanding of automotive electrical systems, engine management, and programming.
- Electrical Systems: Knowledge of wiring diagrams, circuit testing, and component identification is essential.
- Engine Management: Familiarity with fuel injection, ignition systems, and emissions control is necessary.
- Programming: Understanding how to flash and tune ECUs is crucial for optimizing performance.
3. Step-by-Step Guide to Performing an OBD2 Swap
3.1. Preparation
Proper preparation is key to a successful OBD2 swap. This involves researching your vehicle, gathering parts, and planning the installation.
- Research: Research your vehicle’s specific requirements and identify a compatible OBD2 system.
- Parts Acquisition: Obtain all the necessary parts, including the ECU, wiring harness, sensors, and diagnostic port.
- Planning: Create a detailed plan for the installation, including wiring diagrams and component locations.
3.2. Disconnecting the Original System
The first step in the swap process is to disconnect the original engine management system. This involves removing the old ECU, wiring harness, and sensors.
- Disconnect Battery: Disconnect the negative terminal of the battery to prevent electrical shorts.
- Remove Old ECU: Locate the original ECU and disconnect the wiring harness.
- Remove Old Wiring Harness: Carefully disconnect and remove the old wiring harness from the engine.
- Remove Old Sensors: Remove the old sensors from the engine, labeling them for future reference.
 Original ECU
3.3. Installing the OBD2 System
With the old system removed, you can begin installing the new OBD2 system. This involves mounting the ECU, routing the wiring harness, and installing the sensors.
- Mount New ECU: Mount the new ECU in a suitable location, ensuring it is protected from heat and moisture.
- Route New Wiring Harness: Carefully route the new wiring harness through the engine bay, connecting it to the various components.
- Install New Sensors: Install the new sensors in their respective locations, ensuring they are properly connected.
3.4. Wiring and Connections
Proper wiring is critical for the OBD2 system to function correctly. This involves connecting the wiring harness to the ECU, sensors, and other components.
- Connect Wiring Harness to ECU: Connect the wiring harness to the ECU, ensuring all pins are properly aligned.
- Connect Wiring Harness to Sensors: Connect the wiring harness to the sensors, matching the wire colors and pin locations.
- Grounding: Ensure all grounding points are properly connected to the chassis.
3.5. Software and Programming
Once the wiring is complete, you’ll need to program the ECU with the correct software and settings. This may involve flashing the ECU with a custom tune or using a diagnostic tool to configure the system.
- Flash ECU: Use a compatible flashing tool to upload the correct software to the ECU.
- Configure System: Use a diagnostic tool to configure the system settings, such as vehicle parameters and sensor calibrations.
3.6. Testing and Troubleshooting
After installation and programming, it’s essential to test the OBD2 system and troubleshoot any issues. This involves using a diagnostic tool to read trouble codes and monitor engine parameters.
- Read Trouble Codes: Use an OBD2 scanner to read trouble codes and identify any issues.
- Monitor Engine Parameters: Monitor engine parameters such as fuel pressure, ignition timing, and sensor readings to ensure the system is functioning correctly.
- Troubleshooting: Address any issues by checking wiring connections, sensor calibrations, and ECU settings.
4. Advanced Considerations for OBD2 Swaps
4.1. Integrating Additional Sensors
Integrating additional sensors can provide more comprehensive data and control over your engine. This may involve adding wideband oxygen sensors, boost sensors, or temperature sensors.
- Wideband Oxygen Sensors: Provide more accurate air-fuel ratio data for improved tuning.
- Boost Sensors: Monitor turbocharger boost pressure for optimized performance.
- Temperature Sensors: Monitor coolant, oil, and exhaust gas temperatures for improved engine protection.
4.2. Custom Tuning
Custom tuning allows you to fine-tune your engine’s performance to your specific needs. This may involve adjusting fuel maps, ignition timing, and other parameters to optimize power and efficiency.
- Fuel Maps: Adjust the fuel delivery based on engine load and RPM.
- Ignition Timing: Optimize the ignition timing for maximum power and efficiency.
- Boost Control: Control turbocharger boost pressure for improved performance.
4.3. Legal and Regulatory Compliance
It’s important to ensure your OBD2 swap complies with all applicable laws and regulations. This may involve emissions testing, visual inspections, and documentation.
- Emissions Testing: Ensure your vehicle passes emissions testing requirements.
- Visual Inspections: Ensure your vehicle passes visual inspections for proper component installation.
- Documentation: Keep records of all modifications and tuning changes.
5. Common Issues and Troubleshooting
5.1. Diagnostic Errors
Diagnostic errors can occur due to wiring issues, sensor malfunctions, or ECU problems. Use an OBD2 scanner to read trouble codes and identify the source of the problem.
- Wiring Issues: Check wiring connections for shorts, opens, and corrosion.
- Sensor Malfunctions: Test sensors for proper operation and replace if necessary.
- ECU Problems: Verify the ECU is properly programmed and functioning correctly.
5.2. Compatibility Problems
Compatibility problems can arise if the OBD2 system is not properly matched to the vehicle. This may involve issues with sensor signals, communication protocols, or ECU settings.
- Sensor Signals: Ensure sensor signals are compatible with the ECU.
- Communication Protocols: Verify the ECU and vehicle use compatible communication protocols.
- ECU Settings: Adjust ECU settings to match the vehicle’s specifications.
5.3. Performance Issues
Performance issues can occur if the OBD2 system is not properly tuned or configured. This may involve problems with fuel delivery, ignition timing, or boost control.
- Fuel Delivery: Adjust fuel maps to optimize fuel delivery for maximum power and efficiency.
- Ignition Timing: Optimize ignition timing for maximum power and efficiency.
- Boost Control: Adjust boost control settings for improved performance.
6. OBD2 Swap for Specific Mercedes-Benz Models
6.1. OBD2 Swap for Mercedes-Benz C-Class
Performing an OBD2 swap on a Mercedes-Benz C-Class can significantly improve its diagnostic capabilities and performance. Common upgrades include swapping to a newer ECU and wiring harness.
- ECU Upgrade: Replace the original ECU with a more modern OBD2-compliant unit.
- Wiring Harness Upgrade: Upgrade the wiring harness to support the new ECU and sensors.
6.2. OBD2 Swap for Mercedes-Benz E-Class
An OBD2 swap for a Mercedes-Benz E-Class can enhance its engine management and tuning options. This often involves integrating additional sensors for more precise control.
- Sensor Integration: Add wideband oxygen sensors and boost sensors for improved tuning.
- Custom Tuning: Fine-tune the engine parameters for optimal performance.
6.3. OBD2 Swap for Mercedes-Benz S-Class
Upgrading an older Mercedes-Benz S-Class with an OBD2 system can bring its diagnostics and performance up to modern standards. This may require extensive modifications to ensure compatibility.
- Extensive Modifications: Adapt the wiring and mounting locations to accommodate the new system.
- Compatibility Adjustments: Adjust ECU settings to ensure compatibility with the vehicle’s systems.
7. Cost Analysis of an OBD2 Swap
7.1. Parts Costs
The cost of parts for an OBD2 swap can vary widely depending on the vehicle and the specific components needed.
- ECU: $500 – $2000
- Wiring Harness: $300 – $1000
- Sensors: $200 – $500
- Diagnostic Port: $50 – $100
7.2. Labor Costs
Labor costs for an OBD2 swap can also vary depending on the complexity of the project and the hourly rate of the mechanic.
- Basic Swap: 20 – 40 hours
- Complex Swap: 40 – 80 hours
- Hourly Rate: $75 – $150
7.3. Additional Expenses
Additional expenses may include tuning, diagnostic tools, and unforeseen modifications.
- Tuning: $300 – $1000
- Diagnostic Tools: $100 – $500
- Unforeseen Modifications: Varies
8. Optimizing Your Mercedes-Benz After an OBD2 Swap
8.1. Performance Tuning
After performing an OBD2 swap, performance tuning is essential to optimize your engine’s power and efficiency.
- Dyno Tuning: Use a dynamometer to measure and adjust engine parameters.
- Road Tuning: Fine-tune the engine parameters under real-world driving conditions.
8.2. Diagnostic Monitoring
Regular diagnostic monitoring can help you identify and address potential issues before they become major problems.
- OBD2 Scanner: Use an OBD2 scanner to regularly check for trouble codes.
- Data Logging: Log engine parameters to monitor performance and identify anomalies.
8.3. Regular Maintenance
Regular maintenance is crucial for keeping your OBD2 system functioning correctly and prolonging the life of your engine.
- Sensor Replacement: Replace sensors as needed to ensure accurate readings.
- Wiring Inspection: Regularly inspect wiring connections for corrosion and damage.
- ECU Updates: Keep the ECU software up to date with the latest firmware.
9. Case Studies and Success Stories
9.1. Real-World Examples of OBD2 Swaps
Several successful OBD2 swaps have been performed on Mercedes-Benz vehicles, resulting in improved performance and diagnostic capabilities.
- C-Class Upgrade: A Mercedes-Benz C-Class was upgraded with a newer ECU and wiring harness, resulting in improved fuel efficiency and throttle response.
- E-Class Enhancement: A Mercedes-Benz E-Class was enhanced with additional sensors and custom tuning, resulting in increased horsepower and torque.
9.2. Lessons Learned
These case studies provide valuable lessons for anyone considering an OBD2 swap.
- Research is Key: Thoroughly research your vehicle and the OBD2 system before starting the swap.
- Plan Carefully: Create a detailed plan for the installation, including wiring diagrams and component locations.
- Test Thoroughly: Test the OBD2 system thoroughly after installation to ensure it is functioning correctly.
10. Frequently Asked Questions (FAQ) about OBD2 Swaps
Q: What is the main benefit of performing an OBD2 swap?
A: The main benefit of an OBD2 swap is improved diagnostics, as OBD2 systems offer standardized diagnostic trouble codes and real-time data.
Q: Is an OBD2 swap difficult to perform?
A: Yes, an OBD2 swap can be complex, involving intricate wiring and programming, which can be challenging without the proper expertise.
Q: What tools are necessary for an OBD2 swap?
A: Necessary tools include diagnostic tools, wiring equipment (multimeter, soldering iron), and basic mechanical tools (wrenches, sockets).
Q: Can I perform an OBD2 swap on any Mercedes-Benz model?
A: While possible, the feasibility depends on the model and availability of compatible OBD2 systems and parts.
Q: What is the typical cost of an OBD2 swap?
A: The cost can vary widely, but typically ranges from $1,000 to $5,000 depending on parts, labor, and tuning requirements.
Q: How can custom tuning benefit my vehicle after an OBD2 swap?
A: Custom tuning allows you to fine-tune engine parameters like fuel maps and ignition timing, optimizing power and efficiency.
Q: What are some common issues encountered during an OBD2 swap?
A: Common issues include diagnostic errors, compatibility problems, and performance issues related to wiring, sensors, or ECU configuration.
Q: How important is it to comply with legal and regulatory requirements after an OBD2 swap?
A: It is crucial to comply with all applicable laws and regulations, including emissions testing and visual inspections, to ensure your vehicle remains compliant.
Q: What kind of maintenance is required after an OBD2 swap?
A: Regular maintenance includes sensor replacement, wiring inspection, and ECU updates to keep the system functioning correctly.
Q: Where can I find expert help and resources for performing an OBD2 swap on my Mercedes-Benz?
A: MERCEDES-DIAGNOSTIC-TOOL.EDU.VN offers comprehensive guides, expert support, and diagnostic tools to assist you with your OBD2 swap.
11. Call to Action
Ready to enhance your Mercedes-Benz with an OBD2 swap? Contact MERCEDES-DIAGNOSTIC-TOOL.EDU.VN today for expert guidance, diagnostic tools, and comprehensive support.
Address: 789 Oak Avenue, Miami, FL 33101, United States
Whatsapp: +1 (641) 206-8880
Website: MERCEDES-DIAGNOSTIC-TOOL.EDU.VN
Let us help you unlock hidden features and optimize your Mercedes-Benz for peak performance and diagnostic capabilities. Reach out now for a consultation and take the first step towards a smarter, more efficient driving experience.