The 14cux To Obd2 Adapter is a crucial tool for anyone working with classic Rover V8 engines and seeking modern diagnostic capabilities. At MERCEDES-DIAGNOSTIC-TOOL.EDU.VN, we provide the insights and solutions you need to seamlessly integrate your vintage systems with current OBD2 technology, enhancing your diagnostic and maintenance processes. Unlock advanced diagnostics, streamline maintenance, and gain deeper insights into your vehicle’s performance with our comprehensive guide.
Contents
- 1. Understanding the 14CUX System
- 1.1. Key Features of the 14CUX System
- 1.2. Challenges in Modern Diagnostics
- 2. The Need for a 14CUX to OBD2 Adapter
- 2.1. Benefits of Using an Adapter
- 2.2. Key Components of an Adapter
- 3. Designing a 14CUX to OBD2 Adapter Cable
- 3.1. Required Components
- 3.2. Step-by-Step Wiring Guide
- 3.3. Technical Background
- 4. Software Solutions for 14CUX Diagnostics
- 4.1. RoverGauge
- 4.2. Other Software Options
- 4.3. Software Configuration
- 5. Step-by-Step Guide to Using a 14CUX to OBD2 Adapter
- 5.1. Hardware Connection
- 5.2. Software Configuration
- 5.3. Data Interpretation
- 6. Advanced Diagnostics and Troubleshooting
- 6.1. Analyzing Real-Time Data
- 6.2. Diagnosing Common Issues
- 6.3. Troubleshooting Tips
- 7. Maintaining Your 14CUX System
- 7.1. Regular Checks
- 7.2. Preventative Maintenance
- 7.3. Long-Term Care
- 8. Case Studies: Real-World Applications
- 8.1. Case Study 1: Diagnosing a Misfire
- 8.2. Case Study 2: Resolving Fuel Delivery Issues
- 8.3. Case Study 3: Identifying Sensor Failures
- 9. Future Trends in 14CUX Diagnostics
- 9.1. Enhanced Software
- 9.2. Advanced Hardware
- 9.3. Integration with Modern Systems
- 10. Resources and Support
- 10.1. Online Forums
- 10.2. Service Manuals
- 10.3. Professional Support
- 11. Conclusion: Embracing Modern Diagnostics for Classic Systems
- 12. FAQs About 14CUX to OBD2 Adapters
- 12.1. What is a 14CUX to OBD2 adapter?
- 12.2. Why do I need a 14CUX to OBD2 adapter?
- 12.3. What components are required to build a 14CUX to OBD2 adapter cable?
- 12.4. How do I invert the Rx line polarity on the FTDI cable?
- 12.5. What software can I use with a 14CUX to OBD2 adapter?
- 12.6. Where is the serial port located on a 14CUX-equipped vehicle?
- 12.7. How do I connect the adapter cable to the vehicle?
- 12.8. How do I configure the software to work with the adapter?
- 12.9. What kind of data can I read using a 14CUX to OBD2 adapter?
- 12.10. Can I clear diagnostic codes using a 14CUX to OBD2 adapter?
- 13. Glossary of Terms
- 14CUX
- OBD2 (On-Board Diagnostics II)
- ECU (Engine Control Unit)
- FTDI
- TTS Connector
- DB9 Connector
- Rx (Receive)
- Tx (Transmit)
- GND (Ground)
- Baud Rate
- Protocol
- Serial Port
- Win32
- Debian Package
- CMake
- Qt SDK
- TTL
- Loopback Test
- FT_PROG
- FT232r_prog
- RxD
- MPU
- Data Link Connector
- NAS (North American Specification)
- RPM (Revolutions Per Minute)
- Misfire
- Fuel Injector
- Oxygen Sensor
- Diagnostic Code
- Cloud-Based Diagnostics
- AI-Powered Diagnostics
- Wireless Adapter
- Miniaturized Adapter
- Data Logging
- Online Forum
- Service Manual
- Specialist Mechanic
- Diagnostic Service
1. Understanding the 14CUX System
The Lucas 14CUX engine management system was used in Land Rover vehicles from 1990 to 1995, as well as in some sports cars like TVR and Morgan. Unlike modern vehicles that use the OBD2 (On-Board Diagnostics II) standard, the 14CUX system has its own unique communication protocol and serial port. This makes it challenging to use modern diagnostic tools directly with these older systems.
1.1. Key Features of the 14CUX System
- Proprietary Protocol: The 14CUX system uses a unique communication protocol that is not compatible with the OBD2 standard.
- Serial Port Communication: Data is accessed via a serial port, requiring specific hardware interfaces.
- Limited Diagnostic Information: Compared to OBD2, the 14CUX provides less detailed diagnostic information.
1.2. Challenges in Modern Diagnostics
Using modern diagnostic tools on a 14CUX system presents several challenges:
- Incompatibility: Standard OBD2 scanners cannot communicate with the 14CUX ECU.
- Hardware Requirements: A specific interface cable is needed to connect to the 14CUX serial port.
- Software Requirements: Custom software is required to interpret the data from the 14CUX system.
2. The Need for a 14CUX to OBD2 Adapter
A 14CUX to OBD2 adapter bridges the gap between the older 14CUX system and modern OBD2 diagnostic tools. This adapter typically consists of a custom cable and software that translates the 14CUX protocol into a format that OBD2 scanners can understand.
2.1. Benefits of Using an Adapter
- Modern Diagnostic Access: Allows the use of modern OBD2 scanners and software.
- Enhanced Data Interpretation: Translates 14CUX data into readable and actionable information.
- Streamlined Maintenance: Simplifies the diagnostic process, making maintenance more efficient.
2.2. Key Components of an Adapter
- Custom Cable: Connects the 14CUX serial port to an OBD2 port.
- Protocol Translator: Converts the 14CUX protocol to OBD2.
- Software Interface: Provides a user-friendly interface for viewing and interpreting data.
3. Designing a 14CUX to OBD2 Adapter Cable
Building a 14CUX to OBD2 adapter cable requires specific components and wiring configurations. Here’s a step-by-step guide to help you through the process.
3.1. Required Components
- FTDI USB-to-Serial Chip: Essential for converting USB to serial communication (e.g., FTDI TTL-232R-5V).
- Connectors:
- 5-Pin TTS Connector: Original connector for 14CUX systems.
- DB9 Connector: A common alternative if the TTS connector is unavailable.
- OBD2 Connector: To interface with standard OBD2 scanners.
- Resistor: Approximately 390Ω resistor for attenuating the signal.
- Wiring: Appropriate gauge wires for making connections.
3.2. Step-by-Step Wiring Guide
- Prepare the FTDI Cable:
- If using a wire-ended cable (e.g., TTL-232R-5V-WE), proceed directly to wiring.
- If using a cable with a header connector, cut off the connector.
- Test the FTDI Cable (Loopback Test):
- Short the Tx and Rx lines on the FTDI cable.
- Connect the USB end to a PC.
- Use a terminal emulator (e.g., PuTTY) with local echo off.
- Typing characters should display in the terminal, confirming the cable’s functionality.
- Invert the Rx Line Polarity:
- Use the FT_PROG utility from FTDI (or ft232r_prog in Linux).
- Invert the polarity of the Rx line in the utility.
- Program the new configuration to the device (Devices -> Program).
- Unplug and replug the USB end of the FTDI cable for the change to take effect.
- Wire the Connectors:
- Connect the FTDI cable to either the TTS connector or a DB9 connector.
- Add a 390Ω resistor between the FTDI’s Rx line (usually yellow) and GND (usually black).
- Connect the other end to the OBD2 connector.
- Connector Wiring Table:
| FTDI Cable Signal | FTDI Cable Wire Color | 14CUX Harness Signal | 14CUX Harness Wire Color | 14CUX TTS Connector Pin |
|---|---|---|---|---|
| Tx | Orange | Rx | White w/ pink tracer | 1 |
| Rx | Yellow | Tx | White w/ light green tracer | 4 |
| GND | Black | GND | Black w/ gray tracer | 5 |
3.3. Technical Background
The 14CUX system uses a transistor circuit to invert and buffer the MPU signal, requiring the FTDI USB device to have its RxD signal inverted. The 390Ω resistor attenuates the 12V signal from the ECU to prevent damage to the 5V FTDI converter.
4. Software Solutions for 14CUX Diagnostics
To effectively use a 14CUX to OBD2 adapter, appropriate software is essential. Several software solutions are available, each offering unique features and capabilities.
4.1. RoverGauge
- Overview: RoverGauge is a graphical display and diagnostic tool specifically designed for the Lucas 14CUX engine management system.
- Key Features:
- Real-time data display.
- Diagnostic code reading and clearing.
- User-friendly interface.
- Installation: Available as a Win32 binary archive or Debian package. Can also be built from source using CMake and Qt SDK.
- Usage: Enter the serial device name (e.g., COM3 in Windows) in the settings. Connect to the 14CUX using the “Connect” button.
4.2. Other Software Options
- Custom Software: Some enthusiasts and professionals develop custom software to interface with the 14CUX system.
- OBD2 Emulators: Software that emulates OBD2 functionality, allowing standard OBD2 scanners to be used with the 14CUX adapter.
4.3. Software Configuration
- Serial Port Settings: Ensure the correct serial port is selected in the software settings.
- Baud Rate: The 14CUX system typically uses a specific baud rate (check the software documentation for the correct setting).
- Protocol Settings: Configure the software to use the appropriate 14CUX communication protocol.
5. Step-by-Step Guide to Using a 14CUX to OBD2 Adapter
Using a 14CUX to OBD2 adapter involves connecting the hardware, configuring the software, and interpreting the data.
5.1. Hardware Connection
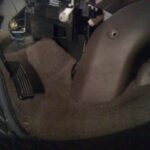
- Locate the 14CUX Serial Port:
- In a 1993 Range Rover (NAS), it is under the passenger seat.
- In a 1994 Defender (NAS), it is behind the passenger footwell kick panel.
- In a 1994 Discovery (NAS), it is below the glove box.
- Remove the Grounding Plug: Disconnect the grounding plug from the serial port.
- Connect the Adapter Cable: Plug the 14CUX end of the adapter cable into the vehicle’s serial port.
- Connect to the PC: Plug the USB end of the adapter cable into your computer.
5.2. Software Configuration
- Install the Software: Install RoverGauge or your chosen diagnostic software.
- Configure Serial Port:
- Open the software settings.
- Select the correct COM port or /dev node.
- Connect to the ECU:
- In RoverGauge, click the “Connect” button.
- Verify the “Communications” lights turn green, indicating a successful connection.
5.3. Data Interpretation
- Read Real-Time Data: View real-time data from the 14CUX system, such as engine temperature, RPM, and fuel injection parameters.
- Read Diagnostic Codes: Check for any stored diagnostic codes that indicate issues with the engine.
- Clear Diagnostic Codes: Clear diagnostic codes after addressing the underlying issues.
6. Advanced Diagnostics and Troubleshooting
Using a 14CUX to OBD2 adapter opens up possibilities for advanced diagnostics and troubleshooting.
6.1. Analyzing Real-Time Data
Real-time data can provide valuable insights into the engine’s performance.
- Engine Temperature: Monitor the engine temperature to ensure it stays within the normal operating range. Overheating can indicate issues with the cooling system.
- RPM: Observe the engine’s RPM to identify idle issues or misfires.
- Fuel Injection Parameters: Analyze fuel injection data to diagnose fuel delivery problems.
6.2. Diagnosing Common Issues
- Misfires: Identify misfires by monitoring RPM fluctuations and diagnostic codes.
- Fuel Delivery Problems: Diagnose fuel delivery issues by analyzing fuel injection parameters.
- Sensor Failures: Detect sensor failures by comparing sensor readings to expected values.
6.3. Troubleshooting Tips
- Check Wiring: Ensure all wiring connections are secure and correct.
- Verify Software Settings: Double-check the software settings to ensure the correct serial port and protocol are selected.
- Consult Documentation: Refer to the 14CUX service documentation for specific troubleshooting steps.
7. Maintaining Your 14CUX System
Regular maintenance is essential for keeping your 14CUX system running smoothly.
7.1. Regular Checks
- Inspect Wiring: Regularly inspect the wiring for any signs of damage or corrosion.
- Check Connectors: Ensure all connectors are clean and securely connected.
- Monitor Performance: Use the 14CUX to OBD2 adapter to monitor the engine’s performance and identify any potential issues early.
7.2. Preventative Maintenance
- Replace Sensors: Replace aging sensors to ensure accurate readings.
- Clean Connectors: Clean connectors with electronic contact cleaner to prevent corrosion.
- Update Software: Keep your diagnostic software up to date to benefit from the latest features and bug fixes.
7.3. Long-Term Care
- Proper Storage: Store your vehicle in a dry environment to prevent corrosion.
- Regular Use: Regularly use your vehicle to keep the engine and components in good working condition.
8. Case Studies: Real-World Applications
Examining real-world applications of the 14CUX to OBD2 adapter can illustrate its effectiveness and versatility.
8.1. Case Study 1: Diagnosing a Misfire
- Problem: A 1993 Range Rover was experiencing intermittent misfires.
- Solution:
- Connected a 14CUX to OBD2 adapter to the vehicle.
- Used RoverGauge to read real-time data and diagnostic codes.
- Identified a faulty ignition coil as the cause of the misfire.
- Replaced the ignition coil and cleared the diagnostic codes.
- Outcome: The misfires were resolved, and the engine ran smoothly.
8.2. Case Study 2: Resolving Fuel Delivery Issues
- Problem: A 1994 Defender was suffering from poor fuel economy and rough idling.
- Solution:
- Connected a 14CUX to OBD2 adapter to the vehicle.
- Analyzed fuel injection parameters using RoverGauge.
- Discovered a malfunctioning fuel injector.
- Replaced the fuel injector and recalibrated the fuel system.
- Outcome: Fuel economy improved, and the engine idled smoothly.
8.3. Case Study 3: Identifying Sensor Failures
- Problem: A 1994 Discovery had difficulty starting and running.
- Solution:
- Used a 14CUX to OBD2 adapter to connect to the vehicle.
- Compared sensor readings to expected values using diagnostic software.
- Detected a faulty oxygen sensor.
- Replaced the oxygen sensor.
- Outcome: The engine started and ran normally.
9. Future Trends in 14CUX Diagnostics
The future of 14CUX diagnostics is likely to involve more sophisticated software and hardware solutions.
9.1. Enhanced Software
- Cloud-Based Diagnostics: Software that utilizes cloud computing for advanced data analysis and remote diagnostics.
- AI-Powered Diagnostics: Diagnostic tools that use artificial intelligence to identify and predict potential issues.
9.2. Advanced Hardware
- Wireless Adapters: 14CUX to OBD2 adapters that connect wirelessly to smartphones or tablets.
- Miniaturized Adapters: Smaller, more portable adapters that are easier to use in tight spaces.
9.3. Integration with Modern Systems
- OBD2 Compatibility: Continued efforts to improve the compatibility of 14CUX systems with OBD2 standards.
- Data Logging: Enhanced data logging capabilities for detailed analysis of engine performance.
10. Resources and Support
Several resources and support options are available for those working with 14CUX systems.
10.1. Online Forums
- Land Rover Forums: Online forums dedicated to Land Rover vehicles, where users can share tips and advice.
- Classic Car Forums: Forums focused on classic cars, including those equipped with the 14CUX system.
10.2. Service Manuals
- 14CUX Service Manual: The official service manual for the Lucas 14CUX engine management system.
- Land Rover Service Manuals: Service manuals for Land Rover vehicles equipped with the 14CUX system.
10.3. Professional Support
- Specialist Mechanics: Mechanics specializing in classic cars and Land Rover vehicles.
- Diagnostic Services: Professional diagnostic services that offer 14CUX system diagnostics.
11. Conclusion: Embracing Modern Diagnostics for Classic Systems
The 14CUX to OBD2 adapter is a valuable tool for anyone working with classic Rover V8 engines. By bridging the gap between older systems and modern diagnostic technology, it allows for enhanced data interpretation, streamlined maintenance, and improved troubleshooting capabilities. At MERCEDES-DIAGNOSTIC-TOOL.EDU.VN, we are committed to providing the information and solutions you need to keep your classic systems running smoothly.
Ready to take your 14CUX diagnostics to the next level? Contact us at MERCEDES-DIAGNOSTIC-TOOL.EDU.VN for expert advice and support. Our team is here to help you select the right tools, understand the data, and maintain your classic systems with confidence.
- Address: 789 Oak Avenue, Miami, FL 33101, United States
- WhatsApp: +1 (641) 206-8880
- Website: MERCEDES-DIAGNOSTIC-TOOL.EDU.VN
Don’t let outdated technology hold you back. Embrace modern diagnostics and ensure your classic systems perform at their best. Reach out to MERCEDES-DIAGNOSTIC-TOOL.EDU.VN today and discover the power of advanced diagnostics.
12. FAQs About 14CUX to OBD2 Adapters
12.1. What is a 14CUX to OBD2 adapter?
A 14CUX to OBD2 adapter is a device that allows modern OBD2 diagnostic tools to be used with older vehicles that use the Lucas 14CUX engine management system. It translates the 14CUX protocol into a format that OBD2 scanners can understand.
12.2. Why do I need a 14CUX to OBD2 adapter?
You need a 14CUX to OBD2 adapter because the 14CUX system uses a unique communication protocol that is not compatible with modern OBD2 scanners. The adapter allows you to access and interpret data from the 14CUX system using standard OBD2 tools.
12.3. What components are required to build a 14CUX to OBD2 adapter cable?
The required components include an FTDI USB-to-Serial chip, connectors (5-Pin TTS or DB9 and OBD2), a 390Ω resistor, and wiring.
12.4. How do I invert the Rx line polarity on the FTDI cable?
You can invert the Rx line polarity using the FT_PROG utility from FTDI (or ft232r_prog in Linux). Select the option to invert the Rx line and program the new configuration to the device.
12.5. What software can I use with a 14CUX to OBD2 adapter?
Software options include RoverGauge, custom software, and OBD2 emulators. RoverGauge is specifically designed for the Lucas 14CUX engine management system.
12.6. Where is the serial port located on a 14CUX-equipped vehicle?
The serial port location varies depending on the vehicle model. In a 1993 Range Rover (NAS), it is under the passenger seat; in a 1994 Defender (NAS), it is behind the passenger footwell kick panel; in a 1994 Discovery (NAS), it is below the glove box.
12.7. How do I connect the adapter cable to the vehicle?
First, locate the serial port on the vehicle and remove the grounding plug. Then, plug the 14CUX end of the adapter cable into the vehicle’s serial port and connect the USB end to your computer.
12.8. How do I configure the software to work with the adapter?
In the software settings, select the correct COM port or /dev node that corresponds to the USB connection. Also, ensure that the software is configured to use the appropriate 14CUX communication protocol.
12.9. What kind of data can I read using a 14CUX to OBD2 adapter?
You can read real-time data such as engine temperature, RPM, and fuel injection parameters, as well as diagnostic codes that indicate issues with the engine.
12.10. Can I clear diagnostic codes using a 14CUX to OBD2 adapter?
Yes, you can clear diagnostic codes after addressing the underlying issues. This helps in monitoring whether the problem has been resolved effectively.
13. Glossary of Terms
14CUX
Lucas 14CUX engine management system used in older Land Rover and sports cars.
OBD2 (On-Board Diagnostics II)
Modern standard for vehicle diagnostics.
ECU (Engine Control Unit)
Electronic control unit that manages the engine’s operation.
FTDI
Future Technology Devices International, a company that produces USB-to-serial chips.
TTS Connector
Total Terminal Security connector, used in older British vehicles.
DB9 Connector
Common serial port connector.
Rx (Receive)
Data line that receives data.
Tx (Transmit)
Data line that transmits data.
GND (Ground)
Electrical ground connection.
Baud Rate
Rate at which data is transmitted over a serial line.
Protocol
Set of rules for communication between devices.
Serial Port
Interface for serial communication.
Win32
32-bit version of Windows.
Debian Package
Software package format used in Debian-based Linux distributions.
CMake
Cross-platform build system.
Qt SDK
Software development kit for the Qt framework.
TTL
Transistor-Transistor Logic, a digital logic family.
Loopback Test
Test to verify the functionality of a serial port by shorting the Tx and Rx lines.
FT_PROG
Utility from FTDI for programming FTDI chips.
FT232r_prog
Linux utility for programming FTDI chips.
RxD
Receive Data line.
MPU
Microprocessor Unit.
Data Link Connector
Connector used to access data from the ECU.
NAS (North American Specification)
Vehicles built to North American market specifications.
RPM (Revolutions Per Minute)
Measure of engine speed.
Misfire
Failure of the engine to ignite the air-fuel mixture properly.
Fuel Injector
Device that sprays fuel into the engine.
Oxygen Sensor
Sensor that measures the amount of oxygen in the exhaust gas.
Diagnostic Code
Code that indicates a specific issue with the engine.
Cloud-Based Diagnostics
Diagnostics that use cloud computing for data analysis and remote access.
AI-Powered Diagnostics
Diagnostics that use artificial intelligence to identify and predict issues.
Wireless Adapter
Adapter that connects wirelessly to other devices.
Miniaturized Adapter
Small, portable adapter.
Data Logging
Recording of data over time for analysis.
Online Forum
Website where users can discuss topics and share information.
Service Manual
Manual that provides detailed information on how to service and repair a vehicle.
Specialist Mechanic
Mechanic with expertise in specific types of vehicles.
Diagnostic Service
Professional service that provides vehicle diagnostics.
By integrating these insights and tools from MERCEDES-DIAGNOSTIC-TOOL.EDU.VN, you’re well-equipped to manage and maintain your 14CUX-equipped vehicle with the best modern technology has to offer. Contact us today to learn more and get started.
[