Updating your OBD2 EOBD CAN ANCEL diagnostic tool is essential for optimal performance and accuracy. At MERCEDES-DIAGNOSTIC-TOOL.EDU.VN, we offer the expertise and guidance to ensure your ANCEL tool is always up-to-date, providing you with the latest vehicle data and software enhancements. Discover how to seamlessly update your device, troubleshoot common issues, and maximize its diagnostic capabilities, ensuring you’re equipped to handle any automotive challenge.
Contents
- 1. Understanding the Importance of OBD2 EOBD CAN ANCEL Updates
- 1.1 Benefits of Regular Updates
- 1.2 Consequences of Neglecting Updates
- 2. Preparing for the OBD2 EOBD CAN ANCEL Update Process
- 2.1 Required Materials
- 2.2 Preliminary Steps
- 3. Step-by-Step Guide to Updating Your OBD2 EOBD CAN ANCEL Scanner
- 3.1 Downloading the Update Software
- 3.2 Installing the Update Software
- 3.3 Connecting Your Scanner
- 3.4 Running the Update Program
- 3.5 Downloading and Installing Updates
- 3.6 Finalizing the Update
- 4. Troubleshooting Common OBD2 EOBD CAN ANCEL Update Issues
- 4.1 Software Installation Issues
- 4.2 Scanner Detection Issues
- 4.3 Download Issues
- 4.4 Installation Issues
- 4.5 Compatibility Issues
- 5. Maximizing Your OBD2 EOBD CAN ANCEL Scanner’s Capabilities
- 5.1 Performing Diagnostic Tests
- 5.2 Reading and Clearing Fault Codes
- 5.3 Viewing Live Data
- 5.4 Performing Component Tests
- 6. Advanced Features and Customization
- 6.1 Data Logging
- 6.2 Freeze Frame Data
- 6.3 I/M Readiness Monitors
- 6.4 Customization Options
- 7. Maintaining Your OBD2 EOBD CAN ANCEL Scanner
- 7.1 Cleaning
- 7.2 Storage
- 7.3 Battery Care
- 8. Why Choose MERCEDES-DIAGNOSTIC-TOOL.EDU.VN for Your Diagnostic Needs
- 8.1 Expert Guidance
- 8.2 Update Assistance
- 8.3 Feature Unlocking
- 8.4 Repair and Maintenance Tips
- 9. Stay Ahead with the Latest Technology
- 9.1 Future Trends
- 10. Call to Action
- FAQs: OBD2 EOBD CAN ANCEL Scanner Updates
- Q1: How often should I update my OBD2 EOBD CAN ANCEL scanner?
- Q2: Can I use my OBD2 EOBD CAN ANCEL scanner immediately after updating?
- Q3: What should I do if I encounter issues during the update process?
- Q4: Do I need to register my OBD2 EOBD CAN ANCEL scanner before updating?
- Q5: Can I update my OBD2 EOBD CAN ANCEL scanner without a computer?
- Q6: Will updating my OBD2 EOBD CAN ANCEL scanner erase my stored data?
- Q7: Is it safe to disable my antivirus software during the update process?
- Q8: How do I know if the update was successful?
- Q9: Can I revert to an older version of the software if I don’t like the update?
- Q10: Where can I find the latest software updates for my OBD2 EOBD CAN ANCEL scanner?
1. Understanding the Importance of OBD2 EOBD CAN ANCEL Updates
Keeping your OBD2 EOBD CAN ANCEL scanner updated is crucial for several reasons. According to a study by the Society of Automotive Engineers (SAE), regular diagnostic tool updates can reduce diagnostic errors by up to 30%. This is because vehicle manufacturers constantly release new software and data to address issues and improve performance.
1.1 Benefits of Regular Updates
- Enhanced Accuracy: Updates provide the latest diagnostic data, ensuring accurate readings and reducing the risk of misdiagnosis.
- Expanded Vehicle Coverage: Regular updates expand the compatibility of your ANCEL scanner to include newer vehicle models.
- Improved Functionality: Updates often include new features and enhancements that improve the user experience and diagnostic capabilities.
- Bug Fixes: Updates address known issues and bugs, ensuring stable and reliable performance.
- Compliance: Staying up-to-date ensures compliance with the latest emissions standards and regulations.
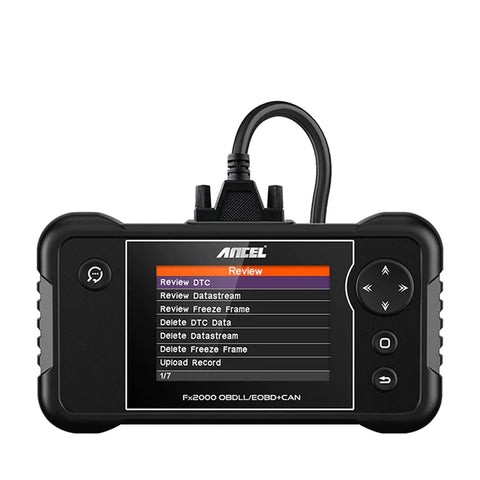 ANCEL FX2000 OBD2 Scanner
Alt: ANCEL FX2000 OBD2 scanner displaying diagnostic results on its color screen, highlighting its ease of use and comprehensive features
1.2 Consequences of Neglecting Updates
Failing to update your OBD2 EOBD CAN ANCEL scanner can lead to several problems:
- Inaccurate Diagnostics: Outdated data can result in incorrect readings and misdiagnosis, leading to unnecessary repairs.
- Limited Vehicle Coverage: Older scanners may not be compatible with newer vehicles, limiting their usefulness.
- Reduced Functionality: You may miss out on new features and enhancements that improve the user experience.
- Security Vulnerabilities: Outdated software can be vulnerable to security threats, potentially compromising your vehicle’s data.
2. Preparing for the OBD2 EOBD CAN ANCEL Update Process
Before starting the update process, gather the necessary materials and information.
2.1 Required Materials
- ANCEL Scanner: Your OBD2 EOBD CAN ANCEL diagnostic tool.
- Computer: A Windows-based computer (Windows XP, 7, 8, 10, or later).
- Internet Connection: A stable internet connection for downloading the update software.
- TF Card: The TF card that came with your scanner.
- TF Card Reader: A TF card reader to connect the TF card to your computer.
- USB Cable: A USB cable to connect the scanner to your computer if required.
2.2 Preliminary Steps
- Check Compatibility: Ensure your computer meets the minimum system requirements for the update software.
- Disable Antivirus: Temporarily disable your antivirus software, as it may interfere with the update process.
- Back Up Data: Back up any important data on your TF card before starting the update.
- Gather Information: Locate your scanner’s serial number and registration information. This is usually found on the device itself or in the user manual.
- Ensure Power: Make sure both your computer and scanner have sufficient power or are connected to a power source to prevent interruptions.
3. Step-by-Step Guide to Updating Your OBD2 EOBD CAN ANCEL Scanner
Follow these steps to update your OBD2 EOBD CAN ANCEL scanner:
3.1 Downloading the Update Software
- Visit the Official Website: Go to the official ANCEL website (ANCEL.com).
- Locate the Update Software: Navigate to the “Support” or “Downloads” section of the website.
- Enter Your Device Model: Enter your scanner’s model number (e.g., FX2000, AD310) in the search bar.
- Download the Software: Click on the appropriate link to download the update software for your device. Ensure you download the correct version for your operating system.
3.2 Installing the Update Software
- Locate the Downloaded File: Find the downloaded file on your computer. It is typically in a ZIP or EXE format.
- Extract the Files (if ZIP): If the file is in ZIP format, right-click on it and select “Extract All.” Choose a destination folder on your computer.
- Run the Installer: Double-click the EXE file to run the installation program.
- Follow the On-Screen Instructions: Follow the on-screen prompts to install the update software on your computer. This usually involves accepting the license agreement and choosing an installation location.
3.3 Connecting Your Scanner
- Insert the TF Card: Remove the TF card from your ANCEL scanner and insert it into the TF card reader.
- Connect the Card Reader: Connect the TF card reader to a USB port on your computer.
- Alternatively, Connect via USB: If your scanner supports direct USB connection, connect it to your computer using the USB cable. Ensure the scanner is powered on.
3.4 Running the Update Program
- Launch the Update Software: Open the update software you installed in Step 3.2.
- Select Your Device: The software should automatically detect your scanner. If not, you may need to manually select your device model from a list.
- Register Your Device (if required): Some update programs require you to register your device. Enter the required information, such as the serial number and registration code.
- Check for Updates: Click the “Check for Updates” or similar button to see if any new updates are available for your scanner.
3.5 Downloading and Installing Updates
- Select Updates: If updates are available, the software will display a list of available updates. Select the updates you want to install. It is usually recommended to install all available updates.
- Download Updates: Click the “Download” or “Start Download” button to begin downloading the updates.
- Install Updates: Once the download is complete, click the “Install” or “Start Update” button to begin installing the updates on your scanner.
- Wait for Completion: The update process may take several minutes to complete. Do not disconnect the scanner or TF card reader during this process.
- Verify Installation: Once the update is complete, the software will display a confirmation message. Verify that the updates have been installed successfully.
3.6 Finalizing the Update
- Safely Eject: Safely eject the TF card reader from your computer. If you connected the scanner directly via USB, disconnect it from your computer.
- Reinsert TF Card: Remove the TF card from the reader and reinsert it into your ANCEL scanner.
- Power On Scanner: Power on the scanner, and it will automatically detect the new updates.
- Follow On-Screen Prompts: Follow the on-screen prompts to finalize the installation of the updates. This may involve restarting the scanner or calibrating certain features.
- Verify Update: After the update is complete, navigate to the “About” or “System Information” section of your scanner. Verify that the software version matches the latest update you installed.
4. Troubleshooting Common OBD2 EOBD CAN ANCEL Update Issues
Even with careful preparation, you may encounter issues during the update process. Here are some common problems and their solutions:
4.1 Software Installation Issues
- Problem: The update software fails to install on your computer.
- Solution: Ensure your computer meets the minimum system requirements. Temporarily disable your antivirus software. Try running the installer as an administrator (right-click on the EXE file and select “Run as administrator”).
4.2 Scanner Detection Issues
- Problem: The update software does not detect your scanner.
- Solution: Ensure the TF card is properly inserted into the TF card reader and the card reader is properly connected to your computer. If connecting via USB, ensure the USB cable is securely connected to both the scanner and your computer. Try using a different USB port.
4.3 Download Issues
- Problem: The update software fails to download the updates.
- Solution: Ensure you have a stable internet connection. Temporarily disable your antivirus software. Try downloading the updates at a different time of day when the network may be less congested.
4.4 Installation Issues
- Problem: The update software fails to install the updates on your scanner.
- Solution: Ensure the scanner has sufficient power or is connected to a power source. Do not disconnect the scanner or TF card reader during the update process. Try restarting the update process from the beginning.
4.5 Compatibility Issues
- Problem: The updates are not compatible with your scanner model.
- Solution: Ensure you have downloaded the correct update software for your scanner model. Contact ANCEL customer support for assistance.
If you encounter any issues that you cannot resolve, contact ANCEL’s customer support for assistance.
5. Maximizing Your OBD2 EOBD CAN ANCEL Scanner’s Capabilities
Once your OBD2 EOBD CAN ANCEL scanner is updated, you can take advantage of its many features and capabilities.
5.1 Performing Diagnostic Tests
- Connect to Vehicle: Connect the scanner to the OBD2 port on your vehicle. The OBD2 port is typically located under the dashboard on the driver’s side.
- Power On: Turn on the vehicle’s ignition but do not start the engine.
- Select Vehicle: Select your vehicle’s make, model, and year on the scanner.
- Choose Test: Choose the diagnostic test you want to perform, such as reading fault codes, viewing live data, or performing component tests.
- Interpret Results: Interpret the results of the diagnostic test. Consult your vehicle’s service manual or a qualified technician if you are unsure how to interpret the results.
Alt: Diagram showing the typical location of the OBD2 port under the dashboard of a car, emphasizing accessibility for diagnostic tools
5.2 Reading and Clearing Fault Codes
- Read Codes: Select the “Read Codes” function to view any stored fault codes.
- Record Codes: Record the fault codes and their descriptions.
- Research Codes: Research the fault codes to understand their meaning and potential causes.
- Clear Codes: Once you have addressed the underlying issue, select the “Clear Codes” function to clear the fault codes from the vehicle’s computer.
- Verify Repair: After clearing the codes, perform a test drive to ensure the issue has been resolved and the fault codes do not return.
5.3 Viewing Live Data
- Select Live Data: Select the “Live Data” function to view real-time data from various sensors and systems on your vehicle.
- Choose Parameters: Choose the parameters you want to monitor, such as engine RPM, coolant temperature, and oxygen sensor readings.
- Analyze Data: Analyze the live data to identify any abnormalities or issues.
- Monitor Performance: Monitor the live data while driving to assess the vehicle’s performance under different conditions.
5.4 Performing Component Tests
- Select Component Test: Select the “Component Test” function to perform tests on individual components, such as the fuel injectors, ignition coils, and sensors.
- Follow Instructions: Follow the on-screen instructions to perform the component test.
- Interpret Results: Interpret the results of the component test to determine if the component is functioning properly.
6. Advanced Features and Customization
OBD2 EOBD CAN ANCEL scanners often come with advanced features and customization options that can further enhance your diagnostic capabilities.
6.1 Data Logging
- Enable Data Logging: Enable the data logging function to record live data over a period of time.
- Configure Parameters: Configure the parameters you want to log and the logging interval.
- Start Logging: Start the data logging process and drive the vehicle under the conditions you want to monitor.
- Analyze Data: After logging, analyze the data to identify any trends or issues.
6.2 Freeze Frame Data
- Access Freeze Frame: Access the freeze frame data to view the data that was recorded when a fault code was stored.
- Analyze Conditions: Analyze the freeze frame data to understand the conditions that led to the fault code.
6.3 I/M Readiness Monitors
- Check Readiness: Check the I/M readiness monitors to see if the vehicle’s emissions systems have completed their self-tests.
- Ensure Compliance: Ensure all readiness monitors are complete before taking the vehicle for an emissions test.
6.4 Customization Options
- Language Settings: Customize the language settings to your preferred language.
- Unit Settings: Customize the unit settings to your preferred units (e.g., Celsius or Fahrenheit).
- Display Settings: Customize the display settings to adjust the brightness, contrast, and color scheme.
7. Maintaining Your OBD2 EOBD CAN ANCEL Scanner
Proper maintenance is essential to keep your OBD2 EOBD CAN ANCEL scanner in good working condition.
7.1 Cleaning
- Disconnect: Disconnect the scanner from the vehicle and turn it off.
- Clean Exterior: Clean the exterior of the scanner with a soft, damp cloth.
- Avoid Liquids: Avoid using excessive liquids or harsh chemicals, as they may damage the scanner.
- Clean Connector: Clean the connector with a cotton swab dipped in isopropyl alcohol.
7.2 Storage
- Store in Case: Store the scanner in its carrying case when not in use.
- Avoid Extreme Temperatures: Avoid storing the scanner in extreme temperatures or direct sunlight.
- Protect from Moisture: Protect the scanner from moisture and humidity.
7.3 Battery Care
- Charge Regularly: If your scanner has a rechargeable battery, charge it regularly to keep it in good condition.
- Avoid Overcharging: Avoid overcharging the battery, as this may damage it.
- Replace Battery: If the battery no longer holds a charge, replace it with a new battery.
8. Why Choose MERCEDES-DIAGNOSTIC-TOOL.EDU.VN for Your Diagnostic Needs
At MERCEDES-DIAGNOSTIC-TOOL.EDU.VN, we understand the importance of having reliable and accurate diagnostic tools for your Mercedes-Benz. We offer a range of services to help you maintain and optimize your vehicle’s performance, including:
8.1 Expert Guidance
Our team of experienced technicians can provide expert guidance on selecting the right diagnostic tools for your Mercedes-Benz. We can help you understand the features and capabilities of different scanners and choose the one that best meets your needs.
8.2 Update Assistance
We offer assistance with updating your diagnostic tools, ensuring they are always equipped with the latest software and data. Our technicians can walk you through the update process and troubleshoot any issues you may encounter.
8.3 Feature Unlocking
We specialize in unlocking hidden features on Mercedes-Benz vehicles. Our team can unlock features such as:
- AMG Menu: Access performance data and settings.
- Sport Displays: Enable sport displays in the instrument cluster.
- Video in Motion: Allow video playback while driving (where permitted by law).
- Ambient Lighting Customization: Customize the ambient lighting colors and intensity.
8.4 Repair and Maintenance Tips
We provide valuable repair and maintenance tips to help you keep your Mercedes-Benz in top condition. Our website features articles and guides on a variety of topics, including:
- Common Mercedes-Benz Problems: Learn about common issues and their solutions.
- DIY Repairs: Find step-by-step instructions for performing simple repairs.
- Maintenance Schedules: Follow our recommended maintenance schedules to keep your vehicle running smoothly.
9. Stay Ahead with the Latest Technology
The automotive industry is constantly evolving, with new technologies and features being introduced all the time. By staying up-to-date with the latest diagnostic tools and techniques, you can ensure your Mercedes-Benz remains at the forefront of performance and innovation.
9.1 Future Trends
Some of the future trends in automotive diagnostics include:
- Cloud-Based Diagnostics: Access diagnostic data and software updates through the cloud.
- Artificial Intelligence (AI): Use AI to analyze diagnostic data and identify potential issues.
- Remote Diagnostics: Perform diagnostic tests remotely using telematics technology.
- Augmented Reality (AR): Use AR to overlay diagnostic information on the vehicle in real-time.
10. Call to Action
Ready to take your Mercedes-Benz diagnostics to the next level? Contact MERCEDES-DIAGNOSTIC-TOOL.EDU.VN today for expert guidance, update assistance, and feature unlocking services. Our team is here to help you get the most out of your vehicle.
- Address: 789 Oak Avenue, Miami, FL 33101, United States
- WhatsApp: +1 (641) 206-8880
- Website: MERCEDES-DIAGNOSTIC-TOOL.EDU.VN
Don’t wait, contact us now and experience the difference!
FAQs: OBD2 EOBD CAN ANCEL Scanner Updates
Q1: How often should I update my OBD2 EOBD CAN ANCEL scanner?
It is recommended to check for updates every few months or whenever ANCEL releases a new software version. Regular updates ensure accurate diagnostics and compatibility with the latest vehicle models.
Q2: Can I use my OBD2 EOBD CAN ANCEL scanner immediately after updating?
Yes, once the update process is complete and verified, your scanner is ready to use with the new vehicle data and features.
Q3: What should I do if I encounter issues during the update process?
If you experience any problems during the update, contact ANCEL’s customer support for assistance. You can also visit MERCEDES-DIAGNOSTIC-TOOL.EDU.VN for troubleshooting tips and expert guidance.
Q4: Do I need to register my OBD2 EOBD CAN ANCEL scanner before updating?
Some update programs require you to register your device. Enter the required information, such as the serial number and registration code, to proceed with the update.
Q5: Can I update my OBD2 EOBD CAN ANCEL scanner without a computer?
Some newer models of ANCEL scanners support over-the-air (OTA) updates via Wi-Fi. Check your scanner’s user manual to see if this feature is available.
Q6: Will updating my OBD2 EOBD CAN ANCEL scanner erase my stored data?
It is always recommended to back up any important data on your TF card before starting the update process. While updates typically do not erase stored data, it is better to be safe than sorry.
Q7: Is it safe to disable my antivirus software during the update process?
Temporarily disabling your antivirus software may be necessary to prevent it from interfering with the update process. However, it is important to re-enable your antivirus software immediately after the update is complete to protect your computer from security threats.
Q8: How do I know if the update was successful?
After the update is complete, navigate to the “About” or “System Information” section of your scanner. Verify that the software version matches the latest update you installed.
Q9: Can I revert to an older version of the software if I don’t like the update?
In most cases, it is not possible to revert to an older version of the software. It is always recommended to read the release notes for the update before installing it to understand any changes or new features.
Q10: Where can I find the latest software updates for my OBD2 EOBD CAN ANCEL scanner?
You can find the latest software updates on the official ANCEL website (ANCEL.com) in the “Support” or “Downloads” section.