Finding the 2005 Cadillac Escalade Obd2 Fuse Location is crucial for diagnosing vehicle issues. This article from MERCEDES-DIAGNOSTIC-TOOL.EDU.VN provides a detailed guide to help you locate the correct fuse, understand its function, and troubleshoot common OBD2 problems, ensuring your Escalade’s diagnostic system functions optimally. This guide covers OBD2 port fuse, diagnostic link connector, and auto repair solutions.
Contents
- Table of Contents
- 1. Understanding the Importance of the OBD2 Port Fuse in Your 2005 Cadillac Escalade
- 2. Locating the OBD2 Fuse in Your 2005 Cadillac Escalade: A Step-by-Step Guide
- 3. Detailed Fuse Box Locations in the 2005 Cadillac Escalade
- 4. Identifying the Correct Fuse for the OBD2 Port
- 5. Common Symptoms of a Blown OBD2 Fuse
- 6. Step-by-Step Guide to Replacing the OBD2 Fuse
- 7. Diagnosing Common OBD2 Problems in Your 2005 Cadillac Escalade
- 8. Advanced Troubleshooting: When a New Fuse Doesn’t Fix the Problem
- 9. Using a Multimeter to Test Fuses and Circuits
- 10. Preventing Future OBD2 Fuse Problems
- 11. Connecting with MERCEDES-DIAGNOSTIC-TOOL.EDU.VN for Expert Assistance
- 12. Understanding the On-Board Diagnostics (OBD2) System
- 13. OBD2 Fuse and its Role in Vehicle Diagnostics
Table of Contents
1. Understanding the Importance of the OBD2 Port Fuse in Your 2005 Cadillac Escalade
2. Locating the OBD2 Fuse in Your 2005 Cadillac Escalade: A Step-by-Step Guide
3. Detailed Fuse Box Locations in the 2005 Cadillac Escalade
4. Identifying the Correct Fuse for the OBD2 Port
5. Common Symptoms of a Blown OBD2 Fuse
6. Step-by-Step Guide to Replacing the OBD2 Fuse
7. Diagnosing Common OBD2 Problems in Your 2005 Cadillac Escalade
8. Advanced Troubleshooting: When a New Fuse Doesn’t Fix the Problem
9. Using a Multimeter to Test Fuses and Circuits
10. Preventing Future OBD2 Fuse Problems
11. Connecting with MERCEDES-DIAGNOSTIC-TOOL.EDU.VN for Expert Assistance
12. Understanding the On-Board Diagnostics (OBD2) System
13. OBD2 Fuse and its Role in Vehicle Diagnostics
14. Fuse Box Diagram and Symbols Explained
15. Why a Working OBD2 Port is Essential for Vehicle Maintenance
16. How to Use an OBD2 Scanner with Your Cadillac Escalade
17. Common OBD2 Diagnostic Trouble Codes (DTCs)
18. Maintenance Tips to Keep Your 2005 Cadillac Escalade Running Smoothly
19. The Role of the Body Control Module (BCM) in OBD2 Functionality
20. Tips for Safely Working with Fuses and Electrical Systems
21. Understanding the Electrical System of the 2005 Cadillac Escalade
22. Choosing the Right Fuses for Your Cadillac Escalade
23. When to Seek Professional Help for Electrical Issues
24. The Evolution of OBD Systems: From OBD1 to OBD2
25. The Impact of Aftermarket Accessories on Your Vehicle’s Electrical System
26. Understanding Circuit Breakers and Relays
27. How to Read and Interpret Wiring Diagrams
28. The Importance of Regular Vehicle Inspections
29. Common Electrical Problems in the 2005 Cadillac Escalade
30. The Future of Vehicle Diagnostics
31. FAQ: Frequently Asked Questions About the 2005 Cadillac Escalade OBD2 Fuse Location
1. Understanding the Importance of the OBD2 Port Fuse in Your 2005 Cadillac Escalade
Do you know why finding the 2005 Cadillac Escalade OBD2 fuse location is so important? The OBD2 port fuse protects the On-Board Diagnostics system, a vital component for vehicle diagnostics. Without a functioning OBD2 system, mechanics can’t read diagnostic trouble codes, leading to increased auto repair costs and potential misdiagnosis. This fuse ensures the diagnostic link connector remains active, providing access to essential vehicle data for troubleshooting and maintenance.
The OBD2 (On-Board Diagnostics II) port is your gateway to understanding your vehicle’s health. It allows technicians and even you, with the right tools, to retrieve valuable data about your car’s performance, emissions, and overall condition. This data is crucial for identifying problems early and preventing costly repairs. The fuse that protects this port is, therefore, a small but mighty component. If it blows, you lose access to this critical diagnostic information.
The OBD2 system is a standardized system used in most vehicles since 1996. It monitors various systems within your car, including the engine, transmission, emissions, and more. When a problem is detected, the system stores a diagnostic trouble code (DTC), which can be read using an OBD2 scanner. This allows technicians to quickly identify the source of the problem and make the necessary repairs.
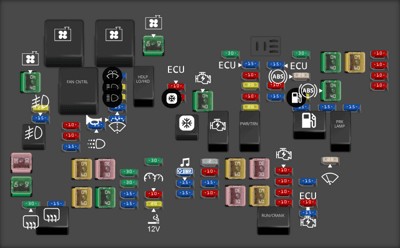
 2007 Cadillac Escalade fuse box diagram Underhood Fuse BlockUnderhood Fuse Block diagram
2. Locating the OBD2 Fuse in Your 2005 Cadillac Escalade: A Step-by-Step Guide
Where can you find the OBD2 fuse in your 2005 Cadillac Escalade? Start by checking the owner’s manual for the exact location. Typically, it is located in one of the fuse boxes: under the hood, in the instrument panel, or in the center console. Once you’ve identified the fuse box, use the fuse box diagram to pinpoint the OBD2 fuse. The fuse is usually labeled as “OBD,” “DLC” (Diagnostic Link Connector), or something similar.
Finding the OBD2 fuse can seem like a daunting task, but it’s quite manageable with a systematic approach. The first place to look is your vehicle’s owner’s manual. This document contains a wealth of information about your car, including the location of all the fuse boxes and a detailed diagram of each one. The diagram will show you the location of each fuse and its corresponding function.
If you don’t have your owner’s manual, don’t worry. You can often find a digital version online by searching for “2005 Cadillac Escalade owner’s manual PDF.” Once you have the manual, locate the section on fuses and fuse boxes.
The 2005 Cadillac Escalade typically has three fuse box locations:
- Under the Hood: This fuse box usually contains fuses for critical engine components and other essential systems.
- Instrument Panel: This fuse box is often located on the driver’s side, near the steering wheel. It contains fuses for various interior components, including the OBD2 port.
- Center Console: Some models may have a fuse box in the center console area, although this is less common for the OBD2 fuse.
Once you’ve located the fuse box, carefully remove the cover. You should see a diagram on the inside of the cover or nearby. This diagram will help you identify the fuse that corresponds to the OBD2 port. Look for labels like “OBD,” “DLC” (Diagnostic Link Connector), or something similar.
3. Detailed Fuse Box Locations in the 2005 Cadillac Escalade
Can you specify the exact locations of the fuse boxes in a 2005 Cadillac Escalade? Here’s a breakdown:
- Underhood Fuse Block: Located in the engine compartment, this fuse box handles essential vehicle systems.
- Instrument Panel Fuse Block: Found inside the vehicle, often on the driver’s side, near the steering wheel.
- Center Instrument Panel Fuse Block: Situated in the center console, this fuse box may require some disassembly to access.
Knowing the precise locations of these fuse boxes is crucial for efficient troubleshooting.
To provide a more detailed guide, let’s break down the exact locations and how to access each fuse box:
1. Underhood Fuse Block:
- Location: This fuse box is in the engine compartment, usually on the driver’s side. Look for a black plastic box labeled “Fuse Box” or something similar.
- Access: To open it, you may need to release a few clips or latches. Consult your owner’s manual for the exact procedure.
- Content: This fuse box contains fuses and relays for critical engine components like the cooling fan, fuel pump, starter, and ABS (Anti-lock Braking System).
2. Instrument Panel Fuse Block:
- Location: This fuse box is inside the vehicle, typically on the driver’s side. It’s often behind a panel on the side of the dashboard or under the steering wheel.
- Access: You may need to use a screwdriver or a plastic trim removal tool to carefully pry off the access panel.
- Content: This fuse box contains fuses for interior components like the radio, power windows, power locks, and the OBD2 port.
3. Center Instrument Panel Fuse Block:
- Location: This fuse box is in the center console, usually behind the radio or climate control panel.
- Access: Accessing this fuse box may require some disassembly of the center console. This can be a bit more complex, so consult your owner’s manual or a repair manual for detailed instructions.
- Content: This fuse box may contain fuses for the rear entertainment system, climate control, and other accessories.
4. Identifying the Correct Fuse for the OBD2 Port
How do you ensure you’re checking the right fuse for the OBD2 port? Consult the fuse box diagram. The diagram will label each fuse and its function. Look for labels such as “OBD,” “DLC,” “Diagnostic,” or “Data Link Connector.” The fuse rating (in amps) is also indicated on the diagram. Make sure the replacement fuse has the same rating.
Once you’ve located the fuse box and removed the cover, the next step is to identify the correct fuse for the OBD2 port. This is where the fuse box diagram becomes invaluable. The diagram is usually printed on the inside of the fuse box cover or in your owner’s manual. It provides a map of all the fuses and relays in the box, along with their corresponding functions.
Carefully examine the diagram and look for a fuse labeled “OBD,” “DLC,” “Diagnostic,” or “Data Link Connector.” These are the most common labels for the OBD2 port fuse. If you’re unsure, you can also consult your owner’s manual for clarification.
In addition to the label, the fuse box diagram will also indicate the fuse rating, which is measured in amps (A). The fuse rating is the maximum amount of electrical current that the fuse can handle before it blows. It’s crucial to replace a blown fuse with one that has the same rating. Using a fuse with a higher rating can damage the circuit and potentially cause a fire.
The fuse rating is usually printed on the fuse itself. It’s a small number followed by the letter “A,” such as “10A” or “15A.” Make a note of the fuse rating for the OBD2 port before you remove the fuse.
If you’re having trouble identifying the correct fuse, you can try using a fuse puller. This is a small plastic tool that makes it easier to remove fuses from the fuse box. Insert the fuse puller into the slots on either side of the fuse and gently pull it out.
5. Common Symptoms of a Blown OBD2 Fuse
What are the telltale signs of a blown OBD2 fuse? The most obvious symptom is that the OBD2 scanner won’t power on when connected to the port. Other symptoms include:
- Check engine light not resetting
- Inability to read diagnostic trouble codes
- Failure of emissions testing equipment to connect
Recognizing these symptoms early can save time and prevent unnecessary repairs.
A blown OBD2 fuse can manifest in several ways, making it important to recognize the symptoms. Here are some of the most common signs:
- OBD2 Scanner Won’t Power On: This is the most obvious and direct symptom. When you plug your OBD2 scanner into the port, it should power on and light up. If it remains completely dark and unresponsive, it’s a strong indication that the fuse is blown.
- Check Engine Light Issues: The check engine light is a key indicator of problems within your car’s systems. If the OBD2 fuse is blown, you may experience issues related to the check engine light, such as:
- Inability to Reset: After fixing a problem, you should be able to reset the check engine light using an OBD2 scanner. If the fuse is blown, the scanner won’t be able to communicate with the car’s computer to reset the light.
- Inaccurate Readings: In some cases, a blown fuse can cause the check engine light to behave erratically, displaying false or misleading codes.
- Inability to Read Diagnostic Trouble Codes (DTCs): The primary function of the OBD2 port is to allow you to read diagnostic trouble codes. If the fuse is blown, the scanner won’t be able to establish a connection with the car’s computer, and you won’t be able to retrieve any codes.
- Emissions Testing Failure: Emissions testing is a crucial part of vehicle maintenance in many areas. If the OBD2 port is not functioning due to a blown fuse, the emissions testing equipment won’t be able to connect to your car, resulting in a failed test.
- Other Electrical Issues: In some cases, a blown OBD2 fuse can be related to other electrical problems in the car. You may notice that other systems, such as the radio or power windows, are also not working correctly. This is because the OBD2 port shares a circuit with other components.
If you experience any of these symptoms, it’s essential to check the OBD2 fuse as soon as possible. A blown fuse is a simple problem to fix, but it can prevent you from diagnosing and addressing more serious issues with your car.
 2007 Cadillac Escalade fuse box diagram Instrument Panel Fuse BlockInstrument Panel Fuse Block diagram
6. Step-by-Step Guide to Replacing the OBD2 Fuse
How do you replace a blown OBD2 fuse in your 2005 Cadillac Escalade? Follow these steps:
- Turn off the ignition: Ensure the car is turned off to prevent electrical shorts.
- Locate the fuse box: Refer to your owner’s manual for the OBD2 fuse location.
- Remove the blown fuse: Use a fuse puller to gently remove the fuse.
- Inspect the fuse: Check if the filament inside the fuse is broken.
- Replace with a new fuse: Use a fuse of the same type and amperage.
- Test the OBD2 port: Plug in your OBD2 scanner to ensure it powers on.
By following these steps, you can quickly restore functionality to your OBD2 port.
Replacing a blown OBD2 fuse is a simple process that you can do yourself with a few basic tools. Here’s a step-by-step guide:
Step 1: Gather Your Supplies
Before you begin, make sure you have the following items:
- A new fuse with the correct amperage rating (check your owner’s manual or the fuse box diagram for the correct rating)
- A fuse puller (optional, but recommended)
- Your owner’s manual or fuse box diagram
- A flashlight or work light
Step 2: Turn Off the Ignition
Before working on any electrical components, it’s essential to turn off the ignition. This will prevent electrical shorts and ensure your safety. Remove the key from the ignition or press the start/stop button to turn off the car.
Step 3: Locate the Fuse Box
Refer to your owner’s manual or the fuse box diagram to locate the fuse box that contains the OBD2 fuse. As mentioned earlier, the OBD2 fuse is typically located in the instrument panel fuse box, but it could be in one of the other fuse boxes.
Step 4: Remove the Fuse Box Cover
Carefully remove the cover of the fuse box. You may need to release a few clips or latches to remove the cover. Consult your owner’s manual for the exact procedure.
Step 5: Locate the Blown Fuse
Use the fuse box diagram to locate the fuse that corresponds to the OBD2 port. Look for labels like “OBD,” “DLC,” “Diagnostic,” or “Data Link Connector.”
Step 6: Remove the Blown Fuse
Use a fuse puller to gently remove the blown fuse from the fuse box. If you don’t have a fuse puller, you can use a pair of needle-nose pliers, but be careful not to damage the fuse box or the surrounding fuses.
Step 7: Inspect the Fuse
Examine the fuse carefully. You should be able to see a small wire or filament inside the fuse. If the fuse is blown, the filament will be broken or melted.
Step 8: Replace the Fuse
Take the new fuse with the correct amperage rating and carefully insert it into the empty slot in the fuse box. Make sure the fuse is fully seated in the slot.
Step 9: Replace the Fuse Box Cover
Put the fuse box cover back in place and secure it with the clips or latches.
Step 10: Test the OBD2 Port
Plug your OBD2 scanner into the OBD2 port and turn on the ignition. The scanner should power on and light up. If it does, then you’ve successfully replaced the blown fuse.
7. Diagnosing Common OBD2 Problems in Your 2005 Cadillac Escalade
What are some common OBD2 problems in the 2005 Cadillac Escalade? These include:
- P0420: Catalyst System Efficiency Below Threshold (Bank 1)
- P0300: Random/Multiple Cylinder Misfire Detected
- P0171/P0174: System Too Lean (Bank 1 and Bank 2)
- U0100: Lost Communication With ECM/PCM
Understanding these codes and their potential causes can help you diagnose and fix issues more efficiently. Always consult a reliable repair manual or database for detailed troubleshooting steps.
The OBD2 system is designed to detect a wide range of problems in your car’s systems. When a problem is detected, the system stores a diagnostic trouble code (DTC), which is a five-digit code that provides information about the nature of the problem.
Here are some of the most common OBD2 problems that you might encounter in your 2005 Cadillac Escalade:
- P0420: Catalyst System Efficiency Below Threshold (Bank 1)
- Description: This code indicates that the catalytic converter is not working as efficiently as it should. The catalytic converter is responsible for reducing harmful emissions from your car’s exhaust.
- Possible Causes:
- Faulty catalytic converter
- Exhaust leaks
- Damaged oxygen sensors
- Engine misfires
- Troubleshooting Steps:
- Check for exhaust leaks
- Test the oxygen sensors
- Inspect the catalytic converter
- Address any engine misfires
- P0300: Random/Multiple Cylinder Misfire Detected
- Description: This code indicates that one or more cylinders in your engine are misfiring. A misfire occurs when the combustion process in a cylinder is incomplete or doesn’t occur at all.
- Possible Causes:
- Faulty spark plugs
- Damaged ignition coils
- Vacuum leaks
- Low fuel pressure
- Worn or damaged engine components
- Troubleshooting Steps:
- Check the spark plugs
- Test the ignition coils
- Look for vacuum leaks
- Check the fuel pressure
- Perform a compression test
- P0171/P0174: System Too Lean (Bank 1 and Bank 2)
- Description: These codes indicate that the engine is running lean, meaning there is too much air and not enough fuel in the air-fuel mixture. Bank 1 refers to the side of the engine that contains cylinder number 1, while Bank 2 refers to the other side.
- Possible Causes:
- Vacuum leaks
- Faulty oxygen sensors
- Low fuel pressure
- Dirty fuel injectors
- Mass airflow (MAF) sensor problems
- Troubleshooting Steps:
- Check for vacuum leaks
- Test the oxygen sensors
- Check the fuel pressure
- Clean or replace the fuel injectors
- Clean or replace the MAF sensor
- U0100: Lost Communication With ECM/PCM
- Description: This code indicates that there is a communication problem between the engine control module (ECM) or powertrain control module (PCM) and other systems in the car.
- Possible Causes:
- Wiring problems
- Faulty ECM/PCM
- Loose connections
- Corroded connectors
- Troubleshooting Steps:
- Check the wiring and connections
- Inspect the ECM/PCM
- Test the communication network
- Consult a professional technician
8. Advanced Troubleshooting: When a New Fuse Doesn’t Fix the Problem
What should you do if replacing the OBD2 fuse doesn’t solve the issue? This indicates a deeper problem:
- Check for shorts: Inspect the wiring connected to the OBD2 port for any signs of damage or shorts.
- Inspect the OBD2 port: Look for bent or damaged pins in the OBD2 port itself.
- Consult a professional: If you can’t find any obvious issues, it’s best to consult a qualified mechanic to diagnose and repair the underlying problem.
Advanced troubleshooting may require specialized tools and expertise.
If you’ve replaced the OBD2 fuse and the problem persists, it’s a sign that there’s a more serious issue at play. Here are some advanced troubleshooting steps you can take:
- Check for Shorts:
- Description: A short circuit occurs when there is an unintended connection between two points in an electrical circuit. This can cause excessive current flow, which can blow fuses.
- Troubleshooting Steps:
- Visually inspect the wiring connected to the OBD2 port for any signs of damage, such as frayed wires, exposed metal, or melted insulation.
- Check for any loose or corroded connections.
- Use a multimeter to test the continuity of the wiring.
- Inspect the OBD2 Port:
- Description: The OBD2 port itself can be a source of problems. Bent or damaged pins can prevent the scanner from making a proper connection, even if the fuse is good.
- Troubleshooting Steps:
- Carefully examine the pins in the OBD2 port for any signs of damage.
- Use a small tool, such as a toothpick or a needle, to gently straighten any bent pins.
- Clean the port with a contact cleaner to remove any dirt or corrosion.
- Consult a Professional:
- Description: If you’ve tried the above steps and the problem still persists, it’s best to consult a qualified mechanic or automotive electrician. They have the specialized tools, knowledge, and experience to diagnose and repair complex electrical problems.
- Why Seek Professional Help:
- Complex Electrical Systems: Modern vehicles have complex electrical systems, and diagnosing problems can be challenging without the right tools and expertise.
- Safety Concerns: Working with electrical systems can be dangerous if you’re not careful. A professional technician knows how to work safely and avoid injury.
- Accurate Diagnosis: A professional technician can use advanced diagnostic tools to accurately pinpoint the source of the problem.
- Proper Repairs: A professional technician can perform the necessary repairs to ensure that the problem is fixed correctly and won’t recur.
9. Using a Multimeter to Test Fuses and Circuits
How can a multimeter help in troubleshooting fuse and circuit issues? A multimeter can:
- Test fuse continuity: Ensure the fuse is conducting electricity.
- Check for voltage: Verify that the OBD2 port is receiving power.
- Identify shorts: Detect any unintended connections in the circuit.
Using a multimeter provides precise measurements for accurate diagnostics.
A multimeter is an essential tool for troubleshooting electrical problems in your car. It can be used to test fuses, check for voltage, and identify shorts in circuits. Here’s how to use a multimeter to diagnose fuse and circuit issues:
- Testing Fuse Continuity:
- Description: Continuity refers to the presence of a complete electrical path. A good fuse should have continuity, meaning that electricity can flow through it.
- Steps:
- Set the multimeter to the continuity setting. This is usually indicated by a symbol that looks like a diode or a speaker.
- Remove the fuse from the fuse box.
- Touch one probe of the multimeter to each end of the fuse.
- If the multimeter beeps or displays a reading of 0 ohms, then the fuse has continuity and is good. If the multimeter doesn’t beep or displays a reading of infinity, then the fuse is blown and needs to be replaced.
- Checking for Voltage:
- Description: Voltage is the electrical potential difference between two points in a circuit. Checking for voltage at the OBD2 port can help you determine if the port is receiving power.
- Steps:
- Set the multimeter to the DC voltage setting. Choose a voltage range that is higher than the expected voltage (usually 12V for car circuits).
- Turn on the ignition.
- Locate the positive and negative terminals in the OBD2 port. Consult your owner’s manual or a repair manual for the exact location of the terminals.
- Touch the red probe of the multimeter to the positive terminal and the black probe to the negative terminal.
- The multimeter should display a voltage reading close to 12V. If the reading is significantly lower or zero, then there is a problem with the circuit.
- Identifying Shorts:
- Description: A short circuit occurs when there is an unintended connection between two points in an electrical circuit. This can cause excessive current flow, which can blow fuses.
- Steps:
- Turn off the ignition and disconnect the battery.
- Set the multimeter to the continuity setting.
- Locate the circuit that you want to test.
- Touch one probe of the multimeter to a point in the circuit and the other probe to ground (the car’s metal chassis).
- If the multimeter beeps or displays a reading of 0 ohms, then there is a short circuit.
- Isolate the short by disconnecting components one by one until the continuity disappears.
10. Preventing Future OBD2 Fuse Problems
How can you prevent future OBD2 fuse issues? Consider these tips:
- Avoid overloading the circuit: Don’t plug in multiple devices that draw power from the OBD2 port simultaneously.
- Use high-quality scanners: Inexpensive or poorly made scanners can sometimes cause shorts.
- Regular maintenance: Keep your vehicle’s electrical system in good condition with regular inspections and maintenance.
Preventive measures can save you from future diagnostic headaches.
Preventing future OBD2 fuse problems is about being mindful of how you use the port and maintaining your car’s electrical system. Here are some tips to help you avoid future issues:
- Avoid Overloading the Circuit:
- Description: The OBD2 port is designed to provide power to a limited number of devices. Plugging in multiple devices that draw power from the port simultaneously can overload the circuit and cause the fuse to blow.
- Prevention:
- Avoid using multiple OBD2 devices at the same time.
- If you need to use multiple devices, consider using a powered OBD2 splitter, which has its own power source and won’t overload the car’s circuit.
- Use High-Quality Scanners:
- Description: Inexpensive or poorly made OBD2 scanners can sometimes cause shorts in the electrical system. These scanners may not be properly designed or tested, and they can introduce electrical noise or voltage spikes that can damage the car’s computer or blow the fuse.
- Prevention:
- Invest in a high-quality OBD2 scanner from a reputable brand.
- Read reviews and do your research before buying a scanner.
- Avoid using generic or unbranded scanners.
- Regular Maintenance:
- Description: Keeping your car’s electrical system in good condition with regular inspections and maintenance can help prevent a wide range of problems, including blown fuses.
- Prevention:
- Have your car’s electrical system inspected by a qualified mechanic at least once a year.
- Check the battery terminals for corrosion and clean them as needed.
- Inspect the wiring for any signs of damage, such as frayed wires, exposed metal, or melted insulation.
- Replace any damaged wiring or connectors.
- Be Careful When Plugging and Unplugging Devices:
- Description: Carelessly plugging and unplugging devices from the OBD2 port can damage the port or cause a short circuit.
- Prevention:
- Be gentle when plugging and unplugging devices.
- Make sure the device is properly aligned with the port before inserting it.
- Avoid forcing the device into the port.
- Keep the OBD2 Port Clean and Dry:
- Description: Dirt, moisture, and other contaminants can corrode the contacts in the OBD2 port, which can lead to electrical problems.
- Prevention:
- Keep the OBD2 port clean and dry.
- Use a contact cleaner to remove any dirt or corrosion.
- Avoid spilling liquids near the port.
11. Connecting with MERCEDES-DIAGNOSTIC-TOOL.EDU.VN for Expert Assistance
Do you need expert assistance with your 2005 Cadillac Escalade? MERCEDES-DIAGNOSTIC-TOOL.EDU.VN offers comprehensive support for diagnosing and repairing your vehicle:
- Contact us: Visit us at 789 Oak Avenue, Miami, FL 33101, United States.
- WhatsApp: Reach out at +1 (641) 206-8880 for immediate assistance.
- Visit our website: Explore our resources at MERCEDES-DIAGNOSTIC-TOOL.EDU.VN.
We provide expert diagnostics, auto repair solutions, and reliable support to keep your vehicle running smoothly.
Sometimes, even with the best DIY efforts, you might need expert assistance to diagnose and repair your 2005 Cadillac Escalade. That’s where MERCEDES-DIAGNOSTIC-TOOL.EDU.VN comes in. We offer comprehensive support and resources to help you keep your vehicle running smoothly.
Here are some ways you can connect with us for expert assistance:
- Visit Our Website:
- Website: MERCEDES-DIAGNOSTIC-TOOL.EDU.VN
- What You’ll Find:
- Detailed articles and guides on diagnosing and repairing various car problems.
- Information about our diagnostic tools and services.
- A contact form to reach out to our team with your questions.
- Contact Us Via WhatsApp:
- WhatsApp: +1 (641) 206-8880
- How We Can Help:
- Get immediate assistance with your diagnostic and repair questions.
- Receive expert advice and guidance from our team of technicians.
- Schedule a consultation or service appointment.
- Visit Our Location:
- Address: 789 Oak Avenue, Miami, FL 33101, United States
- What We Offer:
- In-person diagnostic and repair services.
- Access to our state-of-the-art diagnostic equipment.
- Expert advice and guidance from our team of experienced technicians.
12. Understanding the On-Board Diagnostics (OBD2) System
What is the On-Board Diagnostics (OBD2) system and how does it work? The OBD2 system is a standardized system used in vehicles since 1996 to monitor engine and emissions control systems. It detects malfunctions, stores diagnostic trouble codes (DTCs), and provides access to vehicle data for troubleshooting. This system helps mechanics diagnose problems accurately and efficiently.
To delve deeper into the OBD2 system, let’s explore its various facets:
- Purpose of the OBD2 System:
- Emissions Control: One of the primary goals of the OBD2 system is to monitor and control vehicle emissions. It ensures that your car meets the required emissions standards and helps protect the environment.
- Fault Detection: The OBD2 system is designed to detect malfunctions in various systems within your car, including the engine, transmission, fuel system, and more.
- Data Access: The OBD2 system provides access to valuable data about your car’s performance, which can be used for troubleshooting and maintenance.
- Components of the OBD2 System:
- Sensors: The OBD2 system relies on a network of sensors to monitor various parameters within your car. These sensors include:
- Oxygen sensors: Measure the amount of oxygen in the exhaust.
- Mass airflow (MAF) sensor: Measures the amount of air entering the engine.
- Throttle position sensor (TPS): Measures the position of the throttle.
- Crankshaft position sensor (CKP): Measures the position of the crankshaft.
- Camshaft position sensor (CMP): Measures the position of the camshaft.
- Engine Control Module (ECM) or Powertrain Control Module (PCM): The ECM/PCM is the brain of the OBD2 system. It receives data from the sensors, analyzes it, and makes adjustments to the engine and other systems to optimize performance and emissions.
- Diagnostic Link Connector (DLC): The DLC, also known as the OBD2 port, is the interface between the OBD2 system and the outside world. It allows technicians and you to connect an OBD2 scanner to the car and retrieve data.
- Diagnostic Trouble Codes (DTCs): When the OBD2 system detects a malfunction, it stores a diagnostic trouble code (DTC). A DTC is a five-digit code that provides information about the nature of the problem.
- Sensors: The OBD2 system relies on a network of sensors to monitor various parameters within your car. These sensors include:
- How the OBD2 System Works:
- Monitoring: The OBD2 system continuously monitors the data from the sensors.
- Detection: When the system detects a value that is outside the normal range, it flags a potential problem.
- Storage: If the problem persists for a certain period of time, the system stores a DTC.
- Notification: The system may also turn on the check engine light to alert the driver to the problem.
- Diagnosis: A technician can connect an OBD2 scanner to the DLC and retrieve the DTCs. The technician can then use the DTCs to diagnose the problem and make the necessary repairs.
13. OBD2 Fuse and its Role in Vehicle Diagnostics
Why is the OBD2 fuse critical for vehicle diagnostics? The OBD2 fuse protects the diagnostic link connector, ensuring it receives power to communicate with diagnostic tools. Without a functioning fuse, the OBD2 port is rendered useless, preventing access to vital vehicle data for troubleshooting and repairs. Maintaining this fuse is essential for effective vehicle maintenance.
To better understand the role of the OBD2 fuse, let’s examine its specific functions and importance:
- Protection of the Diagnostic Link Connector (DLC):
- Description: The OBD2 fuse is primarily responsible for protecting the DLC, which is the port that you plug your OBD2 scanner into. The DLC is a sensitive electronic component, and it can be damaged by voltage spikes or short circuits.
- Importance:
- Prevents Damage: The fuse protects the DLC from damage, ensuring that it remains functional.
- Maintains Connectivity: A functioning DLC is essential for establishing a connection between the OBD2 scanner and the car’s computer.
- Power Supply to the OBD2 Port:
- Description: The OBD2 fuse also provides power to the OBD2 port. The OBD2 scanner needs power to operate, and it gets this power from the OBD2 port.
- Importance:
- Ensures Scanner Operation: Without a functioning fuse, the OBD2 scanner won’t be able to power on and communicate with the car’s computer.
- Facilitates Data Retrieval: The power supply is essential for retrieving diagnostic trouble codes (DTC