Element Obd2 diagnostic tools are crucial for identifying and resolving vehicle issues. MERCEDES-DIAGNOSTIC-TOOL.EDU.VN offers in-depth insights and solutions to help you effectively use these tools for your Mercedes-Benz. Discover how to diagnose problems, interpret codes, and maintain your vehicle with confidence by our support. You’ll gain expertise in car diagnostic scans and unlocking hidden features.
Contents
- 1. What is Element OBD2 and How Does It Work?
- 1.1 Key Components of the Element OBD2 System
- 1.2 How the Element OBD2 System Detects and Reports Issues
- 1.3 Benefits of Using Element OBD2 for Vehicle Diagnostics
- 2. Identifying Common Element OBD2 Trouble Codes
- 2.1 P0420: Catalyst System Efficiency Below Threshold (Bank 1)
- 2.2 P0171: System Too Lean (Bank 1)
- 2.3 P0300: Random/Multiple Cylinder Misfire Detected
- 2.4 U0155 Lost Communication With Instrument Panel Cluster (IPC) Control Module
- 2.5 Other Common Element OBD2 Codes
- 3. Step-by-Step Guide to Diagnosing Element OBD2 Issues
- 3.1 Preparing for the Diagnostic Process
- 3.2 Connecting the OBD2 Scan Tool
- 3.3 Reading and Interpreting Trouble Codes
- 3.4 Performing Visual Inspections
- 3.5 Using Live Data to Pinpoint Problems
- 3.6 Testing and Verifying Components
- 3.7 Clearing Codes and Retesting
- 4. Advanced Techniques for Element OBD2 Diagnostics
- 4.1 Using a Professional-Grade Scan Tool
- 4.2 Performing Component-Level Testing
- 4.3 Analyzing Freeze Frame Data
- 4.4 Diagnosing Intermittent Issues
- 4.5 Using Wiring Diagrams and Technical Service Bulletins (TSBs)
- 5. Maintaining Your Element OBD2 System for Optimal Performance
- 5.1 Performing Regular Vehicle Inspections
- 5.2 Keeping Your Vehicle Properly Tuned
- 5.3 Using High-Quality Fuel and Additives
- 5.4 Addressing Issues Promptly
- 5.5 Staying Informed About Element-Specific Issues
- 6. Common Mistakes to Avoid When Using Element OBD2
- 6.1 Ignoring the Check Engine Light
- 6.2 Misinterpreting Trouble Codes
- 6.3 Neglecting Visual Inspections
- 6.4 Overlooking Freeze Frame Data
- 6.5 Failing to Clear Codes and Retest
- 7. Choosing the Right Element OBD2 Scan Tool
- 7.1 Understanding Your Diagnostic Needs
- 7.2 Types of OBD2 Scan Tools
- 7.3 Key Features to Look For
- 7.4 Recommended OBD2 Scan Tools for Honda Element
- 8. Resetting Element OBD2 System: When and How
- 8.1 When to Reset the Element OBD2 System
- 8.2 How to Reset the Element OBD2 System
- 8.3 Precautions When Resetting the OBD2 System
- 9. Element OBD2 and Emissions Testing: What You Need to Know
- 9.1 The Role of OBD2 in Emissions Testing
- 9.2 Readiness Monitors and Emissions Testing
- 9.3 Common Reasons for Emissions Test Failure
- 9.4 Tips for Passing an Emissions Test
- 10. Finding Reliable Element OBD2 Resources and Support
- 10.1 Online Forums and Communities
- 10.2 Repair Manuals and Technical Documentation
- 10.3 Local Mechanics and Repair Shops
- 10.4 Online Databases and Search Engines
- 10.5 Expert Support from MERCEDES-DIAGNOSTIC-TOOL.EDU.VN
1. What is Element OBD2 and How Does It Work?
Element OBD2 refers to the On-Board Diagnostics II (OBD2) system implemented in Honda Element vehicles, providing access to crucial vehicle data for diagnostics and troubleshooting. This standardized system allows mechanics and vehicle owners to read diagnostic trouble codes (DTCs) and monitor various engine and vehicle parameters using a scan tool or code reader.
The OBD2 system works by monitoring various sensors and systems within the vehicle. When a fault or abnormality is detected, the system stores a DTC, which can be accessed using an OBD2 scanner. This information helps identify the source of the problem, enabling targeted repairs and maintenance. According to the Environmental Protection Agency (EPA), all cars and light trucks manufactured after 1996 are required to have an OBD2 system.
1.1 Key Components of the Element OBD2 System
The Element OBD2 system comprises several key components that work together to monitor and diagnose vehicle performance:
- OBD2 Port: A 16-pin connector, typically located under the dashboard, where scan tools are connected.
- Sensors: Various sensors throughout the vehicle that monitor engine performance, emissions, and other parameters.
- Engine Control Unit (ECU): The vehicle’s computer that processes sensor data and stores DTCs.
- Scan Tool or Code Reader: A device used to retrieve DTCs and monitor live data from the ECU.
1.2 How the Element OBD2 System Detects and Reports Issues
The Element OBD2 system continuously monitors various vehicle parameters. When a sensor detects a reading outside the normal range, the ECU verifies the issue. If the problem persists, the ECU stores a DTC and may illuminate the check engine light on the dashboard.
The process involves:
- Monitoring: Sensors collect data on engine performance, emissions, and other systems.
- Detection: The ECU identifies readings outside the acceptable range.
- Verification: The ECU confirms the issue’s persistence.
- Reporting: A DTC is stored, and the check engine light may be activated.
According to a study by the National Institute for Automotive Service Excellence (ASE), understanding how the OBD2 system works is essential for accurate diagnostics and effective repairs.
1.3 Benefits of Using Element OBD2 for Vehicle Diagnostics
Using the Element OBD2 system offers several benefits for vehicle diagnostics:
- Early Issue Detection: Allows for early detection of potential problems, preventing costly repairs.
- Accurate Diagnostics: Provides specific DTCs to pinpoint the source of the issue.
- Cost Savings: Enables DIY repairs for minor issues, reducing reliance on expensive mechanics.
- Performance Monitoring: Allows real-time monitoring of engine and vehicle performance.
By leveraging the capabilities of the Element OBD2 system, vehicle owners can proactively maintain their vehicles and address issues before they escalate.
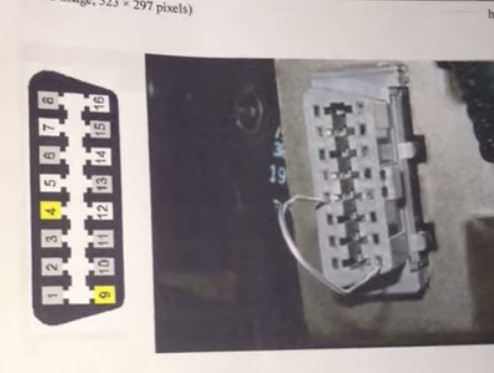 Honda Element OBD2 Port Location
2. Identifying Common Element OBD2 Trouble Codes
Understanding common Element OBD2 trouble codes is essential for diagnosing and addressing vehicle issues effectively. These codes provide valuable information about the nature and location of the problem, allowing for targeted repairs and maintenance.
2.1 P0420: Catalyst System Efficiency Below Threshold (Bank 1)
The P0420 code indicates that the catalytic converter’s efficiency is below the required threshold. This means the converter is not effectively reducing harmful emissions.
Possible Causes:
- Faulty catalytic converter
- Exhaust leaks
- Faulty oxygen sensors
- Engine misfires
Troubleshooting Steps:
- Inspect the catalytic converter for damage.
- Check for exhaust leaks.
- Test the oxygen sensors.
- Address any engine misfires.
2.2 P0171: System Too Lean (Bank 1)
The P0171 code indicates that the engine is running too lean, meaning there is too much air and not enough fuel in the air-fuel mixture.
Possible Causes:
- Vacuum leaks
- Faulty mass airflow (MAF) sensor
- Faulty oxygen sensor
- Fuel pump issues
- Clogged fuel injectors
Troubleshooting Steps:
- Check for vacuum leaks.
- Test the MAF sensor.
- Test the oxygen sensor.
- Inspect the fuel pump and injectors.
2.3 P0300: Random/Multiple Cylinder Misfire Detected
The P0300 code indicates that the engine is experiencing random or multiple cylinder misfires.
Possible Causes:
- Faulty spark plugs
- Faulty ignition coils
- Vacuum leaks
- Low fuel pressure
- Faulty oxygen sensor
Troubleshooting Steps:
- Inspect and replace spark plugs if necessary.
- Test and replace ignition coils if necessary.
- Check for vacuum leaks.
- Check fuel pressure.
- Test the oxygen sensor.
2.4 U0155 Lost Communication With Instrument Panel Cluster (IPC) Control Module
The U0155 code indicates that there is no communication with the instrument panel.
Possible Causes:
- Wiring Harness problem
- CAN Bus problem
- IPC problem
Troubleshooting Steps:
- Check wiring harness
- Check the CAN Bus system
- Replace or reflash the IPC
2.5 Other Common Element OBD2 Codes
- P0113: Intake Air Temperature Sensor Circuit High Input
- P0135: O2 Sensor Heater Circuit Malfunction (Bank 1, Sensor 1)
- P0301: Cylinder 1 Misfire Detected
- P0401: Insufficient EGR Flow
- P0441: Evaporative Emission Control System Incorrect Purge Flow
Understanding these common Element OBD2 codes can help vehicle owners and mechanics quickly identify and address potential issues, improving vehicle performance and reliability.
3. Step-by-Step Guide to Diagnosing Element OBD2 Issues
Diagnosing Element OBD2 issues involves a systematic approach to identify the root cause of the problem. This guide provides a step-by-step process to help you effectively diagnose and resolve OBD2-related issues in your Honda Element.
3.1 Preparing for the Diagnostic Process
Before starting the diagnostic process, gather the necessary tools and information:
- OBD2 Scan Tool: A reliable scan tool or code reader is essential for retrieving DTCs.
- Vehicle Repair Manual: A repair manual provides valuable information on vehicle-specific systems and components.
- Basic Tools: Wrenches, screwdrivers, and other basic tools may be needed for inspections and repairs.
- Safety Gear: Wear safety glasses and gloves to protect yourself during the diagnostic process.
3.2 Connecting the OBD2 Scan Tool
- Locate the OBD2 port, typically found under the dashboard on the driver’s side.
- Plug the scan tool into the OBD2 port.
- Turn the ignition key to the “ON” position without starting the engine.
- Follow the scan tool’s instructions to power it on and establish a connection with the vehicle’s ECU.
3.3 Reading and Interpreting Trouble Codes
- Use the scan tool to retrieve any stored DTCs from the ECU.
- Record all DTCs, noting the code number and description.
- Consult a repair manual or online resources to understand the meaning of each code.
- Prioritize codes based on their severity and potential impact on vehicle performance.
3.4 Performing Visual Inspections
After retrieving the DTCs, perform a thorough visual inspection of the affected systems and components:
- Wiring and Connectors: Check for damaged, corroded, or loose wiring and connectors.
- Vacuum Hoses: Inspect vacuum hoses for cracks, leaks, or disconnections.
- Sensors: Examine sensors for physical damage or contamination.
- Exhaust System: Check for exhaust leaks, rust, or damage.
3.5 Using Live Data to Pinpoint Problems
Many OBD2 scan tools can display live data from the vehicle’s sensors and systems. This information can be invaluable for pinpointing the root cause of the issue:
- Select relevant parameters to monitor, such as oxygen sensor readings, MAF sensor data, and engine temperature.
- Start the engine and observe the live data readings.
- Compare the readings to the expected values in the repair manual.
- Identify any abnormal readings that may indicate a faulty sensor or system.
3.6 Testing and Verifying Components
Based on the DTCs, visual inspections, and live data analysis, you may need to test and verify specific components:
- Oxygen Sensors: Use a multimeter to test the sensor’s resistance and voltage output.
- MAF Sensor: Use a multimeter to test the sensor’s frequency or voltage output.
- Fuel Injectors: Use a multimeter to test the injector’s resistance and spray pattern.
- Ignition Coils: Use an ignition coil tester to check for proper spark.
3.7 Clearing Codes and Retesting
After addressing the identified issues, clear the DTCs from the ECU using the scan tool. Then, perform a test drive to see if the codes return. If the codes reappear, further diagnosis and repairs may be necessary.
By following this step-by-step guide, you can effectively diagnose Element OBD2 issues and ensure your vehicle is running smoothly and efficiently. For more in-depth assistance, contact MERCEDES-DIAGNOSTIC-TOOL.EDU.VN at 789 Oak Avenue, Miami, FL 33101, United States, or via Whatsapp at +1 (641) 206-8880.
4. Advanced Techniques for Element OBD2 Diagnostics
Advanced Element OBD2 diagnostics involve using specialized tools and techniques to troubleshoot complex vehicle issues that may not be easily identified through basic OBD2 scanning. These techniques are essential for experienced mechanics and advanced DIYers who want to delve deeper into vehicle diagnostics.
4.1 Using a Professional-Grade Scan Tool
Professional-grade scan tools offer advanced features beyond basic code reading, such as:
- Bidirectional Control: Allows you to command specific vehicle components to activate or deactivate for testing purposes.
- Advanced Data Logging: Records and analyzes live data over time to identify intermittent issues.
- Module Programming: Enables reprogramming of vehicle modules, such as the ECU, for software updates or replacements.
- Access to Vehicle-Specific Data: Provides access to detailed diagnostic information specific to your Honda Element.
4.2 Performing Component-Level Testing
Component-level testing involves testing individual components within a system to identify faults. This may require specialized tools, such as:
- Multimeter: Used to measure voltage, resistance, and current.
- Oscilloscope: Displays electrical signals over time to identify waveform abnormalities.
- Fuel Pressure Tester: Measures fuel pressure to diagnose fuel system issues.
- Compression Tester: Measures cylinder compression to diagnose engine problems.
4.3 Analyzing Freeze Frame Data
Freeze frame data captures a snapshot of vehicle parameters at the moment a DTC is triggered. This information can provide valuable clues about the conditions that led to the fault.
Key Parameters to Analyze:
- Engine speed (RPM)
- Engine load
- Fuel trim values
- Coolant temperature
- Vehicle speed
4.4 Diagnosing Intermittent Issues
Intermittent issues can be challenging to diagnose because they do not occur consistently. Advanced techniques for diagnosing intermittent issues include:
- Data Logging: Use a scan tool to record live data over an extended period, looking for patterns or anomalies.
- Stress Testing: Subject the vehicle to conditions that may trigger the issue, such as driving over bumps or applying heavy acceleration.
- Visual Inspection: Carefully inspect wiring, connectors, and components for signs of damage or wear.
4.5 Using Wiring Diagrams and Technical Service Bulletins (TSBs)
Wiring diagrams and TSBs can provide valuable information for diagnosing complex Element OBD2 issues:
- Wiring Diagrams: Show the electrical connections between components, helping you trace circuits and identify wiring faults.
- TSBs: Provide information on common issues, diagnostic procedures, and repair solutions specific to your Honda Element.
By mastering these advanced techniques, you can effectively diagnose and resolve even the most challenging Element OBD2 issues, ensuring your vehicle is running at its best.
5. Maintaining Your Element OBD2 System for Optimal Performance
Maintaining your Element OBD2 system is crucial for ensuring optimal vehicle performance, preventing costly repairs, and extending the lifespan of your Honda Element. Regular maintenance and proactive care can help you avoid common OBD2-related issues and keep your vehicle running smoothly.
5.1 Performing Regular Vehicle Inspections
Regular vehicle inspections are essential for identifying potential issues before they escalate. Focus on the following areas:
- Wiring and Connectors: Check for damaged, corroded, or loose wiring and connectors.
- Vacuum Hoses: Inspect vacuum hoses for cracks, leaks, or disconnections.
- Sensors: Examine sensors for physical damage or contamination.
- Exhaust System: Check for exhaust leaks, rust, or damage.
5.2 Keeping Your Vehicle Properly Tuned
A properly tuned engine is essential for optimal performance and emissions. Follow the manufacturer’s recommended maintenance schedule for tune-ups, including:
- Spark Plug Replacement: Replace spark plugs at the recommended intervals.
- Air Filter Replacement: Replace the air filter regularly to ensure proper airflow.
- Fuel Filter Replacement: Replace the fuel filter to prevent fuel system clogs.
- Throttle Body Cleaning: Clean the throttle body to remove carbon buildup and ensure smooth operation.
5.3 Using High-Quality Fuel and Additives
Using high-quality fuel and additives can help keep your engine clean and prevent fuel system issues. Consider using:
- Top Tier Gasoline: Gasoline that meets higher detergency standards to keep fuel injectors clean.
- Fuel Injector Cleaner: Additives that help remove deposits from fuel injectors.
- Fuel Stabilizer: Additives that prevent fuel degradation during storage.
5.4 Addressing Issues Promptly
When a DTC is triggered, address the issue promptly to prevent further damage. Ignoring a check engine light can lead to more severe problems and costly repairs.
- Retrieve the DTC using an OBD2 scan tool.
- Diagnose the issue using the steps outlined in this guide.
- Repair or replace the faulty components.
- Clear the DTC and retest to ensure the issue is resolved.
5.5 Staying Informed About Element-Specific Issues
Stay informed about common issues and maintenance recommendations specific to your Honda Element. Online forums, repair manuals, and technical service bulletins (TSBs) can provide valuable information.
By following these maintenance tips, you can keep your Element OBD2 system in top condition, ensuring reliable performance and preventing costly repairs.
6. Common Mistakes to Avoid When Using Element OBD2
Using Element OBD2 effectively requires careful attention to detail and a solid understanding of the system. Avoiding common mistakes can help you accurately diagnose issues and prevent further damage to your vehicle.
6.1 Ignoring the Check Engine Light
Ignoring the check engine light is one of the most common and costly mistakes. The check engine light is an indication that the OBD2 system has detected an issue that needs attention.
Why it’s a mistake:
- Small problems can turn into major repairs if left unaddressed.
- Ignoring the light can lead to reduced fuel efficiency and performance.
- It may cause further damage to other vehicle components.
What to do instead:
- Retrieve the DTC using an OBD2 scan tool.
- Diagnose the issue and perform necessary repairs.
6.2 Misinterpreting Trouble Codes
Misinterpreting trouble codes can lead to incorrect diagnoses and unnecessary repairs. It’s essential to understand the meaning of each code and consider all possible causes.
Why it’s a mistake:
- You may replace the wrong component, wasting time and money.
- The underlying issue may remain unresolved, leading to further problems.
What to do instead:
- Consult a repair manual or online resources to understand the code’s meaning.
- Consider all possible causes and perform thorough testing.
6.3 Neglecting Visual Inspections
Relying solely on DTCs without performing visual inspections can lead to missed issues. Visual inspections can reveal damaged wiring, vacuum leaks, and other problems that may not trigger a code.
Why it’s a mistake:
- You may overlook obvious problems that are contributing to the issue.
- You may perform unnecessary repairs based on incomplete information.
What to do instead:
- Perform a thorough visual inspection of the affected systems and components.
- Check for damaged wiring, vacuum leaks, and other signs of trouble.
6.4 Overlooking Freeze Frame Data
Overlooking freeze frame data can cause you to miss valuable clues about the conditions that led to the fault. Freeze frame data captures a snapshot of vehicle parameters at the moment a DTC is triggered.
Why it’s a mistake:
- You may miss important information about the operating conditions when the fault occurred.
- It can make it more difficult to diagnose intermittent issues.
What to do instead:
- Analyze the freeze frame data to understand the conditions that led to the fault.
- Pay attention to parameters such as engine speed, load, and fuel trim values.
6.5 Failing to Clear Codes and Retest
Failing to clear codes and retest after performing repairs can lead to confusion and frustration. If you don’t clear the codes, the check engine light may remain on even after the issue is resolved.
Why it’s a mistake:
- You may mistakenly believe that the issue is still present.
- It can make it difficult to diagnose new problems in the future.
What to do instead:
- Clear the DTCs from the ECU using the scan tool.
- Perform a test drive to see if the codes return.
By avoiding these common mistakes, you can use Element OBD2 more effectively and accurately diagnose vehicle issues, ensuring your Honda Element runs smoothly and reliably.
7. Choosing the Right Element OBD2 Scan Tool
Choosing the right Element OBD2 scan tool is crucial for effective vehicle diagnostics. With a wide range of options available, it’s essential to select a tool that meets your specific needs and budget.
7.1 Understanding Your Diagnostic Needs
Before choosing a scan tool, consider your diagnostic needs:
- Basic Code Reading: Do you need a simple tool for reading and clearing DTCs?
- Advanced Diagnostics: Do you need a tool with advanced features like live data, bidirectional control, and module programming?
- Vehicle Coverage: Does the tool support your specific Honda Element model and year?
- Ease of Use: Is the tool easy to use and navigate?
7.2 Types of OBD2 Scan Tools
There are several types of OBD2 scan tools available:
- Basic Code Readers: These tools are designed for reading and clearing DTCs. They are typically inexpensive and easy to use.
- Mid-Range Scan Tools: These tools offer additional features like live data, freeze frame data, and enhanced code definitions.
- Professional-Grade Scan Tools: These tools offer advanced features like bidirectional control, module programming, and vehicle-specific data.
- Smartphone-Based Scanners: These tools use a Bluetooth or Wi-Fi adapter to connect to your smartphone or tablet, allowing you to use a mobile app for diagnostics.
7.3 Key Features to Look For
When choosing an Element OBD2 scan tool, consider the following features:
- Code Definitions: The tool should provide clear and accurate code definitions.
- Live Data: The ability to view live data from the vehicle’s sensors and systems.
- Freeze Frame Data: The ability to view freeze frame data to understand the conditions that led to the fault.
- Bidirectional Control: The ability to command specific vehicle components to activate or deactivate for testing purposes.
- Vehicle Coverage: The tool should support your specific Honda Element model and year.
- Ease of Use: The tool should be easy to use and navigate.
- Updates: The ability to update the tool’s software to support new vehicles and features.
7.4 Recommended OBD2 Scan Tools for Honda Element
Here are some recommended OBD2 scan tools for Honda Element:
- Innova 3100i: A popular mid-range scan tool with code reading, live data, and freeze frame data capabilities.
- Autel MaxiCOM MK808: A professional-grade scan tool with bidirectional control, module programming, and vehicle-specific data.
- OBDLink MX+: A smartphone-based scanner with advanced features and compatibility with various mobile apps.
By carefully considering your diagnostic needs and the features offered by different scan tools, you can choose the right Element OBD2 scan tool for your needs.
8. Resetting Element OBD2 System: When and How
Resetting your Element OBD2 system can be necessary after performing repairs or maintenance to clear trouble codes and ensure the system is functioning correctly. However, it’s essential to understand when and how to reset the system properly to avoid potential issues.
8.1 When to Reset the Element OBD2 System
You may need to reset the Element OBD2 system in the following situations:
- After Performing Repairs: After repairing a fault that triggered a DTC, you should reset the system to clear the code and turn off the check engine light.
- After Replacing a Component: After replacing a faulty sensor or component, you should reset the system to ensure the new component is properly recognized.
- After Performing Maintenance: After performing certain maintenance procedures, such as an oil change or spark plug replacement, you may need to reset the system to clear any maintenance reminders.
- To Clear False Codes: Occasionally, the OBD2 system may trigger false codes due to temporary sensor glitches or electrical noise. Resetting the system can clear these false codes.
8.2 How to Reset the Element OBD2 System
There are several ways to reset the Element OBD2 system:
- Using an OBD2 Scan Tool: The most common method is to use an OBD2 scan tool to clear the DTCs from the ECU.
- Connect the scan tool to the OBD2 port.
- Turn the ignition key to the “ON” position without starting the engine.
- Use the scan tool to retrieve any stored DTCs.
- Select the “Clear Codes” or “Reset” function on the scan tool.
- Follow the scan tool’s instructions to clear the codes.
- Disconnecting the Battery: Disconnecting the battery can also reset the OBD2 system, but this method should be used with caution as it can also erase other vehicle settings.
- Turn off the ignition and remove the key.
- Disconnect the negative battery cable.
- Wait for 15-20 minutes to allow the ECU to reset.
- Reconnect the negative battery cable.
- Driving the Vehicle: In some cases, the OBD2 system may reset itself after a certain number of drive cycles if the fault that triggered the code is no longer present. A drive cycle typically involves starting the engine, driving at various speeds, and allowing the engine to cool down.
8.3 Precautions When Resetting the OBD2 System
- Record DTCs: Before resetting the system, record any stored DTCs so you can reference them later if the issue recurs.
- Understand the Cause: Make sure you understand the cause of the problem and have performed the necessary repairs before resetting the system.
- Check for Readiness Monitors: After resetting the system, check the readiness monitors to ensure that all systems have completed their self-tests. Readiness monitors are indicators that show whether the various emissions systems have been tested and are functioning correctly.
By following these guidelines, you can safely and effectively reset your Element OBD2 system, ensuring it is functioning correctly and providing accurate diagnostic information.
9. Element OBD2 and Emissions Testing: What You Need to Know
Understanding the relationship between your Element OBD2 system and emissions testing is crucial for ensuring your vehicle complies with environmental regulations and passes inspection. The OBD2 system plays a significant role in monitoring emissions-related components and systems, and its status can directly impact your vehicle’s ability to pass an emissions test.
9.1 The Role of OBD2 in Emissions Testing
The OBD2 system is designed to monitor various emissions-related components and systems, including:
- Catalytic Converter: Monitors the efficiency of the catalytic converter in reducing harmful emissions.
- Oxygen Sensors: Monitors the oxygen levels in the exhaust to ensure proper air-fuel mixture.
- Evaporative Emission Control System (EVAP): Monitors the fuel vapor recovery system to prevent fuel vapor leaks.
- Exhaust Gas Recirculation (EGR): Monitors the flow of exhaust gas back into the engine to reduce NOx emissions.
During an emissions test, the testing facility will connect to your vehicle’s OBD2 port and check for:
- Stored DTCs: The presence of any DTCs related to emissions-related components or systems.
- Readiness Monitors: The status of the readiness monitors, which indicate whether the various emissions systems have been tested and are functioning correctly.
9.2 Readiness Monitors and Emissions Testing
Readiness monitors are indicators that show whether the various emissions systems have been tested and are functioning correctly. There are several types of readiness monitors, including:
- Catalyst Monitor: Tests the efficiency of the catalytic converter.
- Oxygen Sensor Monitor: Tests the performance of the oxygen sensors.
- EVAP Monitor: Tests the evaporative emission control system.
- EGR Monitor: Tests the exhaust gas recirculation system.
In order to pass an emissions test, all or most of the readiness monitors must be in a “ready” state, indicating that the systems have been tested and are functioning correctly. The exact number of monitors that must be ready varies depending on the state and local regulations.
9.3 Common Reasons for Emissions Test Failure
- Check Engine Light On: A check engine light indicates that there is a problem with an emissions-related component or system.
- Stored DTCs: The presence of any DTCs related to emissions-related components or systems will cause the vehicle to fail the test.
- Not Ready Monitors: If too many readiness monitors are not in a “ready” state, the vehicle will fail the test.
9.4 Tips for Passing an Emissions Test
- Address Check Engine Light: If the check engine light is on, diagnose and repair the issue before taking the emissions test.
- Clear DTCs: Clear any stored DTCs after performing repairs.
- Complete Drive Cycle: After clearing the codes, perform a complete drive cycle to allow the readiness monitors to complete their self-tests.
- Regular Maintenance: Perform regular maintenance to keep your vehicle running smoothly and prevent emissions-related issues.
- Pre-Test Inspection: Consider having your vehicle inspected by a qualified mechanic before taking the emissions test.
By understanding the role of the OBD2 system in emissions testing and following these tips, you can increase your chances of passing the test and complying with environmental regulations.
10. Finding Reliable Element OBD2 Resources and Support
Finding reliable Element OBD2 resources and support is essential for effectively diagnosing and maintaining your Honda Element. Whether you’re a DIY enthusiast or a professional mechanic, having access to accurate information and expert assistance can save you time, money, and frustration.
10.1 Online Forums and Communities
Online forums and communities are valuable resources for Element OBD2 information. These platforms allow you to connect with other Element owners, share experiences, and ask questions.
- Element Owners Club: A popular online forum dedicated to Honda Element owners, with discussions on various topics, including OBD2 diagnostics and repairs.
- Honda Forums: A general Honda forum with a dedicated section for Element owners.
10.2 Repair Manuals and Technical Documentation
Repair manuals and technical documentation provide detailed information on Element OBD2 systems and components. These resources can be invaluable for diagnosing complex issues and performing repairs.
- Haynes Repair Manual: A comprehensive repair manual covering various Honda Element models and years.
- Chilton Repair Manual: Another popular repair manual offering detailed information on Element maintenance and repairs.
- Honda Service Manual: The official service manual from Honda, providing the most accurate and up-to-date information.
10.3 Local Mechanics and Repair Shops
Local mechanics and repair shops can provide expert assistance with Element OBD2 diagnostics and repairs. Choose a reputable shop with experienced technicians who are familiar with Honda vehicles.
- ASE-Certified Mechanics: Look for mechanics who are certified by the National Institute for Automotive Service Excellence (ASE).
- Honda Specialists: Consider finding a shop that specializes in Honda vehicles.
10.4 Online Databases and Search Engines
Online databases and search engines can help you find information on Element OBD2 trouble codes, diagnostic procedures, and repair solutions.
- OBD-Codes.com: A comprehensive database of OBD2 trouble codes with detailed descriptions and possible causes.
- Google: Use Google to search for specific Element OBD2 issues or questions.
10.5 Expert Support from MERCEDES-DIAGNOSTIC-TOOL.EDU.VN
MERCEDES-DIAGNOSTIC-TOOL.EDU.VN offers expert support and resources for Element OBD2 diagnostics and repairs. Contact us for personalized assistance and guidance.
- Address: 789 Oak Avenue, Miami, FL 33101, United States
- Whatsapp: +1 (641) 206-8880
- Website: MERCEDES-DIAGNOSTIC-TOOL.EDU.VN
By leveraging these resources and support options, you can effectively diagnose and maintain your Element OBD2 system, ensuring your vehicle runs smoothly and reliably.
Is your Mercedes-Benz acting up? Don’t let error codes keep you guessing. Contact MERCEDES-DIAGNOSTIC-TOOL.EDU.VN today at 789 Oak Avenue, Miami, FL 33101, United States, or via Whatsapp at +1 (641) 206-8880 for expert diagnostics and solutions. Visit our website at MERCEDES-DIAGNOSTIC-TOOL.EDU.VN to learn more.