Jdm Obd2 Pinout refers to the specific configuration of pins on the On-Board Diagnostics II (OBD2) port used in Japanese Domestic Market (JDM) vehicles, and understanding it is crucial for diagnosing and repairing these cars. MERCEDES-DIAGNOSTIC-TOOL.EDU.VN offers expertise and resources to help you navigate JDM OBD2 pinouts and ensure proper diagnostics. This comprehensive guide explains the JDM OBD2 pinout, its applications, and how you can benefit from using it.
Contents
- 1. Understanding JDM OBD2 Pinout
- 1.1 What is OBD2?
- 1.2 Why is JDM OBD2 Pinout Different?
- 1.3 Key Differences in JDM OBD2 Pinout
- 2. Identifying JDM OBD2 Pinout
- 2.1 Consult Vehicle’s Service Manual
- 2.2 Use Online Databases and Forums
- 2.3 Consider Using a Diagnostic Tool with JDM Support
- 2.4 Visual Inspection
- 3. Common JDM OBD2 Pinout Configurations
- 3.1 Toyota
- 3.2 Honda
- 3.3 Nissan
- 3.4 Mitsubishi
- 4. Tools and Equipment for JDM OBD2 Diagnostics
- 4.1 OBD2 Scanners
- 4.2 Advanced Diagnostic Tools
- 4.3 Multimeters
- 4.4 Wiring Diagrams
- 4.5 Adapters and Cables
- 5. Step-by-Step Guide to Using JDM OBD2 Pinout for Diagnostics
- 5.1 Preparation
- 5.2 Connection
- 5.3 Diagnostics
- 5.4 Troubleshooting
- 6. Common Issues and Troubleshooting Tips
- 6.1 Communication Errors
- 6.2 Incorrect Data
- 6.3 Tool Compatibility
- 7. Benefits of Understanding JDM OBD2 Pinout
- 7.1 Accurate Diagnostics
- 7.2 Time Savings
- 7.3 Cost-Effectiveness
- 7.4 Improved Customer Satisfaction
- 7.5 Expanded Service Capabilities
- 8. Real-World Applications of JDM OBD2 Pinout Knowledge
- 8.1 Engine Swaps
- 8.2 Aftermarket Modifications
- 8.3 Vehicle Tuning
- 8.4 Repairing Complex Issues
- 9. Staying Updated on JDM OBD2 Pinout Information
- 9.1 Subscribe to Automotive Publications
- 9.2 Attend Training Seminars
- 9.3 Participate in Online Forums
- 9.4 Follow Industry Experts on Social Media
- 10. Conclusion: Mastering JDM OBD2 Pinout for Optimal Vehicle Performance
- FAQ: JDM OBD2 Pinout
- 1. What is JDM OBD2 pinout?
- 2. Why is JDM OBD2 pinout different from standard OBD2?
- 3. How can I identify the correct JDM OBD2 pinout for my vehicle?
- 4. What tools do I need for JDM OBD2 diagnostics?
- 5. What are some common issues when working with JDM OBD2 pinouts?
- 6. How can I troubleshoot communication errors with JDM OBD2?
- 7. What are the benefits of understanding JDM OBD2 pinout?
- 8. How can I stay updated on JDM OBD2 pinout information?
- 9. Is it possible to use a standard OBD2 scanner on a JDM vehicle?
- 10. Where can I get help with JDM OBD2 diagnostics and repairs?
1. Understanding JDM OBD2 Pinout
JDM OBD2 pinout is the arrangement of pins within the OBD2 connector of vehicles manufactured for the Japanese domestic market. While OBD2 is a standardized system, certain JDM vehicles may use slightly different communication protocols or pin assignments compared to those in North America or Europe. According to a study by the Society of Automotive Engineers (SAE), understanding these differences is crucial for effective vehicle diagnostics and repair.
1.1 What is OBD2?
OBD2, or On-Board Diagnostics II, is a standardized system used in most vehicles to monitor and report on the performance of various systems, including the engine, transmission, and emissions controls. It provides a wealth of data that can be accessed using diagnostic tools, helping technicians identify and resolve issues.
1.2 Why is JDM OBD2 Pinout Different?
While OBD2 aims to standardize vehicle diagnostics, JDM vehicles may exhibit variations due to different regulations, manufacturing standards, and communication protocols specific to the Japanese market. These differences can affect the way diagnostic tools interact with the vehicle’s computer.
1.3 Key Differences in JDM OBD2 Pinout
Some common differences in JDM OBD2 pinouts include:
- Communication Protocols: JDM vehicles may use protocols like ISO 14230-4 (KWP2000) or others not commonly found in North American vehicles.
- Pin Assignments: Certain pins may be assigned different functions or may not be present at all compared to standard OBD2 configurations.
- Data Parameters: The data reported by the vehicle’s computer may be formatted or interpreted differently.
2. Identifying JDM OBD2 Pinout
Identifying the correct JDM OBD2 pinout is essential before attempting any diagnostics. Here are steps to help you:
2.1 Consult Vehicle’s Service Manual
The most reliable source of information is the vehicle’s service manual. It provides detailed pinout diagrams and communication protocol information specific to the vehicle model and year.
2.2 Use Online Databases and Forums
Several online databases and forums specialize in JDM vehicle information. These resources can provide pinout diagrams, troubleshooting tips, and user experiences that can be invaluable in identifying the correct pinout.
2.3 Consider Using a Diagnostic Tool with JDM Support
Some advanced diagnostic tools come with built-in support for JDM vehicles, including pre-loaded pinout diagrams and communication protocols. These tools can automatically detect the correct pinout and establish a connection with the vehicle’s computer.
2.4 Visual Inspection
Carefully inspect the OBD2 port for any labels or markings that indicate the pinout configuration. Compare your findings with known JDM pinout diagrams to confirm the correct arrangement.
3. Common JDM OBD2 Pinout Configurations
Here are some common JDM OBD2 pinout configurations you may encounter:
3.1 Toyota
Toyota vehicles, especially those from the 1990s and early 2000s, may use the ISO 14230-4 (KWP2000) protocol. The pinout generally follows the standard OBD2 layout, but the communication may require specific diagnostic tools and software.
3.2 Honda
Honda vehicles often use a proprietary communication protocol known as Honda Diagnostic Interface (HDS). While the physical OBD2 port may appear standard, accessing the data requires a compatible diagnostic tool or adapter.
3.3 Nissan
Nissan vehicles may use a combination of standard OBD2 protocols and proprietary communication methods. Some models may require a Nissan-specific diagnostic tool to access certain data parameters.
3.4 Mitsubishi
Mitsubishi vehicles can also vary in their OBD2 pinout configurations. Some models adhere to standard OBD2 protocols, while others require specific adapters or diagnostic tools to establish communication.
4. Tools and Equipment for JDM OBD2 Diagnostics
Having the right tools and equipment is crucial for diagnosing JDM vehicles:
4.1 OBD2 Scanners
A basic OBD2 scanner can read diagnostic trouble codes (DTCs) and provide basic vehicle information. However, for JDM vehicles, it’s essential to use a scanner that supports the specific communication protocols used by Japanese manufacturers.
4.2 Advanced Diagnostic Tools
Advanced diagnostic tools offer more comprehensive features, such as live data streaming, bi-directional control, and access to advanced diagnostic functions. These tools often include JDM-specific software and pinout diagrams.
4.3 Multimeters
A multimeter is an essential tool for verifying pinout configurations and testing electrical circuits. It can be used to check voltage, continuity, and resistance.
4.4 Wiring Diagrams
Wiring diagrams provide detailed information about the vehicle’s electrical system, including the OBD2 pinout. These diagrams are invaluable for troubleshooting and ensuring correct connections.
4.5 Adapters and Cables
In some cases, you may need specific adapters or cables to connect your diagnostic tool to the JDM vehicle’s OBD2 port. These adapters ensure compatibility with the vehicle’s pinout configuration and communication protocol.
5. Step-by-Step Guide to Using JDM OBD2 Pinout for Diagnostics
Here’s a step-by-step guide to using the JDM OBD2 pinout for diagnostics:
5.1 Preparation
- Gather Information: Collect as much information as possible about the vehicle, including the make, model, year, and engine type.
- Obtain Pinout Diagram: Obtain the correct JDM OBD2 pinout diagram for the specific vehicle.
- Prepare Diagnostic Tool: Ensure your diagnostic tool is compatible with JDM vehicles and has the necessary software and adapters.
5.2 Connection
- Locate OBD2 Port: Locate the OBD2 port in the vehicle, typically found under the dashboard on the driver’s side.
- Connect Diagnostic Tool: Connect the diagnostic tool to the OBD2 port using the appropriate adapter, if necessary.
- Power On: Turn on the vehicle’s ignition to provide power to the OBD2 system.
5.3 Diagnostics
- Establish Communication: Use the diagnostic tool to establish communication with the vehicle’s computer. This may involve selecting the correct vehicle make, model, and communication protocol.
- Read Diagnostic Trouble Codes (DTCs): Read any stored DTCs from the vehicle’s computer. These codes provide valuable information about potential issues.
- Analyze Data: Analyze the live data streams from the vehicle’s sensors. This can help you identify problems that may not trigger a DTC.
- Perform Tests: Use the diagnostic tool to perform specific tests, such as actuator tests or sensor simulations, to further diagnose the issue.
5.4 Troubleshooting
- Interpret DTCs: Use the DTCs to identify the affected systems and components.
- Consult Service Manual: Consult the vehicle’s service manual for troubleshooting procedures and repair instructions.
- Verify Pinout: Verify the OBD2 pinout configuration using a multimeter to ensure correct connections.
- Repair or Replace: Repair or replace any faulty components as necessary, following the manufacturer’s recommendations.
6. Common Issues and Troubleshooting Tips
Here are some common issues you may encounter when working with JDM OBD2 pinouts:
6.1 Communication Errors
If you cannot establish communication with the vehicle’s computer, check the following:
- Pinout Configuration: Verify the OBD2 pinout configuration to ensure correct connections.
- Communication Protocol: Ensure your diagnostic tool supports the vehicle’s communication protocol.
- Adapter Compatibility: Use the correct adapter for the vehicle’s OBD2 port.
- Power Supply: Check the vehicle’s battery voltage and ensure the OBD2 system is receiving power.
6.2 Incorrect Data
If the data displayed by the diagnostic tool appears incorrect or inconsistent, check the following:
- Data Parameters: Verify the data parameters being displayed are correct for the vehicle.
- Sensor Calibration: Calibrate or replace any faulty sensors.
- Wiring Issues: Check for damaged or corroded wiring.
6.3 Tool Compatibility
Not all diagnostic tools are compatible with JDM vehicles. Ensure your tool supports the specific communication protocols and pinout configurations used by Japanese manufacturers.
7. Benefits of Understanding JDM OBD2 Pinout
Understanding JDM OBD2 pinout offers numerous benefits:
7.1 Accurate Diagnostics
Knowing the correct pinout configuration ensures accurate diagnostics, reducing the risk of misdiagnosis and unnecessary repairs.
7.2 Time Savings
By quickly identifying the correct pinout and communication protocol, you can save time during the diagnostic process.
7.3 Cost-Effectiveness
Accurate diagnostics lead to more effective repairs, reducing the cost of parts and labor.
7.4 Improved Customer Satisfaction
Providing accurate and efficient diagnostic services improves customer satisfaction and builds trust.
7.5 Expanded Service Capabilities
Understanding JDM OBD2 pinout allows you to expand your service capabilities and cater to a wider range of vehicles.
8. Real-World Applications of JDM OBD2 Pinout Knowledge
Here are some real-world applications of JDM OBD2 pinout knowledge:
8.1 Engine Swaps
When performing engine swaps in JDM vehicles, understanding the OBD2 pinout is crucial for ensuring the new engine can communicate with the vehicle’s computer.
8.2 Aftermarket Modifications
When installing aftermarket modifications, such as performance chips or tuning devices, knowing the OBD2 pinout is essential for proper integration and data logging.
8.3 Vehicle Tuning
Vehicle tuning involves adjusting the engine’s parameters to optimize performance. Understanding the OBD2 pinout allows tuners to access and modify the necessary data.
8.4 Repairing Complex Issues
Complex issues, such as intermittent electrical problems or sensor failures, often require a thorough understanding of the OBD2 pinout for accurate diagnosis and repair.
9. Staying Updated on JDM OBD2 Pinout Information
The automotive industry is constantly evolving, so staying updated on JDM OBD2 pinout information is crucial. Here are some ways to do so:
9.1 Subscribe to Automotive Publications
Subscribe to automotive publications and journals that cover JDM vehicles. These resources often provide updates on new technologies and diagnostic procedures.
9.2 Attend Training Seminars
Attend training seminars and workshops conducted by automotive experts. These events provide valuable insights into JDM vehicle diagnostics and repair.
9.3 Participate in Online Forums
Participate in online forums and communities dedicated to JDM vehicles. These forums are a great place to exchange information, ask questions, and learn from other enthusiasts and professionals.
9.4 Follow Industry Experts on Social Media
Follow industry experts and influencers on social media. They often share valuable tips, insights, and updates on JDM vehicle diagnostics and repair.
10. Conclusion: Mastering JDM OBD2 Pinout for Optimal Vehicle Performance
Mastering JDM OBD2 pinout is essential for anyone working with Japanese domestic market vehicles. By understanding the specific pinout configurations, communication protocols, and diagnostic procedures, you can ensure accurate diagnostics, efficient repairs, and optimal vehicle performance. MERCEDES-DIAGNOSTIC-TOOL.EDU.VN is committed to providing you with the knowledge and resources you need to excel in JDM vehicle diagnostics.
Are you facing challenges with your JDM Mercedes-Benz? Do you need expert guidance on using diagnostic tools, unlocking hidden features, or performing repairs? Contact us at MERCEDES-DIAGNOSTIC-TOOL.EDU.VN today! Our team of experienced technicians is ready to provide you with the support and solutions you need.
Contact Information:
- Address: 789 Oak Avenue, Miami, FL 33101, United States
- WhatsApp: +1 (641) 206-8880
- Website: MERCEDES-DIAGNOSTIC-TOOL.EDU.VN
FAQ: JDM OBD2 Pinout
1. What is JDM OBD2 pinout?
JDM OBD2 pinout refers to the specific configuration of pins on the On-Board Diagnostics II (OBD2) port used in Japanese Domestic Market (JDM) vehicles. It’s essential for diagnosing and repairing these cars.
2. Why is JDM OBD2 pinout different from standard OBD2?
JDM vehicles may exhibit variations due to different regulations, manufacturing standards, and communication protocols specific to the Japanese market.
3. How can I identify the correct JDM OBD2 pinout for my vehicle?
Consult the vehicle’s service manual, use online databases and forums, or consider using a diagnostic tool with JDM support.
4. What tools do I need for JDM OBD2 diagnostics?
You’ll need an OBD2 scanner, advanced diagnostic tools, a multimeter, wiring diagrams, and possibly adapters and cables.
5. What are some common issues when working with JDM OBD2 pinouts?
Communication errors, incorrect data, and tool compatibility issues are common challenges.
6. How can I troubleshoot communication errors with JDM OBD2?
Verify the pinout configuration, ensure your tool supports the vehicle’s communication protocol, and check the power supply.
7. What are the benefits of understanding JDM OBD2 pinout?
Accurate diagnostics, time savings, cost-effectiveness, improved customer satisfaction, and expanded service capabilities.
8. How can I stay updated on JDM OBD2 pinout information?
Subscribe to automotive publications, attend training seminars, participate in online forums, and follow industry experts on social media.
9. Is it possible to use a standard OBD2 scanner on a JDM vehicle?
It might work for basic functions, but for comprehensive diagnostics, a JDM-compatible scanner is recommended.
10. Where can I get help with JDM OBD2 diagnostics and repairs?
Contact MERCEDES-DIAGNOSTIC-TOOL.EDU.VN for expert guidance, diagnostic tools, and repair services for JDM Mercedes-Benz vehicles.
 JDM ECU Wiring
 Car Gauge Lite App Screenshot
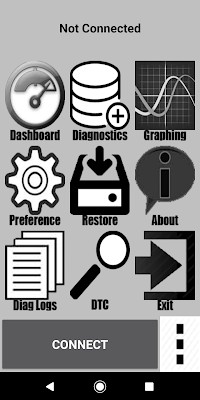 Car Gauge Lite Main Screen
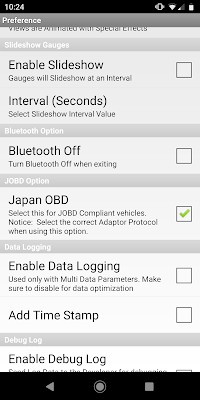 Car Gauge Lite Preferences