Connecting your Mercedes-Benz multiplexer to both your vehicle and laptop is essential for accurate diagnostics and coding. This guide, provided by MERCEDES-DIAGNOSTIC-TOOL.EDU.VN, details the steps to seamlessly establish this connection. Ensure smooth communication between your diagnostic tools and your Mercedes-Benz by understanding the intricacies of multiplexer connectivity, including proper cable usage, software configuration, and potential troubleshooting steps. This process involves proper interfaces, diagnostic software setup, and secure data transmission.
Contents
- 1. Understanding the Mercedes-Benz Multiplexer Connection
- 1.1. What is a Multiplexer?
- 1.2. Key Components for Connection
- 1.3. Importance of Correct Connections
- 1.4. Common Connection Interfaces
- 2. Preparing for the Connection
- 2.1. Software Installation and Setup
- 2.2. Gathering Necessary Hardware
- 2.3. Ensuring Compatibility
- 3. Connecting the Multiplexer to the Vehicle
- 3.1. Locating the OBD-II Port
- 3.2. Connecting the OBD-II Cable
- 3.3. Verifying the Connection
- 4. Connecting the Multiplexer to the Laptop
- 4.1. Wired Connection via Ethernet Cable
- 4.1.1. Steps for Establishing an Ethernet Connection
- 4.1.2. Benefits of Using Ethernet Connection
- 4.2. Wireless Connection via Wi-Fi
- 4.2.1. Steps for Configuring Wi-Fi Connection
- 4.2.2. Troubleshooting Wi-Fi Connection Issues
- 4.3. Verifying Connection in Diagnostic Software
- 5. Performing Diagnostic Tests
- 5.1. Reading Fault Codes
- 5.2. Viewing Live Data
- 5.3. Performing Actuation Tests
- 6. Advanced Diagnostic Procedures
- 6.1. ECU Programming and Coding
- 6.2. Adaptation Resets
- 6.3. Unlocking Hidden Features
- 7. Maintaining the Multiplexer and Connections
- 7.1. Regular Cleaning and Inspection
- 7.2. Software Updates
- 7.3. Proper Storage
- 8. Common Troubleshooting Tips
- 8.1. Connection Errors
- 8.2. Software Issues
- 8.3. Vehicle Communication Problems
- 9. Frequently Asked Questions (FAQs)
- 10. Why Choose MERCEDES-DIAGNOSTIC-TOOL.EDU.VN?
1. Understanding the Mercedes-Benz Multiplexer Connection
Connecting a multiplexer to your Mercedes-Benz vehicle and laptop involves a few key steps to ensure accurate diagnostic communication. The multiplexer acts as a bridge, translating data between your car’s systems and the diagnostic software on your computer. This connection is crucial for reading error codes, performing calibrations, and even unlocking hidden features. Whether you’re a seasoned technician or a passionate Mercedes enthusiast, grasping the connection process empowers you to maintain and optimize your vehicle effectively.
To fully comprehend the Mercedes-Benz multiplexer connection, it’s important to know the main connection types. These connections guarantee the proper transmission of data between the vehicle’s onboard systems and the diagnostic tools.
1.1. What is a Multiplexer?
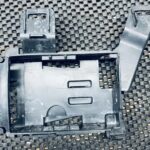
A multiplexer is a device that combines multiple signals into one for transmission over a single channel. In the context of automotive diagnostics, a multiplexer allows a diagnostic tool to communicate with various electronic control units (ECUs) within a vehicle through a single connection.
1.2. Key Components for Connection
To connect your Mercedes-Benz multiplexer, you will typically need:
- A Mercedes-Benz compatible multiplexer (e.g., SD Connect C4 or newer)
- Diagnostic software such as XENTRY or DAS (Diagnostic Assistance System) installed on a laptop.
- An OBD-II cable to connect the multiplexer to the vehicle’s diagnostic port.
- A network cable (Ethernet) or Wi-Fi connection for connecting the multiplexer to the laptop.
1.3. Importance of Correct Connections
Establishing correct connections ensures reliable communication between the diagnostic software and the vehicle’s ECUs. Incorrect connections can lead to:
- Inaccurate diagnostic readings
- Communication errors
- Potential damage to the vehicle’s electronic systems
1.4. Common Connection Interfaces
Mercedes-Benz diagnostic multiplexers typically use the following interfaces:
- OBD-II Port: This is the standard diagnostic port found in most modern vehicles. It provides a physical connection to the vehicle’s ECUs.
- Ethernet Port: Used for a wired connection between the multiplexer and the laptop, offering a stable and fast data transfer.
- Wi-Fi: Allows for a wireless connection, providing flexibility and mobility during diagnostics.
2. Preparing for the Connection
Before connecting your multiplexer to the vehicle and laptop, some preparation is necessary to ensure a smooth process. This includes installing the necessary software, gathering the required hardware, and confirming compatibility.
2.1. Software Installation and Setup
Proper software setup is crucial for successful diagnostics. Here’s how to ensure your software is ready:
- Install Diagnostic Software:
- Insert the software installation disc or run the downloaded setup file.
- Follow the on-screen instructions to install XENTRY or DAS on your laptop.
- Ensure that you have the necessary licenses and activation keys.
- Update Software:
- Check for updates after installation.
- Download and install any available updates to ensure compatibility and access to the latest features.
- Configure Software Settings:
- Launch the diagnostic software and navigate to the settings menu.
- Configure the software to recognize the multiplexer.
- Select the appropriate communication interface (e.g., Ethernet or Wi-Fi).
2.2. Gathering Necessary Hardware
Collect all the necessary hardware to avoid interruptions during the connection process:
- Multiplexer: Ensure that you have a compatible Mercedes-Benz multiplexer, such as the SD Connect C4 or newer models.
- OBD-II Cable: Use a high-quality OBD-II cable to connect the multiplexer to the vehicle’s diagnostic port.
- Ethernet Cable: Have an Ethernet cable ready for a wired connection between the multiplexer and the laptop.
- Laptop: Use a laptop that meets the minimum system requirements for the diagnostic software.
- Power Source: Ensure the multiplexer is powered, either through the OBD-II port or an external power supply.
2.3. Ensuring Compatibility
Confirming compatibility between your hardware and software is essential:
- Check Multiplexer Compatibility:
- Verify that the multiplexer is compatible with your Mercedes-Benz model and year.
- Refer to the multiplexer’s documentation or the manufacturer’s website for compatibility information.
- Software Version Compatibility:
- Ensure that the diagnostic software version is compatible with the multiplexer.
- Some multiplexers may require specific software versions to function correctly.
- System Requirements:
- Check that your laptop meets the minimum system requirements for the diagnostic software.
- Insufficient system resources can lead to performance issues and communication errors.
3. Connecting the Multiplexer to the Vehicle
Connecting the multiplexer to your Mercedes-Benz involves a straightforward process. Following these steps ensures a reliable connection for diagnostics.
3.1. Locating the OBD-II Port
The OBD-II (On-Board Diagnostics II) port is typically located under the dashboard on the driver’s side. Common locations include:
- Below the steering wheel column
- Inside the glove compartment
- Near the center console
Refer to your vehicle’s manual if you have trouble locating the port.
3.2. Connecting the OBD-II Cable
Once you have located the OBD-II port:
- Ensure that the vehicle’s ignition is turned off.
- Plug one end of the OBD-II cable into the multiplexer.
- Plug the other end of the OBD-II cable into the vehicle’s OBD-II port.
- Ensure the connection is secure.
Alt Text: Connecting the OBD-II cable to the diagnostic port in a Mercedes-Benz vehicle.
3.3. Verifying the Connection
After connecting the OBD-II cable, verify that the multiplexer is receiving power:
- Check for indicator lights on the multiplexer.
- The lights should illuminate, indicating that the multiplexer is powered on.
- If there are no lights, check the OBD-II port for any damage or debris.
- Ensure the vehicle’s battery is charged, as a low battery can sometimes prevent the multiplexer from powering on.
4. Connecting the Multiplexer to the Laptop
Connecting the multiplexer to your laptop can be achieved through either a wired (Ethernet) or wireless (Wi-Fi) connection. Each method has its advantages and specific setup steps.
4.1. Wired Connection via Ethernet Cable
A wired connection via Ethernet cable offers a stable and reliable data transfer. This method is preferred for critical diagnostic procedures and software updates.
4.1.1. Steps for Establishing an Ethernet Connection
-
Connect the Ethernet Cable:
- Plug one end of the Ethernet cable into the Ethernet port on the multiplexer.
- Plug the other end into the Ethernet port on your laptop.
-
Configure Network Settings:
- Access Network Settings:
- Open the Control Panel on your laptop.
- Navigate to Network and Internet, then Network and Sharing Center.
- Click on “Change adapter settings.”
- Configure Ethernet Adapter:
- Right-click on the Ethernet adapter and select “Properties.”
- Select “Internet Protocol Version 4 (TCP/IPv4)” and click “Properties.”
- Choose “Use the following IP address.”
- Enter the following IP address, subnet mask, and default gateway:
- IP address: 192.168.2.100
- Subnet mask: 255.255.255.0
- Default gateway: 192.168.2.1
- Click “OK” to save the settings.
- Access Network Settings:
-
Test the Connection:
- Open a command prompt on your laptop.
- Type
ping 192.168.2.1and press Enter. - If the connection is successful, you should see replies from the multiplexer.
4.1.2. Benefits of Using Ethernet Connection
- Stability: Ethernet connections are less prone to interference and provide a more stable connection compared to Wi-Fi.
- Speed: Ethernet offers faster data transfer rates, which is beneficial for large data transfers during software updates and diagnostics.
- Security: Wired connections are generally more secure than wireless connections, reducing the risk of unauthorized access.
4.2. Wireless Connection via Wi-Fi
A wireless connection via Wi-Fi offers greater flexibility and mobility. This method is suitable for general diagnostics and when a wired connection is not feasible.
4.2.1. Steps for Configuring Wi-Fi Connection
-
Access Multiplexer Settings:
- Connect the multiplexer to the laptop via Ethernet cable.
- Open the SDconnect Toolkit on your computer.
- Go to “Administration” and select the multiplexer device from the list.
- Click on “Configuration” or “Settings.”
-
Configure Wi-Fi Settings:
- Select the option for WLAN (Wi-Fi) settings.
- Choose your Wi-Fi network from the list (it should be the same network your computer is connected to).
- Enter your Wi-Fi password (if applicable) and confirm.
- Set the connection mode to “Infrastructure Mode” for a connection via a router, or “Ad-Hoc Mode” for a direct connection to the laptop.
-
Disconnect Ethernet and Restart:
- After configuring the Wi-Fi settings, disconnect the Ethernet cable.
- Restart the C4 multiplexer.
- Allow the multiplexer to connect to the Wi-Fi network. The screen on the C4 multiplexer will display a WLAN connection icon once it’s connected successfully.
-
Check Connection on Computer:
- Open the SDconnect Toolkit again on your laptop.
- Click on “Administration,” and you should now see the C4 multiplexer listed as a device connected via WLAN.
- If it’s connected correctly, the device status should show a green icon.
4.2.2. Troubleshooting Wi-Fi Connection Issues
- Check Wi-Fi Signal Strength: Ensure that the Wi-Fi signal strength is strong enough for a stable connection.
- Verify Network Credentials: Double-check that you have entered the correct Wi-Fi password.
- Reboot Devices: Try rebooting both the multiplexer and the laptop.
- Firewall Settings: Check your firewall settings to ensure it’s not blocking the communication between the multiplexer and the laptop.
4.3. Verifying Connection in Diagnostic Software
After connecting the multiplexer to the laptop, verify the connection within the diagnostic software:
- Launch Diagnostic Software: Open XENTRY or DAS on your laptop.
- Select Multiplexer: Navigate to the settings or configuration menu.
- Select the connected multiplexer from the list of available devices.
- Test Connection: Use the software’s built-in diagnostic tools to test the connection.
- Read Vehicle Information: Attempt to read vehicle information, such as the VIN (Vehicle Identification Number) and ECU data.
- Successful communication indicates that the multiplexer is correctly connected and functioning properly.
5. Performing Diagnostic Tests
Once the multiplexer is successfully connected to both the vehicle and the laptop, you can begin performing diagnostic tests. This involves using the diagnostic software to read fault codes, view live data, and perform actuation tests.
5.1. Reading Fault Codes
Reading fault codes is a fundamental diagnostic procedure that helps identify issues within the vehicle’s systems:
- Access Fault Code Menu:
- In the diagnostic software, navigate to the fault code menu.
- Select the system you want to diagnose (e.g., engine, transmission, ABS).
- Read and Interpret Codes:
- Initiate the fault code reading process.
- The software will display any stored fault codes along with descriptions.
- Refer to the vehicle’s service manual or online resources for detailed information about each code.
- Clear Fault Codes:
- After addressing the underlying issues, clear the fault codes from the system.
- Monitor the system to ensure that the codes do not reappear.
5.2. Viewing Live Data
Viewing live data allows you to monitor the real-time performance of various vehicle components:
- Access Live Data Menu:
- In the diagnostic software, navigate to the live data menu.
- Select the parameters you want to monitor (e.g., engine RPM, coolant temperature, oxygen sensor readings).
- Analyze Data:
- Observe the data streams to identify any abnormalities or deviations from expected values.
- Compare the data to specifications in the service manual.
- Troubleshoot Issues:
- Use the live data to diagnose intermittent issues or performance problems.
- For example, monitoring oxygen sensor readings can help diagnose fuel mixture issues.
5.3. Performing Actuation Tests
Actuation tests allow you to activate specific components to verify their functionality:
- Access Actuation Test Menu:
- In the diagnostic software, navigate to the actuation test menu.
- Select the component you want to test (e.g., fuel pump, injectors, cooling fan).
- Run Tests:
- Initiate the actuation test.
- The software will activate the component and provide feedback.
- Verify Functionality:
- Observe the component to ensure it is functioning correctly.
- Listen for the fuel pump running, watch for injector pulses, or check for fan operation.
- Use actuation tests to isolate and diagnose component failures.
6. Advanced Diagnostic Procedures
Beyond basic diagnostics, advanced procedures allow for deeper analysis and customization of your Mercedes-Benz. These include ECU programming, adaptation resets, and unlocking hidden features.
6.1. ECU Programming and Coding
ECU (Engine Control Unit) programming and coding involve modifying the software within the vehicle’s control modules:
- Access Programming Menu:
- In the diagnostic software, navigate to the ECU programming menu.
- Select the module you want to program or code.
- Perform Programming:
- Follow the on-screen instructions to upload new software or modify existing settings.
- Ensure that you have the correct software files and licenses.
- Verify Programming:
- After programming, verify that the changes have been applied correctly.
- Test the functionality of the affected systems to ensure proper operation.
6.2. Adaptation Resets
Adaptation resets involve clearing stored adaptation values in various control modules:
- Access Adaptation Reset Menu:
- In the diagnostic software, navigate to the adaptation reset menu.
- Select the module you want to reset (e.g., transmission, throttle body).
- Perform Reset:
- Follow the on-screen instructions to perform the adaptation reset.
- The software will clear the stored values and initiate a relearning process.
- Drive Cycle:
- After the reset, perform a drive cycle to allow the module to relearn the necessary parameters.
- Follow the recommended drive cycle procedure in the service manual.
6.3. Unlocking Hidden Features
Many Mercedes-Benz vehicles have hidden features that can be unlocked through coding:
- Access Coding Menu:
- In the diagnostic software, navigate to the coding menu.
- Select the module you want to code.
- Modify Settings:
- Change the coding values to enable or disable specific features.
- Common hidden features include:
- Activating cornering lights
- Enabling enhanced display options
- Adjusting ambient lighting settings
- Test Features:
- After coding, test the new features to ensure they are functioning correctly.
If you’re eager to explore hidden functionalities and tailor your driving experience, MERCEDES-DIAGNOSTIC-TOOL.EDU.VN offers expert guidance and support for unlocking hidden features on your Mercedes-Benz.
7. Maintaining the Multiplexer and Connections
Proper maintenance of your multiplexer and connections ensures reliable performance and prolongs the lifespan of your diagnostic equipment.
7.1. Regular Cleaning and Inspection
Regular cleaning and inspection of the multiplexer and cables can prevent connectivity issues:
- Clean Connectors:
- Use a clean, dry cloth to wipe the connectors on the multiplexer and cables.
- Remove any dirt, dust, or corrosion.
- Inspect Cables:
- Check the cables for any signs of damage, such as cuts, fraying, or exposed wires.
- Replace damaged cables immediately.
- Check OBD-II Port:
- Inspect the OBD-II port on the vehicle for any damage or debris.
- Clean the port if necessary.
7.2. Software Updates
Keeping your diagnostic software up-to-date ensures compatibility with the latest vehicle models and features:
- Check for Updates:
- Regularly check for software updates from the software vendor.
- Download and Install:
- Download and install any available updates.
- Read Release Notes:
- Read the release notes to understand the changes and new features included in the update.
7.3. Proper Storage
Proper storage of the multiplexer and cables protects them from damage:
- Store in a Clean, Dry Place:
- Store the multiplexer and cables in a clean, dry place away from extreme temperatures and humidity.
- Use Protective Cases:
- Use protective cases or bags to prevent damage during storage and transportation.
- Avoid Tangling Cables:
- Coil the cables loosely to avoid tangling and strain on the connectors.
8. Common Troubleshooting Tips
Even with careful preparation, you may encounter issues when connecting the multiplexer. Here are some common troubleshooting tips:
8.1. Connection Errors
- Verify Connections: Ensure that all cables are securely connected.
- Restart Devices: Try restarting the multiplexer and the laptop.
- Check IP Address: Verify that the IP address settings are correct for a wired connection.
- Firewall Settings: Check your firewall settings to ensure they are not blocking the connection.
8.2. Software Issues
- Reinstall Software: Try reinstalling the diagnostic software.
- Update Drivers: Ensure that you have the latest drivers for the multiplexer.
- Check Compatibility: Verify that the software is compatible with your multiplexer and vehicle model.
8.3. Vehicle Communication Problems
- Check Vehicle Battery: Ensure that the vehicle’s battery is fully charged.
- Inspect OBD-II Port: Check the OBD-II port for damage or corrosion.
- Verify Multiplexer Power: Ensure that the multiplexer is receiving power.
9. Frequently Asked Questions (FAQs)
Q1: What is the best Mercedes diagnostic tool?
The best Mercedes diagnostic tool depends on your needs and budget. Options range from professional-grade systems like the Mercedes-Benz XENTRY to more affordable aftermarket tools.
Q2: How do I update my Mercedes diagnostic software?
Software updates are typically available through the diagnostic tool’s interface or the manufacturer’s website. Follow the on-screen instructions to download and install the latest version.
Q3: Can I use a generic OBD-II scanner on my Mercedes-Benz?
While some generic OBD-II scanners can read basic fault codes, they may not provide the comprehensive diagnostic capabilities of a Mercedes-Benz specific tool.
Q4: What does a Mercedes multiplexer do?
A Mercedes multiplexer allows a diagnostic tool to communicate with various electronic control units (ECUs) within a vehicle through a single connection.
Q5: How do I troubleshoot a connection error with my Mercedes multiplexer?
Verify all cable connections, restart devices, check IP address settings, and ensure firewall settings are not blocking the connection.
Q6: What are the benefits of using a wired Ethernet connection over Wi-Fi for diagnostics?
Ethernet connections offer greater stability, faster data transfer rates, and enhanced security compared to Wi-Fi.
Q7: How often should I update my Mercedes diagnostic software?
Regularly check for software updates, especially when new vehicle models are released or when addressing specific diagnostic issues.
Q8: Can I unlock hidden features on my Mercedes-Benz with a diagnostic tool?
Yes, many Mercedes-Benz vehicles have hidden features that can be unlocked through coding with a compatible diagnostic tool.
Q9: What should I do if my multiplexer is not recognized by the diagnostic software?
Ensure the multiplexer is properly connected, the correct drivers are installed, and the software is configured to recognize the device.
Q10: How do I perform an adaptation reset on my Mercedes-Benz?
Navigate to the adaptation reset menu in the diagnostic software, select the module you want to reset, and follow the on-screen instructions.
10. Why Choose MERCEDES-DIAGNOSTIC-TOOL.EDU.VN?
At MERCEDES-DIAGNOSTIC-TOOL.EDU.VN, we provide expert guidance, comprehensive resources, and top-quality diagnostic tools to help you maintain and optimize your Mercedes-Benz. Whether you’re a seasoned technician or a passionate enthusiast, we have the solutions you need to keep your vehicle running smoothly.
Our team is dedicated to providing personalized support and answering all your questions. We understand the complexities of Mercedes-Benz diagnostics and offer tailored solutions to meet your specific needs. We pride ourselves on delivering accurate, reliable information and high-quality products. Our commitment to customer satisfaction sets us apart in the world of Mercedes-Benz diagnostics.
Ready to take control of your Mercedes-Benz diagnostics? Contact us today at 789 Oak Avenue, Miami, FL 33101, United States, or reach out via WhatsApp at +1 (641) 206-8880. Visit our website at MERCEDES-DIAGNOSTIC-TOOL.EDU.VN to explore our wide range of diagnostic tools and services. Let us help you unlock the full potential of your Mercedes-Benz!