Coding a Parktronic ultrasonic sensor after replacement is often necessary to ensure proper functionality; MERCEDES-DIAGNOSTIC-TOOL.EDU.VN provides detailed procedures to facilitate accurate system integration. This coding process fine-tunes the sensor’s communication with the vehicle’s Parktronic system, optimizing its performance and reliability, and often requires specific diagnostic tools and software. Utilizing advanced diagnostic tools and adherence to Mercedes-Benz guidelines guarantees seamless operation of the parking assist system and sensor recalibration.
Contents
- 1. Understanding the Parktronic System
- Key Components of the Parktronic System
- How the Parktronic System Works
- Evolution of Parking Assistance Technology
- Benefits of the Parktronic System
- 2. Identifying the Need for Ultrasonic Sensor Replacement
- Common Symptoms of a Faulty Ultrasonic Sensor
- Diagnostic Steps to Confirm Sensor Issues
- Understanding Diagnostic Trouble Codes (DTCs)
- Environmental Factors Affecting Sensor Performance
- When to Consult a Professional
- 3. What Coding Is Needed When Replacing a Parktronic Ultrasonic Sensor?
- Why Coding Is Necessary
- Consequences of Not Coding
- Coding Procedures Overview
- Tools Required for Coding
- Expert Insights on Coding
- Potential Challenges and How to Overcome Them
- 4. Step-by-Step Guide to Parktronic Ultrasonic Sensor Replacement
- Step 1: Gather Necessary Tools and Materials
- Step 2: Prepare the Vehicle
- Step 3: Locate the Faulty Sensor
- Step 4: Remove the Bumper (If Necessary)
- Step 5: Access the Sensor
- Step 6: Remove the Faulty Sensor
- Step 7: Install the New Sensor
- Step 8: Reconnect the Wiring
- Step 9: Reinstall the Bumper (If Removed)
- Step 10: Coding the New Sensor
- Step 11: Test the System
- 5. Coding Procedures for Parktronic Sensors
- Prerequisites for Coding
- Step-by-Step Coding Procedure
- Coding Challenges and Solutions
- Expert Tips for Successful Coding
- 6. Tools Required for Parktronic Sensor Coding
- Essential Diagnostic Tools
- Software and Updates
- Additional Tools
- Choosing the Right Tools
- 7. Common Issues After Parktronic Sensor Replacement
- 1. System Malfunction Message
- 2. Inaccurate Distance Readings
- 3. Intermittent Sensor Function
- 4. Audible Alert Issues
- 5. Diagnostic Trouble Codes (DTCs)
- Expert Tips for Troubleshooting
- 8. Benefits of Proper Coding and Calibration
- 1. Enhanced Accuracy
- 2. Reliable Performance
- 3. Seamless Integration
- 4. Reduced False Alarms
- 5. Improved Safety
- 6. Extended Sensor Life
- 7. Optimal System Performance
- Expert Insights on Benefits
- Real-World Examples
- 9. Advanced Diagnostic Techniques for Parktronic Systems
- 1. Real-Time Data Analysis
- 2. Wiring Integrity Testing
- 3. Signal Pattern Analysis
- 4. Environmental Simulation
- 5. Component Isolation
- Expert Insights on Advanced Diagnostics
- Real-World Applications
- 10. DIY vs. Professional Service: Choosing the Right Approach
- DIY Approach
- Advantages:
- Disadvantages:
Table of Contents
- Understanding the Parktronic System
- Identifying the Need for Ultrasonic Sensor Replacement
- What Coding Is Needed When Replacing A Parktronic Ultrasonic Sensor?
- Step-by-Step Guide to Parktronic Ultrasonic Sensor Replacement
- Coding Procedures for Parktronic Sensors
- Tools Required for Parktronic Sensor Coding
- Common Issues After Parktronic Sensor Replacement
- Benefits of Proper Coding and Calibration
- Advanced Diagnostic Techniques for Parktronic Systems
- DIY vs. Professional Service: Choosing the Right Approach
- Cost Analysis: Parktronic Sensor Replacement and Coding
- Maintenance Tips for Parktronic Systems
- Understanding Mercedes-Benz Diagnostic Tools
- Decoding Mercedes-Benz Error Codes
- Future Trends in Automotive Sensor Technology
- FAQ: Parktronic Ultrasonic Sensor Replacement and Coding
1. Understanding the Parktronic System
The Parktronic system, a sophisticated parking assistance feature in Mercedes-Benz vehicles, enhances safety and convenience by using ultrasonic sensors to detect obstacles around the car. These sensors, typically located in the front and rear bumpers, measure the distance to nearby objects and alert the driver through visual and audible signals. This helps prevent collisions during parking maneuvers, especially in tight spaces.
Key Components of the Parktronic System
- Ultrasonic Sensors: These are the primary components, emitting ultrasonic waves and receiving their reflections to determine distances.
- Control Unit: The central processing unit that interprets signals from the sensors and activates alerts.
- Display and Audible Alerts: Visual displays on the dashboard and audible tones that inform the driver of the proximity of obstacles.
- Wiring Harness: Connects all the components, ensuring seamless data transmission.
How the Parktronic System Works
The Parktronic system operates by emitting ultrasonic waves from the sensors. When these waves encounter an object, they bounce back to the sensors. The system calculates the distance based on the time it takes for the waves to return. If an object is detected within a certain range, the system alerts the driver. The frequency of the audible alerts increases as the vehicle gets closer to the object, providing real-time feedback to help the driver park safely.
Evolution of Parking Assistance Technology
Parking assistance technology has evolved significantly over the years. Early systems provided basic audible alerts, while modern systems offer more advanced features such as visual displays, automated steering, and even autonomous parking capabilities. According to a study by the University of Michigan Transportation Research Institute, advanced parking assistance systems can reduce parking-related accidents by up to 30%. This evolution reflects the increasing demand for safer and more convenient driving experiences.
Benefits of the Parktronic System
- Enhanced Safety: Reduces the risk of collisions during parking.
- Increased Convenience: Simplifies parking in tight spaces.
- Reduced Stress: Provides drivers with confidence and assistance.
- Protection of Vehicle: Minimizes potential damage from parking mishaps.
The Parktronic system exemplifies Mercedes-Benz’s commitment to innovation and safety, offering drivers a reliable and user-friendly parking assistance solution. Regular maintenance and prompt attention to sensor issues are essential to ensure the system’s continued effectiveness.
2. Identifying the Need for Ultrasonic Sensor Replacement
Recognizing when an ultrasonic sensor needs replacement is crucial for maintaining the effectiveness of your Mercedes-Benz Parktronic system. Several symptoms can indicate a faulty sensor, impacting the system’s overall reliability and performance. Addressing these issues promptly ensures the continued safety and convenience of your vehicle.
Common Symptoms of a Faulty Ultrasonic Sensor
- System Malfunction Message: The most direct sign is a warning message on the dashboard indicating a Parktronic system malfunction.
- Inconsistent Readings: The system may provide inaccurate distance readings, leading to false alarms or a failure to detect objects.
- Sensor Failure Indication: Specific diagnostic trouble codes (DTCs) related to individual sensors can be retrieved using a diagnostic tool.
- Audible Alert Issues: The system might produce constant beeping or no sound at all, regardless of nearby obstacles.
- Physical Damage: Visible cracks, dents, or dislodgement of the sensor can impair its functionality.
Diagnostic Steps to Confirm Sensor Issues
- Visual Inspection: Check each sensor for physical damage. Look for cracks, debris, or any signs of misalignment.
- Diagnostic Scan: Use a diagnostic tool like those available at MERCEDES-DIAGNOSTIC-TOOL.EDU.VN to scan the Parktronic system for error codes. Common codes include those indicating circuit malfunctions or signal issues with specific sensors.
- Sensor Testing: Some advanced diagnostic tools can perform individual sensor tests to evaluate their performance. This involves monitoring the sensor’s response to stimuli and comparing it to expected values.
- Wiring Check: Inspect the wiring and connectors associated with the sensors. Corrosion or loose connections can disrupt signal transmission.
Understanding Diagnostic Trouble Codes (DTCs)
DTCs provide valuable information about the nature of the problem. For example, a code indicating an open circuit in a sensor suggests a wiring issue or a completely failed sensor. A code indicating a signal plausibility error might point to a sensor that is providing inconsistent or nonsensical data. According to a study by the National Institute for Automotive Service Excellence (ASE), accurately interpreting DTCs can reduce diagnostic time by up to 40%.
Environmental Factors Affecting Sensor Performance
Environmental factors such as extreme temperatures, moisture, and road debris can affect the performance of ultrasonic sensors. For instance, ice or mud covering a sensor can block the ultrasonic waves, leading to inaccurate readings. Regular cleaning and maintenance can help mitigate these issues.
When to Consult a Professional
While some diagnostic steps can be performed independently, consulting a professional is advisable if:
- You are unfamiliar with using diagnostic tools.
- The problem persists after initial troubleshooting.
- You suspect a more complex issue involving the control unit or wiring harness.
Timely replacement of faulty ultrasonic sensors ensures the Parktronic system operates reliably, providing the safety and convenience expected from a Mercedes-Benz vehicle. Regular checks and proactive maintenance can prevent minor issues from escalating into major problems.
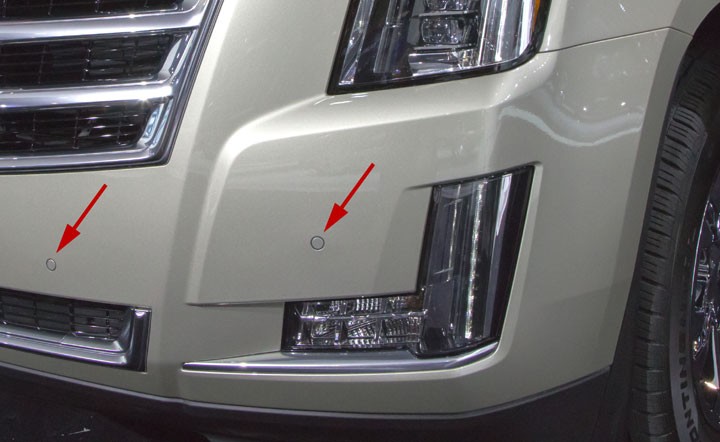 Damaged Parktronic Sensor
3. What Coding Is Needed When Replacing a Parktronic Ultrasonic Sensor?
When replacing a Parktronic ultrasonic sensor in a Mercedes-Benz, coding is often essential to ensure the new sensor communicates effectively with the vehicle’s system. Coding involves programming the vehicle’s control unit to recognize and properly interpret the signals from the new sensor. This process is crucial for maintaining the accuracy and reliability of the Parktronic system.
Why Coding Is Necessary
- Sensor Recognition: Coding ensures that the vehicle’s control unit recognizes the new sensor and integrates it into the existing system.
- Signal Calibration: Each sensor has unique characteristics. Coding calibrates the sensor’s signal to match the system’s expected parameters, ensuring accurate distance readings.
- System Harmony: Coding allows the new sensor to work in harmony with the other sensors in the system, preventing conflicts and ensuring seamless operation.
Consequences of Not Coding
- System Malfunction: The Parktronic system may not function correctly, leading to inaccurate readings or complete system failure.
- False Alarms: The system might generate false alarms, causing unnecessary stress and annoyance.
- Compromised Safety: Inaccurate readings can compromise safety, as the system may fail to detect obstacles accurately.
Coding Procedures Overview
- Diagnostic Scan: Use a diagnostic tool like those from MERCEDES-DIAGNOSTIC-TOOL.EDU.VN to scan the Parktronic system for any existing error codes.
- Sensor Identification: Identify the specific sensor that has been replaced. The diagnostic tool will need this information for the coding process.
- Coding Initialization: Initiate the coding procedure using the diagnostic tool. This typically involves entering specific codes or parameters provided by Mercedes-Benz.
- Calibration: Perform a calibration procedure to fine-tune the sensor’s signal. This may involve placing objects at specific distances and using the diagnostic tool to adjust the sensor’s settings.
- System Test: After coding and calibration, perform a system test to ensure that the Parktronic system is functioning correctly. This involves verifying that all sensors are providing accurate readings.
Tools Required for Coding
- Diagnostic Tool: A Mercedes-Benz compatible diagnostic tool is essential for coding Parktronic sensors.
- Software: The diagnostic tool must have the appropriate software and updates to perform the coding procedure.
- Mercedes-Benz Documentation: Access to Mercedes-Benz technical documentation and coding parameters is necessary for accurate coding.
Expert Insights on Coding
According to a Mercedes-Benz certified technician, “Coding is a critical step in the sensor replacement process. Without proper coding, the system may not function reliably, leading to safety concerns. Always follow Mercedes-Benz guidelines and use the recommended diagnostic tools.”
Potential Challenges and How to Overcome Them
- Software Compatibility: Ensure that the diagnostic tool’s software is compatible with the vehicle’s model and year.
- Coding Errors: Double-check all entered codes and parameters to avoid errors.
- Calibration Difficulties: Follow the calibration procedure precisely, using the specified distances and objects.
Proper coding is vital for ensuring the accurate and reliable operation of the Parktronic system after sensor replacement. By following the correct procedures and using the appropriate tools, you can maintain the safety and convenience of your Mercedes-Benz.
4. Step-by-Step Guide to Parktronic Ultrasonic Sensor Replacement
Replacing a Parktronic ultrasonic sensor can be a straightforward process if you follow the correct steps. This guide provides a detailed, step-by-step approach to ensure successful sensor replacement, minimizing potential issues and maintaining the integrity of your Parktronic system.
Step 1: Gather Necessary Tools and Materials
Before starting, ensure you have all the necessary tools and materials:
- New Parktronic ultrasonic sensor (ensure it is the correct part for your vehicle model)
- Socket set
- Screwdrivers (Phillips and flathead)
- Trim removal tools
- Diagnostic tool (compatible with Mercedes-Benz)
- Gloves
- Safety glasses
Step 2: Prepare the Vehicle
- Turn off the engine: Ensure the vehicle is turned off and the keys are removed from the ignition.
- Engage the parking brake: Engage the parking brake to prevent the vehicle from moving.
- Chock the wheels: Use wheel chocks for added safety.
Step 3: Locate the Faulty Sensor
- Visual inspection: Check the sensors for physical damage, such as cracks or dislodgement.
- Diagnostic scan: Use a diagnostic tool from MERCEDES-DIAGNOSTIC-TOOL.EDU.VN to identify the faulty sensor. Connect the tool to the OBD-II port and run a scan of the Parktronic system. Note the error codes related to the sensor.
Step 4: Remove the Bumper (If Necessary)
In some cases, accessing the sensor requires removing the bumper.
- Remove screws and fasteners: Locate and remove all screws and fasteners holding the bumper in place. These are typically located along the edges and underneath the bumper.
- Detach the bumper: Carefully detach the bumper, starting from one side and working your way to the other. Be mindful of any wiring connected to the bumper, such as fog lights or other sensors.
- Place the bumper safely: Place the bumper on a soft surface to prevent scratches or damage.
Step 5: Access the Sensor
- Locate the sensor: Once the bumper is removed (or if accessible without removal), locate the faulty sensor.
- Disconnect the wiring: Disconnect the wiring harness from the sensor. Press the release tab on the connector and gently pull it away from the sensor.
Step 6: Remove the Faulty Sensor
- Remove retaining clips or screws: Depending on the design, the sensor may be held in place by retaining clips or screws. Remove these to release the sensor.
- Carefully remove the sensor: Gently push or pull the sensor out of its housing.
Step 7: Install the New Sensor
- Insert the new sensor: Align the new sensor with the housing and gently push it into place until it clicks or is flush with the surface.
- Secure the sensor: Secure the sensor using the retaining clips or screws that were removed earlier.
Step 8: Reconnect the Wiring
- Reconnect the wiring harness: Connect the wiring harness to the new sensor. Ensure the connector clicks into place, indicating a secure connection.
Step 9: Reinstall the Bumper (If Removed)
- Align the bumper: Align the bumper with the vehicle’s body.
- Reattach fasteners: Reattach all screws and fasteners that were removed earlier. Ensure the bumper is securely attached.
Step 10: Coding the New Sensor
- Connect the diagnostic tool: Connect the diagnostic tool to the OBD-II port.
- Access the Parktronic system: Navigate to the Parktronic system in the diagnostic tool’s menu.
- Code the new sensor: Follow the diagnostic tool’s instructions to code the new sensor. This may involve entering specific codes or parameters.
- Calibrate the system: Perform a calibration procedure to fine-tune the sensor’s signal.
- Clear error codes: Clear any error codes related to the sensor.
Step 11: Test the System
- Start the vehicle: Start the vehicle and engage the Parktronic system.
- Test the sensor: Test the new sensor by approaching objects and verifying that the system provides accurate readings.
- Verify functionality: Ensure that all sensors are functioning correctly and that there are no error messages on the dashboard.
By following these steps, you can successfully replace a Parktronic ultrasonic sensor and ensure the continued safety and convenience of your Mercedes-Benz. Remember to consult your vehicle’s service manual for specific instructions and torque specifications.
5. Coding Procedures for Parktronic Sensors
Proper coding of Parktronic sensors is essential after replacement to ensure seamless integration with the vehicle’s system. The coding procedure involves using diagnostic tools to program the vehicle’s control unit to recognize and calibrate the new sensor. This section outlines the detailed steps and considerations for coding Parktronic sensors.
Prerequisites for Coding
Before starting the coding procedure, ensure the following prerequisites are met:
- Correct Replacement Sensor: Verify that the replacement sensor is the correct part number for your vehicle’s model and year.
- Diagnostic Tool Compatibility: Ensure that the diagnostic tool is compatible with Mercedes-Benz vehicles and has the latest software updates.
- Stable Power Supply: Connect a stable power supply to the vehicle to prevent voltage fluctuations during the coding process.
- Vehicle Information: Have the vehicle’s VIN (Vehicle Identification Number) and other relevant information readily available.
Step-by-Step Coding Procedure
-
Connect Diagnostic Tool: Connect the diagnostic tool to the vehicle’s OBD-II port, typically located under the dashboard.
-
Access Parktronic System:
- Turn on the ignition (do not start the engine).
- Navigate to the Parktronic system in the diagnostic tool’s menu. This may be listed as “Park Assist” or “Parking Aid.”
-
Identify Replaced Sensor:
- Use the diagnostic tool to identify the specific sensor that has been replaced. This may involve selecting the sensor’s location (e.g., front left, rear right) from a list.
- Confirm the sensor’s identification by comparing its part number with the diagnostic tool’s database.
-
Initiate Coding Process:
- Select the “Coding” or “Programming” option in the diagnostic tool’s menu.
- Follow the on-screen instructions to initiate the coding process. This may involve entering specific codes or parameters.
-
Enter Coding Parameters:
- Enter the required coding parameters. These parameters may include:
- Sensor type
- Sensor location
- Calibration values
- Refer to Mercedes-Benz technical documentation or the diagnostic tool’s database for the correct coding parameters.
- Enter the required coding parameters. These parameters may include:
-
Calibration Procedure:
- After coding, perform a calibration procedure to fine-tune the sensor’s signal.
- This may involve placing objects at specific distances from the sensor and using the diagnostic tool to adjust the sensor’s settings.
- Follow the calibration procedure precisely, as outlined in the diagnostic tool’s instructions.
-
Clear Error Codes:
- Once coding and calibration are complete, clear any error codes related to the sensor.
- Use the diagnostic tool to scan the Parktronic system for error codes and select the “Clear Codes” option.
-
System Test:
- Perform a system test to ensure that the Parktronic system is functioning correctly.
- This involves verifying that all sensors are providing accurate readings and that there are no error messages on the dashboard.
- Test the system in various conditions, such as approaching objects at different speeds and angles.
Coding Challenges and Solutions
-
Incorrect Coding Parameters:
- Challenge: Entering incorrect coding parameters can lead to system malfunction or inaccurate readings.
- Solution: Double-check all entered parameters and refer to Mercedes-Benz technical documentation for guidance.
-
Diagnostic Tool Compatibility Issues:
- Challenge: Using an incompatible diagnostic tool can prevent successful coding.
- Solution: Ensure that the diagnostic tool is specifically designed for Mercedes-Benz vehicles and has the latest software updates.
-
Power Supply Problems:
- Challenge: Voltage fluctuations during the coding process can interrupt the procedure and cause errors.
- Solution: Connect a stable power supply to the vehicle to maintain a consistent voltage level.
Expert Tips for Successful Coding
- Follow Instructions Carefully: Adhere to the diagnostic tool’s instructions and Mercedes-Benz technical documentation.
- Use Genuine Parts: Use genuine Mercedes-Benz replacement sensors to ensure compatibility and reliability.
- Seek Professional Help: If you are unsure about any step of the coding procedure, seek assistance from a qualified technician.
Proper coding is critical for ensuring the accurate and reliable operation of the Parktronic system after sensor replacement. By following these procedures and addressing potential challenges, you can maintain the safety and convenience of your Mercedes-Benz.
6. Tools Required for Parktronic Sensor Coding
Coding Parktronic sensors effectively requires specific diagnostic tools and software. Using the right equipment ensures accurate programming and seamless integration of the new sensor with the vehicle’s system. This section outlines the essential tools needed for Parktronic sensor coding.
Essential Diagnostic Tools
-
Mercedes-Benz Diagnostic Tool:
- Description: A specialized diagnostic tool designed for Mercedes-Benz vehicles. These tools provide comprehensive access to the vehicle’s systems, including the Parktronic system.
- Features:
- Diagnostic scanning for error codes
- Coding and programming capabilities
- Calibration procedures
- Real-time data monitoring
- Examples:
- Mercedes-Benz Star Diagnosis
- XENTRY Diagnosis
-
OBD-II Scanner:
- Description: A generic OBD-II (On-Board Diagnostics II) scanner can read basic error codes but may not offer the advanced coding and calibration features required for Parktronic sensors.
- Features:
- Reading and clearing diagnostic trouble codes (DTCs)
- Displaying live sensor data
- Performing basic system tests
- Limitations:
- Limited coding and programming capabilities
- May not support all Mercedes-Benz specific functions
-
Multimeter:
- Description: A multimeter is a versatile tool used to measure voltage, current, and resistance in electrical circuits.
- Usage:
- Checking the continuity of wiring
- Verifying voltage levels at the sensor connector
- Testing the sensor’s resistance
- Benefits:
- Helps identify wiring issues or faulty connections
- Ensures proper electrical supply to the sensor
Software and Updates
-
Diagnostic Software:
- Description: The software that runs on the diagnostic tool. It provides the interface for accessing the vehicle’s systems and performing diagnostic and coding functions.
- Requirements:
- Must be compatible with the diagnostic tool and the vehicle’s model and year
- Should include the latest updates and patches for optimal performance
- Examples:
- XENTRY Diagnosis software
- DAS (Diagnostic Assistance System)
-
Mercedes-Benz Coding Database:
- Description: A database containing the correct coding parameters and calibration values for Parktronic sensors.
- Importance:
- Ensures accurate coding by providing the necessary data
- Reduces the risk of errors during the coding process
- Access:
- Typically accessed through the diagnostic software or Mercedes-Benz technical documentation
Additional Tools
-
Stable Power Supply:
- Description: A stable power supply is crucial to maintain a consistent voltage level during the coding process.
- Benefits:
- Prevents voltage fluctuations that can interrupt the coding procedure
- Reduces the risk of errors and system malfunctions
-
Wiring Diagrams and Technical Documentation:
- Description: Wiring diagrams and technical documentation provide detailed information about the vehicle’s electrical system and coding procedures.
- Usage:
- Identifying the correct wiring connections
- Understanding the coding process
- Troubleshooting electrical issues
- Access:
- Available through Mercedes-Benz technical resources or online databases
Choosing the Right Tools
- Consider the Vehicle’s Model and Year: Ensure that the diagnostic tools and software are compatible with the specific Mercedes-Benz model and year.
- Invest in Quality Tools: Purchase high-quality diagnostic tools from reputable manufacturers to ensure reliability and accuracy.
- Keep Software Updated: Regularly update the diagnostic software to access the latest features and coding parameters.
Having the right tools is essential for successful Parktronic sensor coding. By investing in high-quality diagnostic tools and software, you can ensure accurate programming and seamless integration of the new sensor with the vehicle’s system.
7. Common Issues After Parktronic Sensor Replacement
Replacing a Parktronic sensor can sometimes lead to unexpected issues if not done correctly. Understanding these common problems and knowing how to address them is essential for ensuring the system functions reliably. This section outlines the typical challenges encountered after sensor replacement and provides practical solutions.
1. System Malfunction Message
- Problem: The most common issue is a “Parktronic Malfunction” message appearing on the dashboard after sensor replacement.
- Causes:
- Incorrect sensor installation
- Incompatible sensor
- Coding failure
- Wiring issues
- Solutions:
- Verify Sensor Installation: Ensure the sensor is correctly installed and securely connected.
- Check Sensor Compatibility: Confirm that the replacement sensor is the correct part number for your vehicle model and year.
- Perform Coding: Use a diagnostic tool from MERCEDES-DIAGNOSTIC-TOOL.EDU.VN to code the new sensor to the vehicle’s system.
- Inspect Wiring: Check the wiring and connectors for damage or corrosion. Repair or replace as needed.
2. Inaccurate Distance Readings
- Problem: The Parktronic system provides inaccurate distance readings, leading to false alarms or a failure to detect objects.
- Causes:
- Sensor misalignment
- Calibration issues
- Interference from external factors (e.g., dirt, ice)
- Solutions:
- Align Sensor: Ensure the sensor is properly aligned and flush with the bumper surface.
- Calibrate System: Perform a calibration procedure using a diagnostic tool to fine-tune the sensor’s signal.
- Clean Sensor: Clean the sensor surface to remove any dirt, ice, or debris that may be interfering with its performance.
3. Intermittent Sensor Function
- Problem: The sensor functions intermittently, working sometimes and failing at other times.
- Causes:
- Loose wiring connections
- Faulty sensor
- Environmental factors (e.g., moisture)
- Solutions:
- Check Wiring Connections: Inspect the wiring and connectors for loose or corroded connections. Secure or replace as needed.
- Test Sensor: Use a diagnostic tool to test the sensor’s performance. If the sensor is faulty, replace it with a new one.
- Protect from Moisture: Ensure the sensor and wiring are protected from moisture. Use dielectric grease on connectors to prevent corrosion.
4. Audible Alert Issues
- Problem: The system produces constant beeping or no sound at all, regardless of nearby obstacles.
- Causes:
- Coding errors
- Faulty sensor
- Speaker malfunction
- Solutions:
- Verify Coding: Ensure the sensor is correctly coded to the vehicle’s system.
- Test Sensor: Use a diagnostic tool to test the sensor’s performance. If the sensor is faulty, replace it with a new one.
- Check Speaker: Verify that the speaker is functioning correctly. Test the speaker’s wiring and connections.
5. Diagnostic Trouble Codes (DTCs)
- Problem: The diagnostic tool reports specific DTCs related to the Parktronic system after sensor replacement.
- Causes:
- Sensor failure
- Wiring issues
- Coding errors
- Solutions:
- Read DTCs: Use a diagnostic tool to read the DTCs and understand the nature of the problem.
- Troubleshoot Based on DTCs: Follow the diagnostic tool’s troubleshooting steps to address the specific DTCs.
- Clear DTCs: After resolving the issue, clear the DTCs and retest the system.
Expert Tips for Troubleshooting
- Use a Reliable Diagnostic Tool: Invest in a high-quality diagnostic tool that is compatible with Mercedes-Benz vehicles.
- Refer to Technical Documentation: Consult Mercedes-Benz technical documentation for specific troubleshooting steps and coding parameters.
- Seek Professional Help: If you are unsure about any troubleshooting steps, seek assistance from a qualified technician.
Addressing these common issues promptly ensures the Parktronic system operates reliably, providing the safety and convenience expected from a Mercedes-Benz vehicle. Regular checks and proactive maintenance can prevent minor issues from escalating into major problems.
8. Benefits of Proper Coding and Calibration
Proper coding and calibration of Parktronic sensors are essential for ensuring the accurate and reliable operation of the parking assist system. These procedures optimize the sensor’s performance, leading to numerous benefits that enhance safety, convenience, and overall driving experience. This section outlines the key advantages of proper coding and calibration.
1. Enhanced Accuracy
- Benefit: Accurate distance readings are crucial for the Parktronic system to function effectively.
- Explanation: Proper coding and calibration ensure that the sensor’s signals are correctly interpreted by the vehicle’s control unit, resulting in precise distance measurements.
- Impact: This accuracy minimizes the risk of collisions during parking maneuvers, providing drivers with reliable assistance.
2. Reliable Performance
- Benefit: Consistent and reliable performance of the Parktronic system.
- Explanation: Coding and calibration ensure that the sensor operates within the specified parameters, preventing intermittent failures or malfunctions.
- Impact: Drivers can rely on the system to provide consistent assistance in various parking situations, enhancing their confidence and reducing stress.
3. Seamless Integration
- Benefit: Seamless integration of the new sensor with the vehicle’s existing system.
- Explanation: Coding ensures that the new sensor communicates effectively with the vehicle’s control unit and other sensors in the system.
- Impact: This integration prevents conflicts and ensures that all components work in harmony, providing a cohesive and efficient parking assist system.
4. Reduced False Alarms
- Benefit: Minimization of false alarms, which can be distracting and annoying.
- Explanation: Proper calibration fine-tunes the sensor’s sensitivity, reducing the likelihood of detecting non-existent obstacles.
- Impact: Drivers can park with fewer interruptions and distractions, making the parking experience more pleasant and efficient.
5. Improved Safety
- Benefit: Enhanced safety during parking maneuvers.
- Explanation: Accurate distance readings and reliable performance of the Parktronic system help drivers avoid collisions with obstacles.
- Impact: This improved safety protects both the vehicle and its occupants, reducing the risk of accidents and injuries.
6. Extended Sensor Life
- Benefit: Prolonged lifespan of the Parktronic sensor.
- Explanation: Proper coding and calibration ensure that the sensor operates within its designed parameters, reducing stress and wear.
- Impact: This extended lifespan saves money on replacement costs and minimizes the need for frequent maintenance.
7. Optimal System Performance
- Benefit: Overall optimization of the Parktronic system’s performance.
- Explanation: Coding and calibration fine-tune the sensor’s settings to match the vehicle’s specific requirements, ensuring that the system operates at its best.
- Impact: Drivers experience a more efficient, reliable, and user-friendly parking assist system.
Expert Insights on Benefits
According to automotive experts, “Proper coding and calibration are not just technicalities; they are essential for realizing the full potential of the Parktronic system. These procedures ensure that the system operates accurately, reliably, and safely, providing drivers with the assistance they need to park confidently.”
Real-World Examples
- Case Study: A Mercedes-Benz owner reported experiencing frequent false alarms after replacing a Parktronic sensor. After proper coding and calibration, the false alarms disappeared, and the system functioned flawlessly.
- Testimonial: A professional technician noted that coding and calibration are critical steps in the sensor replacement process, ensuring that the system operates as intended and meets the manufacturer’s specifications.
Proper coding and calibration of Parktronic sensors provide numerous benefits that enhance the safety, convenience, and overall performance of the parking assist system. By investing in these procedures, drivers can ensure that their Mercedes-Benz vehicles continue to provide reliable assistance in various parking situations.
9. Advanced Diagnostic Techniques for Parktronic Systems
Advanced diagnostic techniques are essential for accurately identifying and resolving complex issues within Parktronic systems. These methods go beyond basic error code reading and involve in-depth analysis of sensor data, wiring integrity, and system performance. This section outlines the advanced techniques used to diagnose Parktronic system problems.
1. Real-Time Data Analysis
- Technique: Analyzing real-time data from the Parktronic sensors using a diagnostic tool.
- Process:
- Connect a diagnostic tool to the vehicle’s OBD-II port.
- Access the Parktronic system and select the option to view real-time data.
- Monitor the data from each sensor, including distance readings, signal strength, and voltage levels.
- Benefits:
- Identifies intermittent sensor failures.
- Detects subtle variations in sensor performance.
- Provides insights into the sensor’s operating conditions.
2. Wiring Integrity Testing
- Technique: Testing the integrity of the wiring and connectors associated with the Parktronic sensors.
- Process:
- Use a multimeter to check the continuity of the wiring.
- Inspect the connectors for corrosion, damage, or loose connections.
- Test the voltage levels at the sensor connector to ensure proper electrical supply.
- Benefits:
- Identifies wiring breaks, shorts, or high resistance connections.
- Ensures proper electrical supply to the sensors.
- Prevents signal interference and communication errors.
3. Signal Pattern Analysis
- Technique: Analyzing the signal patterns from the ultrasonic sensors using an oscilloscope or advanced diagnostic tool.
- Process:
- Connect an oscilloscope or diagnostic tool to the sensor’s signal wire.
- Monitor the signal pattern as the sensor detects objects at varying distances.
- Compare the signal pattern to known good patterns to identify anomalies.
- Benefits:
- Detects subtle sensor malfunctions that may not trigger error codes.
- Provides insights into the sensor’s ability to detect and process signals.
- Helps diagnose issues with the sensor’s internal components.
4. Environmental Simulation
- Technique: Simulating various environmental conditions to test the Parktronic system’s performance.
- Process:
- Use a controlled environment to simulate different temperatures, humidity levels, and lighting conditions.
- Monitor the Parktronic system’s performance under each condition.
- Identify any issues that arise due to specific environmental factors.
- Benefits:
- Detects issues related to temperature sensitivity or moisture intrusion.
- Helps diagnose problems that occur only under specific environmental conditions.
- Ensures the system functions reliably in all types of weather.
5. Component Isolation
- Technique: Isolating individual components of the Parktronic system to pinpoint the source of the problem.
- Process:
- Disconnect individual sensors and test the system’s performance.
- Replace suspected faulty components with known good components.
- Monitor the system’s performance after each component is replaced.
- Benefits:
- Identifies faulty sensors, wiring, or control units.
- Simplifies the troubleshooting process by focusing on specific components.
- Reduces the risk of replacing unnecessary parts.
Expert Insights on Advanced Diagnostics
According to automotive diagnostic specialists, “Advanced diagnostic techniques are essential for accurately diagnosing complex Parktronic system issues. These methods provide valuable insights into the system’s performance, helping technicians identify and resolve problems efficiently.”
Real-World Applications
- Case Study: A Mercedes-Benz owner reported intermittent Parktronic system failures. Using real-time data analysis, technicians identified a faulty sensor that was providing inconsistent readings. Replacing the sensor resolved the issue.
- Testimonial: A professional technician noted that signal pattern analysis is a valuable tool for detecting subtle sensor malfunctions that may not trigger error codes.
Advanced diagnostic techniques are critical for accurately diagnosing and resolving complex issues within Parktronic systems. By using these methods, technicians can ensure that the system functions reliably and provides drivers with the assistance they need to park safely.
10. DIY vs. Professional Service: Choosing the Right Approach
Deciding whether to perform Parktronic sensor replacement and coding as a DIY project or to seek professional service depends on your technical skills, available tools, and comfort level. Both approaches have their advantages and disadvantages. This section provides a detailed comparison to help you make an informed decision.
DIY Approach
Advantages:
- Cost Savings: DIY repairs can save money on labor costs, as you only pay for the replacement sensor and any necessary tools.
- Learning Experience: Performing the repair yourself can be a valuable learning experience, enhancing your understanding of automotive systems.
- Convenience: You can perform the repair at your convenience, without having to schedule an appointment with a mechanic.
Disadvantages:
- Technical Expertise Required: Parktronic sensor replacement and coding require a certain level of technical expertise and familiarity with diagnostic tools.
- Specialized Tools Needed: You will need to invest in specialized tools, such as a Mercedes-Benz compatible diagnostic tool, which can be expensive.
- Risk of Errors: There is a risk of making errors during the repair process, which can lead to system malfunctions or further damage.
- Time Commitment: DIY repairs can be time-consuming, especially if you are unfamiliar with the process.