Malfunctioning diagnostic interface signs include communication errors, inaccurate data, and inability to connect. At MERCEDES-DIAGNOSTIC-TOOL.EDU.VN, we help you identify and resolve these issues, ensuring your Mercedes-Benz diagnostic processes are accurate and efficient. Proper maintenance and timely repairs are essential for vehicle safety and performance. Leverage our expertise for optimal diagnostic tool functionality, enhanced troubleshooting, and precise vehicle maintenance.
1. Understanding the Diagnostic Interface
The diagnostic interface is a critical component in modern vehicle maintenance. It acts as a bridge between diagnostic tools and the vehicle’s onboard computer system. This interface allows technicians and car owners to read error codes, monitor vehicle performance, and perform necessary repairs. A properly functioning diagnostic interface ensures accurate and reliable data, which is essential for effective troubleshooting.
- Definition: The diagnostic interface is a hardware and software system that enables communication between a vehicle’s electronic control units (ECUs) and external diagnostic tools.
- Importance: It facilitates accurate diagnostics, reduces repair time, and enhances overall vehicle maintenance.
2. Common Signs of a Malfunctioning Diagnostic Interface
Identifying the signs of a malfunctioning diagnostic interface is crucial for maintaining the accuracy and efficiency of vehicle diagnostics. Here are several key indicators that your diagnostic interface may be experiencing issues:
2.1 Communication Errors
One of the most common signs of a malfunctioning diagnostic interface is the presence of communication errors. These errors can manifest in various ways, such as the diagnostic tool failing to connect to the vehicle’s computer system or intermittent connection issues during a diagnostic session.
- Failure to Connect: The diagnostic tool cannot establish a connection with the vehicle’s OBD-II port.
- Intermittent Connection: The connection drops unexpectedly during diagnostics.
2.2 Inaccurate Data
A malfunctioning diagnostic interface may provide inaccurate or inconsistent data. This can lead to misdiagnosis and incorrect repairs, potentially causing further damage to the vehicle.
- Incorrect Readings: The diagnostic tool displays values that do not match the actual vehicle parameters.
- Inconsistent Data: Readings fluctuate erratically, making it difficult to identify the root cause of the problem.
2.3 Software Issues
Software glitches or outdated firmware can cause a diagnostic interface to malfunction. These issues can prevent the tool from functioning correctly or lead to compatibility problems with newer vehicle models.
- Software Crashes: The diagnostic tool’s software freezes or crashes during operation.
- Compatibility Problems: The tool is unable to communicate with certain vehicle models or ECUs.
2.4 Hardware Failures
Physical damage or wear and tear can lead to hardware failures within the diagnostic interface. Damaged cables, faulty connectors, or internal component issues can disrupt the communication process and cause the interface to malfunction.
- Damaged Cables: Visible damage to the diagnostic cable, such as cuts or fraying.
- Faulty Connectors: Bent or broken pins in the OBD-II connector.
- Internal Component Issues: Malfunctioning circuit boards or other internal components.
2.5 Error Codes
The diagnostic tool may display error codes related to the interface itself, indicating a problem with the device. These error codes can provide valuable information about the nature of the malfunction and guide troubleshooting efforts.
- Interface-Specific Codes: Error codes that directly reference the diagnostic interface or its components.
- Generic Communication Errors: Codes indicating a general communication failure between the tool and the vehicle.
 Faulty Connectors
Alt text: Close-up of an OBD2 scanner with visible signs of wear and tear on the connector pins, indicating potential hardware failure.
3. Diagnostic Methods for Interface Issues
When you suspect a malfunctioning diagnostic interface, several diagnostic methods can help pinpoint the problem. These methods range from simple visual inspections to advanced diagnostic procedures using specialized tools.
3.1 Visual Inspection
Begin with a thorough visual inspection of the diagnostic interface and its components. Check for any signs of physical damage, such as damaged cables, loose connectors, or broken parts.
- Check Cables: Look for cuts, fraying, or exposed wires.
- Inspect Connectors: Ensure that the connector pins are straight and undamaged.
- Examine the Interface Housing: Look for cracks or other signs of physical damage.
3.2 Software and Firmware Checks
Ensure that the diagnostic tool’s software and firmware are up to date. Outdated software can cause compatibility issues and lead to communication errors.
- Update Software: Download and install the latest software version from the manufacturer’s website.
- Check Firmware: Verify that the firmware is current and compatible with the vehicle models you are diagnosing.
3.3 Voltage and Continuity Testing
Use a multimeter to test the voltage and continuity of the diagnostic interface’s components. This can help identify faulty cables, connectors, or internal circuits.
- Voltage Testing: Measure the voltage at various points in the interface to ensure it is within the specified range.
- Continuity Testing: Check the continuity of the cables and connectors to identify any breaks or shorts.
3.4 Error Code Analysis
If the diagnostic tool displays error codes, analyze them carefully to understand the nature of the problem. Consult the tool’s user manual or the manufacturer’s website for detailed information about specific error codes.
- Look Up Error Codes: Use the diagnostic tool’s database or online resources to find detailed descriptions of the error codes.
- Interpret Error Messages: Understand the meaning of the error messages and their implications for the diagnostic interface.
3.5 Testing with Known Good Components
If possible, test the diagnostic interface with known good components, such as a different cable or connector. This can help isolate the source of the problem and determine whether the issue lies with the interface itself or with an external component.
- Swap Cables: Try using a different diagnostic cable to see if the issue persists.
- Test with Another Vehicle: Connect the interface to a different vehicle to rule out vehicle-specific problems.
4. Steps to Identify Interface Issues with Diagnostic Tools
Using diagnostic tools effectively is crucial for pinpointing problems with your diagnostic interface. Here’s how to use tools like the Ancel AD410 to diagnose interface issues:
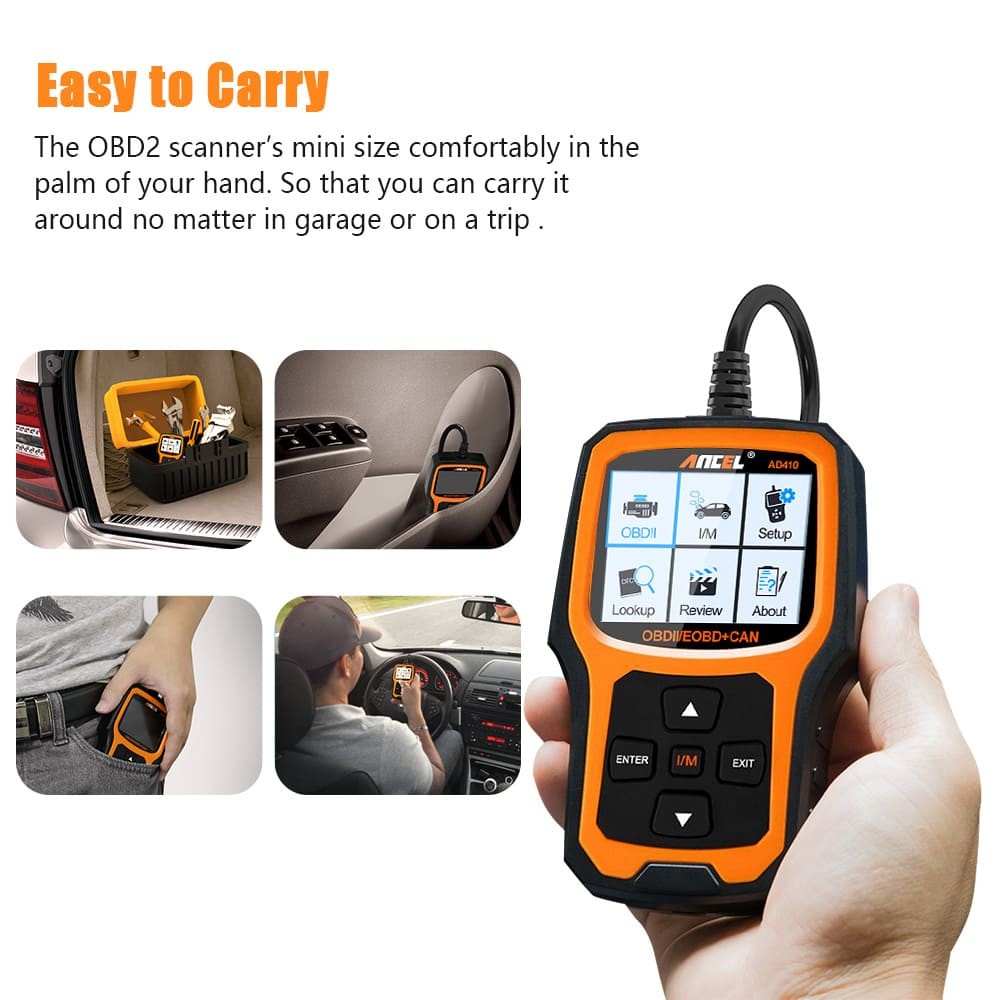
4.1 Introduction to Diagnostic Tools like Ancel AD410
The Ancel AD410 is a professional OBD2 scanner designed to provide accurate and comprehensive diagnostics for a wide range of vehicles. Its user-friendly interface and advanced features make it an excellent choice for identifying issues with diagnostic interfaces and other vehicle systems.
- Features: The Ancel AD410 supports a wide range of diagnostic functions, including reading and clearing error codes, viewing live data, and performing component tests.
- Benefits: It offers accurate diagnostics, user-friendly operation, and compatibility with a wide range of vehicles.
4.2 Connecting the Diagnostic Tool to the Vehicle
To begin the diagnostic process, connect the Ancel AD410 to the vehicle’s OBD-II port. This port is typically located under the dashboard or near the driver’s side footwell.
- Locate the OBD-II Port: Refer to the vehicle’s owner’s manual if you are unsure of the port’s location.
- Connect the Scanner: Plug the Ancel AD410 into the OBD-II port and ensure it is securely connected.
4.3 Accessing Diagnostic Functions
Once connected, power on the Ancel AD410 and navigate to the diagnostic functions menu. Select the appropriate options to initiate a diagnostic scan of the vehicle’s systems.
- Power On the Scanner: Follow the device’s instructions to turn it on.
- Navigate to Diagnostic Functions: Use the menu options to select the diagnostic functions you want to perform.
4.4 Analyzing Diagnostic Results
The Ancel AD410 will scan the vehicle’s systems and display any error codes or fault information it detects. Analyze these results carefully to identify potential issues with the diagnostic interface.
- Read Error Codes: The scanner will display a list of error codes, along with descriptions of each code.
- Interpret Error Messages: Use the scanner’s database or online resources to understand the meaning of the error messages and their implications.
5. Preventing Diagnostic Interface Issues
Preventing diagnostic interface issues is key to ensuring reliable and accurate vehicle diagnostics. By following these best practices, you can minimize the risk of malfunctions and extend the lifespan of your diagnostic tools.
5.1 Regular Maintenance
Regular maintenance is essential for keeping your diagnostic interface in good working condition. This includes cleaning the connectors, inspecting the cables, and ensuring that the software is up to date.
- Clean Connectors: Use a soft, dry cloth to clean the OBD-II connector and the diagnostic cable connectors.
- Inspect Cables: Check the cables for any signs of damage, such as cuts, fraying, or exposed wires.
- Update Software: Regularly update the diagnostic tool’s software and firmware to ensure compatibility and optimal performance.
5.2 Proper Storage
Proper storage is crucial for protecting your diagnostic interface from damage. Store the tool in a clean, dry place away from extreme temperatures and humidity.
- Use a Protective Case: Store the diagnostic interface in a protective case to prevent physical damage.
- Avoid Extreme Temperatures: Keep the tool away from direct sunlight and extreme temperatures, as these can damage the internal components.
- Control Humidity: Store the tool in a dry environment to prevent corrosion and other moisture-related issues.
5.3 Careful Handling
Handle the diagnostic interface with care to avoid physical damage. Avoid dropping the tool, bending the cables, or putting excessive strain on the connectors.
- Avoid Dropping: Be careful not to drop the diagnostic interface, as this can damage the internal components.
- Do Not Bend Cables: Avoid bending the diagnostic cables excessively, as this can cause them to break or fray.
- Handle Connectors Gently: Be gentle when connecting and disconnecting the diagnostic cables to avoid damaging the connector pins.
5.4 Use Quality Components
When replacing diagnostic interface components, such as cables or connectors, use high-quality parts from reputable manufacturers. This will help ensure reliable performance and prevent future issues.
- Buy from Reputable Brands: Purchase replacement components from trusted brands known for their quality and reliability.
- Check Compatibility: Ensure that the replacement components are compatible with your diagnostic tool and the vehicles you are diagnosing.
5.5 Professional Inspections
Consider having your diagnostic interface professionally inspected on a regular basis. A qualified technician can identify potential issues before they become major problems and perform any necessary repairs or maintenance.
- Schedule Regular Inspections: Arrange for periodic inspections by a qualified technician.
- Address Issues Promptly: If any issues are identified during an inspection, address them promptly to prevent further damage.
6. The Role of MERCEDES-DIAGNOSTIC-TOOL.EDU.VN in Diagnostic Interface Maintenance
At MERCEDES-DIAGNOSTIC-TOOL.EDU.VN, we understand the critical role that a properly functioning diagnostic interface plays in vehicle maintenance. We offer a range of services and resources to help you maintain your diagnostic tools and ensure accurate and reliable diagnostics for your Mercedes-Benz vehicles.
6.1 Expert Advice
Our team of experienced technicians can provide expert advice on diagnosing and resolving issues with your diagnostic interface. Whether you are experiencing communication errors, software glitches, or hardware failures, we can help you identify the root cause of the problem and recommend the best course of action.
- Troubleshooting Support: We offer troubleshooting support to help you diagnose and resolve issues with your diagnostic interface.
- Maintenance Tips: We provide maintenance tips and best practices to help you keep your diagnostic tools in good working condition.
6.2 Diagnostic Tool Recommendations
We can recommend the best diagnostic tools and interfaces for your specific needs and budget. Whether you are a professional technician or a car owner performing DIY maintenance, we can help you choose the right tools for the job.
- Tool Selection: We offer guidance on selecting the right diagnostic tools for your Mercedes-Benz vehicles.
- Interface Compatibility: We ensure that the diagnostic interfaces we recommend are compatible with your vehicle models and diagnostic software.
6.3 Repair Services
If your diagnostic interface is damaged or malfunctioning, we can provide repair services to get it back in working order. Our technicians are skilled in diagnosing and repairing a wide range of issues, from damaged cables to faulty connectors to internal component failures.
- Cable Repairs: We can repair or replace damaged diagnostic cables.
- Connector Replacements: We offer connector replacement services for damaged or faulty OBD-II connectors.
- Component-Level Repairs: We can perform component-level repairs on the diagnostic interface to address internal hardware failures.
6.4 Training and Support
We offer training and support to help you use your diagnostic tools effectively. Our training programs cover a range of topics, from basic diagnostic procedures to advanced troubleshooting techniques.
- Diagnostic Training: We provide training on how to use diagnostic tools to identify and resolve vehicle issues.
- Software Tutorials: We offer tutorials on using diagnostic software and interpreting error codes.
- Ongoing Support: We provide ongoing support to help you get the most out of your diagnostic tools and resources.
7. The Importance of Timely Repairs
Addressing diagnostic interface issues promptly is crucial for several reasons. A malfunctioning interface can lead to inaccurate diagnostics, incorrect repairs, and potential damage to the vehicle.
7.1 Accurate Diagnostics
A properly functioning diagnostic interface ensures accurate and reliable data, which is essential for effective troubleshooting. Inaccurate data can lead to misdiagnosis and incorrect repairs, potentially causing further damage to the vehicle.
- Reliable Data: A functioning interface provides accurate and consistent data.
- Effective Troubleshooting: Accurate data allows for effective troubleshooting and identification of the root cause of vehicle issues.
7.2 Prevents Further Damage
A malfunctioning diagnostic interface can lead to incorrect repairs, which can potentially cause further damage to the vehicle. Addressing interface issues promptly can help prevent these problems.
- Avoid Incorrect Repairs: Accurate diagnostics prevent incorrect repairs and potential damage.
- Protect Vehicle Systems: Proper maintenance and timely repairs protect the vehicle’s systems from further damage.
7.3 Ensures Vehicle Safety
Vehicle safety is compromised when a diagnostic interface malfunctions. By ensuring that your diagnostic tools are in good working condition, you can help maintain the safety and reliability of your vehicles.
- Maintain Vehicle Reliability: Proper diagnostics ensure that the vehicle is reliable and safe to operate.
- Enhance Safety Features: Accurate diagnostics allow for proper maintenance and enhancement of safety features.
8. Conclusion
Identifying the signs of a malfunctioning diagnostic interface is essential for maintaining the accuracy and reliability of vehicle diagnostics. By understanding the common signs of interface issues, using effective diagnostic methods, and following best practices for maintenance and storage, you can minimize the risk of malfunctions and ensure that your diagnostic tools are always in good working condition. At MERCEDES-DIAGNOSTIC-TOOL.EDU.VN, we are committed to providing you with the expert advice, diagnostic tool recommendations, repair services, and training you need to keep your diagnostic interfaces functioning properly and your Mercedes-Benz vehicles running smoothly.
Ensure your Mercedes-Benz diagnostic processes are accurate and efficient with expert assistance from MERCEDES-DIAGNOSTIC-TOOL.EDU.VN. Contact us today at 789 Oak Avenue, Miami, FL 33101, United States or WhatsApp +1 (641) 206-8880 for personalized support, tool recommendations, and repair services. Visit our website at MERCEDES-DIAGNOSTIC-TOOL.EDU.VN for more information.
9. FAQs
9.1 How often should I inspect my diagnostic interface?
Regular inspections, at least every six months, are recommended to ensure your diagnostic interface is functioning correctly. Check for any signs of physical damage, loose connections, or software updates. Consistent monitoring can prevent unexpected malfunctions and ensure accurate vehicle diagnostics.
9.2 Can I use any OBD2 scanner for my Mercedes-Benz?
While many OBD2 scanners are compatible, it’s best to use a scanner specifically designed for Mercedes-Benz vehicles to ensure comprehensive diagnostics. These specialized tools often provide more detailed error codes and access to advanced functions, enhancing your ability to troubleshoot and maintain your vehicle effectively.
9.3 What are the common error codes indicating a malfunctioning diagnostic interface?
Common error codes include U0001 (High Speed CAN Communication Bus), U0100 (Lost Communication with ECM/PCM), and U1001 (SCP (J1850) Communication Bus Fault). These codes often indicate communication failures between the diagnostic tool and the vehicle’s control modules, signaling potential issues with the interface.
9.4 How do I update the software on my diagnostic interface?
Software updates are typically available on the manufacturer’s website. Connect your diagnostic interface to a computer, download the latest software version, and follow the installation instructions provided. Keeping your software current ensures compatibility and access to the latest features.
9.5 What should I do if my diagnostic interface fails to connect to the vehicle?
First, ensure the interface is securely plugged into the OBD2 port. Check the vehicle’s battery voltage and inspect the interface cable for damage. If the problem persists, try using the interface on another vehicle or consult the manufacturer’s support for further assistance.
9.6 Is it possible to repair a damaged diagnostic interface?
Yes, minor damages like frayed cables or loose connectors can often be repaired. However, for significant hardware failures, it may be more cost-effective to replace the interface. Contact a professional repair service like MERCEDES-DIAGNOSTIC-TOOL.EDU.VN for an assessment.
9.7 What are the signs of a faulty OBD2 port in my vehicle?
Signs include the diagnostic tool failing to power on when connected, intermittent connection issues, or visible damage to the port. A faulty OBD2 port can prevent proper communication between the diagnostic tool and the vehicle’s computer.
9.8 Can a malfunctioning diagnostic interface affect my vehicle’s performance?
Yes, if the interface provides inaccurate data, it can lead to misdiagnosis and incorrect repairs, potentially affecting your vehicle’s performance. Always ensure your diagnostic tools are functioning correctly to prevent such issues.
9.9 How can I prevent damage to my diagnostic interface?
Store the interface in a protective case, avoid exposing it to extreme temperatures, and handle the cables and connectors with care. Regular maintenance and careful handling can significantly extend the lifespan of your diagnostic tool.
9.10 Where can I get professional support for my diagnostic interface?
Professional support is available at MERCEDES-DIAGNOSTIC-TOOL.EDU.VN. We offer expert advice, diagnostic tool recommendations, repair services, and training to help you maintain your diagnostic interfaces and ensure accurate vehicle diagnostics. Contact us at 789 Oak Avenue, Miami, FL 33101, United States or WhatsApp +1 (641) 206-8880.
10. Key Terms
| Term | Definition |
|---|---|
| Diagnostic Interface | A device that connects to a vehicle’s OBD2 port to read and interpret data from the vehicle’s computer system. |
| OBD2 Scanner | A tool used to diagnose vehicle problems by reading diagnostic trouble codes (DTCs) from the vehicle’s onboard computer. |
| Error Codes (DTCs) | Codes generated by the vehicle’s computer system to indicate specific problems or malfunctions. |
| Communication Errors | Failures in the data transmission between the diagnostic tool and the vehicle’s computer, often resulting in an inability to read or interpret data. |
| Software Updates | Upgrades to the diagnostic tool’s software that improve functionality, add new features, and ensure compatibility with newer vehicle models. |
| Firmware | The embedded software that controls the hardware functions of the diagnostic tool. |
| Voltage Testing | Using a multimeter to measure the electrical potential at various points in the diagnostic interface to identify power supply issues. |
| Continuity Testing | Using a multimeter to check the integrity of electrical connections in the diagnostic interface to identify breaks or shorts. |
| CAN Communication Bus | A high-speed network within a vehicle that allows various electronic control units (ECUs) to communicate with each other. |
| ECU (Electronic Control Unit) | A generic term for any embedded system that controls one or more of the electrical systems or subsystems in a vehicle. |