Interpreting Mercedes battery voltage live data is crucial for diagnosing charging system issues and ensuring optimal vehicle performance, and at MERCEDES-DIAGNOSTIC-TOOL.EDU.VN, we provide the expertise and tools to help you do just that. By understanding the data provided by your Mercedes’ diagnostic systems, you can identify potential problems early and prevent costly repairs. Trust MERCEDES-DIAGNOSTIC-TOOL.EDU.VN to guide you through the process and keep your Mercedes running smoothly with our comprehensive diagnostic tool. This data, coupled with battery health, provides a complete picture.
Contents
- 1. Understanding Mercedes-Benz Battery Voltage Live Data
- 1.1. What is Battery Voltage Live Data?
- 1.2. Why is Monitoring Battery Voltage Important?
- 1.3. Common Voltage Readings and What They Mean
- 1.4. Factors Affecting Battery Voltage
- 2. Tools for Reading Mercedes-Benz Battery Voltage
- 2.1. OBDII Scanners
- 2.1.1. Basic OBDII Scanners
- 2.1.2. Advanced OBDII Scanners
- 2.1.3. Bluetooth OBDII Adapters
- 2.2. Multimeters
- 2.3. Mercedes-Benz Diagnostic Software
- 2.4. Dedicated Battery Testers
- 2.5. Choosing the Right Tool for Your Needs
- 3. Step-by-Step Guide to Reading Battery Voltage
- 3.1. Using a Multimeter
- 3.1.1. Safety Precautions
- 3.1.2. Gathering Necessary Materials
- 3.1.3. Locating the Battery
- 3.1.4. Setting Up the Multimeter
- 3.1.5. Connecting the Multimeter to the Battery
- 3.1.6. Reading the Voltage
- 3.1.7. Disconnecting the Multimeter
- 3.2. Using an OBDII Scanner
- 3.2.1. Finding the OBDII Port
- 3.2.2. Connecting the Scanner
- 3.2.3. Navigating to Live Data
- 3.2.4. Finding Battery Voltage
- 3.2.5. Interpreting the Data
- 3.2.6. Disconnecting the Scanner
- 3.3. Best Practices for Accurate Readings
- 4. Interpreting Live Data Readings
- 4.1. Normal Voltage Ranges
- 4.2. Identifying Potential Problems
- 4.2.1. Low Voltage (Engine Off)
- 4.2.2. High Voltage (Engine Off)
- 4.2.3. Low Voltage (Engine Running)
- 4.2.4. High Voltage (Engine Running)
- 4.3. Common Scenarios and Solutions
- 4.4. When to Seek Professional Help
- 5. Advanced Diagnostics and Troubleshooting
- 5.1. Parasitic Drain Testing
- 5.1.1. Identifying Parasitic Drain
- 5.1.2. Step-by-Step Testing Procedure
- 5.2. Alternator Testing
- 5.2.1. Symptoms of a Failing Alternator
- 5.2.2. Testing Procedure
- 5.2.3. Interpreting Results
- 5.3. Battery Load Testing
- 5.3.1. Performing a Load Test
- 5.4. Using Mercedes-Benz Diagnostic Software
- 5.4.1. Accessing Battery and Charging System Data
- 5.5. Common Diagnostic Trouble Codes (DTCs)
- 5.6. When to Consult a Professional
- 6. Maintaining Optimal Battery Health
- 6.1. Regular Inspections
- 6.1.1. Visual Checks
- 6.1.2. Cleaning Terminals
- 6.2. Proper Charging Habits
- 6.2.1. Avoiding Short Trips
- 6.2.2. Minimizing Electrical Load
- 6.2.3. Using a Battery Maintainer
- 6.3. Addressing Parasitic Drains
- 6.3.1. Identifying Sources of Drain
- 6.3.2. Repairing Faulty Circuits
- 6.4. Protecting Against Extreme Temperatures
1. Understanding Mercedes-Benz Battery Voltage Live Data
Is it critical to understand the real-time battery voltage data in your Mercedes-Benz? Yes, it is, because this data provides invaluable insight into the health and performance of your vehicle’s electrical system. By monitoring voltage fluctuations, you can proactively address potential issues, ensuring your Mercedes-Benz remains reliable and efficient.
1.1. What is Battery Voltage Live Data?
Battery voltage live data refers to the real-time readings of your Mercedes-Benz’s battery voltage as reported by the vehicle’s onboard diagnostic system (OBD). This data is accessible through diagnostic tools like those offered by MERCEDES-DIAGNOSTIC-TOOL.EDU.VN and provides a dynamic view of the battery’s condition while the vehicle is running or at rest.
1.2. Why is Monitoring Battery Voltage Important?
Monitoring battery voltage is essential for several reasons:
- Early Problem Detection: It helps identify potential charging system issues, such as a failing alternator or a parasitic drain, before they lead to a dead battery or other electrical problems.
- Performance Optimization: Proper voltage ensures that all electrical components, from the starter to the infotainment system, function correctly, maintaining optimal vehicle performance.
- Preventative Maintenance: Regular monitoring allows you to track the battery’s health over time and plan for timely replacements, avoiding unexpected breakdowns.
1.3. Common Voltage Readings and What They Mean
| Reading | Meaning | Possible Issues | Recommended Action |
|---|---|---|---|
| 12.6V or Higher (Engine Off) | Fully charged battery. | None. | No action needed. |
| 12.2V – 12.5V (Engine Off) | Partially discharged battery. | Possible parasitic drain or infrequent use. | Check for parasitic drains, ensure regular driving, or use a battery maintainer. |
| Below 12.2V (Engine Off) | Significantly discharged battery. | Old battery, parasitic drain, or alternator issue. | Test the battery and charging system, check for parasitic drains, and consider replacing the battery. |
| 13.5V – 14.5V (Engine On) | Normal alternator output, charging the battery. | None. | No action needed. |
| Above 14.5V (Engine On) | Overcharging. | Faulty voltage regulator in the alternator. | Have the alternator and voltage regulator checked immediately to prevent battery damage. |
| Below 13.5V (Engine On) | Undercharging. | Worn alternator, loose connections, or high electrical load. | Inspect alternator, check connections, reduce electrical load, and test the charging system. |
1.4. Factors Affecting Battery Voltage
Several factors can influence battery voltage readings:
- Temperature: Cold weather can reduce battery voltage and capacity, while extreme heat can shorten battery life.
- Load: High electrical loads (e.g., headlights, air conditioning) can temporarily lower voltage.
- Charging System Health: A failing alternator or voltage regulator can cause undercharging or overcharging.
- Battery Age: As batteries age, their ability to hold a charge diminishes, leading to lower voltage readings.
2. Tools for Reading Mercedes-Benz Battery Voltage
What tools can you use to accurately monitor your Mercedes-Benz’s battery voltage? Several reliable options are available, each offering unique features to suit different needs and technical expertise. Here, we’ll discuss the common tools and their benefits.
2.1. OBDII Scanners
OBDII (On-Board Diagnostics II) scanners are diagnostic tools used to access a vehicle’s computer and retrieve data, including battery voltage. These scanners connect to the OBDII port, typically located under the dashboard, and display real-time data on a screen or through a connected device.
2.1.1. Basic OBDII Scanners
- Functionality: Basic OBDII scanners can read diagnostic trouble codes (DTCs) and display live data, including battery voltage.
- Pros: Affordable, easy to use, and provide essential information for basic diagnostics.
- Cons: Limited advanced features, may not support all Mercedes-Benz specific codes.
- Example: Actron CP9600
2.1.2. Advanced OBDII Scanners
- Functionality: Advanced OBDII scanners offer more comprehensive diagnostics, including enhanced live data, bidirectional control, and the ability to reset certain systems.
- Pros: Provide in-depth diagnostics, support Mercedes-Benz specific codes, and offer advanced features for troubleshooting.
- Cons: More expensive than basic scanners, may require some technical knowledge to use effectively.
- Example: Autel MaxiSys MS906BT
2.1.3. Bluetooth OBDII Adapters
- Functionality: Bluetooth OBDII adapters connect to the OBDII port and transmit data to a smartphone or tablet via Bluetooth.
- Pros: Convenient, portable, and often come with user-friendly apps for data display and analysis.
- Cons: Performance may vary depending on the adapter and app quality, some apps require subscription fees.
- Example: BlueDriver Bluetooth Professional OBDII Scan Tool
2.2. Multimeters
A multimeter is a versatile tool used to measure voltage, current, and resistance in electrical circuits. It can be used to directly measure the battery voltage at the battery terminals.
- Functionality: Measures voltage, current, and resistance.
- Pros: Affordable, accurate, and useful for a wide range of electrical diagnostics.
- Cons: Requires manual connection to the battery terminals, does not provide live data while the vehicle is running.
- Example: Fluke 115 Digital Multimeter
2.3. Mercedes-Benz Diagnostic Software
Mercedes-Benz diagnostic software, such as XENTRY or DAS (Diagnostic Assistance System), provides the most comprehensive diagnostic capabilities for Mercedes-Benz vehicles.
- Functionality: Offers in-depth diagnostics, coding, programming, and access to Mercedes-Benz specific data and functions.
- Pros: Provides the most accurate and detailed information, supports all Mercedes-Benz models and systems.
- Cons: Expensive, requires specialized hardware and software, and typically used by professional technicians.
2.4. Dedicated Battery Testers
- Functionality: Designed specifically for testing battery health, including voltage, state of charge, and cold-cranking amps (CCA).
- Pros: Easy to use, provide quick and accurate battery health assessments.
- Cons: Limited to battery testing, do not provide comprehensive diagnostic capabilities.
- Example: TOPDON BT100 Battery Tester
2.5. Choosing the Right Tool for Your Needs
Selecting the right tool depends on your technical expertise, budget, and diagnostic needs. For basic battery voltage monitoring, a basic OBDII scanner or a multimeter may suffice. For more comprehensive diagnostics and access to Mercedes-Benz specific data, an advanced OBDII scanner or Mercedes-Benz diagnostic software is recommended.
3. Step-by-Step Guide to Reading Battery Voltage
Want to know how to check your Mercedes-Benz battery voltage? You’ve got a few options, and each one is pretty straightforward. Let’s walk through the steps using a multimeter and an OBDII scanner.
3.1. Using a Multimeter
A multimeter provides a direct measurement of the battery’s voltage. Here’s how to use one effectively:
3.1.1. Safety Precautions
Before starting, it’s important to take necessary safety measures:
- Wear Safety Glasses: Protect your eyes from any potential sparks or debris.
- Use Insulated Gloves: Prevent electrical shock.
- Work in a Well-Ventilated Area: Batteries can release hydrogen gas, which is flammable.
- Disconnect Accessories: Turn off or disconnect any accessories that could draw power from the battery.
3.1.2. Gathering Necessary Materials
Make sure you have everything you need on hand:
- Digital Multimeter: A reliable multimeter capable of reading DC voltage.
- Safety Glasses: To protect your eyes.
- Insulated Gloves: To protect your hands from electrical shock.
- Cleaning Supplies (Optional): To clean battery terminals if necessary.
- Wrench (Optional): To loosen and tighten battery terminals if needed.
3.1.3. Locating the Battery
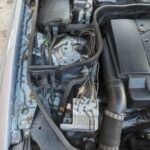
The battery location can vary depending on the Mercedes-Benz model:
- Under the Hood: In many models, the battery is located in the engine compartment, typically on either side of the engine.
- In the Trunk: Some models have the battery located in the trunk, often under the floor panel.
Consult your vehicle’s owner’s manual for the exact location.
3.1.4. Setting Up the Multimeter
Follow these steps to set up your multimeter correctly:
- Turn on the Multimeter: Switch on the multimeter.
- Select DC Voltage Mode: Turn the dial to the DC voltage (VDC) setting. Select a range that is higher than the expected voltage (e.g., 20V if you expect around 12V).
- Connect the Leads:
- Insert the black lead into the COM (common) port.
- Insert the red lead into the V (voltage) port.
3.1.5. Connecting the Multimeter to the Battery
- Identify Terminals: Locate the positive (+) and negative (-) terminals on the battery. The positive terminal is usually marked with a (+) sign and may have a red cover, while the negative terminal is marked with a (-) sign and may have a black cover.
- Connect the Leads:
- Attach the red lead of the multimeter to the positive (+) terminal of the battery.
- Attach the black lead of the multimeter to the negative (-) terminal of the battery.
3.1.6. Reading the Voltage
- Read the Display: Look at the multimeter display to read the voltage. A fully charged battery should read approximately 12.6 volts or higher when the engine is off.
- Record the Reading: Note the voltage reading for future reference.
3.1.7. Disconnecting the Multimeter
- Disconnect Leads: Remove the leads in the reverse order of connection:
- Remove the black lead from the negative (-) terminal.
- Remove the red lead from the positive (+) terminal.
- Turn off the Multimeter: Switch off the multimeter to conserve battery life.
- Store the Equipment: Store the multimeter and leads in a safe, dry place.
3.2. Using an OBDII Scanner
An OBDII scanner provides live data readings, including battery voltage, through the vehicle’s diagnostic port.
3.2.1. Finding the OBDII Port
The OBDII port is typically located under the dashboard on the driver’s side. Refer to your vehicle’s owner’s manual for the exact location if you’re unsure.
3.2.2. Connecting the Scanner
- Turn off the Ignition: Ensure the vehicle’s ignition is turned off.
- Plug in the Scanner: Connect the OBDII scanner to the OBDII port.
- Turn on the Ignition (Key On, Engine Off): Turn the ignition to the “key on, engine off” position. This provides power to the vehicle’s electrical system without starting the engine.
3.2.3. Navigating to Live Data
- Power on the Scanner: Turn on the OBDII scanner.
- Select Vehicle Information: Enter your vehicle’s information, such as make, model, and year, if prompted.
- Navigate to Live Data: Use the scanner’s menu to navigate to the “Live Data” or “Real-Time Data” section. The exact wording may vary depending on the scanner.
3.2.4. Finding Battery Voltage
- Locate Voltage Parameter: Scroll through the list of available parameters to find “Battery Voltage,” “Control Module Voltage,” or a similar term.
- Select and Display: Select the battery voltage parameter to display the real-time voltage reading.
3.2.5. Interpreting the Data
- Monitor the Voltage: Observe the voltage reading on the scanner.
- Engine Off Reading: With the engine off, a fully charged battery should read approximately 12.6 volts or higher.
- Engine On Reading: Start the engine. The voltage should increase to approximately 13.5 to 14.5 volts, indicating that the alternator is charging the battery.
3.2.6. Disconnecting the Scanner
- Turn off the Ignition: Turn off the vehicle’s ignition.
- Disconnect the Scanner: Unplug the OBDII scanner from the OBDII port.
- Store the Scanner: Store the OBDII scanner in a safe, dry place.
3.3. Best Practices for Accurate Readings
- Ensure Clean Connections: Clean any corrosion from the battery terminals before taking a reading.
- Turn off Accessories: Turn off headlights, air conditioning, and other accessories to get an accurate baseline reading.
- Allow Stabilization: Let the battery sit for a few minutes after turning off the engine before taking a reading.
- Use Quality Tools: Invest in a reliable multimeter or OBDII scanner for accurate and consistent readings.
- Check Connections: Ensure the multimeter and OBDII scanner are properly connected for accurate readings.
4. Interpreting Live Data Readings
How should you interpret the live data readings you obtain from your Mercedes-Benz? Understanding the readings will help you identify potential issues and take appropriate action to maintain your vehicle’s electrical system.
4.1. Normal Voltage Ranges
What are the expected voltage ranges for a healthy Mercedes-Benz battery?
- Engine Off: A fully charged battery should read between 12.6 and 12.8 volts.
- Engine Running: With the engine running, the voltage should be between 13.7 and 14.7 volts, indicating the alternator is charging the battery.
4.2. Identifying Potential Problems
What do abnormal voltage readings indicate?
4.2.1. Low Voltage (Engine Off)
- Reading: Below 12.6 volts.
- Possible Causes:
- Discharged Battery: The battery may be depleted due to parasitic drain, infrequent use, or old age.
- Parasitic Drain: Electrical components continue to draw power when the vehicle is off.
- Old Battery: Batteries lose their ability to hold a charge over time.
- Troubleshooting Steps:
- Check for Parasitic Drain: Use a multimeter to measure current draw with the engine off.
- Charge the Battery: Use a battery charger to fully charge the battery.
- Test the Battery: Have the battery tested at an auto parts store to determine its condition.
- Replace the Battery: If the battery is old or fails the test, replace it with a new one.
4.2.2. High Voltage (Engine Off)
- Reading: Above 12.8 volts.
- Possible Causes:
- Recent Charging: The battery may have been recently charged, resulting in a slightly elevated voltage.
- Surface Charge: A temporary voltage increase on the battery plates.
- Troubleshooting Steps:
- Allow Battery to Rest: Let the battery sit for a few hours to allow the surface charge to dissipate.
- Recheck Voltage: After resting, recheck the voltage to ensure it returns to a normal range.
4.2.3. Low Voltage (Engine Running)
- Reading: Below 13.7 volts.
- Possible Causes:
- Alternator Issues: The alternator may not be producing enough power to charge the battery.
- Loose Connections: Corroded or loose connections can impede the flow of electricity.
- High Electrical Load: Excessive use of electrical components can strain the charging system.
- Troubleshooting Steps:
- Check Alternator Output: Use a multimeter to measure the alternator’s output voltage while the engine is running.
- Inspect Connections: Check and clean battery terminals and alternator connections.
- Reduce Electrical Load: Turn off unnecessary electrical components to reduce the load on the charging system.
- Test the Alternator: Have the alternator tested at an auto parts store to determine its condition.
4.2.4. High Voltage (Engine Running)
- Reading: Above 14.7 volts.
- Possible Causes:
- Faulty Voltage Regulator: The voltage regulator may be malfunctioning, causing the alternator to overcharge the battery.
- Overcharging: Continuous overcharging can damage the battery and electrical components.
- Troubleshooting Steps:
- Check Voltage Regulator: Have the voltage regulator tested to ensure it is functioning properly.
- Inspect Charging System: Check the entire charging system for any issues that may be causing overcharging.
- Replace Voltage Regulator: If the voltage regulator is faulty, replace it to prevent further damage.
4.3. Common Scenarios and Solutions
| Scenario | Voltage Reading (Engine Off) | Voltage Reading (Engine Running) | Possible Cause | Solution |
|---|---|---|---|---|
| Car won’t start | Below 12.0V | N/A | Discharged or dead battery | Jump-start the car, charge the battery, or replace it if necessary. |
| Battery drains quickly | 12.6V initially, drops fast | 13.5V – 14.5V | Parasitic drain | Check for and eliminate parasitic drains by disconnecting accessories or repairing faulty circuits. |
| Dim headlights at idle | 12.4V – 12.6V | Below 13.5V | Underperforming alternator | Test and replace the alternator if necessary. |
| Warning lights flickering | Varies | Above 14.7V | Overcharging due to faulty voltage regulator | Test and replace the voltage regulator. |
| Battery light on the dashboard | Varies | Below 13.5V or Above 14.7V | Charging system malfunction (alternator or regulator) | Have the charging system inspected and repaired or replaced as needed. |
| Slow engine cranking | 12.0V – 12.4V | 13.5V – 14.5V | Partially discharged battery | Charge the battery fully and check the charging system. |
| Electrical components not functioning | Below 12.0V | N/A | Severely discharged battery | Charge or replace the battery and check the charging system for any underlying issues. |
4.4. When to Seek Professional Help
When should you consult a professional mechanic?
- Uncertainty: If you’re unsure about interpreting the voltage readings or troubleshooting the issue.
- Complex Issues: If the problem persists after basic troubleshooting.
- Specialized Equipment Needed: If you lack the necessary tools or expertise to perform advanced diagnostics or repairs.
5. Advanced Diagnostics and Troubleshooting
Ready to dive deeper into diagnosing and fixing issues with your Mercedes-Benz battery voltage? Let’s explore some advanced techniques and tools that can help you pinpoint and resolve electrical problems.
5.1. Parasitic Drain Testing
A parasitic drain occurs when electrical components continue to draw power from the battery when the vehicle is off. Identifying and eliminating parasitic drains is crucial for preventing battery drain and ensuring reliable starting.
5.1.1. Identifying Parasitic Drain
- Symptoms:
- Battery is dead or significantly discharged after sitting for a short period.
- Slow engine cranking.
- Frequent need to jump-start the vehicle.
- Tools Needed:
- Digital multimeter with amperage measurement capability.
- Ammeter with a clamp.
5.1.2. Step-by-Step Testing Procedure
-
Prepare the Vehicle:
- Park the vehicle on a level surface.
- Turn off the engine and remove the key from the ignition.
- Ensure all lights, accessories, and aftermarket devices are turned off.
- Open the hood and locate the battery.
-
Disconnect the Negative Battery Terminal:
- Loosen the nut on the negative (-) battery terminal.
- Carefully disconnect the terminal from the battery post.
-
Connect the Multimeter in Series:
- Set the multimeter to amperage (A) mode, typically in the milliamp (mA) range.
- Connect one lead of the multimeter to the disconnected negative battery terminal cable.
- Connect the other lead of the multimeter to the negative (-) battery post.
- Ensure the connection is secure and stable.
-
Allow the Vehicle to Settle:
- After connecting the multimeter, wait for 20-30 minutes to allow the vehicle’s electrical system to enter sleep mode.
- Avoid opening doors or using any electrical components during this time.
-
Read the Current Draw:
- Observe the amperage reading on the multimeter.
- A normal parasitic draw should be less than 50 mA (0.05 amps).
- Readings above 50 mA indicate a potential parasitic drain.
-
Isolate the Circuit:
- If the current draw is high, begin isolating circuits to identify the source of the drain.
- Locate the fuse box(es) in the vehicle.
- One at a time, remove each fuse and observe the multimeter reading.
- When the current draw drops significantly after removing a fuse, the circuit associated with that fuse is likely the source of the parasitic drain.
-
Investigate the Circuit:
- Consult the vehicle’s wiring diagram to identify the components and wiring associated with the affected circuit.
- Inspect the wiring for damage, shorts, or corrosion.
- Check the components connected to the circuit, such as lights, modules, and sensors, for malfunctions.
-
Repair or Replace Faulty Components:
- Repair any damaged wiring or connections.
- Replace any faulty components that are causing the parasitic drain.
-
Verify the Repair:
- After making the necessary repairs, retest the parasitic draw to ensure it is within the normal range (less than 50 mA).
- Reconnect the negative battery terminal.
- Monitor the battery voltage over time to ensure it remains stable.
5.2. Alternator Testing
The alternator is responsible for charging the battery and providing power to the vehicle’s electrical system while the engine is running. Testing the alternator can help determine if it is functioning correctly.
5.2.1. Symptoms of a Failing Alternator
- Battery warning light on the dashboard.
- Dim headlights, especially at idle.
- Slow or no engine cranking.
- Frequent need to jump-start the vehicle.
- Electrical components malfunctioning.
5.2.2. Testing Procedure
-
Visual Inspection:
- Inspect the alternator for physical damage, such as cracks, dents, or loose connections.
- Check the belt tension and condition.
- Ensure all wiring connections are clean and secure.
-
Voltage Test:
- Start the engine and allow it to idle.
- Set the multimeter to DC voltage (VDC) mode.
- Connect the red lead to the positive (+) battery terminal and the black lead to the negative (-) battery terminal.
- Read the voltage on the multimeter. A healthy alternator should produce between 13.7 and 14.7 volts.
- If the voltage is outside this range, proceed to the next steps.
-
Load Test:
- Turn on the headlights, air conditioning, and other electrical accessories to create a load on the alternator.
- Monitor the voltage on the multimeter. The voltage should remain within the 13.7 to 14.7-volt range.
- If the voltage drops significantly below 13.7 volts, the alternator may be unable to handle the electrical load, indicating a potential issue.
-
Alternator Diode Ripple Test:
- Set the multimeter to AC voltage (VAC) mode.
- Connect the red lead to the positive (+) battery terminal and the black lead to the negative (-) battery terminal.
- Read the AC voltage on the multimeter. A healthy alternator should have very low AC ripple voltage, typically less than 0.5 volts.
- Excessive AC ripple voltage indicates a failing diode inside the alternator, which can cause battery drain and electrical issues.
5.2.3. Interpreting Results
- Low Voltage: Indicates a weak or failing alternator. Check the belt tension, wiring connections, and alternator output.
- High Voltage: Indicates a faulty voltage regulator. Replace the voltage regulator or the entire alternator.
- Excessive AC Ripple Voltage: Indicates a failing diode inside the alternator. Replace the alternator.
5.3. Battery Load Testing
A battery load test measures the battery’s ability to deliver sufficient current under load, simulating the demands of starting the engine.
5.3.1. Performing a Load Test
-
Prepare the Battery:
- Ensure the battery is fully charged.
- Clean the battery terminals and connections.
-
Connect the Load Tester:
- Connect the load tester to the battery terminals, following the manufacturer’s instructions.
- Ensure the connections are secure and properly aligned.
-
Apply the Load:
- Apply the specified load for the recommended duration (typically 15 seconds).
- Monitor the voltage on the load tester during the test.
-
Interpret the Results:
- Compare the voltage reading to the load tester’s specifications.
- A healthy battery should maintain a voltage above the minimum threshold (typically around 9.6 volts for a 12-volt battery).
- If the voltage drops below the threshold, the battery is likely weak and needs to be replaced.
5.4. Using Mercedes-Benz Diagnostic Software
For advanced diagnostics, Mercedes-Benz diagnostic software such as XENTRY or DAS (Diagnostic Assistance System) provides the most comprehensive capabilities.
5.4.1. Accessing Battery and Charging System Data
-
Connect the Diagnostic Tool:
- Connect the diagnostic tool to the vehicle’s OBDII port.
- Follow the software prompts to establish communication with the vehicle.
-
Navigate to Diagnostic Functions:
- Use the software menu to navigate to the diagnostic functions related to the battery and charging system.
- This may include sections such as “Battery Management,” “Charging System Analysis,” or “Electrical System Diagnostics.”
-
Read Live Data:
- Access live data readings for battery voltage, alternator output, charging current, and other relevant parameters.
- Monitor the data while the engine is running and under different electrical loads.
-
Perform Diagnostic Tests:
- Use the software to perform diagnostic tests such as battery capacity tests, alternator load tests, and voltage drop tests.
- Follow the software prompts to execute the tests and interpret the results.
-
Check for Diagnostic Trouble Codes (DTCs):
- Scan the vehicle’s systems for any diagnostic trouble codes (DTCs) related to the battery and charging system.
- Record the DTCs and use the software’s troubleshooting guides to diagnose and resolve the issues.
5.5. Common Diagnostic Trouble Codes (DTCs)
| DTC Code | Description | Possible Causes | Troubleshooting Steps |
|---|---|---|---|
| P0560 | System Voltage Malfunction | Low battery voltage, faulty alternator, loose connections, parasitic drain. | Check battery voltage, test alternator output, inspect connections, perform parasitic draw test. |
| P0625 | Generator Field Terminal Circuit Low | Faulty alternator, wiring issues, ECM problem. | Check alternator wiring, test alternator output, inspect ECM. |
| P0626 | Generator Field Terminal Circuit High | Faulty alternator, wiring issues, ECM problem. | Check alternator wiring, test alternator output, inspect ECM. |
| B1002 | Battery Voltage Low | Low battery voltage, parasitic drain, charging system issue. | Check battery voltage, perform parasitic draw test, test alternator. |
| B1003 | Battery Voltage High | Faulty voltage regulator, overcharging. | Test voltage regulator, check charging system. |
| P0562 | System Voltage Low | Weak battery, alternator not charging, loose or corroded connections. | Check battery condition, test alternator output, inspect and clean connections. |
| P0563 | System Voltage High | Faulty voltage regulator causing overcharging. | Test voltage regulator and replace if necessary. |
| B1487 | Battery Sensor Faulty | Malfunctioning battery sensor. | Replace the battery sensor. |
| P0615 | Starter Relay Circuit | Faulty starter relay, wiring issues, starter motor problem. | Check starter relay and wiring, test starter motor. |
| P0616 | Starter Relay Circuit Low | Wiring issues, faulty relay. | Inspect wiring, check and replace the starter relay. |
5.6. When to Consult a Professional
- Complex Electrical Issues: If you encounter complex electrical issues that you cannot diagnose or resolve.
- Safety Concerns: If you are uncomfortable working with electrical systems or unsure about safety precautions.
- Specialized Tools or Software Required: If advanced diagnostics require specialized tools or Mercedes-Benz diagnostic software.
By following these advanced diagnostic and troubleshooting techniques, you can effectively identify and resolve a wide range of battery voltage and charging system issues on your Mercedes-Benz. Always prioritize safety and consult a professional when needed.
6. Maintaining Optimal Battery Health
Want to keep your Mercedes-Benz battery in tip-top shape? Regular maintenance can extend its life and ensure reliable performance. Here’s a guide to help you maintain optimal battery health.
6.1. Regular Inspections
How often should you inspect your battery?
- Frequency: Inspect your battery at least every three months or during routine maintenance checks.
6.1.1. Visual Checks
What should you look for during a visual inspection?
- Corrosion: Check for white or bluish deposits on the battery terminals and connections.
- Cracks or Bulges: Inspect the battery case for any signs of damage.
- Loose Connections: Ensure the battery terminals and connections are tight and secure.
6.1.2. Cleaning Terminals
How do you clean corroded battery terminals?
- Safety First: Wear safety glasses and gloves.
- Disconnect Terminals: Disconnect the negative terminal first, followed by the positive terminal.
- Prepare Cleaning Solution: Mix a solution of baking soda and water.
- Clean Terminals: Apply the solution to the terminals and scrub with a wire brush.
- Rinse and Dry: Rinse with water and dry thoroughly.
- Reconnect Terminals: Reconnect the positive terminal first, followed by the negative terminal.
- Apply Protective Grease: Apply a thin layer of dielectric grease to the terminals to prevent future corrosion.
6.2. Proper Charging Habits
How can you ensure your battery is properly charged?
6.2.1. Avoiding Short Trips
- Why: Short trips may not allow the alternator enough time to fully recharge the battery.
- Solution: Combine short trips or take longer drives periodically to ensure the battery is fully charged.
6.2.2. Minimizing Electrical Load
- Why: Excessive use of electrical components can strain the battery and charging system.
- Solution: Turn off unnecessary electrical accessories, such as headlights, air conditioning, and heated seats, when not needed.
6.2.3. Using a Battery Maintainer
- Why: A battery maintainer can keep the battery at its optimal charge level, especially during periods of infrequent use.
- Solution: Connect a battery maintainer to the battery when the vehicle is not in use for extended periods.
6.3. Addressing Parasitic Drains
How do you identify and address parasitic drains?
6.3.1. Identifying Sources of Drain
- Technique: Use a multimeter to measure current draw with the engine off.
- Normal Range: A normal parasitic draw should be less than 50 mA (0.05 amps).
- Isolating Circuits: Remove fuses one by one to identify the circuit causing the excessive draw.
6.3.2. Repairing Faulty Circuits
- Inspection: Inspect the wiring and components in the affected circuit for damage or malfunctions.
- Repair or Replacement: Repair any damaged wiring or replace faulty components.
6.4. Protecting Against Extreme Temperatures
How do extreme