The 16 Pin Obd2 To 19 Pin Hdmi adapter serves as a bridge between your Mercedes-Benz diagnostic system and external display devices. At MERCEDES-DIAGNOSTIC-TOOL.EDU.VN, we are committed to providing you with a streamlined approach to diagnosing and understanding your Mercedes-Benz vehicle, ensuring that you have access to the latest tools and expert guidance. This adapter enhances your diagnostic capabilities, allowing for a more comprehensive and accessible vehicle analysis. We’ll guide you through everything you need to know, from compatibility and setup to advanced diagnostic techniques, all while keeping it straightforward and easy to understand.
Contents
- 1. Understanding the 16 Pin OBD2 to 19 Pin HDMI Adapter
- 1.1. What is OBD2?
- 1.2. What is HDMI?
- 1.3. Why Use a 16 Pin OBD2 to 19 Pin HDMI Adapter?
- 1.4. Key Features of the Adapter
- 2. Compatibility with Mercedes-Benz Models
- 2.1. Supported Models
- 2.2. Checking for Compatibility
- 2.3. Potential Issues and Solutions
- 3. Setting Up the 16 Pin OBD2 to 19 Pin HDMI Adapter
- 3.1. Step-by-Step Installation Guide
- 3.2. Software and Driver Requirements
- 3.3. Troubleshooting Common Issues
- 4. Performing Basic Diagnostics with the Adapter
- 4.1. Reading Trouble Codes
- 4.2. Monitoring Real-Time Data
- 4.3. Performing Basic Tests
- 5. Advanced Diagnostic Techniques
- 5.1. Reading and Interpreting Freeze Frame Data
- 5.2. Performing Active Tests
- 5.3. Using Live Data to Diagnose Intermittent Issues
- 6. Tips and Tricks for Effective Diagnostics
- 6.1. Keeping Your Diagnostic Software Up to Date
- 6.2. Understanding Mercedes-Benz Specific Codes
- 6.3. Using Online Resources and Forums
- 6.4. The Importance of Regular Vehicle Maintenance
- 7. Common Mistakes to Avoid
- 7.1. Incorrectly Interpreting Trouble Codes
- 7.2. Neglecting Basic Troubleshooting Steps
- 7.3. Overlooking Vehicle History and Symptoms
- 7.4. Ignoring Software Updates and Patches
- 8. Choosing the Right Diagnostic Tool
- 8.1. Types of Diagnostic Tools Available
- 8.2. Features to Look for in a Diagnostic Tool
- 8.3. Recommended Diagnostic Tools for Mercedes-Benz
- 8.4. Where to Buy Diagnostic Tools
- 9. Understanding Mercedes-Benz Diagnostic Protocols
- 9.1. Overview of OBD2, CAN, and Other Protocols
- 9.2. How to Determine the Correct Protocol for Your Vehicle
- 9.3. Troubleshooting Protocol Communication Issues
- 10. Advanced Features and Customization
- 10.1. Accessing Hidden Features and Settings
- 10.2. Performing Software Updates and Recoding
- 10.3. Customizing Vehicle Parameters
- 11. Safety Precautions
- 11.1. Working with Electrical Systems
- 11.2. Handling Hazardous Materials
- 11.3. Following Manufacturer’s Guidelines
- 12. The Future of Automotive Diagnostics
- 12.1. Emerging Technologies in Diagnostics
- 12.2. How Diagnostics are Becoming More User-Friendly
- 12.3. The Role of Mobile Apps in Vehicle Diagnostics
- 13. Benefits of Using MERCEDES-DIAGNOSTIC-TOOL.EDU.VN
- 13.1. Expert Advice and Support
- 13.2. Comprehensive Diagnostic Resources
- 13.3. Access to the Latest Tools and Technology
- 13.4. Community Forum for Mercedes-Benz Enthusiasts
- 14. Real-World Examples of Using the Adapter
- 14.1. Diagnosing an Intermittent Engine Misfire
- 14.2. Identifying a Faulty Oxygen Sensor
- 14.3. Performing an Active Test on a Fuel Pump
- 15. Maintenance and Care for Your Adapter
- 15.1. Proper Storage Techniques
- 15.2. Cleaning Instructions
- 15.3. Preventing Damage
- 16. Frequently Asked Questions (FAQ)
- 16.1. What is the best diagnostic tool for Mercedes-Benz?
- 16.2. How do I unlock hidden features on my Mercedes-Benz?
- 16.3. How often should I service my Mercedes-Benz?
- 16.4. Can I use any OBD2 scanner on my Mercedes-Benz?
- 16.5. What does a check engine light mean on my Mercedes-Benz?
- 16.6. How do I reset the service indicator on my Mercedes-Benz?
- 16.7. What is the difference between OBD1 and OBD2?
- 16.8. How do I find the OBD2 port on my Mercedes-Benz?
- 16.9. What are common issues that trigger the check engine light on Mercedes-Benz vehicles?
- 16.10. How can MERCEDES-DIAGNOSTIC-TOOL.EDU.VN help me with my Mercedes-Benz diagnostics?
- 17. Conclusion
1. Understanding the 16 Pin OBD2 to 19 Pin HDMI Adapter
The 16-pin OBD2 to 19-pin HDMI adapter allows you to connect your vehicle’s On-Board Diagnostic (OBD) system to an HDMI-compatible display. This can significantly enhance your ability to monitor and diagnose your Mercedes-Benz vehicle.
1.1. What is OBD2?
OBD2, or On-Board Diagnostics II, is a standardized system used in most vehicles manufactured after 1996. It provides access to various vehicle subsystems, including engine, transmission, and emissions. According to the Environmental Protection Agency (EPA), OBD2 was implemented to monitor the performance of an engine’s major components, including those responsible for controlling emissions (EPA, 2023).
1.2. What is HDMI?
HDMI, or High-Definition Multimedia Interface, is a standard interface for transmitting high-definition video and audio signals from a source device, such as a diagnostic tool, to a display device like a monitor or TV.
1.3. Why Use a 16 Pin OBD2 to 19 Pin HDMI Adapter?
Using a 16-pin OBD2 to 19-pin HDMI adapter offers several benefits:
- Enhanced Visualization: Allows for real-time data to be displayed on a larger screen, making it easier to read and analyze.
- Improved Diagnostics: Facilitates more detailed and comprehensive diagnostics by providing a clearer view of the data.
- User-Friendly Interface: Simplifies the diagnostic process, making it accessible for both professionals and DIY enthusiasts.
1.4. Key Features of the Adapter
The key features of a high-quality 16-pin OBD2 to 19-pin HDMI adapter include:
- High-Speed Data Transmission: Ensures real-time data transfer without lag.
- Durability: Constructed from high-quality materials to withstand regular use.
- Wide Compatibility: Compatible with a broad range of Mercedes-Benz models and diagnostic tools.
- Plug-and-Play Functionality: Easy to set up and use without requiring complex configurations.
2. Compatibility with Mercedes-Benz Models
The 16-pin OBD2 to 19-pin HDMI adapter is designed to be compatible with a wide range of Mercedes-Benz models. However, it is crucial to ensure that your vehicle and diagnostic tool are fully supported.
2.1. Supported Models
The adapter typically supports Mercedes-Benz models manufactured after 1996, as these vehicles are equipped with the OBD2 system. Here is a list of some commonly supported models:
| Model | Year Range |
|---|---|
| C-Class | 1996-Present |
| E-Class | 1996-Present |
| S-Class | 1996-Present |
| GLC | 2015-Present |
| GLE | 2015-Present |
| A-Class | 2018-Present |
| CLA | 2013-Present |
| CLS | 2004-Present |
| GLA | 2014-Present |
2.2. Checking for Compatibility
To verify compatibility, consult your vehicle’s manual or the adapter’s product specifications. Ensure that both your Mercedes-Benz model and your diagnostic tool are listed as supported devices. You can also visit MERCEDES-DIAGNOSTIC-TOOL.EDU.VN for a comprehensive compatibility list and expert advice.
2.3. Potential Issues and Solutions
While the adapter is designed for broad compatibility, some issues may arise:
- Software Incompatibility: Ensure your diagnostic software is up to date to support the adapter.
- Hardware Limitations: Older diagnostic tools may not fully support the adapter’s features. Consider upgrading to a newer tool.
- Connection Problems: Check the cable and connections to ensure they are secure and functioning correctly.
3. Setting Up the 16 Pin OBD2 to 19 Pin HDMI Adapter
Setting up the 16-pin OBD2 to 19-pin HDMI adapter is a straightforward process. Follow these steps to ensure a successful connection.
3.1. Step-by-Step Installation Guide
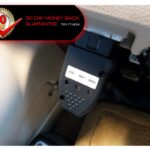
- Locate the OBD2 Port: The OBD2 port is typically located under the dashboard on the driver’s side. Refer to your vehicle’s manual if you are unsure of its exact location.
- Connect the Adapter: Plug the 16-pin OBD2 end of the adapter into your vehicle’s OBD2 port. Ensure it clicks into place for a secure connection.
- Connect the HDMI Cable: Plug one end of the HDMI cable into the adapter’s HDMI port.
- Connect to Display: Plug the other end of the HDMI cable into your display device (monitor, TV, etc.).
- Power On: Turn on your vehicle’s ignition and your display device.
- Launch Diagnostic Software: Start your diagnostic software and select the appropriate settings for OBD2 connectivity.
3.2. Software and Driver Requirements
Ensure that your diagnostic software is compatible with the adapter. You may need to install specific drivers or updates to enable full functionality. Check the adapter’s documentation or the manufacturer’s website for the necessary software and drivers.
3.3. Troubleshooting Common Issues
- No Display:
- Verify that all connections are secure.
- Check the HDMI cable for damage.
- Ensure your display device is set to the correct HDMI input.
- Software Not Recognizing Adapter:
- Install or update the necessary drivers.
- Restart your diagnostic software.
- Consult the software’s documentation for troubleshooting tips.
- Data Transmission Problems:
- Check for any error messages from the diagnostic software.
- Ensure the adapter is fully compatible with your vehicle and software.
4. Performing Basic Diagnostics with the Adapter
Once the adapter is set up, you can begin performing basic diagnostics on your Mercedes-Benz. This includes reading trouble codes, monitoring real-time data, and performing basic tests.
4.1. Reading Trouble Codes
Reading trouble codes is one of the primary functions of an OBD2 diagnostic tool. These codes can help identify potential issues with your vehicle.
- Connect the Adapter: Ensure the adapter is properly connected to your vehicle and display device.
- Launch Diagnostic Software: Start your diagnostic software and select the option to read trouble codes.
- Interpret the Codes: The software will display any stored trouble codes. Refer to your vehicle’s manual or online resources to interpret the meaning of each code.
4.2. Monitoring Real-Time Data
Monitoring real-time data allows you to observe your vehicle’s performance in real-time. This can be useful for diagnosing intermittent issues or monitoring the overall health of your vehicle.
- Select Data Parameters: Choose the data parameters you want to monitor (e.g., engine RPM, coolant temperature, etc.).
- Start Monitoring: Begin monitoring the data and observe the values displayed on your screen.
- Analyze the Data: Look for any unusual or out-of-range values that may indicate a problem.
4.3. Performing Basic Tests
Some diagnostic software allows you to perform basic tests on your vehicle’s systems. These tests can help verify the functionality of various components.
- Select the Test: Choose the test you want to perform from the software’s menu.
- Follow Instructions: Follow the on-screen instructions to perform the test.
- Interpret Results: Analyze the results of the test to determine if any components are not functioning correctly.
5. Advanced Diagnostic Techniques
For more in-depth diagnostics, you can use the 16-pin OBD2 to 19-pin HDMI adapter to perform advanced tests and analyses.
5.1. Reading and Interpreting Freeze Frame Data
Freeze frame data captures a snapshot of the vehicle’s operating conditions at the moment a trouble code was stored. This can provide valuable insight into the cause of the problem.
- Access Freeze Frame Data: Use your diagnostic software to access the freeze frame data associated with a specific trouble code.
- Analyze the Data: Examine the data parameters (e.g., engine load, RPM, fuel trim) to identify any unusual conditions that may have triggered the code.
5.2. Performing Active Tests
Active tests allow you to control certain vehicle components using the diagnostic software. This can be useful for verifying the functionality of actuators and sensors.
- Select the Active Test: Choose the active test you want to perform from the software’s menu (e.g., turning on the fuel pump, activating the cooling fan).
- Execute the Test: Follow the on-screen instructions to execute the test.
- Observe Results: Observe the vehicle’s response to the test and verify that the component is functioning correctly.
5.3. Using Live Data to Diagnose Intermittent Issues
Live data is invaluable for diagnosing intermittent issues that may not trigger trouble codes. By monitoring data parameters in real-time, you can identify any anomalies that occur during specific driving conditions.
- Set Up Live Data Monitoring: Configure your diagnostic software to monitor the relevant data parameters.
- Recreate the Issue: Drive the vehicle under the conditions that typically cause the issue.
- Analyze the Data: Observe the live data for any unusual patterns or values that correlate with the issue.
6. Tips and Tricks for Effective Diagnostics
To get the most out of your 16-pin OBD2 to 19-pin HDMI adapter, consider these tips and tricks.
6.1. Keeping Your Diagnostic Software Up to Date
Regularly update your diagnostic software to ensure you have the latest features, bug fixes, and vehicle coverage. Software updates can improve the accuracy and reliability of your diagnostics.
6.2. Understanding Mercedes-Benz Specific Codes
Mercedes-Benz may use proprietary trouble codes that are not part of the standard OBD2 protocol. Research these codes to gain a deeper understanding of potential issues. Resources like MERCEDES-DIAGNOSTIC-TOOL.EDU.VN can provide valuable information on Mercedes-Benz specific codes.
6.3. Using Online Resources and Forums
Online resources and forums can be a great source of information and support for diagnosing and repairing your Mercedes-Benz. Consult reputable forums and online databases for troubleshooting tips, repair procedures, and expert advice.
6.4. The Importance of Regular Vehicle Maintenance
Regular vehicle maintenance is crucial for preventing diagnostic issues. Keep your Mercedes-Benz well-maintained by following the manufacturer’s recommended service intervals. This can help prevent minor issues from escalating into major problems.
7. Common Mistakes to Avoid
To ensure accurate and safe diagnostics, avoid these common mistakes.
7.1. Incorrectly Interpreting Trouble Codes
Trouble codes provide a starting point for diagnostics, but they do not always pinpoint the exact cause of the problem. Always perform further investigation to verify the root cause.
7.2. Neglecting Basic Troubleshooting Steps
Before diving into advanced diagnostics, perform basic troubleshooting steps such as checking fuses, wiring connections, and fluid levels. Often, simple issues can be resolved quickly with basic troubleshooting.
7.3. Overlooking Vehicle History and Symptoms
Consider the vehicle’s history and symptoms when performing diagnostics. Has the vehicle recently undergone any repairs or maintenance? What symptoms is the driver experiencing? This information can provide valuable clues.
7.4. Ignoring Software Updates and Patches
Ignoring software updates and patches can lead to inaccurate diagnostics and compatibility issues. Keep your diagnostic software up to date to ensure you have the latest features and bug fixes.
8. Choosing the Right Diagnostic Tool
Selecting the right diagnostic tool is essential for effective and accurate diagnostics. Consider these factors when choosing a tool.
8.1. Types of Diagnostic Tools Available
There are several types of diagnostic tools available, ranging from basic code readers to advanced scan tools.
- Basic Code Readers: These tools can read and clear trouble codes. They are suitable for basic diagnostics.
- Mid-Range Scan Tools: These tools offer additional features such as live data monitoring, freeze frame data, and basic testing capabilities.
- Advanced Scan Tools: These tools provide comprehensive diagnostic capabilities, including active tests, bi-directional control, and access to manufacturer-specific data.
8.2. Features to Look for in a Diagnostic Tool
When choosing a diagnostic tool, look for these key features:
- Vehicle Coverage: Ensure the tool supports your Mercedes-Benz model and year.
- Functionality: Consider the features you need, such as trouble code reading, live data monitoring, active tests, and bi-directional control.
- Ease of Use: Choose a tool with a user-friendly interface and clear instructions.
- Update Capability: Ensure the tool can be updated with the latest software and vehicle coverage.
8.3. Recommended Diagnostic Tools for Mercedes-Benz
Here are some recommended diagnostic tools for Mercedes-Benz:
| Tool | Features | Price Range |
|---|---|---|
| Autel MaxiCOM MK906BT | Comprehensive diagnostics, active tests, bi-directional control, wireless connectivity | $1,500-$2,000 |
| Launch X431 V+ | Wide vehicle coverage, advanced functions, remote diagnostics | $1,200-$1,800 |
| iCarsoft MB V3.0 | Mercedes-Benz specific diagnostics, code reading, live data, actuation tests | $200-$300 |
| Thinkdiag | Portable, Bluetooth connectivity, code reading, live data, special functions | $100-$200 |
8.4. Where to Buy Diagnostic Tools
Diagnostic tools can be purchased from various sources, including:
- Online Retailers: Amazon, eBay, etc.
- Automotive Parts Stores: AutoZone, Advance Auto Parts, etc.
- Specialty Diagnostic Tool Suppliers: Companies that specialize in selling diagnostic equipment.
- MERCEDES-DIAGNOSTIC-TOOL.EDU.VN can point you in the right direction
9. Understanding Mercedes-Benz Diagnostic Protocols
Mercedes-Benz vehicles use various diagnostic protocols, including OBD2, CAN, and manufacturer-specific protocols. Understanding these protocols is essential for effective diagnostics.
9.1. Overview of OBD2, CAN, and Other Protocols
- OBD2: The standard protocol used for emissions-related diagnostics. It provides access to basic trouble codes and data.
- CAN (Controller Area Network): A communication protocol used for transmitting data between various vehicle modules. It allows for faster and more reliable communication than older protocols.
- Manufacturer-Specific Protocols: Mercedes-Benz may use proprietary protocols for accessing advanced diagnostic information and performing specific tests.
9.2. How to Determine the Correct Protocol for Your Vehicle
Refer to your vehicle’s manual or the diagnostic software documentation to determine the correct protocol for your vehicle. Some diagnostic tools can automatically detect the protocol.
9.3. Troubleshooting Protocol Communication Issues
If you encounter protocol communication issues, try these troubleshooting steps:
- Verify Compatibility: Ensure your diagnostic tool supports the correct protocol for your vehicle.
- Check Connections: Check the OBD2 port and adapter connections for damage or corrosion.
- Update Software: Update your diagnostic software to the latest version.
- Consult Documentation: Refer to the diagnostic tool’s documentation for troubleshooting tips.
10. Advanced Features and Customization
The 16-pin OBD2 to 19-pin HDMI adapter can also be used for advanced features and customization options.
10.1. Accessing Hidden Features and Settings
Some diagnostic tools allow you to access hidden features and settings in your Mercedes-Benz. These features may include customizing lighting options, enabling additional driver assistance systems, and adjusting vehicle parameters.
10.2. Performing Software Updates and Recoding
Advanced diagnostic tools can be used to perform software updates and recoding on various vehicle modules. This can be useful for fixing software glitches, improving performance, and enabling new features.
10.3. Customizing Vehicle Parameters
Some diagnostic tools allow you to customize vehicle parameters such as engine performance, transmission settings, and suspension characteristics. However, exercise caution when customizing these parameters, as incorrect settings can negatively impact vehicle performance and reliability.
11. Safety Precautions
Always follow these safety precautions when performing diagnostics on your Mercedes-Benz.
11.1. Working with Electrical Systems
- Disconnect the battery before working on electrical systems to prevent electrical shock.
- Use insulated tools to avoid short circuits.
- Follow the manufacturer’s instructions for working on electrical components.
11.2. Handling Hazardous Materials
- Wear appropriate personal protective equipment (PPE) such as gloves and eye protection when handling hazardous materials such as fuel, oil, and coolant.
- Dispose of hazardous materials properly according to local regulations.
11.3. Following Manufacturer’s Guidelines
- Always follow the manufacturer’s guidelines for diagnosing and repairing your Mercedes-Benz.
- Consult the vehicle’s manual and repair manuals for specific instructions and safety precautions.
12. The Future of Automotive Diagnostics
The field of automotive diagnostics is constantly evolving, with new technologies and techniques emerging all the time.
12.1. Emerging Technologies in Diagnostics
Some emerging technologies in automotive diagnostics include:
- Artificial Intelligence (AI): AI-powered diagnostic tools can analyze vast amounts of data to identify potential issues and recommend repairs.
- Remote Diagnostics: Remote diagnostics allow technicians to diagnose and repair vehicles remotely using telematics data and remote access tools.
- Augmented Reality (AR): AR technology can overlay diagnostic information onto the real-world view of the vehicle, making it easier to identify components and perform repairs.
12.2. How Diagnostics are Becoming More User-Friendly
Diagnostic tools are becoming more user-friendly with intuitive interfaces, guided troubleshooting procedures, and integrated repair information. This makes it easier for both professionals and DIY enthusiasts to diagnose and repair vehicles.
12.3. The Role of Mobile Apps in Vehicle Diagnostics
Mobile apps are playing an increasingly important role in vehicle diagnostics. These apps can be used to read trouble codes, monitor live data, and access repair information using a smartphone or tablet.
13. Benefits of Using MERCEDES-DIAGNOSTIC-TOOL.EDU.VN
At MERCEDES-DIAGNOSTIC-TOOL.EDU.VN, we are committed to providing you with the latest tools, expert advice, and comprehensive support for diagnosing and maintaining your Mercedes-Benz.
13.1. Expert Advice and Support
Our team of experienced technicians can provide you with expert advice and support for diagnosing and repairing your Mercedes-Benz. We are here to answer your questions, provide troubleshooting tips, and help you find the right diagnostic tools for your needs.
13.2. Comprehensive Diagnostic Resources
We offer a comprehensive collection of diagnostic resources, including:
- Trouble code definitions
- Repair procedures
- Technical service bulletins
- Wiring diagrams
- Diagnostic tips
13.3. Access to the Latest Tools and Technology
We provide access to the latest diagnostic tools and technology, ensuring that you have the resources you need to diagnose and repair your Mercedes-Benz effectively.
13.4. Community Forum for Mercedes-Benz Enthusiasts
Join our community forum to connect with other Mercedes-Benz enthusiasts, share your experiences, and get advice from experts. Our forum is a great place to learn about diagnostics, repairs, and maintenance.
14. Real-World Examples of Using the Adapter
To illustrate the benefits of using the 16-pin OBD2 to 19-pin HDMI adapter, here are some real-world examples.
14.1. Diagnosing an Intermittent Engine Misfire
A Mercedes-Benz owner was experiencing an intermittent engine misfire that was not triggering any trouble codes. By connecting the 16-pin OBD2 to 19-pin HDMI adapter and monitoring live data, the owner was able to identify a faulty ignition coil that was causing the misfire under certain driving conditions.
14.2. Identifying a Faulty Oxygen Sensor
A technician was troubleshooting a Mercedes-Benz with poor fuel economy and a check engine light. By using the adapter to monitor oxygen sensor data, the technician was able to identify a faulty oxygen sensor that was not functioning correctly. Replacing the sensor resolved the issue and improved fuel economy.
14.3. Performing an Active Test on a Fuel Pump
A DIY enthusiast was diagnosing a Mercedes-Benz that would not start. By using the adapter to perform an active test on the fuel pump, the enthusiast was able to verify that the fuel pump was not functioning correctly. Replacing the fuel pump resolved the issue and allowed the vehicle to start.
15. Maintenance and Care for Your Adapter
To ensure your 16-pin OBD2 to 19-pin HDMI adapter lasts long and works reliably, proper maintenance and care are essential.
15.1. Proper Storage Techniques
- Keep it Clean: Store the adapter in a clean, dry place to prevent dust and moisture from damaging the connectors.
- Use a Case: If possible, store the adapter in a protective case to shield it from physical damage.
- Avoid Extreme Temperatures: Do not store the adapter in places with extreme temperatures, as this can degrade the materials over time.
15.2. Cleaning Instructions
- Gentle Cleaning: Use a soft, dry cloth to clean the adapter. If necessary, slightly dampen the cloth with isopropyl alcohol.
- Avoid Harsh Chemicals: Do not use harsh chemicals or solvents, as they can damage the plastic and electronic components.
- Connector Care: Inspect the connectors regularly for dirt and debris. Use a small brush or compressed air to clean them if needed.
15.3. Preventing Damage
- Handle with Care: Avoid dropping or subjecting the adapter to physical shock.
- Proper Connection: Ensure the adapter is properly connected to the OBD2 port before starting any diagnostics.
- Avoid Overloading: Do not use the adapter in a way that exceeds its rated voltage and current.
16. Frequently Asked Questions (FAQ)
16.1. What is the best diagnostic tool for Mercedes-Benz?
The best diagnostic tool depends on your needs and budget. Advanced tools like the Autel MaxiCOM MK906BT offer comprehensive diagnostics, while more affordable options like the iCarsoft MB V3.0 are great for Mercedes-Benz specific diagnostics.
16.2. How do I unlock hidden features on my Mercedes-Benz?
Unlocking hidden features typically requires advanced diagnostic tools and software. Consult with a professional or refer to online resources for specific instructions.
16.3. How often should I service my Mercedes-Benz?
Mercedes-Benz recommends servicing your vehicle every 10,000 miles or once a year, whichever comes first.
16.4. Can I use any OBD2 scanner on my Mercedes-Benz?
While most OBD2 scanners will work, Mercedes-Benz specific scanners provide more detailed diagnostics and access to proprietary codes.
16.5. What does a check engine light mean on my Mercedes-Benz?
A check engine light can indicate a variety of issues, from minor problems like a loose gas cap to more serious issues like a faulty catalytic converter. Use an OBD2 scanner to read the trouble codes and diagnose the problem.
16.6. How do I reset the service indicator on my Mercedes-Benz?
Resetting the service indicator typically requires using the vehicle’s onboard computer or a diagnostic tool. Refer to your vehicle’s manual or online resources for specific instructions.
16.7. What is the difference between OBD1 and OBD2?
OBD1 is an older diagnostic system used in vehicles manufactured before 1996. OBD2 is a standardized system used in vehicles manufactured after 1996 that provides more comprehensive diagnostic information.
16.8. How do I find the OBD2 port on my Mercedes-Benz?
The OBD2 port is typically located under the dashboard on the driver’s side. Refer to your vehicle’s manual if you are unsure of its exact location.
16.9. What are common issues that trigger the check engine light on Mercedes-Benz vehicles?
Common issues include faulty oxygen sensors, catalytic converters, mass airflow sensors, and loose gas caps.
16.10. How can MERCEDES-DIAGNOSTIC-TOOL.EDU.VN help me with my Mercedes-Benz diagnostics?
MERCEDES-DIAGNOSTIC-TOOL.EDU.VN offers expert advice, comprehensive diagnostic resources, and access to the latest tools and technology to help you diagnose and repair your Mercedes-Benz effectively.
17. Conclusion
The 16-pin OBD2 to 19-pin HDMI adapter is a valuable tool for diagnosing and maintaining your Mercedes-Benz. By understanding its features, compatibility, and setup, you can enhance your diagnostic capabilities and keep your vehicle running smoothly. Remember to follow safety precautions and consult reliable resources like MERCEDES-DIAGNOSTIC-TOOL.EDU.VN for expert advice and support.
Ready to take your Mercedes-Benz diagnostics to the next level? Contact us today for personalized advice on the best diagnostic tools and solutions for your needs. Our experts at MERCEDES-DIAGNOSTIC-TOOL.EDU.VN are here to help you unlock the full potential of your vehicle.
Contact Information:
- Address: 789 Oak Avenue, Miami, FL 33101, United States
- WhatsApp: +1 (641) 206-8880
- Website: MERCEDES-DIAGNOSTIC-TOOL.EDU.VN