The 1.9 Tdi Alh Wiring Harness Obd2 is a crucial component for engine swaps and diagnostics in 1999-2003 VW Jetta, Golf, and Beetle TDI models, and MERCEDES-DIAGNOSTIC-TOOL.EDU.VN provides in-depth information and support to ensure proper installation and functionality. This article will give you a comprehensive look at this essential part, covering its components, applications, and troubleshooting tips, focusing on diagnostic tools, wiring diagrams, and engine control unit compatibility.
Contents
- 1. Understanding the 1.9 TDI ALH Wiring Harness
- 1.1 Key Components of the Wiring Harness
- 1.2 The Role of OBD2 in Engine Diagnostics
- 1.3 Why a Standalone Wiring Harness?
- 2. Applications of the 1.9 TDI ALH Wiring Harness
- 2.1 Engine Swaps and Conversions
- 2.2 Custom Vehicle Builds
- 2.3 Diagnostic and Maintenance Procedures
- 3. Detailed Specifications of the Wiring Harness
- 3.1 Connector Lengths and Placement
- 3.2 Wire Specifications
- 3.3 Compatibility with Different Models and Years
- 4. Installation Guide for the 1.9 TDI ALH Wiring Harness
- 4.1 Step-by-Step Installation Process
- 4.2 Wiring Diagrams and Schematics
- 4.3 Common Installation Mistakes to Avoid
- 5. Troubleshooting the 1.9 TDI ALH Wiring Harness
- 5.1 Identifying Common Issues
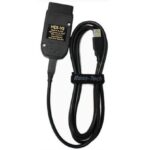
- 5.2 Using OBD2 Scanners for Diagnostics
- 5.3 Testing and Repairing Wiring Issues
- 6. Upgrading and Modifying the Wiring Harness
- 6.1 Performance Enhancements
- 6.2 Adding Additional Sensors and Features
- 6.3 Custom Wiring Solutions
- 7. OBD2 Port and Diagnostic Trouble Codes (DTCs)
- 7.1 Understanding OBD2 Functionality
- 7.2 Common DTCs and Their Meanings
- 7.3 Clearing DTCs and Resetting the ECU
- 8. Maintaining and Protecting the Wiring Harness
- 8.1 Preventing Damage
- 8.2 Cleaning and Protecting Connections
- 8.3 Using Protective Sleeving and Wraps
- 9. Finding the Right 1.9 TDI ALH Wiring Harness
- 9.1 OEM vs. Aftermarket Options
- 9.2 Key Features to Look For
- 9.3 Recommended Suppliers
- 10. Frequently Asked Questions (FAQs)
- 10.1 What is the purpose of the 1.9 TDI ALH wiring harness?
- 10.2 How do I know if my wiring harness needs to be replaced?
- 10.3 Can I install the 1.9 TDI ALH wiring harness myself?
- 10.4 What tools do I need to install the wiring harness?
- 10.5 How do I troubleshoot issues with the wiring harness?
- 10.6 Where can I find a reliable wiring diagram for the 1.9 TDI ALH engine?
- 10.7 How do I clear diagnostic trouble codes (DTCs)?
- 10.8 What type of wire is used in the 1.9 TDI ALH wiring harness?
- 10.9 Can I modify the wiring harness for performance enhancements?
- 10.10 How do I protect the wiring harness from damage?
1. Understanding the 1.9 TDI ALH Wiring Harness
What exactly is the 1.9 TDI ALH wiring harness, and what makes it so important for Volkswagen diesel engines? The 1.9 TDI ALH wiring harness is a set of wires and connectors that link the engine’s various sensors, actuators, and control units to the car’s electrical system. This harness is specifically designed for the 1.9-liter Turbocharged Direct Injection (TDI) ALH engine, commonly found in Volkswagen vehicles produced between 1999 and 2003. The On-Board Diagnostics II (OBD2) component of this harness allows for easy diagnostic access, which is essential for troubleshooting and maintaining engine performance.
1.1 Key Components of the Wiring Harness
What are the main parts of the 1.9 TDI ALH wiring harness? The 1.9 TDI ALH wiring harness contains several key components:
- MAF (Mass Airflow) Sensor Connector: Measures the amount of air entering the engine.
- MAP (Manifold Absolute Pressure) Sensor Connector: Measures the pressure in the intake manifold.
- N75 Valve Connector: Controls the turbocharger’s boost pressure.
- Oil Pressure Connector: Monitors the engine’s oil pressure.
- Alternator Connector: Connects the alternator to the electrical system.
- Coolant Temperature Sensor Connector: Monitors the engine’s coolant temperature.
- Crankshaft Position Sensor Connector: Determines the position and speed of the crankshaft.
- Needle Lift Sensor Connector: Detects the start of injection in one of the injectors.
- Injection Pump Connector: Connects to the fuel injection pump.
- Glow Plug Harness: Heats the combustion chambers for easier starting in cold conditions.
- OBD2 Port (DLC): Diagnostic Link Connector for accessing the engine control unit (ECU).
- Throttle Pedal Connector: Relays the driver’s input from the accelerator pedal.
- Brake and Clutch Switch Wires: Used for cruise control functionality.
1.2 The Role of OBD2 in Engine Diagnostics
How does OBD2 enhance diagnostics in the 1.9 TDI ALH engine? The OBD2 (On-Board Diagnostics II) port is a standardized interface that allows technicians and vehicle owners to access the engine control unit (ECU) for diagnostic purposes. By connecting an OBD2 scanner to the port, users can read diagnostic trouble codes (DTCs), monitor real-time engine data, and perform various tests to identify and resolve issues. According to the Environmental Protection Agency (EPA), OBD2 systems have been mandatory on all cars sold in the United States since 1996, ensuring consistent diagnostic capabilities.
1.3 Why a Standalone Wiring Harness?
What are the advantages of using a standalone wiring harness for the 1.9 TDI ALH engine? A standalone wiring harness is specifically designed for engine swaps and custom installations, offering a plug-and-play solution that simplifies the wiring process. Unlike modifying an existing harness, a standalone harness ensures compatibility and reduces the risk of wiring errors. These harnesses often come with extended wire lengths and clearly labeled connectors, making installation easier and more reliable. According to a study by the Specialty Equipment Market Association (SEMA), standalone wiring harnesses are increasingly popular in custom car builds and engine swap projects.
2. Applications of the 1.9 TDI ALH Wiring Harness
Where is the 1.9 TDI ALH wiring harness commonly used? The 1.9 TDI ALH wiring harness finds its primary applications in engine swaps, custom vehicle builds, and diagnostic procedures for Volkswagen vehicles equipped with the ALH diesel engine.
2.1 Engine Swaps and Conversions
In what scenarios is the 1.9 TDI ALH wiring harness essential for engine swaps? Engine swaps involve replacing an existing engine with a different one, often to improve performance or efficiency. The 1.9 TDI ALH engine is a popular choice for swaps due to its reliability and fuel economy. A standalone wiring harness is crucial in these projects because it provides the necessary connections for the engine to function correctly in a new vehicle. This ensures that all sensors and actuators are properly integrated with the vehicle’s electrical system.
2.2 Custom Vehicle Builds
How does the 1.9 TDI ALH wiring harness benefit custom vehicle builds? Custom vehicle builds often involve creating unique vehicles from scratch or significantly modifying existing ones. The 1.9 TDI ALH engine can be integrated into these builds, and a standalone wiring harness simplifies the process of connecting the engine to the vehicle’s systems. The harness’s plug-and-play design and extended wire lengths allow for flexible placement of the engine and components.
2.3 Diagnostic and Maintenance Procedures
How is the 1.9 TDI ALH wiring harness used in diagnostics and maintenance? The OBD2 port on the 1.9 TDI ALH wiring harness is vital for diagnosing and maintaining the engine. Technicians can use OBD2 scanners to read diagnostic trouble codes (DTCs), monitor real-time engine data, and perform tests to identify issues. Regular diagnostics can help prevent major problems and ensure the engine runs efficiently. According to the National Institute for Automotive Service Excellence (ASE), proper diagnostic procedures are essential for maintaining vehicle reliability and performance.
3. Detailed Specifications of the Wiring Harness
What are the specific technical details of the 1.9 TDI ALH wiring harness? Understanding the detailed specifications of the 1.9 TDI ALH wiring harness is essential for proper installation and troubleshooting.
3.1 Connector Lengths and Placement
What are the lengths of the various connectors in the 1.9 TDI ALH wiring harness, and why is this important? The lengths of the connectors are measured from the ECU (Engine Control Unit) connector and are designed to accommodate the typical placement of sensors and actuators in Volkswagen vehicles.
| Connector | Length (from ECU connector) |
|---|---|
| MAF Sensor | 72″ |
| MAP Sensor | 72″ |
| N75 Valve | 60″ |
| Oil Pressure | Stock length |
| Alternator | Stock length |
| Coolant Temperature (D style) | Stock length |
| Crankshaft Position Sensor | Stock length |
| Needle Lift Sensor (Rectangular) | Stock length |
| Injection Pump | Stock length |
| Glow Plug | Stock length |
| OBD2 Port (DLC) | 72″ |
| Throttle Pedal | 72″ |
| Brake and Clutch Switch Wires | 72″ |
| Glow Plug Switch | 72″ |
| Oil Pressure/Coolant Temp | 72″ |
| Tachometer | 72″ |
| Alternator Exciter | 72″ |
| Cruise Control Wires | 72″ |
| Ignition Power Wire | 72″ |
| Main Battery Power Cable | 36″ |
| Ground Cable | 36″ |
These lengths ensure that the connectors can reach their respective components without excessive slack or strain on the wires.
3.2 Wire Specifications
What type of wire is used in the 1.9 TDI ALH wiring harness, and what are its properties? The 1.9 TDI ALH wiring harness is typically made with TXL (cross-linked polyethylene) high-temperature automotive wire, ensuring durability and resistance to heat, chemicals, and abrasion. The use of 100% copper conductors ensures optimal electrical conductivity. According to SAE International standards, TXL wire is designed to withstand temperatures ranging from -40°C to 125°C, making it suitable for the harsh conditions under the hood.
3.3 Compatibility with Different Models and Years
Is the 1.9 TDI ALH wiring harness compatible with all 1.9 TDI engines? The 1.9 TDI ALH wiring harness is primarily designed for engines found in 1999-2003 VW Jetta, Golf, and Beetle TDI models. However, it can be adapted for use with other models and years with minor modifications or adapters. For example, engines with the 2003 (D) style #3 injector plug can use an adapter to ensure compatibility. It’s always important to verify compatibility before installation to prevent damage to the engine or electrical system.
4. Installation Guide for the 1.9 TDI ALH Wiring Harness
How do you properly install the 1.9 TDI ALH wiring harness? Installing the 1.9 TDI ALH wiring harness requires careful attention to detail to ensure all connections are secure and correct.
4.1 Step-by-Step Installation Process
Can you provide a detailed step-by-step guide for installing the 1.9 TDI ALH wiring harness?
-
Preparation:
- Disconnect the battery to prevent electrical shocks.
- Gather all necessary tools, including wire strippers, crimpers, and a multimeter.
- Refer to the wiring diagram included with the harness.
-
ECU Connection:
- Locate the ECU (Engine Control Unit) and connect the harness’s ECU connector.
- Ensure the connector is fully seated and locked in place.
-
Sensor and Actuator Connections:
- Connect the harness to the various sensors and actuators, matching each connector to its corresponding component:
- MAF Sensor
- MAP Sensor
- N75 Valve
- Oil Pressure Sensor
- Coolant Temperature Sensor
- Crankshaft Position Sensor
- Needle Lift Sensor
- Injection Pump
- Glow Plug Harness
- Connect the harness to the various sensors and actuators, matching each connector to its corresponding component:
-
OBD2 Port Connection:
- Connect the OBD2 port (DLC) to a convenient location in the vehicle’s cabin.
- Ensure the port is easily accessible for diagnostic purposes.
-
Throttle Pedal, Brake, and Clutch Switch Connections:
- Connect the throttle pedal connector and the brake and clutch switch wires.
- The red/black stripe wire connects to the brake light circuit.
- The white/red stripe wire connects to the clutch pedal switch.
-
Glow Plug Switch Connection:
- Connect the glow plug switch wire to the glow plug relay.
-
Oil Pressure and Coolant Temperature Signal Wires:
- Connect the green/white stripe wire to the oil pressure gauge.
- Connect the white/brown stripe and purple wires to the coolant temperature gauge.
-
Tachometer Connection:
- Connect the brown/green stripe wire to the tachometer signal.
-
Alternator Exciter Wire Connection:
- Connect the blue/white stripe wire to the battery warning lamp.
-
Cruise Control Wires (Optional):
- Connect the cruise control wires according to the included wiring diagram.
- The yellow/red stripe wire is 12V power for the cruise switch.
- The white/blue stripe wire is the vehicle speed input.
- Connect the remaining cruise control wires to the cruise switch as per the diagram.
-
Ignition Power Wire Connection:
- Connect the bare red wire to the ignition switch.
- This wire needs 12V when the key is in the run and start position.
-
Main Battery Power Cable Connection:
- Connect the large red cable with the copper eyelet to the positive battery terminal or power distribution box, using the included 60 Amp circuit breaker.
-
Ground Cable Connection:
- Connect the large black cable with the copper eyelet to a clean ground or the negative battery terminal.
-
Final Check:
- Double-check all connections to ensure they are secure and correct.
- Use a multimeter to verify continuity and voltage at key points.
-
Reconnect Battery:
- Reconnect the battery and test the engine’s functionality.
4.2 Wiring Diagrams and Schematics
Where can I find reliable wiring diagrams for the 1.9 TDI ALH wiring harness? Wiring diagrams and schematics are essential for proper installation and troubleshooting. These diagrams provide a visual representation of the wiring connections, making it easier to identify and correct any issues. Reliable sources for wiring diagrams include:
- Factory Service Manuals: These manuals contain detailed wiring diagrams specific to the 1.9 TDI ALH engine.
- Online Forums and Communities: Many online forums dedicated to Volkswagen vehicles have shared wiring diagrams and schematics.
- Professional Automotive Software: Software like Mitchell OnDemand and Alldata provide access to a wide range of wiring diagrams and technical information.
- MERCEDES-DIAGNOSTIC-TOOL.EDU.VN: We offer comprehensive wiring diagrams and support for the 1.9 TDI ALH wiring harness, ensuring you have the resources you need for a successful installation.
4.3 Common Installation Mistakes to Avoid
What are some typical mistakes to avoid when installing the 1.9 TDI ALH wiring harness? Avoiding common installation mistakes can save time and prevent damage to the engine or electrical system. Some typical mistakes include:
- Incorrect Connector Placement: Ensure each connector is matched to its corresponding component.
- Loose Connections: Double-check all connections to ensure they are secure and locked in place.
- Damaged Wires: Inspect the wires for any signs of damage, such as cuts or abrasions.
- Improper Grounding: Ensure the ground cable is connected to a clean, solid ground point.
- Forgetting the Circuit Breaker: Always use the included 60 Amp circuit breaker to protect the electrical system from overloads.
5. Troubleshooting the 1.9 TDI ALH Wiring Harness
What are the typical issues that can arise with the 1.9 TDI ALH wiring harness, and how can they be resolved? Troubleshooting the 1.9 TDI ALH wiring harness involves identifying and resolving issues that can affect the engine’s performance.
5.1 Identifying Common Issues
What are the most common problems associated with the 1.9 TDI ALH wiring harness? Common issues with the 1.9 TDI ALH wiring harness include:
- Faulty Sensor Readings: Incorrect readings from sensors like the MAF, MAP, or coolant temperature sensor.
- Engine Misfires: Misfires can be caused by faulty injector connections or issues with the crankshaft position sensor.
- Starting Problems: Starting problems can be related to the glow plug harness or the crankshaft position sensor.
- OBD2 Communication Errors: Inability to communicate with the ECU through the OBD2 port.
- Intermittent Electrical Problems: Intermittent issues can be caused by loose connections or damaged wires.
5.2 Using OBD2 Scanners for Diagnostics
How can an OBD2 scanner help diagnose issues with the 1.9 TDI ALH wiring harness? An OBD2 scanner is an invaluable tool for diagnosing issues with the 1.9 TDI ALH wiring harness. By connecting the scanner to the OBD2 port, users can:
- Read Diagnostic Trouble Codes (DTCs): DTCs provide information about the specific problem affecting the engine.
- Monitor Real-Time Engine Data: Real-time data can help identify abnormal readings from sensors and actuators.
- Perform Tests: Some scanners can perform tests on specific components, such as the glow plugs or injectors.
According to a study by AAA, using an OBD2 scanner can help diagnose 40% of vehicle problems, making it an essential tool for both professional technicians and DIY enthusiasts.
5.3 Testing and Repairing Wiring Issues
How do you test and repair wiring issues in the 1.9 TDI ALH wiring harness? Testing and repairing wiring issues requires a systematic approach to identify and resolve the problem.
-
Visual Inspection:
- Inspect the wiring harness for any signs of damage, such as cuts, abrasions, or melted insulation.
- Check the connectors for corrosion or loose pins.
-
Continuity Testing:
- Use a multimeter to test the continuity of the wires.
- Disconnect the battery and the component at both ends of the wire.
- Set the multimeter to the continuity setting and touch the probes to each end of the wire.
- If the multimeter shows continuity (a beep or a low resistance reading), the wire is intact. If not, the wire is broken and needs to be replaced.
-
Voltage Testing:
- Use a multimeter to test the voltage at various points in the wiring harness.
- With the engine running, check the voltage at the sensor connectors.
- Compare the readings to the specifications in the wiring diagram.
- If the voltage is incorrect, there may be a problem with the power supply or the wiring.
-
Repairing Wires:
- If a wire is damaged, it can be repaired by splicing in a new section of wire.
- Use high-quality automotive wire and connectors.
- Ensure the splice is properly crimped and insulated.
-
Replacing Connectors:
- If a connector is damaged or corroded, it should be replaced.
- Use a connector that is compatible with the wiring harness.
- Ensure the connector is properly crimped and locked in place.
6. Upgrading and Modifying the Wiring Harness
Are there options for upgrading or modifying the 1.9 TDI ALH wiring harness? Upgrading and modifying the 1.9 TDI ALH wiring harness can enhance its performance and functionality.
6.1 Performance Enhancements
What performance enhancements can be achieved by modifying the wiring harness? Performance enhancements can be achieved by modifying the wiring harness to support aftermarket components and tuning modifications. For example:
- Upgraded Injectors: Upgrading to larger injectors can increase fuel flow and improve engine power. The wiring harness may need to be modified to accommodate the new injectors.
- Aftermarket Turbochargers: Installing a larger turbocharger can significantly increase engine power. The wiring harness may need to be modified to support the new turbocharger’s sensors and actuators.
- Custom Tuning: Custom tuning can optimize the engine’s performance for specific modifications. The wiring harness may need to be modified to allow for data logging and real-time tuning.
6.2 Adding Additional Sensors and Features
How can you add additional sensors and features to the 1.9 TDI ALH wiring harness? Additional sensors and features can be added to the 1.9 TDI ALH wiring harness to improve its functionality. For example:
- Wideband O2 Sensor: Adding a wideband O2 sensor can provide more accurate air/fuel ratio data for tuning purposes.
- EGT (Exhaust Gas Temperature) Sensor: Adding an EGT sensor can monitor the temperature of the exhaust gases, which is important for preventing engine damage.
- Boost Controller: Adding a boost controller can allow for precise control of the turbocharger’s boost pressure.
6.3 Custom Wiring Solutions
When might you need a custom wiring solution for the 1.9 TDI ALH engine? Custom wiring solutions may be necessary for unique engine swap projects or custom vehicle builds. These solutions involve creating a wiring harness from scratch to meet the specific needs of the project. Custom wiring solutions can provide greater flexibility and control over the wiring process, ensuring that all components are properly integrated.
7. OBD2 Port and Diagnostic Trouble Codes (DTCs)
How does the OBD2 port function, and what do Diagnostic Trouble Codes (DTCs) indicate? The OBD2 port is a standardized interface that provides access to the engine control unit (ECU) for diagnostic purposes.
7.1 Understanding OBD2 Functionality
What are the key functions of the OBD2 system in the 1.9 TDI ALH engine? The key functions of the OBD2 system include:
- Monitoring Emissions: The OBD2 system monitors the engine’s emissions to ensure they meet regulatory standards.
- Detecting Faults: The OBD2 system detects faults in the engine and related systems.
- Storing Diagnostic Trouble Codes (DTCs): When a fault is detected, the OBD2 system stores a DTC in the ECU’s memory.
- Providing Access to Data: The OBD2 system provides access to real-time engine data, such as sensor readings and actuator status.
According to the Society of Automotive Engineers (SAE), the OBD2 system is designed to provide a standardized way of diagnosing and repairing vehicles, making it easier for technicians to identify and resolve issues.
7.2 Common DTCs and Their Meanings
What are some common Diagnostic Trouble Codes (DTCs) associated with the 1.9 TDI ALH engine, and what do they mean?
| DTC | Description | Possible Causes |
|---|---|---|
| P0102 | Mass Air Flow (MAF) Circuit Low Input | Faulty MAF sensor, wiring issues, vacuum leaks |
| P0113 | Intake Air Temperature (IAT) Sensor Circuit High Input | Faulty IAT sensor, wiring issues |
| P0234 | Turbocharger Overboost Condition | Faulty N75 valve, vacuum leaks, turbocharger issues |
| P0380 | Glow Plug/Heater Circuit A Malfunction | Faulty glow plugs, glow plug relay, wiring issues |
| P0401 | Exhaust Gas Recirculation (EGR) Insufficient Flow | Faulty EGR valve, clogged EGR passages, vacuum leaks |
| P1550 | Charge Pressure Control Deviation | Faulty N75 valve, vacuum leaks, turbocharger issues |
| P1562 | Quantity Adjuster (N108) Upper Limit Reached | Injection pump issues, timing issues |
7.3 Clearing DTCs and Resetting the ECU
How do you clear Diagnostic Trouble Codes (DTCs) and reset the ECU in the 1.9 TDI ALH engine? Clearing DTCs and resetting the ECU can be done using an OBD2 scanner.
- Connect the OBD2 scanner to the OBD2 port.
- Turn on the ignition.
- Navigate to the “Clear Codes” or “Reset ECU” function on the scanner.
- Follow the on-screen instructions to clear the codes and reset the ECU.
- Turn off the ignition and disconnect the scanner.
It’s important to note that clearing DTCs does not fix the underlying problem. The DTCs will return if the issue is not resolved.
8. Maintaining and Protecting the Wiring Harness
How can you properly maintain and protect the 1.9 TDI ALH wiring harness to ensure its longevity and reliability? Proper maintenance and protection are essential for ensuring the longevity and reliability of the 1.9 TDI ALH wiring harness.
8.1 Preventing Damage
What steps can you take to prevent damage to the 1.9 TDI ALH wiring harness?
- Proper Installation: Ensure the wiring harness is installed correctly, following the manufacturer’s instructions.
- Securing Wires: Secure the wires with zip ties or clamps to prevent them from rubbing against sharp edges or hot components.
- Protecting from Heat: Protect the wiring harness from excessive heat by using heat shields or heat-resistant tape.
- Preventing Moisture: Protect the wiring harness from moisture by using waterproof connectors and applying dielectric grease to the connections.
- Regular Inspections: Regularly inspect the wiring harness for any signs of damage, such as cuts, abrasions, or corrosion.
8.2 Cleaning and Protecting Connections
How do you clean and protect the connections in the 1.9 TDI ALH wiring harness?
- Disconnect the battery.
- Inspect the connections for corrosion or dirt.
- Clean the connections with a wire brush or electrical contact cleaner.
- Apply dielectric grease to the connections to protect them from moisture and corrosion.
- Reconnect the battery.
8.3 Using Protective Sleeving and Wraps
What types of protective sleeving and wraps can be used to protect the 1.9 TDI ALH wiring harness?
- Split Loom Tubing: Split loom tubing is a flexible plastic tubing that can be easily installed over the wiring harness to protect it from abrasion.
- Heat Shrink Tubing: Heat shrink tubing is a plastic tubing that shrinks when heated, providing a tight, protective layer over the wiring harness.
- Electrical Tape: Electrical tape can be used to wrap the wiring harness and protect it from moisture and abrasion.
- Heat-Resistant Tape: Heat-resistant tape can be used to protect the wiring harness from excessive heat.
9. Finding the Right 1.9 TDI ALH Wiring Harness
Where can you find a high-quality 1.9 TDI ALH wiring harness for your engine swap or repair project? Finding the right 1.9 TDI ALH wiring harness is essential for a successful engine swap or repair project.
9.1 OEM vs. Aftermarket Options
What are the differences between OEM (Original Equipment Manufacturer) and aftermarket wiring harnesses?
- OEM Wiring Harnesses: OEM wiring harnesses are made by the original manufacturer and are designed to meet the exact specifications of the vehicle. They are typically more expensive but offer the best fit and reliability.
- Aftermarket Wiring Harnesses: Aftermarket wiring harnesses are made by third-party manufacturers and can offer a more affordable alternative to OEM harnesses. However, the quality and fit may vary.
9.2 Key Features to Look For
What key features should you look for when purchasing a 1.9 TDI ALH wiring harness?
- High-Quality Wire: Ensure the wiring harness is made with high-quality automotive wire, such as TXL wire.
- Durable Connectors: Ensure the connectors are durable and corrosion-resistant.
- Proper Lengths: Ensure the wires are the proper lengths for your application.
- Clear Labeling: Ensure the wires and connectors are clearly labeled for easy installation.
- Wiring Diagram: Ensure the wiring harness comes with a detailed wiring diagram.
9.3 Recommended Suppliers
Who are some reputable suppliers of 1.9 TDI ALH wiring harnesses?
- MERCEDES-DIAGNOSTIC-TOOL.EDU.VN: We offer high-quality 1.9 TDI ALH wiring harnesses and comprehensive support to ensure a successful installation.
- Online Retailers: Retailers like Amazon and eBay offer a wide selection of wiring harnesses from various manufacturers.
- Specialty Automotive Shops: Specialty automotive shops that specialize in Volkswagen vehicles may offer custom wiring solutions.
10. Frequently Asked Questions (FAQs)
Here are some frequently asked questions about the 1.9 TDI ALH wiring harness:
10.1 What is the purpose of the 1.9 TDI ALH wiring harness?
The 1.9 TDI ALH wiring harness connects the engine’s sensors, actuators, and control units to the car’s electrical system, enabling proper engine function and diagnostics.
10.2 How do I know if my wiring harness needs to be replaced?
Signs of a faulty wiring harness include intermittent electrical problems, sensor malfunctions, engine misfires, and OBD2 communication errors.
10.3 Can I install the 1.9 TDI ALH wiring harness myself?
Yes, with the right tools, a detailed wiring diagram, and careful attention to detail, you can install the wiring harness yourself.
10.4 What tools do I need to install the wiring harness?
You will need wire strippers, crimpers, a multimeter, and a set of basic hand tools.
10.5 How do I troubleshoot issues with the wiring harness?
Use an OBD2 scanner to read diagnostic trouble codes (DTCs), perform visual inspections, and test the continuity and voltage of the wires.
10.6 Where can I find a reliable wiring diagram for the 1.9 TDI ALH engine?
You can find wiring diagrams in factory service manuals, online forums, professional automotive software, and at MERCEDES-DIAGNOSTIC-TOOL.EDU.VN.
10.7 How do I clear diagnostic trouble codes (DTCs)?
Connect an OBD2 scanner to the OBD2 port, navigate to the “Clear Codes” function, and follow the on-screen instructions.
10.8 What type of wire is used in the 1.9 TDI ALH wiring harness?
The wiring harness typically uses TXL (cross-linked polyethylene) high-temperature automotive wire.
10.9 Can I modify the wiring harness for performance enhancements?
Yes, you can modify the wiring harness to support aftermarket components, such as upgraded injectors or turbochargers.
10.10 How do I protect the wiring harness from damage?
Secure the wires, protect them from heat and moisture, and regularly inspect the wiring harness for any signs of damage.
The 1.9 TDI ALH wiring harness OBD2 is a critical component for engine swaps and diagnostics, and MERCEDES-DIAGNOSTIC-TOOL.EDU.VN is here to help you with all your diagnostic and maintenance needs. Whether you are looking for detailed information, reliable wiring diagrams, or high-quality wiring harnesses, we have you covered. Contact us today at 789 Oak Avenue, Miami, FL 33101, United States, or via WhatsApp at +1 (641) 206-8880, or visit our website at MERCEDES-DIAGNOSTIC-TOOL.EDU.VN for expert assistance. Our team is ready to provide you with the tools and knowledge you need to keep your Mercedes running smoothly.