The 1998 Crv Obd2 Location is typically under the dashboard on the driver’s side. At MERCEDES-DIAGNOSTIC-TOOL.EDU.VN, we equip you with detailed guidance on locating and utilizing your OBD2 port for efficient diagnostics and maintenance. Explore our resources for understanding diagnostic protocols, troubleshooting common issues, and unlocking your vehicle’s potential.
Contents
- 1. Understanding the Importance of the OBD2 Port in Your 1998 CRV
- 1.1 What is OBD2 and Why Should You Care?
- 1.2 Quick Guide to Locating the OBD2 Port
- 1.3 Common Reasons You Might Need to Access the OBD2 Port
- 2. Step-by-Step Guide to Finding the OBD2 Port in a 1998 CRV
- 2.1 Initial Inspection Under the Dashboard
- 2.2 Checking Specific Areas and Panels
- 2.3 Using the Owner’s Manual for Precise Location
- 2.4 What to Do If You Still Can’t Find It
- 2.5 Real-World Example: Locating the OBD2 Port in My Friend’s 1998 CRV
- 3. Tools Needed to Use the OBD2 Port
- 3.1 Basic OBD2 Scanners: Features and Benefits
- 3.2 Advanced OBD2 Scanners: Features and Benefits
- 3.3 Smartphone OBD2 Adapters and Apps
- 3.4 Essential Tools for Common OBD2 Repairs
- 3.5 Comparing Different OBD2 Tools: A Quick Guide
- 4. How to Read and Interpret OBD2 Codes on Your 1998 CRV
- 4.1 Connecting Your OBD2 Scanner
- 4.2 Reading the Diagnostic Trouble Codes (DTCs)
- 4.3 Understanding the Structure of an OBD2 Code
- 4.4 Common OBD2 Codes for the 1998 CRV and Their Meanings
- 4.5 Using Online Resources to Further Understand Codes
- 4.6 Clearing Codes and What to Consider Before Doing So
- 4.7 Case Study: Interpreting a P0171 Code on a 1998 CRV
- 5. Common Problems Diagnosed Via the OBD2 Port on a 1998 CRV
- 5.1 Misfire Issues (P0300 – P0304 Codes)
- 5.2 Oxygen Sensor Problems (P0130 – P0141 Codes)
- 5.3 Catalytic Converter Efficiency (P0420 Code)
- 5.4 Evaporative Emission Control System Leaks (P0440 – P0457 Codes)
- 5.5 Transmission Issues (P0700 Series Codes)
- 5.6 Case Study: Diagnosing a P0442 Code on a 1998 CRV
- 6. Clearing the Check Engine Light: What You Need to Know
- 6.1 When Is It Safe to Clear the Check Engine Light?
- 6.2 Step-by-Step Guide to Clearing Codes with an OBD2 Scanner
- 6.3 Understanding Readiness Monitors
- 6.4 Driving Cycle to Reset Readiness Monitors
- 6.5 What to Do If the Check Engine Light Returns
- 6.6 Case Study: Clearing a Check Engine Light After Replacing an O2 Sensor
- 7. Advanced Diagnostics and Customization Options via OBD2
- 7.1 Live Data Streaming and Analysis
- 7.2 Actuation Tests and Component Testing
- 7.3 Reprogramming and Tuning the ECU
- 7.4 Unlocking Hidden Features (If Applicable)
- 7.5 Using Scan Tools for Performance Monitoring
- 7.6 Case Study: Using Live Data to Diagnose a Performance Issue
- 8. Maintenance Tips to Keep Your 1998 CRV Running Smoothly
- 8.1 Regular Oil Changes
- 8.2 Checking and Replacing Fluids
- 8.3 Inspecting and Replacing Filters
- 8.4 Checking and Maintaining Brakes
- 8.5 Tire Maintenance
- 8.6 Inspecting Belts and Hoses
- 8.7 Regular OBD2 Scans
- 8.8 Following the Manufacturer’s Recommended Maintenance Schedule
- 8.9 Case Study: Preventing a Major Repair with Regular Maintenance
- 9. Common Mistakes to Avoid When Using the OBD2 Port
- 9.1 Plugging in the Scanner Incorrectly
- 9.2 Clearing Codes Without Addressing the Problem
- 9.3 Ignoring Readiness Monitors
- 9.4 Using Incompatible Scanners or Apps
- 9.5 Attempting Advanced Procedures Without Proper Knowledge
- 9.6 Neglecting Basic Maintenance
- 9.7 Case Study: The Importance of Proper Scanner Usage
- 10. Frequently Asked Questions (FAQ) About the 1998 CRV OBD2 Port
- 10.1 Where is the OBD2 port located on a 1998 Honda CRV?
- 10.2 What type of OBD2 scanner do I need for a 1998 CRV?
- 10.3 Can I use a smartphone app to read OBD2 codes on my 1998 CRV?
- 10.4 How do I clear the check engine light on my 1998 CRV?
- 10.5 What does the P0420 code mean on a 1998 CRV?
- 10.6 How do I reset the readiness monitors on my 1998 CRV?
- 10.7 Is it safe to drive with the check engine light on in my 1998 CRV?
- 10.8 Can I reprogram the ECU on my 1998 CRV using the OBD2 port?
- 10.9 What are some common problems that can be diagnosed via the OBD2 port on a 1998 CRV?
- 10.10 How often should I perform an OBD2 scan on my 1998 CRV?
1. Understanding the Importance of the OBD2 Port in Your 1998 CRV
The OBD2 (On-Board Diagnostics II) port is a crucial interface in your 1998 CRV, serving as the gateway to your vehicle’s computer. Knowing where to find it and how to use it can save you time and money on car repairs.
1.1 What is OBD2 and Why Should You Care?
OBD2, short for On-Board Diagnostics II, is a standardized system that monitors and reports on various vehicle parameters. According to the EPA (United States Environmental Protection Agency), OBD2 was mandated in all cars sold in the US starting in 1996 to monitor emissions-related components. This standardization allows mechanics and car owners to access vital information about the engine, transmission, and other systems using a scan tool.
Knowing how to use the OBD2 port allows you to:
- Diagnose issues early: Detect minor problems before they become major repairs.
- Save money: Avoid costly trips to the mechanic by identifying and fixing simple issues yourself.
- Monitor performance: Keep track of your car’s health and performance metrics.
- Ensure compliance: Check if your car is running within the required emission standards.
1.2 Quick Guide to Locating the OBD2 Port
For a 1998 Honda CRV, the OBD2 port is generally found under the dashboard on the driver’s side. However, the exact location can vary slightly. Follow these steps to find it:
- Check Under the Dashboard: Kneel down and look under the driver’s side dashboard.
- Look for the Connector: The OBD2 port is a 16-pin, trapezoid-shaped connector.
- Feel Around: If it’s not immediately visible, feel around the area. It might be tucked away but should be accessible.
- Consult Your Manual: If you’re still having trouble, check your owner’s manual for the exact location.
1.3 Common Reasons You Might Need to Access the OBD2 Port
There are several reasons why you might need to access the OBD2 port:
- Check Engine Light: The most common reason is to read the diagnostic trouble codes (DTCs) when the check engine light comes on.
- Emissions Testing: Many states require OBD2 scans as part of their emissions testing programs.
- Performance Monitoring: You can use a scan tool to monitor real-time data, such as engine temperature, RPM, and fuel consumption.
- Programming and Tuning: Some advanced users utilize the OBD2 port for reprogramming or tuning the engine control unit (ECU).
2. Step-by-Step Guide to Finding the OBD2 Port in a 1998 CRV
Finding the OBD2 port in your 1998 CRV can be straightforward with the right guidance. Let’s break down the process into simple steps.
2.1 Initial Inspection Under the Dashboard
Start by positioning yourself comfortably in the driver’s seat. Lean forward and thoroughly inspect the area beneath the steering wheel. Use a flashlight to illuminate any dark corners. Look for a small, rectangular port, usually black or gray, with 16 pins inside.
2.2 Checking Specific Areas and Panels
Sometimes, the OBD2 port is hidden behind a small panel. Check these areas:
- Lower Dash Panel: Inspect the panel directly below the steering wheel. Some CRVs have a small cover that needs to be removed.
- Kick Panel: Look near the kick panel on the driver’s side. The port might be mounted on or near this panel.
- Center Console Area: In rare cases, the port might be located closer to the center console, though this is less common in the 1998 CRV.
2.3 Using the Owner’s Manual for Precise Location
Your owner’s manual is a valuable resource. Refer to the section on diagnostics or troubleshooting. The manual often includes a diagram showing the exact location of the OBD2 port. If you don’t have a physical copy, you can often find a digital version online.
2.4 What to Do If You Still Can’t Find It
If you’ve followed these steps and still can’t locate the OBD2 port, consider these tips:
- Ask a Mechanic: A local mechanic can quickly point out the location.
- Online Forums: Consult online CRV forums or communities. Other owners may have encountered the same issue and can provide specific advice.
- Check Videos: Look for YouTube videos that show the OBD2 port location on similar year CRVs.
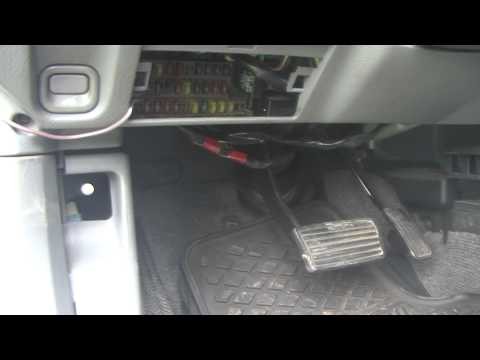 OBD2 Port Location
2.5 Real-World Example: Locating the OBD2 Port in My Friend’s 1998 CRV
My friend, Sarah, had a check engine light on in her 1998 CRV. We started by looking under the dashboard, but the port wasn’t immediately visible. After consulting the owner’s manual, we found it tucked behind a small panel near the steering column. Removing the panel revealed the OBD2 port, allowing us to connect the scan tool and diagnose the issue.
3. Tools Needed to Use the OBD2 Port
Once you’ve located the OBD2 port, you’ll need the right tools to extract meaningful information. Here’s what you need to get started.
3.1 Basic OBD2 Scanners: Features and Benefits
A basic OBD2 scanner is an essential tool for any car owner. These scanners are designed to read diagnostic trouble codes (DTCs) and provide a brief description of the problem.
Key features of a basic OBD2 scanner include:
- Reading DTCs: Displays the error codes stored in the vehicle’s computer.
- Clearing DTCs: Allows you to reset the check engine light after addressing the issue.
- Live Data: Some basic scanners offer limited live data, such as engine RPM and coolant temperature.
- Cost-Effective: Basic scanners are generally affordable, making them accessible to most car owners.
3.2 Advanced OBD2 Scanners: Features and Benefits
Advanced OBD2 scanners offer a broader range of capabilities for more in-depth diagnostics.
Key features of an advanced OBD2 scanner include:
- Enhanced DTC Reading: Provides more detailed descriptions of the error codes and possible causes.
- Live Data Streaming: Displays real-time data from various sensors, allowing you to monitor performance.
- Actuation Tests: Enables you to test individual components, such as fuel injectors and solenoids.
- Graphing: Visualizes data over time, making it easier to identify patterns and anomalies.
- Bi-Directional Control: Allows you to send commands to the vehicle’s computer to control certain functions.
3.3 Smartphone OBD2 Adapters and Apps
Smartphone OBD2 adapters are small devices that plug into the OBD2 port and communicate with your smartphone via Bluetooth or Wi-Fi. These adapters, combined with the right apps, can turn your phone into a powerful diagnostic tool.
Popular OBD2 apps include:
- Torque Pro: A popular app for Android devices, offering a wide range of features, including live data, DTC reading, and performance monitoring.
- OBD Fusion: A versatile app available for both iOS and Android, providing comprehensive diagnostics and customization options.
- Carista: An app known for its user-friendly interface and ability to perform advanced diagnostics and customization on supported vehicles.
3.4 Essential Tools for Common OBD2 Repairs
In addition to an OBD2 scanner, you might need some basic tools to perform common repairs:
- Socket Set: For removing and installing various components.
- Wrench Set: For tightening and loosening bolts and nuts.
- Screwdrivers: Both Phillips head and flathead screwdrivers are essential.
- Multimeter: For testing electrical circuits and components.
- OBD2 Extension Cable: Useful if the OBD2 port is in a hard-to-reach location.
3.5 Comparing Different OBD2 Tools: A Quick Guide
Here’s a quick comparison table to help you choose the right OBD2 tool:
| Feature | Basic OBD2 Scanner | Advanced OBD2 Scanner | Smartphone Adapter & App |
|---|---|---|---|
| DTC Reading | Basic | Enhanced | Basic to Enhanced |
| Live Data | Limited | Comprehensive | Comprehensive |
| Actuation Tests | No | Yes | Limited to Yes |
| Graphing | No | Yes | Yes |
| Bi-Directional Control | No | Yes | Limited |
| Cost | Low | Medium to High | Low to Medium |
| User-Friendliness | High | Medium | High |
4. How to Read and Interpret OBD2 Codes on Your 1998 CRV
Understanding OBD2 codes is crucial for diagnosing and fixing issues with your 1998 CRV. Here’s a step-by-step guide to reading and interpreting these codes.
4.1 Connecting Your OBD2 Scanner
- Turn Off the Ignition: Make sure the engine is off before plugging in the scanner.
- Locate the OBD2 Port: Refer to the previous sections to find the port.
- Plug in the Scanner: Firmly insert the scanner into the OBD2 port.
- Turn On the Ignition: Turn the key to the “on” position without starting the engine.
- Power On the Scanner: Follow the scanner’s instructions to power it on.
4.2 Reading the Diagnostic Trouble Codes (DTCs)
Once the scanner is connected and powered on, navigate to the “Read Codes” or “Diagnostic Codes” option in the menu. The scanner will then retrieve any stored DTCs from the vehicle’s computer.
4.3 Understanding the Structure of an OBD2 Code
OBD2 codes are five-character alphanumeric codes that provide information about the nature and location of a problem. Here’s how to break down the structure of a typical OBD2 code, such as P0301:
- First Character: Indicates the system affected:
- P: Powertrain (engine, transmission)
- B: Body (airbags, power windows)
- C: Chassis (ABS, suspension)
- U: Network (communication systems)
- Second Character: Indicates whether the code is generic or manufacturer-specific:
- 0: Generic (SAE) code
- 1, 2, or 3: Manufacturer-specific code
- Third Character: Indicates the specific subsystem:
- 1: Fuel and air metering
- 2: Fuel and air metering (injector circuit)
- 3: Ignition system or misfire
- 4: Auxiliary emission controls
- 5: Vehicle speed control and idle control system
- 6: Computer output circuit
- 7: Transmission
- 8: Transmission
- Fourth and Fifth Characters: Specify the exact fault within the subsystem.
4.4 Common OBD2 Codes for the 1998 CRV and Their Meanings
Here are some common OBD2 codes you might encounter with a 1998 CRV:
| Code | Description | Possible Causes |
|---|---|---|
| P0300 | Random/Multiple Cylinder Misfire Detected | Faulty spark plugs, ignition coils, fuel injectors, vacuum leaks, low compression |
| P0301 | Cylinder 1 Misfire Detected | Faulty spark plug, ignition coil, fuel injector, vacuum leak, low compression in cylinder 1 |
| P0171 | System Too Lean (Bank 1) | Vacuum leaks, faulty O2 sensor, low fuel pressure, dirty fuel injectors |
| P0420 | Catalyst System Efficiency Below Threshold | Faulty catalytic converter, O2 sensors, exhaust leaks |
| P0740 | Torque Converter Clutch Circuit Malfunction | Faulty torque converter, solenoid, wiring issues, low transmission fluid |
| P1457 | Evaporative Emission Control System Leak | Loose or faulty gas cap, damaged charcoal canister, leaking hoses, faulty purge valve |
4.5 Using Online Resources to Further Understand Codes
Several online resources can help you further understand OBD2 codes:
- OBD-Codes.com: A comprehensive database of OBD2 codes with detailed descriptions and possible causes.
- AutoCodes.com: Offers a similar database with additional resources, such as repair guides and troubleshooting tips.
- CRV Forums: Online forums dedicated to the Honda CRV can provide insights from other owners who have experienced similar issues.
4.6 Clearing Codes and What to Consider Before Doing So
After addressing the issue, you can clear the DTCs using the OBD2 scanner. However, consider these points before clearing the codes:
- Record the Codes: Write down the codes and their descriptions for future reference.
- Verify the Repair: Ensure the issue has been resolved before clearing the codes.
- Readiness Monitors: Clearing codes will reset the readiness monitors, which need to be completed before an emissions test.
- Potential Issues: Clearing codes without fixing the underlying problem will only result in the check engine light coming back on.
4.7 Case Study: Interpreting a P0171 Code on a 1998 CRV
John’s 1998 CRV displayed a P0171 code, indicating a “System Too Lean (Bank 1)” condition. After researching the code, he checked for vacuum leaks, cleaned the mass airflow sensor, and inspected the fuel injectors. He found a cracked vacuum hose and replaced it. After clearing the code, the check engine light stayed off, and the car ran smoothly.
5. Common Problems Diagnosed Via the OBD2 Port on a 1998 CRV
The OBD2 port is your gateway to diagnosing a variety of common issues in your 1998 CRV. Here are some frequent problems that can be identified using an OBD2 scanner.
5.1 Misfire Issues (P0300 – P0304 Codes)
Misfires occur when one or more cylinders in the engine fail to ignite the air-fuel mixture properly. Common codes include P0300 (Random/Multiple Cylinder Misfire Detected) and P0301-P0304 (Cylinder-Specific Misfires).
Possible Causes:
- Faulty spark plugs
- Defective ignition coils
- Clogged or failing fuel injectors
- Vacuum leaks
- Low compression
Troubleshooting Steps:
- Check and replace spark plugs if needed.
- Test ignition coils using a multimeter.
- Inspect and clean fuel injectors.
- Look for vacuum leaks using a smoke tester or by spraying carburetor cleaner around vacuum lines.
- Perform a compression test to check for cylinder issues.
5.2 Oxygen Sensor Problems (P0130 – P0141 Codes)
Oxygen sensors monitor the amount of oxygen in the exhaust stream and provide feedback to the engine control unit (ECU) to adjust the air-fuel mixture. Common codes include P0130-P0141, indicating issues with the O2 sensors.
Possible Causes:
- Faulty O2 sensors
- Exhaust leaks
- Wiring issues
- Contaminated sensors
Troubleshooting Steps:
- Inspect O2 sensors for damage or contamination.
- Check for exhaust leaks near the sensors.
- Test sensor voltage using a multimeter.
- Replace faulty O2 sensors.
5.3 Catalytic Converter Efficiency (P0420 Code)
The P0420 code indicates that the catalytic converter is not functioning efficiently, which can lead to emissions problems.
Possible Causes:
- Failing catalytic converter
- Faulty O2 sensors
- Exhaust leaks
Troubleshooting Steps:
- Inspect the catalytic converter for damage.
- Check O2 sensors for proper functioning.
- Look for exhaust leaks.
- Replace the catalytic converter if necessary.
5.4 Evaporative Emission Control System Leaks (P0440 – P0457 Codes)
These codes indicate leaks in the evaporative emission control system, which prevents fuel vapors from escaping into the atmosphere.
Possible Causes:
- Loose or faulty gas cap
- Cracked or damaged charcoal canister
- Leaking hoses
- Faulty purge valve
Troubleshooting Steps:
- Check the gas cap for proper sealing.
- Inspect the charcoal canister and hoses for damage.
- Test the purge valve for proper operation.
- Use a smoke tester to find leaks.
5.5 Transmission Issues (P0700 Series Codes)
The P0700 series codes indicate issues with the transmission, such as problems with the torque converter clutch or shift solenoids.
Possible Causes:
- Low transmission fluid
- Faulty torque converter
- Defective shift solenoids
- Wiring issues
Troubleshooting Steps:
- Check the transmission fluid level and condition.
- Test shift solenoids for proper operation.
- Inspect wiring for damage.
- Replace faulty components as needed.
5.6 Case Study: Diagnosing a P0442 Code on a 1998 CRV
Lisa’s 1998 CRV had a P0442 code (Evaporative Emission Control System Leak Detected – Small Leak). She started by checking the gas cap, which seemed fine. After inspecting the hoses and charcoal canister, she found a small crack in one of the vapor lines. Replacing the hose resolved the issue, and the code disappeared.
6. Clearing the Check Engine Light: What You Need to Know
The check engine light can be alarming, but it’s often a minor issue. Here’s what you need to know about clearing the check engine light on your 1998 CRV.
6.1 When Is It Safe to Clear the Check Engine Light?
It’s generally safe to clear the check engine light after you’ve:
- Diagnosed the problem using an OBD2 scanner.
- Addressed the underlying issue with a repair or replacement.
- Verified that the problem is no longer present.
Clearing the light without addressing the problem will only result in it coming back on.
6.2 Step-by-Step Guide to Clearing Codes with an OBD2 Scanner
- Connect the Scanner: Plug the OBD2 scanner into the port and turn on the ignition.
- Read the Codes: Retrieve and record any stored DTCs.
- Navigate to Clear Codes: Find the “Clear Codes” or “Erase Codes” option in the scanner menu.
- Confirm the Action: Follow the prompts to confirm that you want to clear the codes.
- Turn Off the Ignition: Turn off the ignition and remove the scanner.
- Restart the Engine: Start the engine to see if the check engine light stays off.
6.3 Understanding Readiness Monitors
Readiness monitors are diagnostic tests that the vehicle’s computer performs to ensure that various systems are functioning correctly. When you clear the DTCs, you also reset the readiness monitors. These monitors need to be completed before you can pass an emissions test.
Common readiness monitors include:
- Misfire Monitor
- Fuel System Monitor
- Comprehensive Components Monitor
- Catalyst Monitor
- Evaporative System Monitor
- Oxygen Sensor Monitor
- Oxygen Sensor Heater Monitor
6.4 Driving Cycle to Reset Readiness Monitors
To complete the readiness monitors, you need to perform a specific driving cycle. This cycle involves driving the car under various conditions to allow the computer to run the necessary tests.
A typical Honda driving cycle includes:
- Cold Start: Start the engine and let it idle for two minutes.
- Acceleration: Accelerate to 55 mph and maintain that speed for three minutes.
- Deceleration: Decelerate to 20 mph without using the brakes.
- Cruise: Maintain 20 mph for one minute.
- Repeat: Repeat steps 2-4 several times.
Consult your owner’s manual or online resources for the specific driving cycle for your 1998 CRV.
6.5 What to Do If the Check Engine Light Returns
If the check engine light comes back on after clearing the codes, it means the underlying problem has not been resolved. In this case, you should:
- Re-Read the Codes: Use the OBD2 scanner to retrieve the new DTCs.
- Diagnose the Issue: Investigate the possible causes of the new codes.
- Perform Repairs: Address the underlying problem with the necessary repairs or replacements.
- Clear the Codes: Clear the codes again after verifying the repair.
6.6 Case Study: Clearing a Check Engine Light After Replacing an O2 Sensor
Michael’s 1998 CRV had a P0135 code (O2 Sensor Heater Circuit Malfunction). After testing the O2 sensor, he found that the heater circuit was faulty. He replaced the O2 sensor and cleared the code. After completing the driving cycle, the check engine light stayed off, indicating that the problem was resolved.
7. Advanced Diagnostics and Customization Options via OBD2
Beyond reading and clearing codes, the OBD2 port offers advanced diagnostics and customization options. Here’s a look at some of the possibilities.
7.1 Live Data Streaming and Analysis
Advanced OBD2 scanners and smartphone apps allow you to stream live data from various sensors in real-time. This data can provide valuable insights into your vehicle’s performance and help you diagnose complex issues.
Common live data parameters include:
- Engine RPM
- Coolant Temperature
- Intake Air Temperature
- Mass Airflow (MAF)
- Oxygen Sensor Readings
- Fuel Trims
- Ignition Timing
By analyzing this data, you can identify anomalies and pinpoint potential problems.
7.2 Actuation Tests and Component Testing
Actuation tests allow you to control individual components using the OBD2 scanner. This can be useful for testing components like fuel injectors, solenoids, and relays.
For example, you can use an actuation test to:
- Activate a fuel injector to see if it’s functioning properly.
- Cycle a solenoid to check its operation.
- Test the operation of a cooling fan.
7.3 Reprogramming and Tuning the ECU
Some advanced users utilize the OBD2 port for reprogramming or tuning the engine control unit (ECU). This can be done to improve performance, fuel economy, or customize various parameters.
However, reprogramming the ECU can be risky and should only be done by experienced professionals. Incorrect programming can damage the ECU and cause serious problems.
7.4 Unlocking Hidden Features (If Applicable)
Some vehicles have hidden features that can be unlocked using the OBD2 port. These features might include:
- Enabling daytime running lights
- Adjusting idle speed
- Customizing instrument panel settings
However, the availability of these features depends on the specific vehicle and the capabilities of the OBD2 tool.
7.5 Using Scan Tools for Performance Monitoring
OBD2 scan tools can be used to monitor performance metrics, such as:
- 0-60 mph acceleration time
- Quarter-mile time
- Horsepower and torque
This can be useful for tracking performance improvements after making modifications to the vehicle.
7.6 Case Study: Using Live Data to Diagnose a Performance Issue
Mark noticed that his 1998 CRV was running rough and had poor fuel economy. Using an advanced OBD2 scanner, he streamed live data and noticed that the oxygen sensor readings were erratic. After replacing the O2 sensor, the engine ran smoothly, and the fuel economy improved.
8. Maintenance Tips to Keep Your 1998 CRV Running Smoothly
Regular maintenance is crucial for keeping your 1998 CRV running smoothly and avoiding costly repairs. Here are some essential maintenance tips.
8.1 Regular Oil Changes
Changing the oil regularly is one of the most important maintenance tasks. Refer to your owner’s manual for the recommended oil change interval, typically every 3,000 to 5,000 miles.
8.2 Checking and Replacing Fluids
Check and top off fluids regularly, including:
- Coolant
- Brake fluid
- Power steering fluid
- Transmission fluid
8.3 Inspecting and Replacing Filters
Replace filters regularly, including:
- Air filter
- Fuel filter
- Cabin air filter
8.4 Checking and Maintaining Brakes
Inspect the brakes regularly for wear and tear. Replace brake pads and rotors as needed.
8.5 Tire Maintenance
Maintain proper tire pressure and rotate tires regularly to ensure even wear.
8.6 Inspecting Belts and Hoses
Inspect belts and hoses for cracks, leaks, or damage. Replace them as needed.
8.7 Regular OBD2 Scans
Perform regular OBD2 scans to check for any potential issues. Address any codes promptly to prevent minor problems from becoming major repairs.
8.8 Following the Manufacturer’s Recommended Maintenance Schedule
Follow the manufacturer’s recommended maintenance schedule outlined in your owner’s manual. This schedule provides guidelines for various maintenance tasks at specific intervals.
8.9 Case Study: Preventing a Major Repair with Regular Maintenance
Sarah followed a strict maintenance schedule for her 1998 CRV, including regular oil changes, fluid checks, and filter replacements. As a result, her CRV ran smoothly for many years with minimal repairs.
9. Common Mistakes to Avoid When Using the OBD2 Port
Using the OBD2 port incorrectly can lead to problems. Here are some common mistakes to avoid.
9.1 Plugging in the Scanner Incorrectly
Make sure to plug the scanner firmly into the OBD2 port. A loose connection can result in communication errors.
9.2 Clearing Codes Without Addressing the Problem
Clearing codes without fixing the underlying issue will only result in the check engine light coming back on.
9.3 Ignoring Readiness Monitors
Failing to complete the readiness monitors after clearing codes can prevent you from passing an emissions test.
9.4 Using Incompatible Scanners or Apps
Make sure the scanner or app you’re using is compatible with your vehicle. Incompatible tools can cause communication errors or provide inaccurate information.
9.5 Attempting Advanced Procedures Without Proper Knowledge
Attempting advanced procedures like ECU reprogramming without proper knowledge can damage the ECU and cause serious problems.
9.6 Neglecting Basic Maintenance
Neglecting basic maintenance tasks can lead to a variety of problems that can be diagnosed via the OBD2 port.
9.7 Case Study: The Importance of Proper Scanner Usage
Tom plugged an incompatible scanner into his 1998 CRV, which caused a communication error and temporarily disabled the ECU. After consulting a mechanic, he learned that he needed to use a scanner that was specifically designed for his vehicle.
10. Frequently Asked Questions (FAQ) About the 1998 CRV OBD2 Port
Here are some frequently asked questions about the 1998 CRV OBD2 port.
10.1 Where is the OBD2 port located on a 1998 Honda CRV?
The OBD2 port is typically located under the dashboard on the driver’s side.
10.2 What type of OBD2 scanner do I need for a 1998 CRV?
You can use any standard OBD2 scanner that is compatible with Honda vehicles.
10.3 Can I use a smartphone app to read OBD2 codes on my 1998 CRV?
Yes, you can use a smartphone app with an OBD2 adapter that plugs into the OBD2 port.
10.4 How do I clear the check engine light on my 1998 CRV?
You can clear the check engine light using an OBD2 scanner by navigating to the “Clear Codes” option.
10.5 What does the P0420 code mean on a 1998 CRV?
The P0420 code indicates that the catalytic converter efficiency is below the threshold.
10.6 How do I reset the readiness monitors on my 1998 CRV?
You can reset the readiness monitors by performing a specific driving cycle.
10.7 Is it safe to drive with the check engine light on in my 1998 CRV?
It depends on the severity of the problem. If the light is flashing, it indicates a serious issue that needs immediate attention. If the light is solid, it’s generally safe to drive, but you should diagnose the problem as soon as possible.
10.8 Can I reprogram the ECU on my 1998 CRV using the OBD2 port?
Reprogramming the ECU can be risky and should only be done by experienced professionals.
10.9 What are some common problems that can be diagnosed via the OBD2 port on a 1998 CRV?
Common problems include misfires, oxygen sensor issues, catalytic converter problems, and evaporative emission control system leaks.
10.10 How often should I perform an OBD2 scan on my 1998 CRV?
You should perform an OBD2 scan whenever the check engine light comes on or at least once a year as part of your regular maintenance routine.
By understanding the importance, location, and usage of the OBD2 port, you can keep your 1998 CRV running smoothly and avoid costly repairs. Remember, MERCEDES-DIAGNOSTIC-TOOL.EDU.VN is here to support you with expert guidance and resources.
Don’t let car troubles slow you down. Contact us at MERCEDES-DIAGNOSTIC-TOOL.EDU.VN today! Our experts are ready to assist you with all your Mercedes diagnostic needs. Whether you’re looking for the right diagnostic tools, need help unlocking hidden features, or require step-by-step repair guides, we’ve got you covered. Reach out now and let us help you keep your Mercedes in top condition!
Contact Information:
- Address: 789 Oak Avenue, Miami, FL 33101, United States
- WhatsApp: +1 (641) 206-8880
- Website: MERCEDES-DIAGNOSTIC-TOOL.EDU.VN