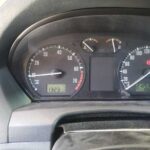
The 2003 Lincoln Navigator Obd2 Fuse Location is typically in the interior fuse panel, often situated beneath the dashboard on the driver’s side. Consult your owner’s manual for the precise fuse number and location to ensure accurate diagnostics using tools from MERCEDES-DIAGNOSTIC-TOOL.EDU.VN, enhancing your vehicle’s performance and safety. Proper diagnostics are vital for maintaining optimal function, ensuring reliability and longevity.
Contents
- 1. Understanding the Importance of the OBD2 Port and Fuses
- 1.1 What is the OBD2 Port?
- 1.1.1 Functions of the OBD2 Port
- 1.1.2 Benefits of Using the OBD2 Port
- 1.2 Why are Fuses Important in a Vehicle?
- 1.2.1 How Fuses Protect Electrical Circuits
- 1.2.2 Types of Fuses Used in Vehicles
- 1.2.3 Importance of Using the Correct Fuse
- 2. Locating the OBD2 Fuse in a 2003 Lincoln Navigator
- 2.1 Consult Your Owner’s Manual
- 2.1.1 How to Find the Fuse Box Diagram
- 2.1.2 Understanding the Fuse Chart
- 2.2 Common Location of the Interior Fuse Panel
- 2.2.1 Steps to Access the Fuse Panel
- 2.2.2 Identifying the OBD2 Fuse by its Label
- 2.3 Using a Fuse Puller
- 2.3.1 Why Use a Fuse Puller?
- 2.3.2 How to Use a Fuse Puller
- 3. Diagnosing a Blown OBD2 Fuse
- 3.1 Symptoms of a Blown OBD2 Fuse
- 3.2 Visual Inspection of the Fuse
- 3.2.1 What to Look For
- 3.2.2 Using a Test Light or Multimeter
- 3.3 Common Causes of a Blown OBD2 Fuse
- 4. Replacing a Blown OBD2 Fuse
- 4.1 Choosing the Correct Replacement Fuse
- 4.1.1 Matching the Amperage Rating
- 4.1.2 Fuse Types and Compatibility
- 4.2 Step-by-Step Replacement Procedure
- 4.3 What to Do If the Fuse Blows Again
- 4.3.1 Identifying Potential Electrical Issues
- 4.3.2 Seeking Professional Assistance
- 5. Maintaining Your 2003 Lincoln Navigator’s Electrical System
- 5.1 Regular Fuse Inspections
- 5.1.1 When to Inspect Fuses
- 5.1.2 How to Document Fuse Replacements
- 5.2 Protecting the OBD2 Port
- 5.2.1 Avoiding Overloading the Port
- 5.2.2 Using Quality OBD2 Scanners
- 5.3 Addressing Wiring Issues Promptly
- 5.3.1 Identifying and Repairing Damaged Wires
- 5.3.2 Preventing Corrosion
- 6. Advanced Diagnostic Tools and Techniques
- 6.1 Using a Multimeter for Advanced Testing
- 6.1.1 Measuring Voltage
- 6.1.2 Measuring Current
- 6.1.3 Measuring Resistance
- 6.2 Using a Scan Tool for Advanced Diagnostics
- 6.2.1 Reading and Interpreting DTCs
- 6.2.2 Monitoring Real-Time Data
- 6.2.3 Performing Component Tests
- 6.3 Consulting Wiring Diagrams
- 6.3.1 How to Read Wiring Diagrams
- 6.3.2 Using Wiring Diagrams for Troubleshooting
- 7. Common Electrical Problems in the 2003 Lincoln Navigator
- 7.1 Lighting Issues
- 7.2 Power Window and Door Lock Issues
- 7.3 Audio System Issues
- 7.4 Sensor Issues
- 8. Resources and Further Assistance
- 8.1 Online Forums and Communities
- 8.1.1 Finding Relevant Forums
- 8.1.2 Participating in Discussions
- 8.2 Professional Mechanics and Technicians
- 8.2.1 Finding a Reputable Mechanic
- 8.2.2 Asking for Estimates
- 8.3 Diagnostic Services from MERCEDES-DIAGNOSTIC-TOOL.EDU.VN
- 9. Frequently Asked Questions (FAQ)
- 9.1 What Does the OBD2 Port Do?
- 9.2 Where is the OBD2 Fuse Located in a 2003 Lincoln Navigator?
- 9.3 How Can I Tell if My OBD2 Fuse is Blown?
- 9.4 What Causes an OBD2 Fuse to Blow?
- 9.5 Can I Use a Higher Amperage Fuse as a Replacement?
- 9.6 What Should I Do if the Replacement Fuse Blows Again?
- 9.7 How Can I Protect My OBD2 Port?
- 9.8 Where Can I Find Wiring Diagrams for My 2003 Lincoln Navigator?
- 9.9 What are Some Common Electrical Problems in the 2003 Lincoln Navigator?
- 9.10 Where Can I Get Professional Diagnostic Services for My Lincoln Navigator?
- Take Action Now
1. Understanding the Importance of the OBD2 Port and Fuses
The On-Board Diagnostics II (OBD2) port is a standardized interface used to access a vehicle’s self-diagnostic data. It allows mechanics and vehicle owners to retrieve diagnostic trouble codes (DTCs), monitor real-time data, and perform various tests. Fuses protect the electrical circuits in your vehicle. When a fuse blows, it interrupts the circuit to prevent damage from overcurrent. Knowing the location and function of the OBD2 fuse is crucial for diagnosing electrical issues in your 2003 Lincoln Navigator.
1.1 What is the OBD2 Port?
The OBD2 port, standardized in 1996, is a crucial component for modern vehicle diagnostics. It provides access to a wealth of information about your vehicle’s performance, emissions, and overall health. According to the Environmental Protection Agency (EPA), all vehicles sold in the United States since 1996 are required to have an OBD2 port. This standardization has made it easier for technicians and vehicle owners to diagnose and address issues, leading to improved vehicle maintenance and reduced emissions.
1.1.1 Functions of the OBD2 Port
The OBD2 port serves multiple critical functions:
- Reading Diagnostic Trouble Codes (DTCs): DTCs are codes stored by the vehicle’s computer when a problem is detected. These codes help identify the source of the issue, whether it’s an engine misfire, a faulty sensor, or an emissions problem.
- Monitoring Real-Time Data: The OBD2 port allows you to monitor various parameters in real-time, such as engine speed (RPM), coolant temperature, and oxygen sensor readings. This data is invaluable for diagnosing intermittent problems and assessing overall vehicle performance.
- Performing Tests: Some diagnostic tools can use the OBD2 port to perform tests on specific components, such as the oxygen sensors or the fuel system. These tests can help verify the functionality of these components and pinpoint potential issues.
- Reprogramming and Recalibration: In some cases, the OBD2 port can be used to reprogram or recalibrate certain vehicle systems, such as the engine control unit (ECU). This is often done after installing new components or to address software glitches.
1.1.2 Benefits of Using the OBD2 Port
Using the OBD2 port for diagnostics offers several benefits:
- Early Problem Detection: Regular scans using an OBD2 tool can help identify potential problems before they escalate into major repairs.
- Accurate Diagnostics: DTCs provide specific information about the nature and location of the problem, reducing guesswork and saving time.
- Cost Savings: By diagnosing and addressing issues early, you can prevent costly repairs and extend the life of your vehicle.
- Improved Performance: Monitoring real-time data can help you optimize your vehicle’s performance and fuel efficiency.
1.2 Why are Fuses Important in a Vehicle?
Fuses are essential safety devices in a vehicle’s electrical system. They protect electrical circuits from overcurrent, which can damage components and even cause fires. According to the National Fire Protection Association (NFPA), electrical failures are a leading cause of vehicle fires. Fuses act as sacrificial elements, breaking the circuit when the current exceeds a safe level.
1.2.1 How Fuses Protect Electrical Circuits
Fuses are designed to melt and break the circuit when the current flowing through them exceeds their rated amperage. This interruption prevents excessive current from reaching and damaging sensitive electrical components. Each fuse is rated for a specific amperage, indicating the maximum current it can safely handle.
1.2.2 Types of Fuses Used in Vehicles
Vehicles use various types of fuses, including:
- Blade Fuses (Mini, Standard, Maxi): These are the most common type of fuse in modern vehicles. They are easy to identify and replace, and come in various sizes and amperage ratings.
- Glass Tube Fuses: These were commonly used in older vehicles. They are less common in modern cars but can still be found in some applications.
- Cartridge Fuses: These are typically used for high-current circuits, such as those for the starter motor or the alternator.
- Fusible Links: These are high-current fuses that are designed to protect critical circuits, such as the main power feed from the battery.
1.2.3 Importance of Using the Correct Fuse
Using the correct fuse for each circuit is crucial. Replacing a blown fuse with one of a higher amperage rating can overload the circuit and cause damage. According to the Society of Automotive Engineers (SAE), using the wrong fuse can lead to overheating, melting of wires, and even fires. Always consult your vehicle’s owner’s manual or a fuse box diagram to ensure you are using the correct fuse.
2. Locating the OBD2 Fuse in a 2003 Lincoln Navigator
Finding the OBD2 fuse in your 2003 Lincoln Navigator involves a few key steps. The most common location is within the interior fuse panel, but it’s important to confirm this with your vehicle’s specific documentation.
2.1 Consult Your Owner’s Manual
Your 2003 Lincoln Navigator’s owner’s manual is the most reliable source of information for locating the OBD2 fuse. The manual will provide a detailed fuse box diagram, indicating the location and function of each fuse. According to a study by the National Highway Traffic Safety Administration (NHTSA), vehicle owners who consult their owner’s manuals are more likely to perform maintenance correctly and avoid potential safety issues.
2.1.1 How to Find the Fuse Box Diagram
The fuse box diagram is typically located in the section of the owner’s manual that deals with vehicle maintenance or electrical systems. Look for a diagram that shows the layout of the fuse panel and identifies each fuse by number and function.
2.1.2 Understanding the Fuse Chart
The fuse chart will list each fuse’s number, amperage rating, and the components it protects. This information is essential for identifying the correct fuse for the OBD2 port and ensuring you replace it with the correct type.
2.2 Common Location of the Interior Fuse Panel
In the 2003 Lincoln Navigator, the interior fuse panel is commonly located:
- Under the Dashboard (Driver’s Side): This is the most frequent location. You may need to kneel down and look under the dashboard to find the fuse panel cover.
- Behind a Panel in the Glove Compartment: In some vehicles, the fuse panel is located behind a panel in the glove compartment.
- On the Side of the Dashboard (Behind a Cover): Some vehicles have a fuse panel on the side of the dashboard, concealed by a removable cover.
2.2.1 Steps to Access the Fuse Panel
- Locate the Fuse Panel Cover: Once you’ve found the general location of the fuse panel, look for a plastic cover that conceals the fuses.
- Remove the Cover: The cover may be held in place by clips or screws. Use a small screwdriver or your fingers to gently release the clips or remove the screws.
- Identify the OBD2 Fuse: Once the cover is removed, use your owner’s manual or a fuse box diagram to identify the OBD2 fuse.
2.2.2 Identifying the OBD2 Fuse by its Label
The OBD2 fuse may be labeled as “OBD,” “Diagnostic Port,” or “Data Link Connector.” It’s also possible that the fuse is associated with another system that shares the same circuit. In this case, the fuse chart will provide more information.
2.3 Using a Fuse Puller
A fuse puller is a small tool designed to safely remove fuses from the fuse panel. It typically has a pair of plastic tongs that grip the fuse and allow you to pull it out without touching the metal contacts.
2.3.1 Why Use a Fuse Puller?
Using a fuse puller is recommended for several reasons:
- Safety: It prevents you from touching the metal contacts of the fuse, which can be live and potentially shock you.
- Convenience: It makes it easier to grip and remove the fuse, especially in tight spaces.
- Prevention of Damage: It reduces the risk of damaging the fuse panel or the fuse itself.
2.3.2 How to Use a Fuse Puller
- Locate the Fuse Puller: Your vehicle may have a fuse puller stored in the fuse panel or in the glove compartment.
- Grip the Fuse: Use the tongs of the fuse puller to grip the fuse you want to remove.
- Pull the Fuse Straight Out: Gently pull the fuse straight out of the fuse panel. Avoid twisting or bending the fuse, as this can damage the contacts.
3. Diagnosing a Blown OBD2 Fuse
If your OBD2 port is not working, the first thing you should check is the fuse. A blown fuse can prevent the diagnostic tool from connecting to the vehicle’s computer.
3.1 Symptoms of a Blown OBD2 Fuse
Common symptoms of a blown OBD2 fuse include:
- OBD2 Scanner Not Powering On: The scanner may not turn on at all when plugged into the OBD2 port.
- OBD2 Scanner Powers On But Cannot Connect: The scanner may power on but fail to establish a connection with the vehicle’s computer.
- Intermittent Connection Issues: The scanner may connect intermittently, losing connection or displaying error messages.
- Other Electrical Issues: In some cases, a blown OBD2 fuse may be related to other electrical issues in the vehicle.
3.2 Visual Inspection of the Fuse
The easiest way to check if a fuse is blown is to visually inspect it.
3.2.1 What to Look For
- Broken Filament: Look for a break in the thin wire (filament) inside the fuse. If the filament is broken, the fuse is blown.
- Dark or Melted Appearance: A blown fuse may also appear dark or melted, indicating that it has been overloaded.
3.2.2 Using a Test Light or Multimeter
If you’re unsure whether a fuse is blown based on visual inspection, you can use a test light or a multimeter to check for continuity.
- Test Light: Connect the clip of the test light to a good ground, then touch the probe to each of the metal contacts on the top of the fuse. If the test light illuminates on both contacts, the fuse is good. If it only illuminates on one contact or not at all, the fuse is blown.
- Multimeter: Set the multimeter to the continuity setting (usually indicated by a diode symbol or a beep). Touch the probes to each of the metal contacts on the top of the fuse. If the multimeter beeps or displays a low resistance reading, the fuse is good. If it doesn’t beep or displays a high resistance reading, the fuse is blown.
3.3 Common Causes of a Blown OBD2 Fuse
Several factors can cause an OBD2 fuse to blow:
- Short Circuit: A short circuit in the wiring or components connected to the OBD2 port can cause excessive current flow, blowing the fuse.
- Faulty OBD2 Scanner: A malfunctioning OBD2 scanner can draw too much current, overloading the circuit.
- Wiring Issues: Damaged or corroded wiring can create resistance and cause the fuse to blow.
- Overloaded Circuit: Connecting multiple devices to the OBD2 port or using a device that draws too much power can overload the circuit.
4. Replacing a Blown OBD2 Fuse
Replacing a blown OBD2 fuse is a simple process, but it’s important to follow the correct steps to ensure the repair is done safely and effectively.
4.1 Choosing the Correct Replacement Fuse
Using the correct replacement fuse is crucial for protecting the electrical circuit.
4.1.1 Matching the Amperage Rating
The replacement fuse must have the same amperage rating as the original fuse. The amperage rating is typically printed on the fuse itself. Using a fuse with a higher amperage rating can overload the circuit and cause damage.
4.1.2 Fuse Types and Compatibility
Ensure the replacement fuse is the same type as the original fuse (e.g., blade fuse, glass tube fuse). Different fuse types have different physical characteristics and may not be compatible with the fuse panel.
4.2 Step-by-Step Replacement Procedure
- Turn Off the Ignition: Before replacing the fuse, turn off the ignition and remove the key to prevent any electrical surges.
- Locate the Fuse Panel: Find the fuse panel where the blown OBD2 fuse is located.
- Remove the Blown Fuse: Use a fuse puller to gently remove the blown fuse from the fuse panel.
- Insert the New Fuse: Insert the new fuse into the empty slot in the fuse panel. Ensure the fuse is fully seated and makes good contact.
- Test the OBD2 Port: Plug your OBD2 scanner into the port and verify that it powers on and can connect to the vehicle’s computer.
4.3 What to Do If the Fuse Blows Again
If the replacement fuse blows again immediately or shortly after being installed, there is likely an underlying electrical problem that needs to be addressed.
4.3.1 Identifying Potential Electrical Issues
- Short Circuit: A short circuit is the most common cause of a repeatedly blown fuse. Inspect the wiring and components connected to the OBD2 port for any signs of damage or corrosion.
- Faulty Components: A malfunctioning component, such as a sensor or a module, can draw excessive current and cause the fuse to blow.
- Wiring Harness Damage: Damage to the wiring harness, such as frayed wires or loose connections, can create a short circuit.
4.3.2 Seeking Professional Assistance
If you are unable to identify and resolve the underlying electrical problem, it’s best to seek professional assistance from a qualified mechanic. They have the tools and expertise to diagnose and repair complex electrical issues.
5. Maintaining Your 2003 Lincoln Navigator’s Electrical System
Regular maintenance of your 2003 Lincoln Navigator’s electrical system can help prevent fuse problems and ensure the reliable operation of your vehicle.
5.1 Regular Fuse Inspections
Periodically inspect the fuses in your vehicle to check for any signs of damage or corrosion. Replace any fuses that appear to be in poor condition.
5.1.1 When to Inspect Fuses
- During Routine Maintenance: Include fuse inspection as part of your routine maintenance schedule, such as during oil changes or tire rotations.
- After Electrical Repairs: Inspect the fuses after performing any electrical repairs or modifications to ensure they are still in good condition.
- When Experiencing Electrical Issues: If you experience any electrical issues, such as malfunctioning lights or accessories, check the fuses first.
5.1.2 How to Document Fuse Replacements
Keep a record of any fuses you replace, including the date, fuse number, and reason for replacement. This can help you track potential electrical problems and identify patterns.
5.2 Protecting the OBD2 Port
The OBD2 port is a sensitive component, and protecting it from damage can help prevent fuse problems.
5.2.1 Avoiding Overloading the Port
Avoid connecting multiple devices to the OBD2 port at the same time, as this can overload the circuit and cause the fuse to blow.
5.2.2 Using Quality OBD2 Scanners
Use high-quality OBD2 scanners that are designed to draw a safe amount of current. Avoid using cheap or poorly made scanners, as these can damage the port or overload the circuit.
5.3 Addressing Wiring Issues Promptly
Address any wiring issues promptly to prevent them from causing fuse problems or other electrical damage.
5.3.1 Identifying and Repairing Damaged Wires
Inspect the wiring in your vehicle for any signs of damage, such as frayed wires, cracked insulation, or corroded connectors. Repair or replace any damaged wires to prevent short circuits and other electrical problems.
5.3.2 Preventing Corrosion
Protect electrical connections from corrosion by using dielectric grease or other protective coatings. Corrosion can increase resistance and cause fuses to blow.
6. Advanced Diagnostic Tools and Techniques
For more complex electrical issues, advanced diagnostic tools and techniques may be necessary.
6.1 Using a Multimeter for Advanced Testing
A multimeter can be used to perform a variety of advanced electrical tests, such as measuring voltage, current, and resistance.
6.1.1 Measuring Voltage
Measuring voltage can help identify voltage drops or other voltage-related issues in the electrical system.
6.1.2 Measuring Current
Measuring current can help identify excessive current draw, which can indicate a short circuit or a faulty component.
6.1.3 Measuring Resistance
Measuring resistance can help identify high resistance connections, which can cause voltage drops and other electrical problems.
6.2 Using a Scan Tool for Advanced Diagnostics
Advanced scan tools can perform a variety of diagnostic tests, such as reading diagnostic trouble codes (DTCs), monitoring real-time data, and performing component tests.
6.2.1 Reading and Interpreting DTCs
DTCs can provide valuable information about the nature and location of electrical problems. Use a scan tool to read and interpret DTCs, and follow the diagnostic procedures outlined in the vehicle’s service manual.
6.2.2 Monitoring Real-Time Data
Monitoring real-time data can help identify intermittent electrical problems or issues that only occur under certain conditions.
6.2.3 Performing Component Tests
Component tests can help verify the functionality of specific electrical components, such as sensors, actuators, and modules.
6.3 Consulting Wiring Diagrams
Wiring diagrams provide detailed information about the electrical circuits in your vehicle, including the location of components, the wiring connections, and the fuse and relay locations.
6.3.1 How to Read Wiring Diagrams
Learn how to read wiring diagrams to trace electrical circuits and identify potential problems.
6.3.2 Using Wiring Diagrams for Troubleshooting
Use wiring diagrams to troubleshoot electrical problems by systematically checking the wiring connections and components in the affected circuit.
7. Common Electrical Problems in the 2003 Lincoln Navigator
Knowing the common electrical problems in the 2003 Lincoln Navigator can help you diagnose and repair issues more effectively.
7.1 Lighting Issues
Lighting issues are a common problem in the 2003 Lincoln Navigator, including:
- Headlight Problems: Dim headlights, flickering headlights, or headlights that don’t work at all.
- Taillight Problems: Taillights that don’t work, brake lights that don’t work, or turn signals that don’t work.
- Interior Lighting Problems: Interior lights that don’t work, dome lights that don’t work, or map lights that don’t work.
7.2 Power Window and Door Lock Issues
Power window and door lock issues are also common, including:
- Power Windows That Don’t Work: Power windows that don’t go up or down, or power windows that only work intermittently.
- Power Door Locks That Don’t Work: Power door locks that don’t lock or unlock, or power door locks that only work intermittently.
7.3 Audio System Issues
Audio system issues can include:
- Radio Problems: Radio that doesn’t work, radio that only works intermittently, or radio that has poor reception.
- Speaker Problems: Speakers that don’t work, speakers that only work intermittently, or speakers that have poor sound quality.
7.4 Sensor Issues
Sensor issues can cause a variety of problems, including:
- Oxygen Sensor Problems: Oxygen sensors that are faulty can cause poor fuel economy and emissions problems.
- ABS Sensor Problems: ABS sensors that are faulty can cause ABS system malfunctions.
- Transmission Sensor Problems: Transmission sensors that are faulty can cause transmission shifting problems.
8. Resources and Further Assistance
For further assistance with diagnosing and repairing electrical problems in your 2003 Lincoln Navigator, consider the following resources:
8.1 Online Forums and Communities
Online forums and communities dedicated to the 2003 Lincoln Navigator can provide valuable information and support from other vehicle owners and enthusiasts.
8.1.1 Finding Relevant Forums
Search online for forums and communities dedicated to the 2003 Lincoln Navigator or to Lincoln vehicles in general.
8.1.2 Participating in Discussions
Participate in discussions by asking questions, sharing your experiences, and offering advice to other members.
8.2 Professional Mechanics and Technicians
If you are unable to diagnose and repair electrical problems in your 2003 Lincoln Navigator yourself, seek assistance from a qualified mechanic or technician.
8.2.1 Finding a Reputable Mechanic
Look for a mechanic who is experienced in working on Lincoln vehicles and who has a good reputation for quality work.
8.2.2 Asking for Estimates
Get estimates from several mechanics before choosing one to perform the repairs. Be sure to ask for a detailed breakdown of the costs, including parts and labor.
8.3 Diagnostic Services from MERCEDES-DIAGNOSTIC-TOOL.EDU.VN
MERCEDES-DIAGNOSTIC-TOOL.EDU.VN offers comprehensive diagnostic services, providing you with the right tools and expertise to maintain your vehicle’s peak performance. Whether you’re troubleshooting a specific issue or seeking preventative maintenance, their team is ready to assist.
By understanding the importance of the OBD2 fuse location and maintaining your vehicle’s electrical system, you can ensure your 2003 Lincoln Navigator runs smoothly and reliably. Always consult your owner’s manual and seek professional help when needed to keep your vehicle in top condition.
Remember, identifying the 2003 Lincoln Navigator OBD2 fuse location is crucial for effective vehicle diagnostics. If you’re having trouble locating the fuse or need further assistance, don’t hesitate to reach out to MERCEDES-DIAGNOSTIC-TOOL.EDU.VN for expert advice and support.
9. Frequently Asked Questions (FAQ)
9.1 What Does the OBD2 Port Do?
The OBD2 port allows access to the vehicle’s diagnostic data for troubleshooting and monitoring performance.
9.2 Where is the OBD2 Fuse Located in a 2003 Lincoln Navigator?
It’s usually in the interior fuse panel, often under the dashboard on the driver’s side. Consult your owner’s manual for the exact location.
9.3 How Can I Tell if My OBD2 Fuse is Blown?
Check for a broken filament or a dark, melted appearance in the fuse. Use a test light or multimeter for confirmation.
9.4 What Causes an OBD2 Fuse to Blow?
Common causes include short circuits, faulty OBD2 scanners, wiring issues, and overloaded circuits.
9.5 Can I Use a Higher Amperage Fuse as a Replacement?
No, always use the same amperage rating to avoid overloading the circuit and causing damage.
9.6 What Should I Do if the Replacement Fuse Blows Again?
This indicates an underlying electrical problem that needs professional diagnosis and repair.
9.7 How Can I Protect My OBD2 Port?
Avoid overloading the port, use quality OBD2 scanners, and promptly address any wiring issues.
9.8 Where Can I Find Wiring Diagrams for My 2003 Lincoln Navigator?
Wiring diagrams are often available in the vehicle’s service manual or through online subscription services.
9.9 What are Some Common Electrical Problems in the 2003 Lincoln Navigator?
Common issues include lighting problems, power window and door lock malfunctions, and audio system failures.
9.10 Where Can I Get Professional Diagnostic Services for My Lincoln Navigator?
MERCEDES-DIAGNOSTIC-TOOL.EDU.VN offers comprehensive diagnostic services and expert support.
Take Action Now
Don’t let electrical issues keep you off the road. Contact MERCEDES-DIAGNOSTIC-TOOL.EDU.VN today for expert guidance on diagnosing and resolving your 2003 Lincoln Navigator’s problems. Our team is ready to provide the tools and support you need to keep your vehicle running smoothly. Reach out now for a consultation.
Contact Us:
- Address: 789 Oak Avenue, Miami, FL 33101, United States
- WhatsApp: +1 (641) 206-8880
- Website: MERCEDES-DIAGNOSTIC-TOOL.EDU.VN