The 4200nex Jeep Vehicle Gauges Obd2 scanner is a game-changer for Jeep owners, giving you unparalleled access to your vehicle’s data and control over its features, and MERCEDES-DIAGNOSTIC-TOOL.EDU.VN can help you unlock its full potential. This comprehensive guide dives deep into how this technology can enhance your driving experience, improve vehicle maintenance, and even unlock hidden functionalities. Explore the future of automotive diagnostics and customization to elevate your Jeep ownership experience.
Contents
- 1. What is a 4200NEX and Why Use it on a Jeep?
- 1.1 Understanding the Pioneer AVH-4200NEX
- 1.2 OBD2 Scanners: Your Jeep’s Diagnostic Window
- 1.3 The Power of Integration: 4200NEX, OBD2, and Maestro RR
- 2. Key Features and Benefits of Using a 4200NEX with OBD2 on Your Jeep
- 2.1 Real-Time Vehicle Gauges on Your Touchscreen
- 2.2 Accessing Diagnostic Trouble Codes (DTCs)
- 2.3 Monitoring Vehicle Performance
- 2.4 Retaining and Enhancing Factory Features
- 2.5 Apple CarPlay and Android Auto Integration
- 3. Step-by-Step Guide to Installing a 4200NEX with OBD2 in Your Jeep
- 3.1 Gathering the Necessary Tools and Equipment
- 3.2 Disconnecting the Battery and Removing the Factory Radio
- 3.3 Wiring the 4200NEX and Maestro RR
- 3.4 Flashing the Maestro RR Module
- 3.5 Connecting the OBD2 Scanner (If Applicable)
- 3.6 Installing the 4200NEX and Testing Functionality
- 4. Troubleshooting Common Issues
- 4.1 Steering Wheel Controls Not Working
- 4.2 No Sound
- 4.3 Vehicle Gauges Not Displaying
- 4.4 Apple CarPlay or Android Auto Not Connecting
- 5. Maximizing the Potential of Your 4200NEX and OBD2 Setup
- 5.1 Customizing Gauges and Display Settings
- 5.2 Exploring Advanced OBD2 Features
- 5.3 Integrating with Other Aftermarket Accessories
- 5.4 Staying Up-to-Date with Software Updates
- 6. The Future of Vehicle Integration
- 6.1 Over-the-Air Updates and Cloud Connectivity
- 6.2 Enhanced Driver Assistance Features
- 6.3 Personalized Driving Experiences
- 7. Frequently Asked Questions (FAQs)
- 8. Conclusion: Enhance Your Jeep Experience with 4200NEX and OBD2
1. What is a 4200NEX and Why Use it on a Jeep?
The Pioneer AVH-4200NEX is a multimedia receiver that brings modern technology to your Jeep’s dashboard. When combined with an OBD2 scanner and interfaces like the iDatalink Maestro RR, it unlocks a wealth of features beyond just playing music and navigation. The OBD2 scanner reads data from your Jeep’s onboard computer, while the 4200NEX displays this information in an easy-to-understand format.
1.1 Understanding the Pioneer AVH-4200NEX
The Pioneer AVH-4200NEX is a double-DIN receiver known for its user-friendly interface and compatibility with both Apple CarPlay and Android Auto. It boasts a responsive touchscreen, customizable display options, and a range of audio settings to fine-tune your listening experience. According to Pioneer Electronics, its intuitive design and feature set make it a popular choice for upgrading older vehicle entertainment systems.
1.2 OBD2 Scanners: Your Jeep’s Diagnostic Window
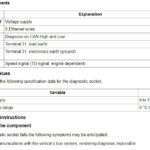
OBD2 (On-Board Diagnostics II) scanners are tools that access your vehicle’s computer to read diagnostic trouble codes (DTCs) and monitor various parameters. They plug into the OBD2 port, typically found under the dashboard. These scanners can reveal why your check engine light is on, monitor engine performance, and even clear codes in some cases. As stated by the Environmental Protection Agency (EPA), all cars and light trucks manufactured after 1996 are required to have an OBD2 system.
1.3 The Power of Integration: 4200NEX, OBD2, and Maestro RR
The true potential unlocks when you integrate the 4200NEX with an OBD2 scanner using an interface module like the iDatalink Maestro RR. This combination allows you to display real-time vehicle data directly on the 4200NEX screen, control factory features through the head unit, and even add custom gauges. According to iDatalink, the Maestro RR enables seamless integration with a wide range of vehicles, offering enhanced functionality and control.
2. Key Features and Benefits of Using a 4200NEX with OBD2 on Your Jeep
Using a 4200NEX with an OBD2 scanner in your Jeep offers a multitude of benefits, from enhanced vehicle monitoring to improved entertainment and convenience.
2.1 Real-Time Vehicle Gauges on Your Touchscreen
One of the most appealing features is the ability to display real-time vehicle gauges directly on the 4200NEX screen. Instead of relying on the factory gauges, you can monitor parameters like engine temperature, oil pressure, battery voltage, and even custom gauges like boost pressure (if applicable). This provides a more comprehensive and accurate view of your Jeep’s performance.
2.2 Accessing Diagnostic Trouble Codes (DTCs)
The OBD2 scanner allows you to read diagnostic trouble codes (DTCs) that trigger the check engine light. This information helps you identify the source of the problem and take appropriate action. Some scanners even provide descriptions of the codes, making it easier to understand the issue. Knowing the DTC can save you time and money by allowing you to diagnose the problem yourself before taking it to a mechanic.
2.3 Monitoring Vehicle Performance
Beyond basic gauges, you can monitor various performance parameters like fuel economy, engine load, and air-fuel ratio. This data can help you optimize your driving habits for better fuel efficiency and identify potential performance issues before they become major problems. According to a study by the Oak Ridge National Laboratory, real-time feedback on fuel consumption can improve driver efficiency by up to 15%.
2.4 Retaining and Enhancing Factory Features
Integrating with the iDatalink Maestro RR allows you to retain factory features like steering wheel controls, Uconnect functionality, and even factory amplifiers. It can also enhance these features by providing more customization options and integrating them seamlessly with the 4200NEX.
2.5 Apple CarPlay and Android Auto Integration
The 4200NEX brings Apple CarPlay and Android Auto to your Jeep, allowing you to access your smartphone’s navigation, music, and communication features through the head unit. This provides a safer and more convenient way to use your phone while driving. According to Apple, CarPlay is designed to minimize distractions while driving, allowing you to focus on the road.
3. Step-by-Step Guide to Installing a 4200NEX with OBD2 in Your Jeep
Installing a 4200NEX with OBD2 in your Jeep can seem daunting, but with careful planning and the right tools, it’s a manageable project. Here’s a step-by-step guide to help you through the process.
3.1 Gathering the Necessary Tools and Equipment
Before you begin, gather all the necessary tools and equipment. This typically includes:
- Pioneer AVH-4200NEX head unit
- OBD2 scanner (compatible with your Jeep)
- iDatalink Maestro RR module
- Wiring harness (specific to your Jeep model)
- Dash adapter kit
- Antenna adapter
- Wire stripper/crimper
- Connectors (butt connectors or soldering equipment)
- Screwdrivers
- Socket set
- Multimeter (optional, but recommended)
- Patience
3.2 Disconnecting the Battery and Removing the Factory Radio
Safety first Disconnect the negative terminal of your Jeep’s battery before starting any electrical work. This prevents accidental shorts and damage to your vehicle’s electrical system.
Next, remove the factory radio. The exact procedure varies depending on your Jeep model, but it typically involves removing a few trim panels and unscrewing the radio from the dashboard. Consult your Jeep’s service manual or online resources for specific instructions.
3.3 Wiring the 4200NEX and Maestro RR
This is the most crucial step. Carefully connect the wiring harness to the 4200NEX and the Maestro RR module. The wiring diagram included with the Maestro RR and the 4200NEX should provide clear instructions. Pay close attention to the wire colors and functions to ensure correct connections.
Typically, you’ll need to connect the following wires:
- Power (12V+)
- Ground
- Ignition
- Illumination
- Speaker wires (front left, front right, rear left, rear right)
- Steering wheel control wires
- Uconnect wires (if applicable)
Use butt connectors or soldering to make secure connections. Wrap each connection with electrical tape to prevent shorts.
3.4 Flashing the Maestro RR Module
Before installing the Maestro RR module, you’ll need to flash it with the correct firmware for your Jeep model and the features you want to retain. This is typically done through the iDatalink website using a computer and a USB cable.
Follow the instructions on the iDatalink website to select your vehicle, the 4200NEX head unit, and the features you want to retain (steering wheel controls, Uconnect, gauges, etc.). The website will generate a custom firmware file that you can download and upload to the Maestro RR module.
3.5 Connecting the OBD2 Scanner (If Applicable)
If your OBD2 scanner requires a direct connection to the head unit, connect it according to the manufacturer’s instructions. Some scanners may connect wirelessly via Bluetooth.
3.6 Installing the 4200NEX and Testing Functionality
Once all the wiring is complete and the Maestro RR module is flashed, carefully install the 4200NEX into the dashboard using the dash adapter kit. Connect the antenna adapter and any other necessary cables.
Reconnect the battery and test all the functions of the 4200NEX, including the radio, CD player, Apple CarPlay/Android Auto, steering wheel controls, and vehicle gauges. If everything works correctly, secure the head unit in place and reinstall the trim panels.
4. Troubleshooting Common Issues
Even with careful installation, you may encounter some issues. Here are some common problems and how to troubleshoot them:
4.1 Steering Wheel Controls Not Working
- Check the Maestro RR module: Ensure it’s properly flashed with the correct firmware for your Jeep and head unit.
- Verify wiring: Double-check the steering wheel control wires are connected correctly between the Maestro RR module and the head unit.
- Consult the Maestro RR manual: Refer to the manual for troubleshooting steps specific to your vehicle and head unit.
4.2 No Sound
- Check speaker wire connections: Ensure all speaker wires are securely connected to the head unit and the vehicle’s wiring harness.
- Verify amplifier settings: If your Jeep has a factory amplifier, make sure it’s properly connected and the settings are correct in the Maestro RR module.
- Check the head unit’s audio settings: Ensure the volume is turned up and the correct audio source is selected.
4.3 Vehicle Gauges Not Displaying
- Verify OBD2 scanner connection: Ensure the OBD2 scanner is properly connected to the head unit (if applicable) or paired via Bluetooth.
- Check Maestro RR settings: Make sure the “gauges” option is enabled in the Maestro RR firmware.
- Consult the Maestro RR manual: Refer to the manual for troubleshooting steps specific to your vehicle and head unit.
4.4 Apple CarPlay or Android Auto Not Connecting
- Check USB connection: Ensure your iPhone or Android phone is connected to the correct USB port on the head unit.
- Verify software versions: Make sure your phone and the head unit have the latest software updates installed.
- Consult the Apple CarPlay or Android Auto documentation: Refer to the documentation for troubleshooting steps specific to your phone and head unit.
5. Maximizing the Potential of Your 4200NEX and OBD2 Setup
Once your 4200NEX and OBD2 setup is installed, there are several ways to maximize its potential and customize it to your liking.
5.1 Customizing Gauges and Display Settings
The 4200NEX typically allows you to customize the gauges displayed on the screen, their layout, and their appearance. Experiment with different settings to find a configuration that suits your preferences.
5.2 Exploring Advanced OBD2 Features
Some OBD2 scanners offer advanced features like data logging, performance testing, and even the ability to program custom parameters. Explore the capabilities of your scanner to unlock its full potential. According to research by SEMA, aftermarket programmers and diagnostic tools are increasingly popular among automotive enthusiasts.
5.3 Integrating with Other Aftermarket Accessories
The 4200NEX can often be integrated with other aftermarket accessories like backup cameras, amplifiers, and subwoofers. This allows you to create a truly custom and feature-rich entertainment system.
5.4 Staying Up-to-Date with Software Updates
Pioneer and iDatalink regularly release software updates for their products. These updates often include new features, bug fixes, and improved compatibility. Make sure to stay up-to-date with the latest software to ensure your system is running smoothly.
6. The Future of Vehicle Integration
The integration of head units, OBD2 scanners, and vehicle data is a rapidly evolving field. As technology advances, we can expect even more sophisticated features and capabilities.
6.1 Over-the-Air Updates and Cloud Connectivity
Future head units may offer over-the-air software updates and cloud connectivity, allowing for seamless access to vehicle data and remote diagnostics. According to a report by McKinsey, over-the-air updates are becoming increasingly important for automotive manufacturers.
6.2 Enhanced Driver Assistance Features
Integration with advanced driver-assistance systems (ADAS) like lane departure warning and adaptive cruise control could become more common, providing drivers with even more information and control.
6.3 Personalized Driving Experiences
Future systems may be able to personalize the driving experience based on individual preferences, automatically adjusting settings like seat position, climate control, and audio settings.
7. Frequently Asked Questions (FAQs)
7.1. What is the best OBD2 scanner to use with the Pioneer AVH-4200NEX?
The best OBD2 scanner depends on your needs and budget. Some popular options include the ScanGauge II, the OBDLink MX+, and the BlueDriver Bluetooth Professional OBDII Scan Tool.
7.2. Can I use the factory microphone with the 4200NEX for phone calls?
No, you’ll need to use the microphone included with the 4200NEX.
7.3. Will the Uconnect features still work after installing the 4200NEX?
With the iDatalink Maestro RR, you can retain Uconnect features like Bluetooth calling and voice control.
7.4. Do I need a special wiring harness for my Jeep model?
Yes, you’ll need a wiring harness specifically designed for your Jeep model to ensure proper integration.
7.5. Can I display boost pressure on the 4200NEX if my Jeep has a turbocharger?
Yes, if your Jeep has a turbocharger and the OBD2 scanner supports it, you can display boost pressure on the 4200NEX.
7.6. How often should I update the software on my 4200NEX and Maestro RR?
Check for updates regularly, especially if you’re experiencing issues or want to take advantage of new features.
7.7. Is professional installation recommended?
If you’re not comfortable working with electronics or vehicle wiring, professional installation is recommended.
7.8. Where can I find more information about compatible OBD2 scanners and features?
Consult the Pioneer and iDatalink websites for compatibility information and feature lists.
7.9. Can I use the 4200NEX to clear diagnostic trouble codes?
Some OBD2 scanners allow you to clear diagnostic trouble codes, but it’s important to understand the underlying issue before doing so.
7.10. What are the benefits of using real-time vehicle gauges?
Real-time vehicle gauges provide a more accurate and comprehensive view of your Jeep’s performance, allowing you to identify potential problems early and optimize your driving habits.
8. Conclusion: Enhance Your Jeep Experience with 4200NEX and OBD2
Integrating a Pioneer AVH-4200NEX with an OBD2 scanner and an iDatalink Maestro RR module is a fantastic way to modernize your Jeep, gain valuable insights into its performance, and unlock a world of customization options. From real-time vehicle gauges to Apple CarPlay and Android Auto integration, this setup offers a wealth of benefits for any Jeep owner. Embrace the power of technology and elevate your driving experience to the next level.
Ready to unlock the full potential of your Jeep? Contact MERCEDES-DIAGNOSTIC-TOOL.EDU.VN today for expert advice on selecting the right diagnostic tools, accessing hidden features, and maintaining your vehicle for peak performance. Visit us at 789 Oak Avenue, Miami, FL 33101, United States, or reach out via Whatsapp at +1 (641) 206-8880. Explore our website at MERCEDES-DIAGNOSTIC-TOOL.EDU.VN for more information and personalized support. Let us help you take control of your Jeep’s performance and unleash its true capabilities!