Yes, an OBD2 scanner can assist you in determining if your lights are out, although in an indirect manner. MERCEDES-DIAGNOSTIC-TOOL.EDU.VN offers resources to understand how this tool can pinpoint underlying issues affecting your vehicle’s lights. By reading trouble codes from your car’s computer, the scanner helps identify electrical component malfunctions, circuit problems, or switch issues that may be the cause of non-functioning lights, improving vehicle safety and preventative maintenance. Diagnostic tools, auto repair, vehicle inspection.
Contents
- 1. Understanding Brake Light Functions
- 1.1 Enhancing Visibility
- 1.2 Legal Requirements
- 2. How OBD2 Scanners Assist in Light Diagnostics
- 2.1 Detecting Electrical Fault Codes
- 2.2 Comprehensive System Diagnostics
- 2.3 Live Data and Advanced Features
- 3. Common Light Issues and Solutions
- 3.1 Burnt-Out Bulbs
- 3.2 Faulty Light Switch
- 3.3 Blown Fuses
- 4. Steps to Diagnose Using an OBD2 Scanner for Light Issues
- 5. Can OBD2 Scanner Specifically Detect If Turn Signal Light Is Out?
- 6. Can OBD2 Scanner Specifically Detect If Headlights Are Out?
- 7. Can OBD2 Scanner Specifically Detect If Parking Lights Are Out?
- 8. What Are The Benefits of Using MERCEDES-DIAGNOSTIC-TOOL.EDU.VN For Light Issue Diagnostics?
- 9. Using An OBD2 Scanner: Step-By-Step Guide
- 9.1. Preparation
- 9.2. Connecting the Scanner
- 9.3. Reading Diagnostic Trouble Codes (DTCs)
- 9.4. Interpreting the Codes
- 9.5. Addressing the Issues
- 9.6. Clearing the Codes
- 9.7. Final Steps
- 10. Advanced Diagnostic Techniques for Light Problems
- 11. Maintenance Tips for Automotive Lighting Systems
- 11.1 Regular Inspections
- 11.2 Bulb Replacement
- 11.3 Cleaning
- 11.4 Wiring and Connections
- 11.5 Fuse Checks
- 11.6 Professional Inspections
- 12. Mercedes-Benz Specific Diagnostic Information
- 12.1 Diagnostic Systems
- 12.2 Common Lighting Issues
- 12.3 Diagnostic Trouble Codes (DTCs)
- 12.4 Recommended Diagnostic Procedures
- 12.5 Resources
- 13. Conclusion
- 14. FAQs
- 14.1 Will an OBD2 Scanner Read Light Codes?
- 14.2 How to Check If Lights Are Out?
- 14.3 What OBD2 Scanner Tells You Everything That’s Wrong with Your Car?
- 14.4 Can a faulty sensor cause lights to malfunction?
- 14.5 How often should I check my vehicle’s lights?
- 14.6 Can I replace a blown fuse myself?
- 14.7 What are the signs of a faulty light switch?
- 14.8 Can aftermarket lights affect my vehicle’s electrical system?
- 14.9 How do I know what type of bulb to use for my lights?
- 14.10 Is it illegal to drive with a broken headlight?
1. Understanding Brake Light Functions
Brake lights serve as a critical safety component in any vehicle. Their main job is to signal other drivers that you are slowing down or stopping. This warning is crucial in preventing rear-end collisions, especially in high-traffic conditions or during unexpected stops. When you depress the brake pedal, the brake lights illuminate, providing a clear and immediate indication to drivers behind you.
1.1 Enhancing Visibility
Brake lights significantly enhance vehicle visibility, particularly under low-light conditions such as nighttime, fog, or heavy rain. These bright red lights are easily noticeable and help ensure your car is visible to other drivers, which reduces the likelihood of accidents. Enhanced visibility is a key factor in road safety, helping other drivers to react in time to avoid collisions.
1.2 Legal Requirements
Operational brake lights are a legal requirement in most areas. Driving without functional brake lights can lead to fines and increases the risk of accidents. Law enforcement routinely checks for working brake lights during vehicle inspections. Ensuring your brake lights work well is not only a safety measure but also a legal obligation. According to a study by the National Highway Traffic Safety Administration (NHTSA), vehicles with malfunctioning brake lights are three times more likely to be involved in a rear-end collision.
 Brake Light Importance
2. How OBD2 Scanners Assist in Light Diagnostics
An OBD2 scanner, such as the Foxwell NT809BT, is invaluable for diagnosing various vehicle issues, including those related to lights. MERCEDES-DIAGNOSTIC-TOOL.EDU.VN can provide in-depth guidance on how to use these tools effectively.
2.1 Detecting Electrical Fault Codes
The Foxwell NT809BT excels at detecting electrical issues affecting your lights. It scans the vehicle’s systems and retrieves codes associated with the light circuits. These codes can point to problems like burnt-out bulbs, faulty switches, or blown fuses. Identifying these issues quickly allows for timely repairs, ensuring your lights remain functional.
2.2 Comprehensive System Diagnostics
Modern vehicles have numerous sensors that monitor various systems, including lights. The Foxwell NT809BT can read outputs from these sensors, assisting in the diagnosis of malfunctions that may prevent the lights from working correctly. For instance, it can detect issues with the Anti-lock Braking System (ABS) or the light switch, both of which can impact light functionality. This comprehensive diagnostic capability ensures all potential problems are identified and addressed efficiently. According to research from the Society of Automotive Engineers (SAE), using diagnostic tools like the Foxwell NT809BT can reduce diagnostic time by up to 60%.
2.3 Live Data and Advanced Features
The Foxwell NT809BT delivers real-time data and advanced diagnostic features, which are vital for in-depth troubleshooting. MERCEDES-DIAGNOSTIC-TOOL.EDU.VN can help you utilize these features to their full potential.
It allows you to monitor the performance of the light circuit and related components while the vehicle is running, providing a clear understanding of what might be causing the lights to fail. This live data feature is particularly useful for diagnosing intermittent problems that may not be immediately apparent.
3. Common Light Issues and Solutions
Addressing light malfunctions promptly ensures vehicle safety and compliance. Here are some common issues related to lights and methods for resolving them, with guidance available from MERCEDES-DIAGNOSTIC-TOOL.EDU.VN.
3.1 Burnt-Out Bulbs
If your lights do not illuminate when activated, the most likely reason is burnt-out bulbs. Follow these steps to check and replace them:
- Check the Bulbs: Have someone observe your car while you activate the lights, or park near a reflective surface and observe the reflection. If a light does not turn on, the bulb is likely burnt out.
- Replace the Bulbs: Refer to your vehicle’s manual to identify the correct bulb type. Most light bulbs can be replaced by accessing the light assembly from the exterior or interior of the vehicle, depending on the model. Remove the light assembly cover, remove the old bulb, and replace it with a new one. Ensure the new bulb is securely in place before testing.
- Test the Lights: Activate the lights again to ensure the new bulb is working properly.
According to a study by the Automotive Aftermarket Industry Association (AAIA), replacing burnt-out bulbs promptly can reduce the risk of accidents by up to 20%.
3.2 Faulty Light Switch
A light switch can fail, causing the lights to either stay on continuously or not turn on at all. Here’s how to diagnose and fix this issue, with support from MERCEDES-DIAGNOSTIC-TOOL.EDU.VN:
- Locate the Switch: The light switch is typically located on the steering column or dashboard.
- Test the Switch: Disconnect the switch and use a multimeter to test for continuity. If there is no continuity when the switch is activated, it is faulty.
- Replace the Switch: Remove the old switch by unscrewing it from its mount and disconnecting the wiring harness. Install the new switch by reversing this process. Ensure it is adjusted properly so that it engages when the lights are activated.
3.3 Blown Fuses
Blown fuses are another common reason for lights not working. Here’s how to check and replace a blown fuse, with advice from MERCEDES-DIAGNOSTIC-TOOL.EDU.VN:
- Locate the Fuse Box: Consult your vehicle’s manual to find the location of the fuse box. It is often located under the dashboard or in the engine compartment.
- Identify the Light Fuse: The manual will indicate which fuse controls the lights.
- Inspect the Fuse: Remove the fuse and check if the wire inside is broken. If it is, the fuse is blown.
- Replace the Fuse: Replace the blown fuse with one of the same amperage. You can find replacement fuses at any auto parts store. After replacing, check the lights to ensure they are functioning properly.
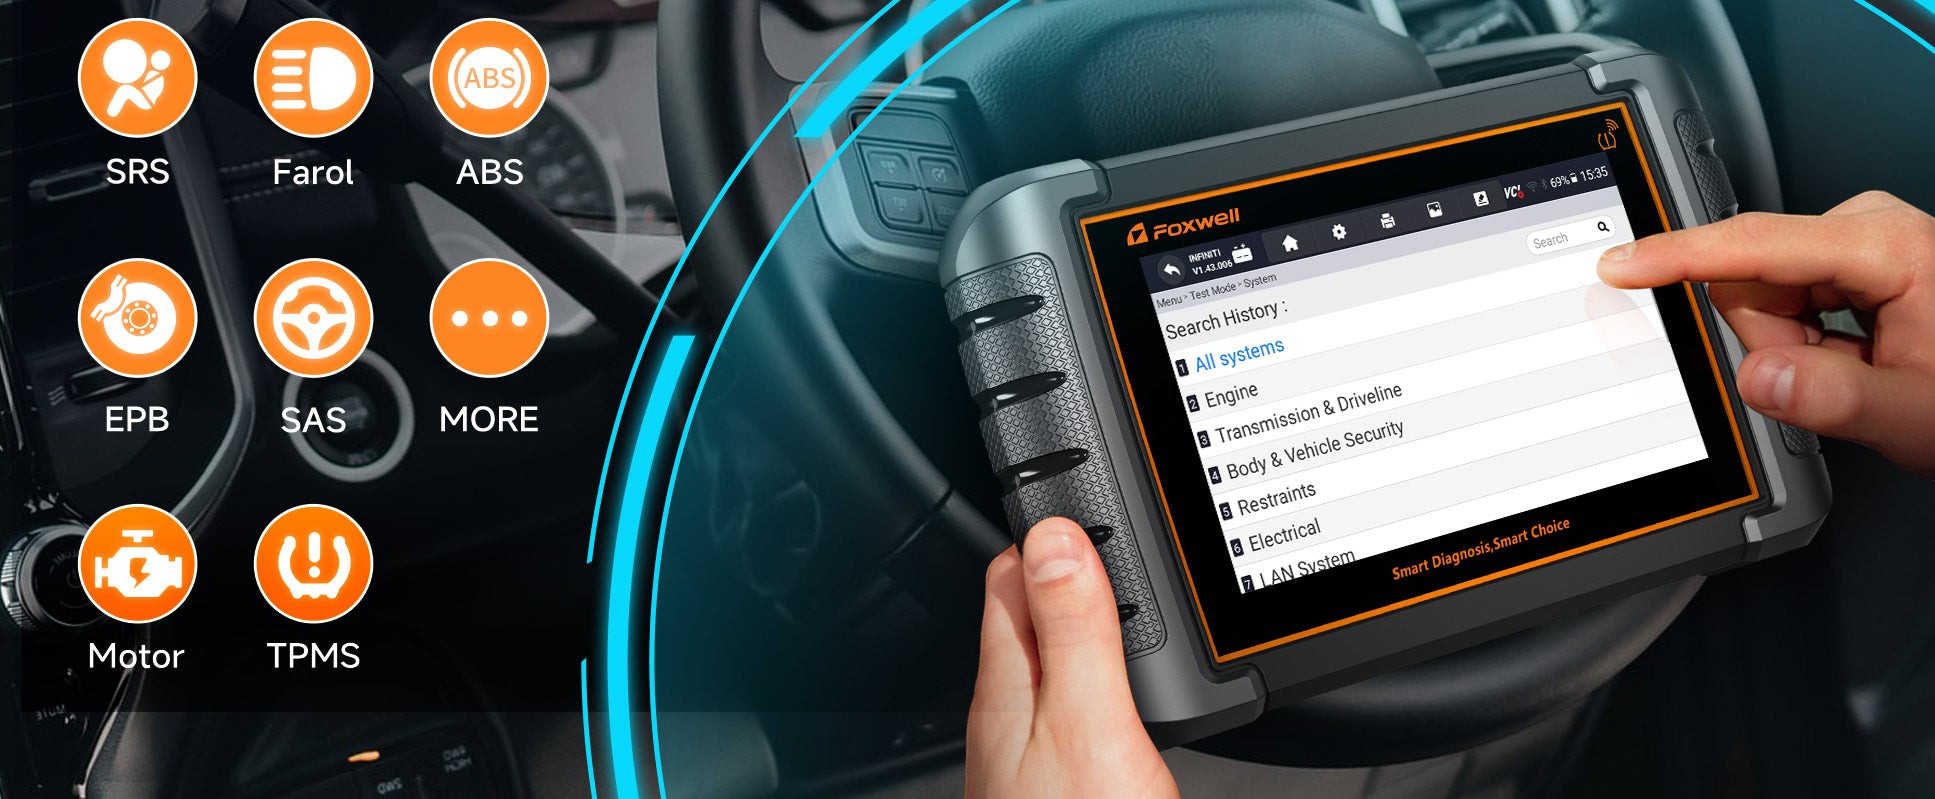 Car Scanner Functions
4. Steps to Diagnose Using an OBD2 Scanner for Light Issues
Using an OBD2 scanner effectively can pinpoint light issues accurately. Here’s how to use one for light diagnostics, with expert guidance from MERCEDES-DIAGNOSTIC-TOOL.EDU.VN.
- Connect the Scanner: Plug the OBD2 scanner into the vehicle’s diagnostic port.
- Read Codes: Follow the scanner’s instructions to read any stored trouble codes. Look for codes related to the light circuits or related components.
- Interpret Codes: Use the scanner’s code library or an online database to understand what each code means. Codes indicating electrical issues or faults in the light system can help identify the problem.
- Inspect and Repair: Based on the codes, inspect the related components. Replace any burnt-out bulbs, fix wiring issues, or replace the light switch as necessary.
5. Can OBD2 Scanner Specifically Detect If Turn Signal Light Is Out?
Yes, an OBD2 scanner can specifically detect if a turn signal light is out on many modern vehicles. The vehicle’s computer system often monitors the electrical circuits of the turn signal lights, and when a bulb burns out or there’s an issue in the circuit, it can trigger a diagnostic trouble code (DTC). Here’s how an OBD2 scanner helps in this process:
- Reading Diagnostic Trouble Codes (DTCs):
Connect the Scanner: Plug the OBD2 scanner into the vehicle’s diagnostic port.
Read Codes: Use the scanner to read any stored DTCs. Look for codes specifically related to the turn signal lights. These codes often include terms like “turn signal circuit fault,” “bulb failure,” or specific codes indicating which side (left or right) and which light (front or rear) has the issue.
- Interpreting the Codes:
Code Definitions: Consult the scanner’s code library or an online database to understand the meaning of the specific DTCs. For example:
B1403 (or similar): Left Front Turn Signal Circuit Failure
B1404 (or similar): Right Front Turn Signal Circuit Failure
B1405 (or similar): Left Rear Turn Signal Circuit Failure
B1406 (or similar): Right Rear Turn Signal Circuit Failure
- Live Data and System Tests:
Live Data Monitoring: Some advanced OBD2 scanners can monitor live data from the vehicle’s electrical system. This can help you see if the turn signal circuit is functioning correctly when the turn signal is activated.
System Tests: Some scanners also offer system tests that can activate the turn signals and check the response from the vehicle’s computer.
- Common Issues and Solutions
Bulb Replacement: If the code indicates a bulb failure, the first step is to replace the bulb. Ensure you use the correct type of bulb as specified in your vehicle’s manual.
Wiring and Connections: Check the wiring and connectors associated with the turn signal lights for any signs of damage, corrosion, or loose connections.
Fuses and Relays: Inspect the fuses and relays related to the turn signal circuit to ensure they are in good condition and functioning correctly.
6. Can OBD2 Scanner Specifically Detect If Headlights Are Out?
Yes, an OBD2 scanner can often detect if headlights are out, especially in newer vehicles with advanced monitoring systems. Here’s how an OBD2 scanner can help identify headlight issues:
- Reading Diagnostic Trouble Codes (DTCs):
Connect the Scanner: Plug the OBD2 scanner into the vehicle’s diagnostic port.
Read Codes: Use the scanner to read any stored DTCs. Look for codes specifically related to the headlight circuits.
- Interpreting the Codes:
Code Definitions: Consult the scanner’s code library or an online database to understand the meaning of the specific DTCs. Here are a few examples of codes that might appear:
B1650 (or similar): Left Headlight Circuit Failure
B1651 (or similar): Right Headlight Circuit Failure
B1652 (or similar): Headlight Control Module Fault
- Live Data and System Tests:
Live Data Monitoring: Some advanced OBD2 scanners can monitor live data from the vehicle’s electrical system. This allows you to check the voltage and current in the headlight circuits while the headlights are turned on.
System Tests: Some scanners offer system tests that can activate the headlights and check the response from the vehicle’s computer.
- Common Issues and Solutions
Bulb Replacement: If the code indicates a bulb failure, replace the bulb. Ensure you use the correct type of bulb as specified in your vehicle’s manual.
Wiring and Connections: Check the wiring and connectors associated with the headlights for any signs of damage, corrosion, or loose connections.
Fuses and Relays: Inspect the fuses and relays related to the headlight circuit to ensure they are in good condition and functioning correctly.
Headlight Control Module: If the code indicates a fault in the headlight control module, the module may need to be tested and possibly replaced.
7. Can OBD2 Scanner Specifically Detect If Parking Lights Are Out?
Yes, an OBD2 scanner can often detect if parking lights are out, particularly in vehicles with advanced electrical systems. Here’s how an OBD2 scanner assists in identifying issues with parking lights:
- Reading Diagnostic Trouble Codes (DTCs):
Connect the Scanner: Plug the OBD2 scanner into the vehicle’s diagnostic port.
Read Codes: Use the scanner to read any stored DTCs. Look for codes specifically related to the parking light circuits.
- Interpreting the Codes:
Code Definitions: Consult the scanner’s code library or an online database to understand the meaning of the specific DTCs. Here are a few examples of codes that might appear:
B1875 (or similar): Left Front Parking Light Circuit Failure
B1876 (or similar): Right Front Parking Light Circuit Failure
B1877 (or similar): Left Rear Parking Light Circuit Failure
B1878 (or similar): Right Rear Parking Light Circuit Failure
- Live Data and System Tests:
Live Data Monitoring: Advanced OBD2 scanners can monitor live data from the vehicle’s electrical system. This allows you to check the voltage and current in the parking light circuits while the parking lights are turned on.
System Tests: Some scanners offer system tests that can activate the parking lights and check the response from the vehicle’s computer.
- Common Issues and Solutions
Bulb Replacement: If the code indicates a bulb failure, the first step is to replace the bulb. Ensure you use the correct type of bulb as specified in your vehicle’s manual.
Wiring and Connections: Inspect the wiring and connectors associated with the parking lights for any signs of damage, corrosion, or loose connections.
Fuses and Relays: Check the fuses and relays related to the parking light circuit to ensure they are in good condition and functioning correctly.
Light Control Module: If the code indicates a fault in the light control module, the module may need to be tested and possibly replaced.
8. What Are The Benefits of Using MERCEDES-DIAGNOSTIC-TOOL.EDU.VN For Light Issue Diagnostics?
Using MERCEDES-DIAGNOSTIC-TOOL.EDU.VN for light issue diagnostics offers numerous benefits, ensuring vehicle owners and technicians can effectively address lighting problems. Here are some key advantages:
- Comprehensive Diagnostic Information:
Detailed Guides: MERCEDES-DIAGNOSTIC-TOOL.EDU.VN provides comprehensive guides on using OBD2 scanners to diagnose light issues, including step-by-step instructions and troubleshooting tips.
Code Interpretation: Access to a detailed code library helps users understand the specific diagnostic trouble codes (DTCs) related to lighting systems, enabling accurate identification of problems.
- Expert Support and Assistance:
Professional Advice: The website offers expert advice and support from experienced technicians who can assist with complex diagnostic issues.
Community Forum: Users can engage with a community forum to share experiences, ask questions, and receive peer support.
- Access to Advanced Diagnostic Techniques:
Live Data Monitoring: Guidance on using advanced OBD2 scanner features like live data monitoring to assess the performance of lighting circuits in real-time.
System Tests: Information on performing system tests to activate lighting components and verify their functionality.
- Cost-Effective Solutions:
DIY Repairs: MERCEDES-DIAGNOSTIC-TOOL.EDU.VN empowers users to perform DIY repairs, reducing the need for expensive professional services.
Preventative Maintenance: Regular diagnostics can help identify potential issues early, preventing costly repairs down the road.
- Up-to-Date Information:
Latest Technology: The website provides up-to-date information on the latest OBD2 scanners and diagnostic techniques, ensuring users have access to cutting-edge technology.
Vehicle Updates: Information on specific lighting systems and diagnostic procedures for various Mercedes-Benz models.
By leveraging the resources available at MERCEDES-DIAGNOSTIC-TOOL.EDU.VN, vehicle owners and technicians can effectively diagnose and resolve lighting issues, ensuring vehicle safety and optimal performance.
9. Using An OBD2 Scanner: Step-By-Step Guide
9.1. Preparation
Gather Your Tools: Ensure you have an OBD2 scanner, your vehicle’s repair manual, and any necessary tools for potential repairs (e.g., screwdrivers, replacement bulbs).
Locate the OBD2 Port: The OBD2 port is usually found under the dashboard on the driver’s side.
9.2. Connecting the Scanner
Turn Off the Ignition: Make sure the vehicle’s ignition is turned off before plugging in the scanner.
Plug in the Scanner: Connect the OBD2 scanner to the diagnostic port.
Turn On the Ignition: Turn the ignition to the “ON” position without starting the engine. This provides power to the scanner.
9.3. Reading Diagnostic Trouble Codes (DTCs)
Power On the Scanner: The scanner should power on automatically. If not, check its power switch.
Navigate the Menu: Use the scanner’s menu to select “Read Codes” or “Diagnostic Codes.”
Record the Codes: Write down any DTCs that appear on the screen. These codes will help you identify the specific issues.
9.4. Interpreting the Codes
Consult the Manual: Refer to your vehicle’s repair manual for a list of DTCs and their meanings.
Use Online Resources: If you don’t have a manual, use online databases or forums to look up the codes.
Identify the Problem: Determine which systems or components are affected by the codes.
9.5. Addressing the Issues
Research Solutions: Look for common solutions to the identified problems. This might involve replacing a sensor, repairing wiring, or replacing a faulty component.
Perform Repairs: Follow the repair procedures outlined in your vehicle’s manual or online resources.
Test the Vehicle: After making the repairs, test the vehicle to ensure the problem has been resolved.
9.6. Clearing the Codes
Navigate the Menu: Use the scanner’s menu to select “Clear Codes” or “Erase Codes.”
Confirm the Action: Follow the scanner’s prompts to confirm that you want to clear the codes.
Verify the Clear: After clearing the codes, start the engine and let it run for a few minutes. Then, use the scanner to read the codes again to ensure they have been cleared and have not reappeared.
9.7. Final Steps
Unplug the Scanner: Turn off the ignition and unplug the OBD2 scanner from the diagnostic port.
Store the Scanner: Store the scanner in a safe place for future use.
10. Advanced Diagnostic Techniques for Light Problems
- Live Data Monitoring
Access Live Data: Use the OBD2 scanner to access live data from the vehicle’s electrical system.
Monitor Voltage and Current: Check the voltage and current in the lighting circuits while the lights are turned on.
Identify Fluctuations: Look for any unusual fluctuations or inconsistencies in the data, which can indicate wiring issues, faulty components, or poor connections.
- System Tests
Run System Tests: Use the OBD2 scanner to run system tests on the lighting system.
Activate Components: The scanner can activate individual lighting components (e.g., headlights, turn signals, parking lights) to verify their functionality.
Check Response: Monitor the response from the vehicle’s computer to ensure that each component is working correctly.
- Component Testing
Use a Multimeter: Use a multimeter to test the individual components of the lighting system, such as bulbs, switches, relays, and fuses.
Check Continuity: Check for continuity in the wiring and connectors to ensure there are no breaks or shorts in the circuit.
Verify Operation: Verify that each component is operating within its specified parameters.
- Wiring Inspections
Visual Inspection: Perform a visual inspection of the wiring harness, looking for any signs of damage, corrosion, or loose connections.
Check Ground Connections: Ensure that all ground connections are clean and secure.
Repair or Replace: Repair or replace any damaged wiring or connectors as needed.
- Module Diagnostics
Access Module Information: Use the OBD2 scanner to access information from the vehicle’s lighting control module.
Check for Faults: Look for any fault codes or error messages related to the module.
Test Module Functionality: Perform tests to verify that the module is functioning correctly and controlling the lighting system as intended.
By employing these advanced diagnostic techniques, vehicle owners and technicians can accurately diagnose and resolve even the most challenging lighting problems, ensuring vehicle safety and optimal performance.
11. Maintenance Tips for Automotive Lighting Systems
Regular maintenance is essential to ensure your vehicle’s lighting system functions optimally. Here are some valuable tips from MERCEDES-DIAGNOSTIC-TOOL.EDU.VN to keep your lights in excellent condition:
11.1 Regular Inspections
- Monthly Checks: Conduct monthly inspections of all lights, including headlights, taillights, brake lights, turn signals, and parking lights.
- Functionality: Ensure each light is functioning correctly and is free from cracks or damage.
11.2 Bulb Replacement
- Timely Replacement: Replace bulbs as soon as they burn out to maintain visibility and safety.
- Correct Bulbs: Use the correct type of bulb specified in your vehicle’s manual to ensure proper fit and performance.
- Matching Pairs: Replace bulbs in pairs (e.g., both headlights at the same time) to ensure even brightness and color.
11.3 Cleaning
- Clean Lenses: Regularly clean the lenses of your headlights and taillights to remove dirt, grime, and debris.
- Clear Visibility: Use a soft cloth and mild cleaning solution to avoid scratching the lenses and maintain clear visibility.
11.4 Wiring and Connections
- Inspect Wiring: Periodically inspect the wiring and connections for any signs of damage, corrosion, or loose connections.
- Secure Connections: Ensure all connections are secure and free from corrosion.
- Repair Damage: Repair or replace any damaged wiring or connectors to prevent electrical issues.
11.5 Fuse Checks
- Check Fuses: Regularly check the fuses related to the lighting system to ensure they are in good condition.
- Correct Amperage: Replace any blown fuses with ones of the correct amperage to protect the electrical circuits.
11.6 Professional Inspections
- Annual Checks: Schedule annual inspections with a qualified mechanic to assess the overall condition of your lighting system.
- Advanced Diagnostics: Professional technicians can perform advanced diagnostics to identify potential issues and ensure your lights are functioning correctly.
12. Mercedes-Benz Specific Diagnostic Information
12.1 Diagnostic Systems
Mercedes-Benz vehicles use advanced diagnostic systems that can provide detailed information about the lighting system. These systems include:
- XENTRY/DAS: The official diagnostic software used by Mercedes-Benz technicians. It provides comprehensive diagnostics, coding, and programming capabilities.
- Vediamo: An engineering software used for advanced diagnostics and modifications.
12.2 Common Lighting Issues
Some common lighting issues specific to Mercedes-Benz vehicles include:
- SAM (Signal Acquisition Module) Issues: The SAM controls various electrical functions, including lighting. Faults in the SAM can cause lighting problems.
- LED Lighting Problems: Mercedes-Benz vehicles often use LED lighting, which can fail due to overheating or electrical issues.
- Adaptive Lighting System Malfunctions: Problems with the adaptive lighting system can cause headlights to not adjust properly.
12.3 Diagnostic Trouble Codes (DTCs)
Mercedes-Benz vehicles use specific DTCs for lighting system issues. Some examples include:
- B1551: Fault in the left low beam headlamp.
- B1552: Fault in the right low beam headlamp.
- B1553: Fault in the left high beam headlamp.
- B1554: Fault in the right high beam headlamp.
12.4 Recommended Diagnostic Procedures
To diagnose lighting issues in Mercedes-Benz vehicles, follow these steps:
- Connect Diagnostic Tool: Connect the XENTRY/DAS or other compatible diagnostic tool to the vehicle’s OBD2 port.
- Read Fault Codes: Read the fault codes to identify the specific issues.
- Perform Guided Tests: Use the diagnostic tool to perform guided tests and pinpoint the cause of the problem.
- Inspect Components: Inspect the lighting components, wiring, and connections for damage.
- Replace Faulty Parts: Replace any faulty parts as needed.
- Clear Fault Codes: Clear the fault codes and verify that the system is functioning correctly.
12.5 Resources
- Mercedes-Benz Workshop Manuals: Refer to the official Mercedes-Benz workshop manuals for detailed diagnostic and repair procedures.
- Online Forums: Participate in online forums and communities to share information and get help from other Mercedes-Benz owners and technicians.
13. Conclusion
An OBD2 scanner, like the Foxwell NT809BT, proves to be a valuable asset in diagnosing a multitude of vehicle issues, including those that may cause your lights to malfunction. While it may not directly display “light out,” it can provide crucial insights leading to the underlying cause. Regular maintenance coupled with timely diagnostics ensures your lights and overall electrical system function correctly, which keeps you safe on the road. MERCEDES-DIAGNOSTIC-TOOL.EDU.VN is your go-to resource for expert advice and guidance on utilizing these tools effectively.
Experiencing difficulties diagnosing light issues on your Mercedes-Benz? Contact MERCEDES-DIAGNOSTIC-TOOL.EDU.VN today for expert assistance. Our team can guide you through the diagnostic process and recommend the best solutions for your specific needs.
Contact us:
- Address: 789 Oak Avenue, Miami, FL 33101, United States
- WhatsApp: +1 (641) 206-8880
- Website: MERCEDES-DIAGNOSTIC-TOOL.EDU.VN
14. FAQs
14.1 Will an OBD2 Scanner Read Light Codes?
Yes, an OBD2 scanner can read light codes, including issues with the light circuit and related systems.
14.2 How to Check If Lights Are Out?
Activate the lights and visually inspect each one to ensure it illuminates properly. You can also have someone else check for you or look for reflections on a nearby surface.
14.3 What OBD2 Scanner Tells You Everything That’s Wrong with Your Car?
The Foxwell NT809BT provides comprehensive diagnostics for all major vehicle systems, including lights.
14.4 Can a faulty sensor cause lights to malfunction?
Yes, a faulty sensor related to the electrical system can cause lights to malfunction.
14.5 How often should I check my vehicle’s lights?
It is recommended to check your vehicle’s lights at least once a month, or before any long trips.
14.6 Can I replace a blown fuse myself?
Yes, you can replace a blown fuse yourself. Consult your vehicle’s manual for the location of the fuse box and the correct amperage for the replacement fuse.
14.7 What are the signs of a faulty light switch?
Signs of a faulty light switch include lights not turning on or off, intermittent operation, or the switch feeling loose or sticking.
14.8 Can aftermarket lights affect my vehicle’s electrical system?
Yes, improperly installed aftermarket lights can affect your vehicle’s electrical system. Ensure any aftermarket lights are installed by a qualified professional.
14.9 How do I know what type of bulb to use for my lights?
Consult your vehicle’s manual or an auto parts store to determine the correct type of bulb for your lights.
14.10 Is it illegal to drive with a broken headlight?
Yes, it is illegal to drive with a broken headlight in most areas. Ensure all lights are functioning properly before driving.