The D16y8 Obd1 Or Obd2 conversion is a popular modification for Honda enthusiasts seeking a balance of performance and affordability. At MERCEDES-DIAGNOSTIC-TOOL.EDU.VN, we provide expert insights and solutions to help you make the right choice for your specific needs, whether you’re aiming for enhanced engine management or simplified diagnostics. With our guidance, you can navigate the complexities of engine swaps and achieve optimal results. Unlock your vehicle’s full potential with engine management systems, performance tuning, and diagnostic tools.
Contents
- 1. Understanding OBD1 and OBD2 Systems
- 2. Why Choose a D16y8 Engine Swap?
- 3. Key Differences Between D16y8 OBD1 and OBD2
- 4. D16y8 OBD1 Conversion: A Detailed Guide
- 5. D16y8 OBD2 Wiring Harness and ECU Considerations
- 6. Required Parts for D16y8 OBD1 Conversion
- 7. Step-by-Step Guide to Converting D16y8 to OBD1
- 8. Modifying Power Steering Bracket and Pump
- 9. Troubleshooting Common Issues After the Swap
- 10. Benefits of Using MERCEDES-DIAGNOSTIC-TOOL.EDU.VN
- 11. Maximizing Performance with Proper Tuning
- 12. Expert Tips for Maintaining Your D16y8 Engine
Table of Contents
- Understanding OBD1 and OBD2 Systems
- Why Choose a D16y8 Engine Swap?
- Key Differences Between D16y8 OBD1 and OBD2
- D16y8 OBD1 Conversion: A Detailed Guide
- D16y8 OBD2 Wiring Harness and ECU Considerations
- Required Parts for D16y8 OBD1 Conversion
- Step-by-Step Guide to Converting D16y8 to OBD1
- Modifying Power Steering Bracket and Pump
- Troubleshooting Common Issues After the Swap
- Benefits of Using MERCEDES-DIAGNOSTIC-TOOL.EDU.VN
- Maximizing Performance with Proper Tuning
- Expert Tips for Maintaining Your D16y8 Engine
- D16y8 OBD1 or OBD2: Performance Comparison
- Real-World Examples of Successful D16y8 Swaps
- Understanding VTEC Wiring for OBD1 Conversion
- FAQ: Frequently Asked Questions
1. Understanding OBD1 and OBD2 Systems
What are OBD1 and OBD2, and why are they important for engine swaps? OBD1 (On-Board Diagnostics 1) and OBD2 (On-Board Diagnostics 2) are automotive diagnostic systems. OBD1, used in vehicles manufactured before 1996, provides basic diagnostic information. OBD2, standardized in 1996, offers more comprehensive data, improving emissions monitoring and diagnostics.
OBD1 is an earlier diagnostic system that is less standardized compared to OBD2. In the early 1990s, each car manufacturer had its diagnostic connector, communication protocol, and error code system. According to a report by the California Air Resources Board (CARB), the transition to OBD2 was motivated by the need for a more consistent and effective way to monitor vehicle emissions systems. OBD1 systems typically provide limited data, such as basic engine parameters and a few emission-related faults. Retrieving this data often requires specialized tools and manufacturer-specific knowledge.
OBD2 offers a standardized approach, ensuring that any OBD2-compliant scan tool can communicate with any OBD2-compliant vehicle. This system monitors a wide array of parameters, including engine performance, emissions control devices, and sensor data. OBD2 systems use a standard 16-pin diagnostic connector (DLC) and a set of standardized diagnostic trouble codes (DTCs), making it easier for technicians to diagnose and repair vehicles. As noted in a study by the Environmental Protection Agency (EPA), the enhanced monitoring capabilities of OBD2 have led to significant improvements in detecting and addressing emission-related issues.
The transition from OBD1 to OBD2 reflects advancements in automotive technology and environmental regulation. While OBD1 served its purpose in early vehicle diagnostics, OBD2 provides a more robust and standardized platform for monitoring and maintaining modern vehicles. Understanding these systems is crucial for anyone involved in engine swaps or automotive repairs, ensuring compatibility and effective diagnostics.
2. Why Choose a D16y8 Engine Swap?
Why is the D16y8 engine a popular choice for engine swaps, and what are its benefits? The D16y8, a 1.6-liter SOHC VTEC engine, is favored for its blend of performance, reliability, and affordability. It offers a significant power boost over non-VTEC engines and is relatively easy to install in older Honda models.
The D16y8 engine is a popular choice for engine swaps due to several compelling reasons. First, it offers a significant performance upgrade over many base model engines without requiring extensive modifications to the vehicle. Its single overhead camshaft (SOHC) design, combined with the Variable Valve Timing and Lift Electronic Control (VTEC) system, provides a noticeable increase in horsepower and torque, enhancing the overall driving experience. According to Honda Tuning Magazine, the D16y8 is capable of producing around 127 horsepower, making it a substantial improvement over the D15 series engines commonly found in older Honda Civics.
Second, the D16y8 is known for its reliability and durability. The engine’s robust construction and relatively simple design contribute to its longevity, making it a dependable choice for daily driving and performance applications. A survey conducted by Honda-Tech.com found that D16y8 engines, when properly maintained, often exceed 200,000 miles without major issues. This reliability reduces the long-term costs associated with engine swaps, providing peace of mind for enthusiasts.
Third, the D16y8 is relatively affordable compared to other Honda engines, such as the B-series or K-series. Its widespread availability and lower cost make it an attractive option for those on a budget. Additionally, the D16y8 has a strong aftermarket support, with numerous performance parts and upgrades available to further enhance its capabilities. This allows enthusiasts to customize the engine to meet their specific needs and preferences.
The D16y8 engine offers a balanced combination of performance, reliability, and affordability, making it a popular and practical choice for engine swaps. Whether you’re looking to improve your daily driver or build a fun weekend project, the D16y8 provides a solid foundation for achieving your automotive goals.
3. Key Differences Between D16y8 OBD1 and OBD2
What are the main differences between D16y8 OBD1 and OBD2 systems, and how do these differences affect the conversion process? The primary differences lie in the engine management system. OBD1 uses fewer sensors and a simpler ECU, while OBD2 employs more sensors for enhanced monitoring and control.
The key differences between D16y8 OBD1 and OBD2 systems primarily revolve around the complexity and sophistication of their respective engine management systems. OBD1 (On-Board Diagnostics 1) is an earlier, less standardized system that relies on fewer sensors and a simpler Engine Control Unit (ECU) to manage engine performance. In contrast, OBD2 (On-Board Diagnostics 2) is a more advanced system that incorporates a greater number of sensors and a more complex ECU to provide enhanced monitoring and control of engine parameters.
One of the main distinctions is the number and type of sensors used. OBD2 systems typically include sensors such as oxygen sensors both before and after the catalytic converter, providing more precise feedback on exhaust emissions. This allows the ECU to make finer adjustments to fuel delivery and ignition timing, optimizing engine efficiency and reducing emissions. OBD1 systems generally have fewer sensors, limiting their ability to monitor and control these parameters with the same level of precision. According to a technical document from the Society of Automotive Engineers (SAE), the increased sensor coverage in OBD2 systems enables more accurate and comprehensive diagnostics.
Another significant difference is the diagnostic capabilities. OBD2 offers a standardized set of diagnostic trouble codes (DTCs) and a universal diagnostic connector (DLC), making it easier to diagnose and repair issues. The standardized nature of OBD2 allows any compliant scan tool to read and interpret the data from any OBD2-compliant vehicle. OBD1 systems, on the other hand, often require specialized tools and manufacturer-specific knowledge to retrieve and interpret diagnostic information. This can make troubleshooting more challenging and time-consuming.
The ECU in an OBD2 system is also more sophisticated, with greater processing power and memory. This allows it to run more complex algorithms for fuel management, ignition control, and emissions monitoring. The ECU can adapt to changing driving conditions and make real-time adjustments to optimize performance and efficiency. OBD1 ECUs are less capable in this regard, with limited processing power and less sophisticated control strategies.
These differences have significant implications for the conversion process. Converting a D16y8 engine from OBD2 to OBD1 involves simplifying the engine management system by replacing the OBD2 sensors, distributor, and ECU with their OBD1 counterparts. This can be a cost-effective way to install a D16y8 engine into an older vehicle that originally came with an OBD1 system. However, it also means sacrificing some of the advanced monitoring and control capabilities of the OBD2 system. Understanding these trade-offs is essential for making an informed decision about which conversion path is best for your needs.
4. D16y8 OBD1 Conversion: A Detailed Guide
Why might someone choose to convert a D16y8 to OBD1, and what are the main steps involved? Converting to OBD1 simplifies the wiring and ECU requirements, making it easier to install the D16y8 in older vehicles. The main steps include swapping sensors, distributor, and ECU to OBD1-compatible versions.
Converting a D16y8 engine to OBD1 is a strategic choice for individuals seeking to streamline the installation process in older vehicles and simplify the engine management system. This conversion primarily involves replacing specific components with OBD1-compatible versions, thereby reducing the complexity associated with wiring and ECU requirements. The rationale behind this conversion lies in the desire to adapt a newer engine into an older vehicle that originally operated on the OBD1 system, making the integration smoother and more manageable.
The main steps involved in converting a D16y8 to OBD1 include several key component swaps. First and foremost, the OBD2 distributor must be replaced with an OBD1 distributor. This is crucial because the OBD2 distributor is designed to communicate with the OBD2 ECU, which is incompatible with the OBD1 system. Similarly, the fuel injectors need to be swapped to OBD1-compatible injectors. While it is possible to retain the D16y8 injectors, this would necessitate changing the injector clips to suit the OBD1 wiring harness, which adds complexity to the process.
Another essential step is replacing the OBD2 ECU with an OBD1 ECU, such as the P28. The ECU is the brain of the engine management system, and using a compatible OBD1 ECU ensures that all the engine components work in harmony. The OBD1 ECU is programmed to interpret signals from the OBD1 sensors and adjust fuel delivery, ignition timing, and other parameters accordingly. Without this crucial swap, the engine will not run correctly, if at all.
Sensor swaps are also a critical part of the conversion. This includes replacing the OBD2 sensors with their OBD1 counterparts to ensure compatibility with the OBD1 ECU. Specifically, the Intake Air Temperature (IAT) sensor may need to be relocated or adapted, as OBD2 and OBD1 systems often have different placements for this sensor. Additionally, the alternator may require modification or replacement to ensure it is compatible with the OBD1 electrical system.
Wiring modifications are inevitable during this conversion. The OBD1 wiring harness needs to be adapted to fit the D16y8 engine, which may involve extending or rerouting certain wires. One common modification is related to the VTEC (Variable Timing and Lift Electronic Control) wiring. Since OBD1 VTEC systems typically use an oil pressure switch, and the D16y8 may not have one, a wire needs to be run from the VTEC solenoid to the A4 pin on the ECU. A jumper wire between D6 (VTEC pressure sensor) and A4 is also necessary to prevent error code 22, which relates to the VTEC pressure sensor.
Completing these steps allows for a more straightforward installation of the D16y8 engine into older vehicles by simplifying the engine management system and reducing potential compatibility issues. This conversion streamlines the wiring and ensures that all components are properly integrated, resulting in a functional and reliable engine setup.
5. D16y8 OBD2 Wiring Harness and ECU Considerations
What are the wiring harness and ECU considerations when dealing with a D16y8 OBD2 engine? The D16y8 OBD2 engine requires an OBD2-compatible wiring harness and ECU. Adapting an OBD1 harness requires modifying connectors and ensuring sensor compatibility.
When dealing with a D16y8 OBD2 engine, it is essential to carefully consider the wiring harness and ECU to ensure proper functionality and compatibility. The D16y8 OBD2 engine is designed to work with an OBD2-compatible wiring harness and ECU, which are specifically engineered to manage the engine’s advanced features and diagnostic capabilities. Using the correct wiring harness and ECU is crucial for optimizing engine performance and maintaining its reliability.
The OBD2 wiring harness includes connectors and wiring configurations that match the sensors and components of the D16y8 engine. This harness is designed to transmit signals accurately between the engine sensors, the ECU, and other vehicle systems. Key components of the OBD2 wiring harness include connectors for the oxygen sensors (both upstream and downstream), the crankshaft position sensor, the camshaft position sensor, the throttle position sensor, and the fuel injectors. Each of these sensors provides critical data to the ECU, allowing it to make precise adjustments to fuel delivery, ignition timing, and other engine parameters.
The ECU is the brain of the engine management system, responsible for interpreting the data from the sensors and controlling the engine’s functions. An OBD2-compatible ECU is programmed to work specifically with the D16y8 engine, taking into account its unique characteristics and performance requirements. This ECU uses sophisticated algorithms to optimize engine performance, reduce emissions, and provide diagnostic information.
One of the key considerations when working with a D16y8 OBD2 engine is whether to retain the OBD2 system or convert to OBD1. If you choose to retain the OBD2 system, you must ensure that the wiring harness and ECU are fully compatible with the engine and the vehicle it is being installed in. This may involve sourcing a specific OBD2 wiring harness and ECU that are designed for the D16y8 engine.
Alternatively, if you opt to convert the D16y8 engine to OBD1, you will need to replace the OBD2 wiring harness and ECU with OBD1-compatible versions. This conversion requires careful modification of the wiring and replacement of several key components, such as the distributor, injectors, and sensors. While converting to OBD1 can simplify the wiring and ECU requirements, it also means sacrificing some of the advanced features and diagnostic capabilities of the OBD2 system.
Adapting an OBD1 harness for use with a D16y8 OBD2 engine requires meticulous attention to detail. This involves modifying connectors to ensure they match the OBD2 components and verifying sensor compatibility. Each sensor must be correctly wired to the appropriate pin on the OBD1 ECU to ensure accurate data transmission. Failure to properly adapt the wiring harness can result in incorrect sensor readings, poor engine performance, and potential damage to the engine.
Careful selection and installation of the wiring harness and ECU are critical for ensuring the proper operation and longevity of the engine. Whether you choose to retain the OBD2 system or convert to OBD1, understanding the wiring and ECU requirements is essential for achieving optimal results.
6. Required Parts for D16y8 OBD1 Conversion
What parts are essential for a successful D16y8 OBD1 conversion? Essential parts include an OBD1 distributor, OBD1 ECU (e.g., P28), OBD1 injectors (or modified clips), and necessary wiring modifications.
For a successful D16y8 OBD1 conversion, several key parts are essential to ensure compatibility and optimal engine performance. These parts facilitate the transition from the more complex OBD2 system to the simpler, more manageable OBD1 system. The primary components required for this conversion include an OBD1 distributor, an OBD1 ECU (such as the P28), OBD1 injectors (or modified clips), and the necessary wiring modifications to integrate these parts seamlessly.
First and foremost, an OBD1 distributor is crucial. The OBD2 distributor is designed to communicate with the OBD2 ECU, and its signals are incompatible with the OBD1 system. Replacing the OBD2 distributor with an OBD1 version ensures that the ignition timing and spark delivery are correctly managed by the OBD1 ECU. This swap is a fundamental step in the conversion process.
Next, an OBD1 ECU, such as the P28, is required. The ECU is the control center of the engine management system, and it must be compatible with the OBD1 sensors and components. The P28 ECU is a popular choice because it is widely available and known for its compatibility with the D16y8 engine in an OBD1 setup. This ECU interprets the signals from the OBD1 sensors and adjusts fuel delivery, ignition timing, and other parameters to optimize engine performance.
OBD1 injectors are another essential component. While it is possible to retain the D16y8 injectors, doing so requires modifying the injector clips to fit the OBD1 wiring harness. Swapping to OBD1 injectors simplifies this process, as they are designed to plug directly into the OBD1 harness. If you choose to retain the D16y8 injectors, ensure that the injector clips are securely and correctly installed to avoid any fuel delivery issues.
Wiring modifications are inevitable during the OBD1 conversion. The OBD1 wiring harness needs to be adapted to fit the D16y8 engine, which may involve extending or rerouting certain wires. One of the common modifications involves the VTEC (Variable Timing and Lift Electronic Control) wiring. Since OBD1 VTEC systems typically use an oil pressure switch, and the D16y8 may not have one, a wire needs to be run from the VTEC solenoid to the A4 pin on the ECU. A jumper wire between D6 (VTEC pressure sensor) and A4 is also necessary to prevent error code 22, which relates to the VTEC pressure sensor.
Careful attention to these wiring modifications is crucial for ensuring that the VTEC system functions correctly. The VTEC system is designed to improve engine performance at higher RPMs, and proper wiring ensures that it engages when needed.
In addition to these primary components, it is also important to consider other parts that may be needed for a successful conversion. These include an OBD1 intake air temperature (IAT) sensor, which may need to be relocated or adapted, and an OBD1 alternator, which may require modification to ensure compatibility with the OBD1 electrical system.
Ensuring that you have all the necessary parts before starting the conversion process can save time and prevent frustration. Carefully sourcing these components and understanding their roles in the OBD1 system is key to achieving a reliable and well-performing D16y8 engine setup.
7. Step-by-Step Guide to Converting D16y8 to OBD1
Can you provide a step-by-step guide for converting a D16y8 engine to OBD1? This guide should cover everything from removing the OBD2 components to installing the OBD1 replacements.
Converting a D16y8 engine to OBD1 involves several key steps to ensure compatibility and optimal performance. This comprehensive guide covers the entire process, from removing the OBD2 components to installing the OBD1 replacements.
Step 1: Preparation and Safety Measures
Before starting the conversion, gather all the necessary tools and parts. These include the OBD1 distributor, OBD1 ECU (e.g., P28), OBD1 injectors (or modified clips), wiring harness, and any necessary tools for removing and installing components. Disconnect the negative terminal of the battery to prevent electrical shorts and ensure safety throughout the process.
Step 2: Removing OBD2 Components
Begin by removing the OBD2 components from the D16y8 engine. Start with the OBD2 distributor. Disconnect the wiring harness from the distributor and unbolt it from the engine block. Carefully remove the distributor and set it aside.
Next, remove the OBD2 injectors. Disconnect the fuel lines and wiring connectors from the injectors. Unbolt the fuel rail and carefully remove the injectors from the intake manifold. Ensure that you relieve any fuel pressure before disconnecting the fuel lines to prevent fuel spillage.
Remove the OBD2 ECU from the vehicle. Locate the ECU, usually found under the passenger side dash or in the engine bay. Disconnect the wiring harness from the ECU and unbolt it from its mounting bracket. Set the ECU aside.
Step 3: Installing OBD1 Components
Install the OBD1 distributor in place of the OBD2 distributor. Align the distributor correctly and bolt it to the engine block. Connect the wiring harness to the OBD1 distributor. Ensure that the distributor is properly seated and securely fastened.
Install the OBD1 injectors. If you are using OBD1 injectors, simply plug them into the fuel rail and secure them in place. If you are retaining the D16y8 injectors, ensure that the injector clips have been modified to fit the OBD1 wiring harness. Install the fuel rail and connect the fuel lines.
Install the OBD1 ECU (e.g., P28) in the vehicle. Mount the ECU in its designated location and connect the wiring harness. Ensure that all connections are secure and properly aligned.
Step 4: Wiring Modifications
Wiring modifications are a critical part of the OBD1 conversion. The OBD1 wiring harness needs to be adapted to fit the D16y8 engine. One of the common modifications involves the VTEC (Variable Timing and Lift Electronic Control) wiring.
Since OBD1 VTEC systems typically use an oil pressure switch, and the D16y8 may not have one, a wire needs to be run from the VTEC solenoid to the A4 pin on the ECU. Locate the VTEC solenoid on the engine and run a wire from the solenoid to the A4 pin on the OBD1 ECU.
A jumper wire between D6 (VTEC pressure sensor) and A4 is also necessary to prevent error code 22, which relates to the VTEC pressure sensor. Create a jumper wire and connect it between the D6 pin and the A4 pin on the OBD1 ECU.
Ensure that all wiring connections are properly insulated to prevent shorts and ensure reliable performance.
Step 5: Final Checks and Testing
After installing all the OBD1 components and completing the wiring modifications, perform a thorough check of all connections. Ensure that all bolts are tightened, all wiring harnesses are securely connected, and all fuel lines are properly attached.
Reconnect the negative terminal of the battery. Turn the ignition key to the “on” position and check for any warning lights or error codes. Start the engine and listen for any unusual noises or vibrations.
Monitor the engine’s performance and check for any leaks or issues. Use a diagnostic scan tool to check for any error codes and verify that all sensors are functioning correctly.
Step 6: Troubleshooting
If you encounter any issues during the conversion process, refer to a diagnostic manual or consult with a qualified mechanic. Common issues include incorrect wiring, faulty sensors, or improper installation of components.
By following these steps carefully, you can successfully convert a D16y8 engine to OBD1 and enjoy the benefits of a simplified engine management system.
8. Modifying Power Steering Bracket and Pump
Why might the power steering bracket and pump need modification during a D16y8 swap, and how is this done? The power steering bracket and pump may need modification due to differences between EG and EK models. This typically involves oversizing bracket holes and creating a small groove for clearance.
During a D16y8 engine swap, modifications to the power steering bracket and pump may be necessary due to differences between the EG (1992-1995 Civic) and EK (1996-2000 Civic) models. These differences can affect the fitment and compatibility of the power steering system, requiring adjustments to ensure proper functionality.
The primary reason for these modifications is that the power steering line from the power steering rack differs between the EG and EK models. Specifically, the fitting used on the pump end of the power steering line is different, making it necessary to adapt the power steering system to the D16y8 engine.
The typical solution involves using the power steering pump and bracket from a D15B7 engine (or another compatible EG engine). However, even with the D15B7 pump and bracket, some modifications are usually required to ensure a proper fit with the D16y8 block.
The first step in this modification process is to oversize the bracket holes. The holes in the D15B7 power steering bracket may not align perfectly with the mounting points on the D16y8 block. To address this, carefully enlarge the bracket holes using a drill or file. This allows the bracket to be properly aligned with the mounting points on the D16y8 block.
In addition to oversizing the bracket holes, a small groove may need to be taken from the bracket to clear the engine block. This is because the D16y8 block may have slight differences in its casting compared to the D15B7 block, causing interference with the power steering bracket. Use a grinder or file to carefully remove a small amount of material from the bracket to create the necessary clearance.
Once these modifications are complete, the D15B7 power steering pump and bracket should bolt up to the D16y8 block. Ensure that all bolts are properly tightened and that the power steering pump is securely mounted.
After installing the modified power steering system, it is essential to check for proper alignment and functionality. Inspect the power steering belt to ensure it is correctly aligned and properly tensioned. Check the power steering fluid level and add fluid as needed.
Start the engine and check for any leaks or unusual noises from the power steering system. Turn the steering wheel from lock to lock to ensure that the power steering is functioning smoothly and without any binding or resistance.
If you encounter any issues with the power steering system after the engine swap, troubleshoot the problem by checking the power steering lines, pump, and rack for leaks or damage. Ensure that the power steering fluid is at the correct level and that the power steering belt is properly tensioned.
Modifying the power steering bracket and pump during a D16y8 engine swap requires careful attention to detail and a thorough understanding of the differences between the EG and EK models. By following these steps and taking the necessary precautions, you can ensure that the power steering system functions correctly and reliably.
9. Troubleshooting Common Issues After the Swap
What are some common issues that might arise after a D16y8 engine swap, and how can they be resolved? Common issues include CEL codes, poor engine performance, and wiring problems. These can be resolved by checking connections, verifying sensor functionality, and addressing wiring errors.
After performing a D16y8 engine swap, several common issues may arise that can affect engine performance and reliability. Troubleshooting these issues effectively requires a systematic approach, starting with identifying the symptoms and then diagnosing the root cause. Common problems include Check Engine Light (CEL) codes, poor engine performance, and wiring problems.
One of the most frequent issues encountered after an engine swap is the appearance of CEL codes. These codes indicate that the ECU has detected a problem with one or more engine components. To diagnose CEL codes, use an OBD1 or OBD2 scanner (depending on your conversion) to read the codes. Common codes after a D16y8 swap may relate to the VTEC system, oxygen sensors, or other engine sensors.
Once you have identified the CEL codes, research their meaning and potential causes. For example, a VTEC-related code may indicate a problem with the VTEC solenoid, oil pressure switch, or wiring. An oxygen sensor code may indicate a faulty sensor, exhaust leak, or wiring issue.
After identifying the potential causes of the CEL codes, inspect the relevant components. Check the VTEC solenoid for proper operation and ensure that the oil pressure switch is functioning correctly. Inspect the oxygen sensors for damage or contamination and verify that the wiring is intact.
Clear the CEL codes and monitor the engine’s performance. If the codes reappear, further troubleshooting may be necessary to identify the underlying problem.
Poor engine performance can also be a common issue after a D16y8 engine swap. Symptoms of poor engine performance may include rough idling, hesitation during acceleration, or a lack of power.
To diagnose poor engine performance, start by checking the basics. Ensure that the engine has adequate fuel, air, and spark. Check the fuel pressure, air filter, and spark plugs. Inspect the ignition timing and adjust as needed.
If the basic checks do not reveal any problems, further troubleshooting may be necessary. Check the engine compression to ensure that the cylinders are sealing properly. Inspect the intake manifold for leaks or damage. Check the throttle position sensor (TPS) and mass airflow sensor (MAF) for proper operation.
Wiring problems are another potential source of issues after a D16y8 engine swap. Incorrect or poorly connected wiring can cause a variety of problems, including CEL codes, poor engine performance, and even engine damage.
To troubleshoot wiring problems, start by inspecting the wiring harness for any obvious damage or loose connections. Check the wiring diagrams for the D16y8 engine and the vehicle it is being installed in. Verify that all wires are properly connected to the correct pins on the ECU and other components.
Use a multimeter to check the continuity of the wiring and ensure that there are no shorts or open circuits. Pay close attention to the wiring for the VTEC system, oxygen sensors, and other critical engine sensors.
If you encounter any wiring problems, repair or replace the damaged wiring and ensure that all connections are secure and properly insulated.
By systematically troubleshooting these common issues, you can effectively diagnose and resolve problems after a D16y8 engine swap, ensuring optimal engine performance and reliability.
10. Benefits of Using MERCEDES-DIAGNOSTIC-TOOL.EDU.VN
How can MERCEDES-DIAGNOSTIC-TOOL.EDU.VN assist with your D16y8 engine swap or diagnostic needs? MERCEDES-DIAGNOSTIC-TOOL.EDU.VN provides expert advice, diagnostic tools, and resources to help you successfully complete your engine swap and troubleshoot any issues.
MERCEDES-DIAGNOSTIC-TOOL.EDU.VN offers a range of services and resources that can greatly assist with your D16y8 engine swap or diagnostic needs. Our expertise and tools are designed to help you successfully complete your engine swap and troubleshoot any issues that may arise along the way.
One of the key benefits of using MERCEDES-DIAGNOSTIC-TOOL.EDU.VN is our expert advice. Our team of experienced technicians and automotive specialists can provide guidance and support throughout the engine swap process. Whether you have questions about wiring, sensor compatibility, or ECU programming, we can offer valuable insights and solutions to help you overcome any challenges.
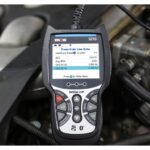
We also provide a range of diagnostic tools that can help you troubleshoot issues after the engine swap. Our diagnostic tools are designed to read and interpret diagnostic trouble codes (DTCs) from the ECU, allowing you to identify potential problems with the engine. We offer both OBD1 and OBD2 scanners, ensuring that you have the right tool for your specific engine setup.
In addition to diagnostic tools, we also offer a variety of resources that can help you with your engine swap. Our website features detailed guides, wiring diagrams, and technical articles that cover a wide range of topics related to engine swaps and diagnostics. These resources can provide valuable information and step-by-step instructions to help you complete your engine swap successfully.
We understand that engine swaps can be complex and challenging, which is why we are committed to providing our customers with the support they need to succeed. Whether you are a seasoned mechanic or a first-time engine swapper, we can help you navigate the process and achieve your goals.
Our team can provide personalized recommendations for parts and components, based on your specific engine and vehicle. We can also help you troubleshoot any issues that may arise during the engine swap, providing guidance and support to help you resolve problems quickly and efficiently.
We also offer ECU programming services, which can be essential for optimizing engine performance after the swap. Our experienced technicians can program your ECU to take full advantage of the D16y8 engine’s capabilities, ensuring that it runs smoothly and efficiently.
At MERCEDES-DIAGNOSTIC-TOOL.EDU.VN, we are dedicated to providing our customers with the highest level of service and support. Whether you need expert advice, diagnostic tools, or technical resources, we are here to help you succeed with your D16y8 engine swap. Contact us today to learn more about our services and how we can assist you with your automotive needs.
11. Maximizing Performance with Proper Tuning
How can proper tuning maximize the performance of a D16y8 engine after a swap? Proper tuning optimizes fuel delivery, ignition timing, and VTEC engagement for peak performance and efficiency.
Proper tuning is essential for maximizing the performance of a D16y8 engine after a swap. Tuning involves adjusting various engine parameters, such as fuel delivery, ignition timing, and VTEC engagement, to optimize the engine’s performance and efficiency. When done correctly, tuning can unlock the full potential of the D16y8 engine, resulting in improved horsepower, torque, and overall drivability.
One of the key aspects of tuning is optimizing fuel delivery. The D16y8 engine requires the correct amount of fuel to operate efficiently. Too much fuel can result in a rich condition, which can cause poor fuel economy, reduced power, and increased emissions. Too little fuel can result in a lean condition, which can cause engine damage due to overheating and detonation.
Tuning the fuel delivery involves adjusting the fuel injectors’ pulse width, which controls the amount of fuel injected into the cylinders. This can be done using a programmable ECU or a standalone fuel management system. A wideband oxygen sensor is essential for monitoring the air-fuel ratio (AFR) and ensuring that the engine is running at the optimal fuel mixture.
Ignition timing is another critical parameter that must be properly tuned to maximize engine performance. Ignition timing refers to the point at which the spark plugs fire in relation to the position of the pistons. Advancing the ignition timing can increase horsepower and torque, but too much advance can cause detonation, which can damage the engine.
Tuning the ignition timing involves adjusting the timing advance curve, which determines how much the timing is advanced at different engine speeds and loads. This can be done using a programmable ECU or a standalone ignition system. A knock sensor is essential for detecting detonation and preventing engine damage.
VTEC engagement is another important parameter that can be tuned to optimize engine performance. VTEC (Variable Timing and Lift Electronic Control) is a Honda technology that allows the engine to switch between two different camshaft profiles, one optimized for low-end torque and the other optimized for high-end horsepower.
Tuning the VTEC engagement involves adjusting the RPM at which the VTEC system switches from the low-end camshaft profile to the high-end camshaft profile. This can be done using a programmable ECU or a VTEC controller. The optimal VTEC engagement point depends on the engine’s modifications, such as aftermarket camshafts or intake manifolds.
In addition to these key parameters, other aspects of tuning can also improve engine performance. These include adjusting the idle speed, throttle response, and rev limiter. Proper tuning requires specialized equipment and expertise. It is recommended to consult with a qualified tuner who has experience with the D16y8 engine. A dyno tune is often the best way to optimize engine performance, as it allows the tuner to make adjustments while monitoring the engine’s output in real time.
12. Expert Tips for Maintaining Your D16y8 Engine
What expert tips can ensure the longevity and reliability of a D16y8 engine? Regular maintenance, timely oil changes, and monitoring vital signs can extend the life of your D16y8 engine.
To ensure the longevity and reliability of a D16y8 engine, implementing a consistent and thorough maintenance routine is essential. Regular maintenance, timely oil changes, and diligent monitoring of vital signs can significantly extend the life of your engine and prevent costly repairs.
One of the most critical maintenance tasks is performing regular oil changes. The engine oil lubricates the engine’s moving parts, reduces friction, and helps to dissipate heat. Over time, the oil can become contaminated with dirt, debris, and combustion byproducts, reducing its ability to protect the engine.
It is recommended to change the engine oil and filter every 3,000 to 5,000 miles, depending on your driving conditions and the type of oil used. Use a high-quality synthetic oil that meets the specifications for the D16y8 engine. When changing the oil, always replace the oil filter with a new one to ensure optimal filtration.
In addition to oil changes, it is also important to regularly inspect and maintain other vital engine components. Check the air filter and replace it as needed to ensure proper airflow to the engine. Inspect the spark plugs and replace them if they are worn or fouled. Check the ignition timing and adjust as needed to ensure optimal engine performance.
The cooling system is another critical area to maintain. Check the coolant level regularly and add coolant as needed to maintain the proper level. Inspect the radiator hoses and clamps for leaks or damage. Flush the cooling system every two to three years to remove any buildup of scale or corrosion.
The timing belt is a critical component that must be replaced at regular intervals. The timing belt synchronizes the rotation of the camshaft and crankshaft, ensuring that the valves open and close at the correct time. A broken timing belt can cause serious engine damage, so it is essential to replace it according to the manufacturer’s recommendations.
Monitor the engine’s vital signs regularly to detect any potential problems early. Pay attention to the engine temperature, oil pressure, and coolant level. If you notice any unusual readings or symptoms, such as overheating, low oil pressure, or coolant leaks, investigate the problem immediately.
Keep the engine clean and free of dirt and debris. A clean engine runs cooler and is less likely to experience problems. Regularly wash the engine bay and clean any oil or grease buildup.
When performing maintenance or repairs, use high-quality parts and components that are designed for the D16y8 engine. Avoid using cheap or aftermarket parts that may not meet the engine’s specifications.
By following these expert tips and implementing a consistent maintenance routine, you can ensure the longevity and reliability of your D16y8 engine