Changing the OBD port on your 1995 Dodge to OBD2 involves creating a custom sub-harness and potentially addressing injector and cruise control system differences; consulting MERCEDES-DIAGNOSTIC-TOOL.EDU.VN can provide essential insights. This modification is useful for enhanced diagnostic capabilities and improved vehicle management. To maintain optimal performance, consider professional diagnostics and calibration services.
Contents
- 1. What Is the Process to Convert a 1995 Dodge OBD1 to OBD2?
- 1.1 Creating a Custom Sub-Harness
- 1.2 Addressing Injector Connector Differences
- 1.3 Cruise Control Module Compatibility
- 2. Why Should I Consider Converting My 1995 Dodge to OBD2?
- 2.1 Enhanced Diagnostic Capabilities
- 2.2 Standardized Data Access
- 2.3 Improved Vehicle Management
- 3. What Tools Are Needed to Convert a 1995 Dodge to OBD2?
- 3.1 Multimeter
- 3.2 Wiring Diagrams
- 3.3 OBD2 Connector
- 3.4 Wire Crimpers
- 3.5 Soldering Equipment
- 3.6 Heat Shrink Tubing
- 3.7 Injector and Cruise Control Conversion Harnesses
- 4. How Can I Ensure Compatibility After Converting to OBD2?
- 4.1 Verify Wiring with a Multimeter
- 4.2 Use a Professional-Grade Scan Tool
- 4.3 Test All Vehicle Systems
- 5. What Are the Potential Challenges of Converting to OBD2?
- 5.1 Wiring Errors
- 5.2 ECM Incompatibility
- 5.3 Cruise Control and Injector System Issues
- 6. How Do Injector Connectors Differ Between OBD1 and OBD2 Systems?
- 6.1 Connector Types
- 6.2 Flow Rates
- 6.3 Conversion Harnesses
- 7. What Steps Are Involved in Building a Custom Sub-Harness?
- 7.1 Gather Wiring Diagrams
- 7.2 Identify Pin Layouts
- 7.3 Cut and Strip Wires
- 7.4 Crimp or Solder Connections
- 7.5 Insulate with Heat Shrink Tubing
- 8. What Role Does the ECM Play in an OBD2 Conversion?
- 8.1 Data Interpretation
- 8.2 Engine Management
- 8.3 Communication with Other Systems
- 9. How Does the Cruise Control System Differ Between OBD1 and OBD2?
- 9.1 OBD1 Cruise Control System
- 9.2 OBD2 Cruise Control System
- 9.3 Conversion Harnesses
- 10. What Are the Benefits of Using a Professional-Grade Scan Tool After Conversion?
- 10.1 Accurate Diagnostics
- 10.2 Real-Time Data Monitoring
- 10.3 Comprehensive System Testing
- 11. How Can I Troubleshoot Common Issues After an OBD2 Conversion?
- 11.1 Check the Wiring
- 11.2 Verify ECM Compatibility
- 11.3 Test Cruise Control and Injector Systems
- 12. What Are the Safety Precautions to Consider During an OBD2 Conversion?
- 12.1 Disconnect the Battery
- 12.2 Use Proper Wiring Techniques
- 12.3 Protect Electrical Connections
- 13. How Do I Handle Issues With Missing Wires During the Conversion?
- 13.1 Consult Wiring Diagrams
- 13.2 Add Necessary Wires
- 13.3 Ensure Proper Connections
- 14. What Should I Do if the Scan Tool Is Not Communicating After the Conversion?
- 14.1 Check the OBD2 Connector Wiring
- 14.2 Verify Scan Tool Compatibility
- 14.3 Ensure the ECM Is Functioning Correctly
- 15. What Are Common Mistakes to Avoid During an OBD2 Conversion?
- 15.1 Incorrect Wiring
- 15.2 Neglecting ECM Compatibility
- 15.3 Overlooking Cruise Control and Injector Systems
- 16. How Can I Ensure the OBD2 Port Is Properly Grounded?
- 16.1 Check the Ground Wire Connection
- 16.2 Verify Continuity to the Chassis
- 16.3 Clean Any Corroded Surfaces
- 17. What Type of Wire Should I Use for the Conversion?
- 17.1 Stranded Copper Wire
- 17.2 Heat-Resistant Insulation
- 17.3 Appropriate Wire Size
- 18. How Can I Prevent Corrosion on the New OBD2 Connector?
- 18.1 Use Dielectric Grease
- 18.2 Protect Connections with Heat Shrink Tubing
- 18.3 Inspect Regularly for Signs of Corrosion
- 19. What Are the Long-Term Maintenance Tips for an OBD2 System After Conversion?
- 19.1 Regularly Check for Diagnostic Codes
- 19.2 Inspect the Connector for Damage
- 19.3 Ensure Proper Grounding
- 20. What is the Future of OBD Standards and How Might They Affect My Conversion?
- 20.1 Enhanced Data Capabilities
- 20.2 Improved Security Measures
- 20.3 More Comprehensive Diagnostic Information
- 21. What Are the Ethical Considerations When Modifying a Vehicle’s OBD System?
- 21.1 Compliance with Emissions Regulations
- 21.2 Avoiding Data Manipulation
- 21.3 Respecting Vehicle Security
- 22. How Can I Document My OBD2 Conversion for Future Reference?
- 22.1 Detailed Wiring Diagrams
- 22.2 Components Used
- 22.3 Troubleshooting Steps
- 23. What Are the Legal Implications of Converting to OBD2?
- 23.1 Compliance with Local Emissions Standards
- 23.2 Regulations
- 24. How Does Temperature Affect the OBD2 Conversion Process and Performance?
- 24.1 Conductivity of Electrical Connections
- 24.2 Performance of Electronic Components
- 25. How to choose the right OBD2 connector for my 1995 Dodge conversion project?
- 25.1 Connector Type
- 25.2 Pin Quality
- 25.3 Environmental Protection
- 26. Can I use a Bluetooth OBD2 scanner on my converted 1995 Dodge?
- 26.1 Compatibility
- 26.2 Protocol Support
- 26.3 Wireless Connectivity
- 27. What are the best practices for wire routing during an OBD2 conversion to avoid interference?
- 27.1 Keep Wires Away From Heat Sources
- 27.2 Secure Wires Properly
- 27.3 Use Shielded Cables
- 28. What is the significance of using a terminating resistor in the OBD2 conversion process?
- 28.1 Signal Termination
- 28.2 Signal Reflections
- 28.3 Data Integrity
- 29. How to inspect and clean the OBD2 connector to ensure proper contact and communication?
- 29.1 Visual Inspection
- 29.2 Electrical Contact Cleaner
- 29.3 Small Brush
- 30. What are the alternatives if I can’t find an exact OBD2 connector for my 1995 Dodge?
- 30.1 Universal OBD2 Connector
- 30.2 Salvage Yard
- 30.3 Custom Connector
- 31. How does humidity affect the OBD2 conversion and what can I do to mitigate its effects?
- 31.1 Dielectric Grease
- 31.2 Heat Shrink Tubing
- 31.3 Proper Ventilation
- 32. What are the best resources for finding accurate wiring diagrams for OBD2 conversions on older vehicles?
- 32.1 Online Databases
- 32.2 Vehicle-Specific Repair Manuals
- 32.3 Automotive Forums
- 33. How does altitude affect the OBD2 conversion and calibration process?
- 33.1 Air Density
- 33.2 Air-Fuel Mixture
- 33.3 ECM Adjustments
- 34. What are the different communication protocols used in OBD2 systems, and which one should I expect on my converted 1995 Dodge?
- 34.1 ISO 9141-2
- 34.2 KWP2000
- 34.3 CAN
- 35. How to ensure that the added wires are properly insulated and protected from damage after the OBD2 conversion?
- 35.1 Heat Shrink Tubing
- 35.2 Zip Ties
- 35.3 Protective Loom
- 36. What type of diagnostic software is compatible with a converted OBD2 system on a 1995 Dodge?
- 36.1 Generic OBD2 Scan Tools
- 36.2 Vehicle-Specific Diagnostic Software
- 36.3 Smartphone Apps
- 37. How to test the output voltage of the OBD2 port after the conversion to verify it meets the standard specifications?
- 37.1 Multimeter
- 37.2 Voltage Range
- 38. What are the benefits of performing a smoke test after an OBD2 conversion to identify potential leaks?
- 38.1 Vacuum Leaks
- 38.2 Exhaust Leaks
- 38.3 Intake System Integrity
1. What Is the Process to Convert a 1995 Dodge OBD1 to OBD2?
Converting a 1995 Dodge from OBD1 to OBD2 involves creating a custom sub-harness to adapt the wiring, potentially addressing injector connector differences and cruise control module compatibility. The process entails re-wiring the existing OBD1 connector to fit the OBD2 standard and adding any necessary wires for enhanced functionality. This upgrade ensures better diagnostic capabilities and vehicle management.
1.1 Creating a Custom Sub-Harness
A custom sub-harness is essential for adapting the OBD1 connector to the OBD2 system. This involves identifying the pin layouts for both OBD1 and OBD2, then carefully re-wiring the connections. According to a study by the Society of Automotive Engineers (SAE), proper wiring is crucial to avoid electrical issues and ensure accurate data transmission.
1.2 Addressing Injector Connector Differences
Mopar vehicles have used various injector connectors over the years. Matching the injectors to the ECM (Engine Control Module) is important. If the connectors are different, conversion harnesses can be used to ensure compatibility. This is particularly important because injector flow rates have varied, and matching them to the ECM is necessary for proper engine performance.
1.3 Cruise Control Module Compatibility
The method of control for the cruise control module differs between OBD1 and OBD2 systems. OBD1 uses different pins on the ECM for on/off, set/resume, etc., while OBD2 uses one or two pins with variable voltage. Conversion harnesses often include resistors to adapt the cruise control switches to the OBD2 ECM.
2. Why Should I Consider Converting My 1995 Dodge to OBD2?
Converting your 1995 Dodge to OBD2 offers enhanced diagnostic capabilities, standardized data access, and improved compatibility with modern scanning tools. OBD2 provides a more detailed and standardized interface, making it easier to diagnose issues and monitor vehicle performance. According to the EPA (Environmental Protection Agency), OBD2 systems provide comprehensive data for emissions control and diagnostics.
2.1 Enhanced Diagnostic Capabilities
OBD2 systems provide a wider range of diagnostic information compared to OBD1. This includes live data streams, freeze frame data, and more detailed diagnostic trouble codes (DTCs). This enhanced capability makes it easier to identify and resolve issues quickly.
2.2 Standardized Data Access
OBD2 uses a standardized diagnostic port and communication protocols, ensuring compatibility with a wide range of scanning tools. This standardization simplifies the diagnostic process and makes it easier for mechanics to access vehicle data.
2.3 Improved Vehicle Management
With OBD2, you can monitor various vehicle parameters in real-time, allowing for better vehicle management and preventive maintenance. This includes monitoring engine performance, fuel efficiency, and emissions, which can help you identify potential issues before they become major problems.
3. What Tools Are Needed to Convert a 1995 Dodge to OBD2?
To convert a 1995 Dodge to OBD2, you’ll need a multimeter, wiring diagrams, OBD2 connector, wire crimpers, soldering equipment, heat shrink tubing, and possibly injector and cruise control conversion harnesses. These tools ensure accurate wiring and proper connections. Consulting MERCEDES-DIAGNOSTIC-TOOL.EDU.VN can provide additional guidance on tool selection and usage.
3.1 Multimeter
A multimeter is essential for testing continuity, voltage, and current. This tool helps ensure that the wiring is correct and that the signals are properly transmitted.
3.2 Wiring Diagrams
Wiring diagrams for both OBD1 and OBD2 systems are crucial for identifying the correct pin layouts and wiring configurations. These diagrams serve as a roadmap for the conversion process.
3.3 OBD2 Connector
You will need an OBD2 connector to replace the OBD1 connector. This connector should be of high quality to ensure a reliable connection.
3.4 Wire Crimpers
Wire crimpers are used to securely attach wires to the OBD2 connector pins. Proper crimping is essential for a reliable electrical connection.
3.5 Soldering Equipment
Soldering equipment can be used to reinforce the wire connections and ensure a strong, durable bond. This is particularly useful in harsh automotive environments.
3.6 Heat Shrink Tubing
Heat shrink tubing is used to insulate and protect the wire connections. This helps prevent corrosion and ensures a long-lasting connection.
3.7 Injector and Cruise Control Conversion Harnesses
Depending on your specific vehicle, you may need injector and cruise control conversion harnesses to ensure compatibility. These harnesses adapt the connectors and wiring to the OBD2 system.
4. How Can I Ensure Compatibility After Converting to OBD2?
To ensure compatibility after converting to OBD2, verify the wiring with a multimeter, use a professional-grade scan tool to read diagnostic codes, and test all vehicle systems. Proper verification and testing will ensure that the conversion is successful and that all systems are functioning correctly. For advanced diagnostics and troubleshooting, consider consulting MERCEDES-DIAGNOSTIC-TOOL.EDU.VN.
4.1 Verify Wiring with a Multimeter
After completing the wiring, use a multimeter to verify the continuity and voltage at each pin on the OBD2 connector. This ensures that the wiring is correct and that the signals are properly transmitted.
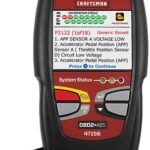
4.2 Use a Professional-Grade Scan Tool
Connect a professional-grade scan tool to the OBD2 port and read the diagnostic codes. This will help identify any issues with the conversion and ensure that the ECM is properly communicating.
4.3 Test All Vehicle Systems
Test all vehicle systems, including the engine, transmission, and cruise control, to ensure that they are functioning correctly. This will help identify any compatibility issues and ensure that the conversion is successful.
5. What Are the Potential Challenges of Converting to OBD2?
Potential challenges of converting to OBD2 include wiring errors, ECM incompatibility, and issues with the cruise control and injector systems. Careful planning and attention to detail can help mitigate these challenges. Consulting resources like MERCEDES-DIAGNOSTIC-TOOL.EDU.VN can provide additional insights and solutions.
5.1 Wiring Errors
Wiring errors are a common challenge when converting to OBD2. Incorrect wiring can lead to communication issues and system malfunctions. Double-checking the wiring with a multimeter and referring to wiring diagrams can help prevent these errors.
5.2 ECM Incompatibility
The ECM may not be fully compatible with the OBD2 system, leading to communication issues and inaccurate data. In some cases, it may be necessary to reprogram or replace the ECM.
5.3 Cruise Control and Injector System Issues
Differences in the cruise control and injector systems between OBD1 and OBD2 can cause compatibility issues. Using conversion harnesses and verifying the wiring can help resolve these issues.
6. How Do Injector Connectors Differ Between OBD1 and OBD2 Systems?
Injector connectors can differ significantly between OBD1 and OBD2 systems due to variations in injector design and ECM requirements. Mopar has used various injector connectors over the years, and they don’t all take the same connector. Injector flow rates also changed over the years, so matching injectors to the ECM is crucial.
6.1 Connector Types
Different types of connectors may be used based on the year and model of the vehicle. These connectors vary in size, shape, and pin configuration.
6.2 Flow Rates
Injector flow rates also changed over the years, so you will want to match injectors to the ECM, which could require conversion harnesses to plug the injectors in.
6.3 Conversion Harnesses
Conversion harnesses are available to adapt different injector connectors to the ECM. These harnesses ensure proper electrical connection and fuel delivery.
7. What Steps Are Involved in Building a Custom Sub-Harness?
Building a custom sub-harness involves gathering wiring diagrams, identifying pin layouts, cutting and stripping wires, crimping or soldering connections, and insulating with heat shrink tubing. Precision and attention to detail are critical for a reliable connection. MERCEDES-DIAGNOSTIC-TOOL.EDU.VN offers detailed guides on creating custom wiring solutions for automotive applications.
7.1 Gather Wiring Diagrams
Gather wiring diagrams for both the OBD1 and OBD2 systems to identify the correct pin layouts and wiring configurations.
7.2 Identify Pin Layouts
Identify the pin layouts for both the OBD1 and OBD2 connectors. This will help you determine how to re-wire the connections.
7.3 Cut and Strip Wires
Cut the wires to the appropriate length and strip the ends to expose the bare wire.
7.4 Crimp or Solder Connections
Crimp or solder the wires to the OBD2 connector pins. Ensure that the connections are secure and durable.
7.5 Insulate with Heat Shrink Tubing
Insulate the wire connections with heat shrink tubing to protect them from corrosion and ensure a long-lasting connection.
8. What Role Does the ECM Play in an OBD2 Conversion?
The ECM (Engine Control Module) is central to an OBD2 conversion, as it interprets and processes data from the OBD2 port, manages engine functions, and communicates with other vehicle systems. Ensuring ECM compatibility is essential for the success of the conversion. According to Bosch Automotive Handbook, the ECM is responsible for managing engine performance, fuel injection, and emissions control.
8.1 Data Interpretation
The ECM interprets the data received from the OBD2 port, including diagnostic trouble codes (DTCs) and live data streams.
8.2 Engine Management
The ECM uses the data from the OBD2 system to manage engine functions, such as fuel injection, ignition timing, and emissions control.
8.3 Communication with Other Systems
The ECM communicates with other vehicle systems, such as the transmission, ABS, and airbag systems, to coordinate vehicle functions.
9. How Does the Cruise Control System Differ Between OBD1 and OBD2?
The cruise control system differs between OBD1 and OBD2 in how the switches signal the ECM. OBD1 uses different pins on the ECM for on/off, set/resume, etc., while OBD2 uses one or two pins with variable voltage. Conversion harnesses often include resistors to adapt the cruise control switches to the OBD2 ECM.
9.1 OBD1 Cruise Control System
In the OBD1 setup, the cruise switches worked different pins on the ECM to tell it on/off, set/resume, etc.
9.2 OBD2 Cruise Control System
The OBD2 ECM uses just one or two pins and variable voltage through the switches to tell the computer what to do.
9.3 Conversion Harnesses
The conversion harness adds resistors into the wires in the harness and then gangs the outputs to the pins as required to adapt the cruise control switches to the OBD2 ECM.
10. What Are the Benefits of Using a Professional-Grade Scan Tool After Conversion?
Using a professional-grade scan tool after conversion provides accurate diagnostics, real-time data monitoring, and comprehensive system testing, ensuring the OBD2 system functions correctly. Professional scan tools offer advanced features that are not available in basic scan tools. Consult MERCEDES-DIAGNOSTIC-TOOL.EDU.VN for recommendations on professional scan tools and their applications.
10.1 Accurate Diagnostics
Professional-grade scan tools provide accurate diagnostic information, helping to identify any issues with the conversion and ensure that all systems are functioning correctly.
10.2 Real-Time Data Monitoring
These scan tools allow you to monitor real-time data, such as engine speed, coolant temperature, and fuel pressure. This data can help you identify potential issues before they become major problems.
10.3 Comprehensive System Testing
Professional-grade scan tools offer comprehensive system testing capabilities, allowing you to test individual components and systems to ensure that they are functioning correctly.
11. How Can I Troubleshoot Common Issues After an OBD2 Conversion?
To troubleshoot common issues after an OBD2 conversion, start by checking the wiring, verifying ECM compatibility, and testing the cruise control and injector systems. A systematic approach can help identify and resolve problems efficiently. MERCEDES-DIAGNOSTIC-TOOL.EDU.VN provides detailed troubleshooting guides for automotive electrical systems.
11.1 Check the Wiring
Start by checking the wiring for any errors or loose connections. Use a multimeter to verify the continuity and voltage at each pin on the OBD2 connector.
11.2 Verify ECM Compatibility
Verify that the ECM is compatible with the OBD2 system. If necessary, reprogram or replace the ECM.
11.3 Test Cruise Control and Injector Systems
Test the cruise control and injector systems to ensure that they are functioning correctly. Use conversion harnesses if necessary to adapt the connectors and wiring.
12. What Are the Safety Precautions to Consider During an OBD2 Conversion?
Safety precautions during an OBD2 conversion include disconnecting the battery, using proper wiring techniques, and protecting electrical connections with heat shrink tubing. These measures prevent electrical shock and ensure a safe and reliable conversion process. According to the National Highway Traffic Safety Administration (NHTSA), electrical work on vehicles should always be performed with caution.
12.1 Disconnect the Battery
Disconnect the battery before starting any electrical work to prevent electrical shock.
12.2 Use Proper Wiring Techniques
Use proper wiring techniques, such as crimping and soldering, to ensure secure and durable connections.
12.3 Protect Electrical Connections
Protect electrical connections with heat shrink tubing to prevent corrosion and ensure a long-lasting connection.
13. How Do I Handle Issues With Missing Wires During the Conversion?
When dealing with missing wires during an OBD2 conversion, consult wiring diagrams, add the necessary wires, and ensure proper connections. Adding missing wires is essential for the proper functionality of the OBD2 system. Consulting resources like MERCEDES-DIAGNOSTIC-TOOL.EDU.VN can provide detailed wiring solutions.
13.1 Consult Wiring Diagrams
Consult wiring diagrams for both the OBD1 and OBD2 systems to identify any missing wires.
13.2 Add Necessary Wires
Add the necessary wires to the OBD2 connector, ensuring that they are properly connected to the ECM and other vehicle systems.
13.3 Ensure Proper Connections
Ensure that all wire connections are secure and durable. Use crimping and soldering techniques to create reliable connections.
14. What Should I Do if the Scan Tool Is Not Communicating After the Conversion?
If the scan tool is not communicating after the conversion, check the OBD2 connector wiring, verify the scan tool compatibility, and ensure the ECM is functioning correctly. Communication issues are a common problem after an OBD2 conversion. Troubleshooting these issues systematically can help identify the root cause.
14.1 Check the OBD2 Connector Wiring
Check the OBD2 connector wiring for any errors or loose connections. Use a multimeter to verify the continuity and voltage at each pin.
14.2 Verify Scan Tool Compatibility
Verify that the scan tool is compatible with the OBD2 system and that it is properly configured for your vehicle.
14.3 Ensure the ECM Is Functioning Correctly
Ensure that the ECM is functioning correctly and that it is properly communicating with the OBD2 system.
15. What Are Common Mistakes to Avoid During an OBD2 Conversion?
Common mistakes to avoid during an OBD2 conversion include incorrect wiring, neglecting ECM compatibility, and overlooking the cruise control and injector systems. Avoiding these mistakes can ensure a successful conversion. Seeking advice from experts at MERCEDES-DIAGNOSTIC-TOOL.EDU.VN can help you avoid these pitfalls.
15.1 Incorrect Wiring
Incorrect wiring is a common mistake that can lead to communication issues and system malfunctions. Double-check the wiring with a multimeter and refer to wiring diagrams to prevent these errors.
15.2 Neglecting ECM Compatibility
Neglecting ECM compatibility can lead to communication issues and inaccurate data. Ensure that the ECM is compatible with the OBD2 system and reprogram or replace it if necessary.
15.3 Overlooking Cruise Control and Injector Systems
Overlooking the cruise control and injector systems can cause compatibility issues. Use conversion harnesses and verify the wiring to resolve these issues.
16. How Can I Ensure the OBD2 Port Is Properly Grounded?
To ensure the OBD2 port is properly grounded, check the ground wire connection, verify continuity to the chassis, and clean any corroded surfaces. Proper grounding is essential for the OBD2 system to function correctly. According to the SAE, proper grounding is critical for the performance of automotive electrical systems.
16.1 Check the Ground Wire Connection
Check the ground wire connection at the OBD2 connector to ensure that it is secure and properly connected.
16.2 Verify Continuity to the Chassis
Verify continuity between the ground wire and the vehicle chassis using a multimeter. This ensures that the OBD2 port is properly grounded.
16.3 Clean Any Corroded Surfaces
Clean any corroded surfaces on the chassis or ground wire connection to ensure a good electrical connection.
17. What Type of Wire Should I Use for the Conversion?
Use automotive-grade wire for the conversion, as it is designed to withstand the harsh conditions in a vehicle, including temperature extremes, vibration, and exposure to chemicals. Automotive-grade wire is typically made from stranded copper and is insulated with a durable, heat-resistant material. According to the American Wire Gauge (AWG) standards, the wire size should be appropriate for the current it will carry.
17.1 Stranded Copper Wire
Use stranded copper wire for its flexibility and durability. Stranded wire is less likely to break under vibration and flexing than solid wire.
17.2 Heat-Resistant Insulation
Choose wire with heat-resistant insulation to withstand the high temperatures in the engine compartment.
17.3 Appropriate Wire Size
Select the appropriate wire size based on the current it will carry. Refer to AWG standards for guidance on wire sizing.
18. How Can I Prevent Corrosion on the New OBD2 Connector?
To prevent corrosion on the new OBD2 connector, use dielectric grease, protect connections with heat shrink tubing, and inspect regularly for signs of corrosion. Corrosion can degrade the electrical connections and lead to system malfunctions. Regularly maintaining the OBD2 connector can prevent these issues.
18.1 Use Dielectric Grease
Apply dielectric grease to the OBD2 connector pins to prevent corrosion and improve electrical conductivity.
18.2 Protect Connections with Heat Shrink Tubing
Protect the wire connections with heat shrink tubing to prevent moisture and contaminants from reaching the connections.
18.3 Inspect Regularly for Signs of Corrosion
Inspect the OBD2 connector regularly for signs of corrosion. Clean any corroded surfaces with a wire brush and apply dielectric grease.
19. What Are the Long-Term Maintenance Tips for an OBD2 System After Conversion?
Long-term maintenance tips for an OBD2 system after conversion include regularly checking for diagnostic codes, inspecting the connector for damage, and ensuring proper grounding. Regular maintenance can ensure the OBD2 system continues to function correctly. Seeking maintenance advice from experts at MERCEDES-DIAGNOSTIC-TOOL.EDU.VN can help maintain optimal performance.
19.1 Regularly Check for Diagnostic Codes
Regularly check for diagnostic codes using a scan tool. This can help identify potential issues before they become major problems.
19.2 Inspect the Connector for Damage
Inspect the OBD2 connector for any signs of damage, such as cracked or broken pins. Replace the connector if necessary.
19.3 Ensure Proper Grounding
Ensure that the OBD2 port is properly grounded. Check the ground wire connection and verify continuity to the chassis.
20. What is the Future of OBD Standards and How Might They Affect My Conversion?
The future of OBD standards is likely to include enhanced data capabilities, improved security measures, and more comprehensive diagnostic information. These advancements could affect your conversion by requiring updates or modifications to ensure compatibility with the latest standards. Staying informed about the latest OBD developments can help you prepare for future upgrades.
20.1 Enhanced Data Capabilities
Future OBD standards are likely to include enhanced data capabilities, such as the ability to transmit more detailed diagnostic information and support advanced vehicle systems.
20.2 Improved Security Measures
Improved security measures will be implemented to protect against hacking and unauthorized access to vehicle data.
20.3 More Comprehensive Diagnostic Information
Future OBD standards will provide more comprehensive diagnostic information, making it easier to identify and resolve issues quickly.
21. What Are the Ethical Considerations When Modifying a Vehicle’s OBD System?
Ethical considerations when modifying a vehicle’s OBD system include ensuring compliance with emissions regulations, avoiding data manipulation, and respecting vehicle security. Modifying the OBD system unethically can have legal and environmental consequences. According to the EPA, tampering with emissions control systems is illegal and can result in fines and penalties.
21.1 Compliance with Emissions Regulations
Ensure that your modifications comply with all applicable emissions regulations. Tampering with emissions control systems is illegal and can harm the environment.
21.2 Avoiding Data Manipulation
Avoid manipulating vehicle data to conceal issues or gain an unfair advantage. This can lead to legal and ethical consequences.
21.3 Respecting Vehicle Security
Respect vehicle security and avoid any modifications that could compromise the vehicle’s security systems.
22. How Can I Document My OBD2 Conversion for Future Reference?
To document your OBD2 conversion for future reference, keep detailed records of the wiring diagrams, components used, and troubleshooting steps. Proper documentation can be invaluable for future maintenance and repairs. Maintaining thorough records can save time and effort in the long run.
22.1 Detailed Wiring Diagrams
Keep detailed records of the wiring diagrams used for the conversion. This will help you understand the wiring configuration and troubleshoot any issues that may arise.
22.2 Components Used
Keep a list of all the components used for the conversion, including the OBD2 connector, wire, and conversion harnesses. This will help you replace any components that may fail in the future.
22.3 Troubleshooting Steps
Keep a record of all the troubleshooting steps taken during the conversion. This will help you identify and resolve any issues that may arise in the future.
23. What Are the Legal Implications of Converting to OBD2?
Legal implications of converting to OBD2 include compliance with local emissions standards and regulations. Ensure that the conversion does not violate any local laws or regulations. It’s important to be aware of and comply with all applicable laws.
23.1 Compliance with Local Emissions Standards
Ensure that the conversion complies with all applicable local emissions standards. Modifying the OBD system in a way that violates these standards can result in fines and penalties.
23.2 Regulations
Be aware of any local regulations that may apply to the conversion. Some areas may have specific requirements for vehicle modifications.
24. How Does Temperature Affect the OBD2 Conversion Process and Performance?
Temperature can affect the OBD2 conversion process and performance by influencing the conductivity of electrical connections and the performance of electronic components. Extreme temperatures can cause components to fail or malfunction. Proper insulation and protection can mitigate these effects.
24.1 Conductivity of Electrical Connections
Temperature can affect the conductivity of electrical connections. High temperatures can increase resistance, while low temperatures can decrease conductivity.
24.2 Performance of Electronic Components
Extreme temperatures can affect the performance of electronic components, such as sensors and the ECM. Proper insulation and protection can help mitigate these effects.
25. How to choose the right OBD2 connector for my 1995 Dodge conversion project?
Choosing the right OBD2 connector for your 1995 Dodge conversion project involves considering factors such as connector type, pin quality, and environmental protection. According to the Society of Automotive Engineers (SAE) standards, using a high-quality connector is crucial for reliable data transmission and longevity. Ensure the connector meets automotive-grade specifications.
25.1 Connector Type
Select an OBD2 connector that is compatible with the standard OBD2 port configuration. Verify that the connector has the correct number of pins and the proper pin layout.
25.2 Pin Quality
Choose a connector with high-quality pins that are made from corrosion-resistant materials. The pins should be durable and able to withstand repeated use.
25.3 Environmental Protection
Select a connector that provides environmental protection against moisture, dust, and other contaminants. Look for connectors with seals or gaskets that can protect the pins from corrosion.
26. Can I use a Bluetooth OBD2 scanner on my converted 1995 Dodge?
Yes, you can use a Bluetooth OBD2 scanner on your converted 1995 Dodge, provided the scanner is compatible with the OBD2 protocol and your vehicle’s ECM. According to a study by IEEE, Bluetooth OBD2 scanners offer convenience and wireless connectivity, enhancing the diagnostic process. Ensure the scanner supports the necessary diagnostic protocols.
26.1 Compatibility
Verify that the Bluetooth OBD2 scanner is compatible with the OBD2 protocol used by your vehicle’s ECM. Some scanners may not support older or non-standard protocols.
26.2 Protocol Support
Ensure that the scanner supports the necessary diagnostic protocols, such as ISO 9141-2, KWP2000, or CAN.
26.3 Wireless Connectivity
Bluetooth OBD2 scanners offer wireless connectivity, allowing you to view diagnostic data on your smartphone or tablet.
27. What are the best practices for wire routing during an OBD2 conversion to avoid interference?
Best practices for wire routing during an OBD2 conversion to avoid interference include keeping wires away from heat sources, securing wires properly, and using shielded cables. Proper wire routing is crucial for minimizing electromagnetic interference (EMI) and ensuring reliable data transmission. According to automotive engineering guidelines, organized wiring reduces potential issues.
27.1 Keep Wires Away From Heat Sources
Route wires away from heat sources, such as the exhaust manifold and engine block, to prevent damage to the insulation.
27.2 Secure Wires Properly
Secure wires properly using zip ties, clips, or other fasteners to prevent them from rubbing against sharp edges or vibrating excessively.
27.3 Use Shielded Cables
Use shielded cables for critical circuits to minimize electromagnetic interference (EMI) from other electrical components.
28. What is the significance of using a terminating resistor in the OBD2 conversion process?
The significance of using a terminating resistor in the OBD2 conversion process is to ensure proper signal termination, prevent signal reflections, and maintain data integrity. Terminating resistors are particularly important in Controller Area Network (CAN) bus systems. According to Bosch Automotive Handbook, proper termination is essential for reliable CAN bus communication.
28.1 Signal Termination
Terminating resistors provide proper signal termination, preventing signal reflections that can cause data errors.
28.2 Signal Reflections
Signal reflections can occur when the signal reaches the end of the bus and is reflected back, causing interference with the original signal.
28.3 Data Integrity
By preventing signal reflections, terminating resistors help maintain data integrity and ensure reliable communication between the ECM and other vehicle systems.
29. How to inspect and clean the OBD2 connector to ensure proper contact and communication?
To inspect and clean the OBD2 connector to ensure proper contact and communication, use a visual inspection, clean the connector with electrical contact cleaner, and use a small brush to remove debris. Proper maintenance of the OBD2 connector is crucial for reliable diagnostic data transmission. Regular cleaning can prevent connectivity issues.
29.1 Visual Inspection
Perform a visual inspection of the OBD2 connector to check for any signs of damage, such as cracked or broken pins.
29.2 Electrical Contact Cleaner
Clean the connector with electrical contact cleaner to remove any dirt, grease, or corrosion.
29.3 Small Brush
Use a small brush to gently remove any debris from the connector pins. Be careful not to bend or damage the pins.
30. What are the alternatives if I can’t find an exact OBD2 connector for my 1995 Dodge?
If you can’t find an exact OBD2 connector for your 1995 Dodge, consider using a universal OBD2 connector, sourcing a used connector from a salvage yard, or fabricating a custom connector. According to automotive repair experts, adaptability is key in older vehicle modifications. Explore all available options to ensure a successful conversion.
30.1 Universal OBD2 Connector
Use a universal OBD2 connector that is designed to fit a wide range of vehicles. These connectors typically come with a set of pins that can be configured to match the wiring of your vehicle.
30.2 Salvage Yard
Source a used OBD2 connector from a salvage yard. This can be a cost-effective way to find an exact match for your vehicle.
30.3 Custom Connector
Fabricate a custom OBD2 connector using individual pins and a connector housing. This option requires more technical expertise but can be a viable solution if an exact match cannot be found.
31. How does humidity affect the OBD2 conversion and what can I do to mitigate its effects?
Humidity can affect the OBD2 conversion by causing corrosion on electrical connections and affecting the performance of electronic components. According to the National Institute of Standards and Technology (NIST), controlling humidity is essential for maintaining the reliability of electronic systems. Use dielectric grease, protect connections with heat shrink tubing, and ensure proper ventilation.
31.1 Dielectric Grease
Apply dielectric grease to the OBD2 connector pins to prevent corrosion and improve electrical conductivity.
31.2 Heat Shrink Tubing
Protect the wire connections with heat shrink tubing to prevent moisture and contaminants from reaching the connections.
31.3 Proper Ventilation
Ensure that the vehicle’s interior is properly ventilated to reduce humidity levels.
32. What are the best resources for finding accurate wiring diagrams for OBD2 conversions on older vehicles?
Best resources for finding accurate wiring diagrams for OBD2 conversions on older vehicles include online databases, vehicle-specific repair manuals, and automotive forums. Accurate wiring diagrams are essential for a successful OBD2 conversion. Consulting multiple resources can help ensure accuracy.
32.1 Online Databases
Use online databases, such as Alldata or Mitchell OnDemand, to access wiring diagrams for a wide range of vehicles.
32.2 Vehicle-Specific Repair Manuals
Consult vehicle-specific repair manuals, such as those published by Haynes or Chilton, for detailed wiring diagrams and repair information.
32.3 Automotive Forums
Search automotive forums for wiring diagrams and conversion tips from other vehicle enthusiasts.
33. How does altitude affect the OBD2 conversion and calibration process?
Altitude can affect the OBD2 conversion and calibration process by altering air density and engine performance. According to a study by the Society of Automotive Engineers (SAE), changes in altitude can affect the air-fuel mixture and timing, requiring adjustments to the ECM. Calibrating the OBD2 system at different altitudes can optimize performance.
33.1 Air Density
Altitude affects air density, with higher altitudes having lower air density. This can affect engine performance and emissions.
33.2 Air-Fuel Mixture
The air-fuel mixture may need to be adjusted to compensate for changes in air density. This can be done using a scan tool or by reprogramming the ECM.
33.3 ECM Adjustments
The ECM may need to be adjusted to optimize performance at different altitudes. This can be done using a scan tool or by reprogramming the ECM.
34. What are the different communication protocols used in OBD2 systems, and which one should I expect on my converted 1995 Dodge?
Different communication protocols used in OBD2 systems include ISO 9141-2, KWP2000, PWM, VPW, and CAN. On a converted 1995 Dodge, you might expect to use ISO 9141-2 or KWP2000. Understanding these protocols is essential for proper communication with diagnostic tools.
34.1 ISO 9141-2
ISO 9141-2 is a common protocol used in older OBD2 systems. It uses a K-line for communication.
34.2 KWP2000
KWP2000 is another protocol used in older OBD2 systems. It is an extension of ISO 9141-2.
34.3 CAN
CAN (Controller Area Network) is a more modern protocol used in newer OBD2 systems. It is faster and more reliable than ISO 9141-2 and KWP2000.
35. How to ensure that the added wires are properly insulated and protected from damage after the OBD2 conversion?
To ensure that the added wires are properly insulated and protected from damage after the OBD2 conversion, use heat shrink tubing, secure wires with zip ties, and apply protective loom. Proper insulation and protection are crucial for the longevity and reliability of the wiring. Regular inspections can help identify potential issues.
35.1 Heat Shrink Tubing
Use heat shrink tubing to insulate wire connections and protect them from moisture and contaminants.
35.2 Zip Ties
Secure wires with zip ties to prevent them from rubbing against sharp edges or vibrating excessively.
35.3 Protective Loom
Apply protective loom to the wiring harness to provide additional protection from abrasion and heat.
36. What type of diagnostic software is compatible with a converted OBD2 system on a 1995 Dodge?
Diagnostic software compatible with a converted OBD2 system on a 1995 Dodge includes generic OBD2 scan tools, vehicle-specific diagnostic software, and smartphone apps. According to automotive diagnostic experts, selecting the right software is essential for accurate diagnostics and troubleshooting. Ensure the software supports the OBD2 protocol used by your vehicle.
36.1 Generic OBD2 Scan Tools
Generic OBD2 scan tools are compatible with a wide range of vehicles and can read basic diagnostic codes.
36.2 Vehicle-Specific Diagnostic Software
Vehicle-specific diagnostic software provides more detailed diagnostic information and allows you to perform advanced functions, such as programming and calibration.
36.3 Smartphone Apps
Smartphone apps, such as Torque Pro or OBD Fusion, can be used with a Bluetooth OBD2 adapter to read diagnostic codes and monitor vehicle parameters.
37. How to test the output voltage of the OBD2 port after the conversion to verify it meets the standard specifications?
To test the output voltage of the OBD2 port after the conversion, use a multimeter to measure the voltage at pin 16, which should be around 12-14 volts. According to automotive electrical standards, proper voltage is essential for the OBD2 system to function correctly. Ensure the voltage is within the specified range.
37.1 Multimeter
Use a multimeter to measure the voltage at pin 16 of the OBD2 connector.
37.2 Voltage Range
The voltage at pin 16 should be around 12-14 volts. If the voltage is outside of this range, there may be an issue with the wiring or the vehicle’s electrical system.
38. What are the benefits of performing a smoke test after an OBD2 conversion to identify potential leaks?
Benefits of performing a smoke test after an OBD2 conversion to identify potential leaks include detecting vacuum leaks, identifying exhaust leaks, and verifying the integrity of the intake system. According to automotive repair experts, smoke testing is an effective way to find leaks that can affect engine performance and emissions. Early detection can prevent major issues.
38.1 Vacuum Leaks
Smoke testing can help detect vacuum leaks, which can cause rough idling, poor acceleration, and reduced fuel economy.
38.2 Exhaust Leaks
Smoke testing can identify exhaust leaks, which can cause a loss of power and increase emissions.
38.3 Intake System Integrity
Smoke testing can verify the integrity of the intake system, ensuring that there are no leaks that could affect engine performance.
Converting your 1995 Dodge to OBD2 can significantly enhance its diagnostic capabilities and improve overall vehicle management. While the process involves careful wiring, component selection, and troubleshooting, the benefits of standardized data access and advanced diagnostic features make it a worthwhile upgrade. For expert guidance, detailed information, and comprehensive support, visit MERCEDES-DIAGNOSTIC-TOOL.EDU.VN.
Ready to take the next step in upgrading your 1995 Dodge? Contact MERCEDES-DIAGNOSTIC-TOOL.EDU.VN today for expert consultation on OBD2 conversion, advanced diagnostic tools, and comprehensive support. Our team is here to help you navigate the conversion process, ensuring optimal performance and enhanced diagnostic capabilities for your vehicle. Reach out to us now at 789 Oak Avenue, Miami, FL 33101, United States, Whatsapp: +1 (641)