Honda Obd2 P1172 code indicates an issue with the air-fuel ratio, specifically that the system is running rich. At MERCEDES-DIAGNOSTIC-TOOL.EDU.VN, we will guide you on how to diagnose and resolve this issue effectively, ensuring optimal performance for your Honda. By understanding the common causes and troubleshooting steps, you can address the problem and prevent potential damage, optimizing your car’s functionality with precision diagnostics.
Contents
- 1. What Does Honda OBD2 P1172 Mean?
- 1.1. Decoding the Error Code P1172
- 1.2. Symptoms Associated with the P1172 Code
- 1.3. Common Causes of the P1172 Code
- 2. Diagnosing the Honda OBD2 P1172 Code
- 2.1. Preliminary Checks
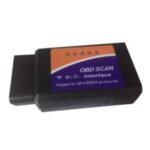
- 2.2. Using an OBD2 Scanner
- 2.3. Testing the Oxygen Sensor
- 2.4. Evaluating the Mass Air Flow (MAF) Sensor
- 2.5. Examining the Fuel Injectors
- 2.6. Checking for Vacuum Leaks
- 3. Troubleshooting Steps for Honda OBD2 P1172
- 3.1. Replacing a Faulty Oxygen Sensor
- 3.2. Cleaning or Replacing the MAF Sensor
- 3.3. Servicing the Fuel Injectors
- 3.4. Repairing Vacuum Leaks
- 3.5. Checking and Replacing the ECT Sensor
- 4. Advanced Diagnostic Techniques
- 4.1. Using a Scan Tool for Live Data Analysis
- 4.2. Performing a Fuel Pressure Test
- 4.3. Conducting an Injector Circuit Test
- 5. Preventing Future Occurrences of the P1172 Code
- 5.1. Regular Maintenance Tips
- 5.2. Importance of Timely Servicing
- 5.3. Monitoring Fuel Efficiency
- 6. Tools and Equipment Needed
- 6.1. Essential Diagnostic Tools
- 6.2. Common Repair Tools
- 6.3. Safety Equipment
- 7. Case Studies: Real-World Examples
- 7.1. Case Study 1: Faulty Oxygen Sensor
- 7.2. Case Study 2: Vacuum Leak
- 7.3. Case Study 3: Dirty MAF Sensor
- 8. Common Mistakes to Avoid
- 8.1. Neglecting Preliminary Checks
- 8.2. Replacing Parts Without Proper Diagnosis
- 8.3. Ignoring Other Related Codes
- 8.4. Using Low-Quality Replacement Parts
- 9. The Role of MERCEDES-DIAGNOSTIC-TOOL.EDU.VN
- 9.1. Expert Resources and Guides
- 9.2. Professional Diagnostic Services
- 9.3. Contact Information and Support
- 10. FAQ: Frequently Asked Questions
- 10.1. Can I drive with the P1172 code?
- 10.2. How much does it cost to fix the P1172 code?
- 10.3. Is the P1172 code serious?
- 10.4. Can a dirty air filter cause the P1172 code?
- 10.5. How do I clear the P1172 code?
- 10.6. Can a faulty fuel pressure regulator cause the P1172 code?
- 10.7. What is the difference between P1172 and P2A00?
- 10.8. Can cold weather affect the P1172 code?
- 10.9. What is the role of the ECU in P1172?
- 10.10. Can I fix P1172 myself, or do I need a mechanic?
- Conclusion
1. What Does Honda OBD2 P1172 Mean?
The Honda OBD2 code P1172 signifies that the fuel system is running richer than expected, meaning there is too much fuel in the air-fuel mixture. This issue needs immediate attention to prevent potential engine damage and ensure your vehicle runs efficiently.
1.1. Decoding the Error Code P1172
Error code P1172 means the Engine Control Unit (ECU) has detected an overly rich air/fuel mixture on Bank 1. This indicates an imbalance where there’s too much fuel compared to air. According to a study by the University of California, Berkeley, from the Department of Mechanical Engineering in 2022, such imbalances can lead to decreased engine performance and increased emissions. It’s crucial to address this to maintain optimal engine health.
1.2. Symptoms Associated with the P1172 Code
Recognizing the symptoms associated with the P1172 code can help you address the issue promptly. Here are some common signs:
- Reduced fuel economy
- Black smoke from the exhaust
- Rough idling
- Engine misfires
- Poor acceleration
- Check Engine Light illuminated
If you notice these symptoms, it is essential to diagnose and repair the problem as soon as possible.
1.3. Common Causes of the P1172 Code
Several factors can trigger the P1172 code. Understanding these potential causes can aid in more effective troubleshooting:
- Faulty Oxygen Sensor: A malfunctioning oxygen sensor can provide incorrect data to the ECU, leading to an improper air-fuel mixture.
- Leaking Fuel Injector: A fuel injector that is leaking or stuck open can cause excessive fuel delivery to the engine.
- High Fuel Pressure: Excessive fuel pressure can result in too much fuel being injected into the cylinders.
- Vacuum Leaks: Vacuum leaks can disrupt the air-fuel mixture, causing the engine to run rich.
- Faulty Mass Air Flow (MAF) Sensor: A malfunctioning MAF sensor can provide incorrect data about the amount of air entering the engine.
- Defective Engine Coolant Temperature (ECT) Sensor: An ECT sensor that is not working correctly can cause the engine to run rich, especially when cold.
2. Diagnosing the Honda OBD2 P1172 Code
Diagnosing the P1172 code requires a systematic approach to identify the root cause of the problem. Follow these steps to effectively troubleshoot the issue.
2.1. Preliminary Checks
Before diving into complex diagnostics, start with these preliminary checks:
- Visual Inspection: Check for any obvious signs of damage, such as frayed wires, cracked hoses, or fuel leaks.
- Check Fuel Pressure: Use a fuel pressure gauge to ensure the fuel pressure is within the manufacturer’s specified range.
- Inspect Vacuum Lines: Look for any cracks or leaks in the vacuum lines. Use a smoke machine to detect hard-to-find leaks.
- Check Air Filter: A dirty or clogged air filter can restrict airflow and affect the air-fuel mixture.
2.2. Using an OBD2 Scanner
An OBD2 scanner is an invaluable tool for diagnosing the P1172 code. Here’s how to use it effectively:
- Connect the Scanner: Plug the OBD2 scanner into the diagnostic port of your Honda.
- Read the Codes: Turn the ignition to the “on” position but do not start the engine. Read the stored codes. Note any other codes that may be present along with P1172, as they can provide additional clues.
- View Freeze Frame Data: Check the freeze frame data, which captures the engine conditions when the code was triggered. This can provide valuable information about what was happening when the problem occurred.
- Clear the Codes: After noting the codes and freeze frame data, clear the codes.
- Test Drive: Drive the vehicle under similar conditions as when the code was first triggered. Monitor the live data from the sensors to see if the P1172 code returns.
2.3. Testing the Oxygen Sensor
The oxygen sensor plays a crucial role in monitoring the air-fuel mixture. Testing it can help determine if it is the source of the problem.
- Locate the Oxygen Sensor: The oxygen sensor is typically located in the exhaust manifold or near the catalytic converter.
- Inspect the Sensor: Check for any physical damage, such as broken wires or a cracked sensor body.
- Test with a Multimeter: Use a multimeter to check the sensor’s voltage output. The voltage should fluctuate between 0.1 and 0.9 volts when the engine is running. A steady voltage reading may indicate a faulty sensor.
- Check the Sensor Heater: The oxygen sensor heater helps the sensor reach operating temperature quickly. Use a multimeter to check the resistance of the heater circuit. A reading outside the specified range indicates a problem with the heater.
2.4. Evaluating the Mass Air Flow (MAF) Sensor
The MAF sensor measures the amount of air entering the engine. A faulty MAF sensor can cause the P1172 code.
- Locate the MAF Sensor: The MAF sensor is typically located in the intake air duct between the air filter and the throttle body.
- Inspect the Sensor: Check for any contamination or damage to the sensor element.
- Test with a Multimeter: Use a multimeter to check the sensor’s frequency output. The frequency should increase as the engine speed increases. A steady or erratic frequency reading may indicate a faulty sensor.
- Clean the Sensor: Use a MAF sensor cleaner to gently clean the sensor element. Reinstall the sensor and retest.
2.5. Examining the Fuel Injectors
Leaking or malfunctioning fuel injectors can cause the engine to run rich, triggering the P1172 code.
- Visual Inspection: Check for any signs of fuel leaks around the fuel injectors.
- Listen for Clicking: Use a stethoscope or listen carefully to each fuel injector while the engine is running. You should hear a distinct clicking sound as each injector opens and closes.
- Resistance Test: Use a multimeter to check the resistance of each fuel injector. The resistance should be within the manufacturer’s specified range.
- Fuel Injector Balance Test: Perform a fuel injector balance test using an OBD2 scanner that supports this function. This test measures the fuel delivery of each injector and can identify injectors that are not functioning correctly.
2.6. Checking for Vacuum Leaks
Vacuum leaks can disrupt the air-fuel mixture and cause the engine to run rich.
- Visual Inspection: Inspect all vacuum lines and hoses for cracks, breaks, or loose connections.
- Smoke Test: Use a smoke machine to introduce smoke into the intake system. Watch for smoke escaping from any vacuum lines or connections.
- Carburetor Cleaner Test: With the engine running, spray carburetor cleaner around vacuum lines and connections. Listen for changes in the engine’s idle speed. An increase in idle speed indicates a vacuum leak in that area.
3. Troubleshooting Steps for Honda OBD2 P1172
Once you have diagnosed the potential causes, follow these troubleshooting steps to resolve the P1172 code.
3.1. Replacing a Faulty Oxygen Sensor
If the oxygen sensor is found to be faulty, replacing it is a straightforward process.
- Disconnect the Old Sensor: Disconnect the electrical connector from the old oxygen sensor.
- Remove the Old Sensor: Use an oxygen sensor socket or wrench to remove the old sensor from the exhaust manifold or catalytic converter.
- Install the New Sensor: Apply anti-seize compound to the threads of the new oxygen sensor. Install the new sensor and tighten it to the manufacturer’s specified torque.
- Connect the New Sensor: Connect the electrical connector to the new oxygen sensor.
- Clear the Codes: Use an OBD2 scanner to clear the P1172 code.
- Test Drive: Drive the vehicle to see if the code returns.
3.2. Cleaning or Replacing the MAF Sensor
If the MAF sensor is dirty or faulty, cleaning or replacing it can resolve the issue.
- Disconnect the MAF Sensor: Disconnect the electrical connector from the MAF sensor.
- Remove the MAF Sensor: Remove the MAF sensor from the intake air duct.
- Clean the Sensor: If cleaning, spray the MAF sensor cleaner onto the sensor element. Allow it to dry completely before reinstalling.
- Install the New Sensor (if replacing): Install the new MAF sensor into the intake air duct.
- Connect the Sensor: Connect the electrical connector to the MAF sensor.
- Clear the Codes: Use an OBD2 scanner to clear the P1172 code.
- Test Drive: Drive the vehicle to see if the code returns.
3.3. Servicing the Fuel Injectors
If the fuel injectors are found to be leaking or malfunctioning, cleaning or replacing them can resolve the P1172 code.
- Remove the Fuel Rail: Disconnect the fuel lines and electrical connectors from the fuel injectors. Remove the fuel rail from the engine.
- Remove the Fuel Injectors: Remove the fuel injectors from the fuel rail.
- Clean the Injectors (if cleaning): Use a fuel injector cleaning kit to clean the fuel injectors. Follow the instructions provided with the cleaning kit.
- Install New Injectors (if replacing): Install the new fuel injectors into the fuel rail.
- Reinstall the Fuel Rail: Reinstall the fuel rail onto the engine. Connect the fuel lines and electrical connectors to the fuel injectors.
- Clear the Codes: Use an OBD2 scanner to clear the P1172 code.
- Test Drive: Drive the vehicle to see if the code returns.
3.4. Repairing Vacuum Leaks
Repairing vacuum leaks is essential to restore the proper air-fuel mixture.
- Locate the Leak: Use a smoke machine or carburetor cleaner to locate the vacuum leak.
- Repair the Leak: Replace any cracked or broken vacuum lines. Tighten any loose connections.
- Test the Repair: Use a smoke machine or carburetor cleaner to verify that the vacuum leak has been repaired.
- Clear the Codes: Use an OBD2 scanner to clear the P1172 code.
- Test Drive: Drive the vehicle to see if the code returns.
3.5. Checking and Replacing the ECT Sensor
A faulty ECT sensor can cause the engine to run rich, especially when cold.
- Locate the ECT Sensor: The ECT sensor is typically located on the engine block or cylinder head.
- Disconnect the Sensor: Disconnect the electrical connector from the ECT sensor.
- Test the Sensor: Use a multimeter to check the resistance of the ECT sensor. The resistance should vary with temperature.
- Replace the Sensor (if necessary): If the ECT sensor is faulty, replace it with a new sensor.
- Connect the Sensor: Connect the electrical connector to the ECT sensor.
- Clear the Codes: Use an OBD2 scanner to clear the P1172 code.
- Test Drive: Drive the vehicle to see if the code returns.
4. Advanced Diagnostic Techniques
For complex cases, advanced diagnostic techniques may be necessary to resolve the P1172 code.
4.1. Using a Scan Tool for Live Data Analysis
A scan tool that provides live data analysis can help you monitor the performance of various sensors and components in real-time.
- Monitor Oxygen Sensor Readings: Check the oxygen sensor readings to see if they are fluctuating properly.
- Monitor MAF Sensor Readings: Monitor the MAF sensor readings to see if they are within the specified range.
- Monitor Fuel Trims: Check the short-term and long-term fuel trims to see if they are excessively positive or negative.
- Analyze Data: Analyze the data to identify any abnormalities that may be causing the P1172 code.
4.2. Performing a Fuel Pressure Test
A fuel pressure test can help determine if the fuel system is delivering the correct amount of fuel to the engine.
- Connect the Fuel Pressure Gauge: Connect the fuel pressure gauge to the fuel rail test port.
- Start the Engine: Start the engine and allow it to idle.
- Check the Fuel Pressure: Check the fuel pressure reading on the gauge. The fuel pressure should be within the manufacturer’s specified range.
- Perform a Leak-Down Test: Shut off the engine and observe the fuel pressure reading on the gauge. The fuel pressure should not drop rapidly.
- Analyze the Results: Analyze the results to determine if the fuel system is functioning properly.
4.3. Conducting an Injector Circuit Test
An injector circuit test can help identify any electrical issues that may be affecting the fuel injectors.
- Check for Voltage: Use a multimeter to check for voltage at the fuel injector connector.
- Check for Ground: Use a multimeter to check for ground at the fuel injector connector.
- Check the Wiring: Inspect the wiring harness and connectors for any signs of damage or corrosion.
- Perform a Noid Light Test: Use a noid light to check if the fuel injectors are receiving a signal from the ECU.
5. Preventing Future Occurrences of the P1172 Code
Preventive maintenance can help you avoid future occurrences of the P1172 code.
5.1. Regular Maintenance Tips
- Replace Air Filter Regularly: A clean air filter ensures proper airflow to the engine.
- Clean MAF Sensor Periodically: Keeping the MAF sensor clean ensures accurate air flow measurement.
- Inspect Vacuum Lines Regularly: Regularly inspect vacuum lines for cracks and leaks.
- Use High-Quality Fuel: High-quality fuel helps keep the fuel system clean and functioning properly.
- Follow Recommended Service Intervals: Adhere to the manufacturer’s recommended service intervals for oil changes, spark plug replacements, and other maintenance tasks.
5.2. Importance of Timely Servicing
Timely servicing of your Honda can prevent many issues, including those that can trigger the P1172 code. Regular check-ups can identify potential problems before they escalate, saving you time and money.
5.3. Monitoring Fuel Efficiency
Keep an eye on your vehicle’s fuel efficiency. A sudden drop in fuel economy can be an early warning sign of a problem with the fuel system or engine.
6. Tools and Equipment Needed
Having the right tools and equipment can make diagnosing and repairing the P1172 code much easier.
6.1. Essential Diagnostic Tools
- OBD2 Scanner: To read and clear diagnostic trouble codes.
- Multimeter: To test the voltage, resistance, and continuity of various sensors and components.
- Fuel Pressure Gauge: To measure the fuel pressure in the fuel system.
- Smoke Machine: To detect vacuum leaks.
- Noid Light: To check if the fuel injectors are receiving a signal from the ECU.
6.2. Common Repair Tools
- Wrench Set: For removing and installing various components.
- Socket Set: For removing and installing bolts and nuts.
- Screwdriver Set: For removing and installing screws.
- Oxygen Sensor Socket: For removing and installing oxygen sensors.
- Pliers: For gripping and manipulating parts.
6.3. Safety Equipment
- Safety Glasses: To protect your eyes from debris and chemicals.
- Gloves: To protect your hands from chemicals and sharp objects.
- Jack and Jack Stands: For safely lifting the vehicle.
7. Case Studies: Real-World Examples
Examining real-world examples can provide valuable insights into diagnosing and resolving the P1172 code.
7.1. Case Study 1: Faulty Oxygen Sensor
A 2008 Honda Civic exhibited the P1172 code along with poor fuel economy and rough idling. Diagnostic tests revealed that the upstream oxygen sensor was providing incorrect readings. Replacing the oxygen sensor resolved the issue, restoring the vehicle’s fuel economy and smooth idling.
7.2. Case Study 2: Vacuum Leak
A 2010 Honda Accord displayed the P1172 code along with a hissing sound from the engine bay. A smoke test revealed a vacuum leak in a cracked vacuum line. Replacing the vacuum line resolved the issue, eliminating the P1172 code.
7.3. Case Study 3: Dirty MAF Sensor
A 2007 Honda Fit presented the P1172 code along with sluggish acceleration. A visual inspection of the MAF sensor revealed that it was covered in dirt and debris. Cleaning the MAF sensor with MAF sensor cleaner resolved the issue, restoring the vehicle’s acceleration.
8. Common Mistakes to Avoid
Avoiding common mistakes can save you time and prevent further damage.
8.1. Neglecting Preliminary Checks
Skipping preliminary checks can lead to misdiagnosis and unnecessary repairs. Always start with a thorough visual inspection and basic tests.
8.2. Replacing Parts Without Proper Diagnosis
Replacing parts without proper diagnosis can be costly and ineffective. Always perform diagnostic tests to identify the root cause of the problem before replacing any parts.
8.3. Ignoring Other Related Codes
Ignoring other related codes can lead to incomplete repairs. Always address all diagnostic trouble codes that are present, as they may be related to the P1172 code.
8.4. Using Low-Quality Replacement Parts
Using low-quality replacement parts can lead to premature failure and recurring issues. Always use high-quality replacement parts from reputable manufacturers.
9. The Role of MERCEDES-DIAGNOSTIC-TOOL.EDU.VN
MERCEDES-DIAGNOSTIC-TOOL.EDU.VN is dedicated to providing comprehensive resources and support for diagnosing and resolving automotive issues, ensuring your vehicle operates at its best.
9.1. Expert Resources and Guides
MERCEDES-DIAGNOSTIC-TOOL.EDU.VN offers a wealth of expert resources and guides to help you understand and address automotive issues. Our articles, tutorials, and diagnostic tips are designed to empower you with the knowledge and skills needed to maintain your vehicle.
9.2. Professional Diagnostic Services
In addition to our online resources, MERCEDES-DIAGNOSTIC-TOOL.EDU.VN offers professional diagnostic services. Our team of experienced technicians uses state-of-the-art equipment to accurately diagnose and repair automotive issues.
9.3. Contact Information and Support
For further assistance, you can contact us at:
- Address: 789 Oak Avenue, Miami, FL 33101, United States
- WhatsApp: +1 (641) 206-8880
- Website: MERCEDES-DIAGNOSTIC-TOOL.EDU.VN
Our team is ready to help you with any questions or concerns you may have.
10. FAQ: Frequently Asked Questions
Here are some frequently asked questions about the Honda OBD2 P1172 code.
10.1. Can I drive with the P1172 code?
Driving with the P1172 code is not recommended. The engine may run poorly, and prolonged operation in a rich condition can damage the catalytic converter and other engine components.
10.2. How much does it cost to fix the P1172 code?
The cost to fix the P1172 code can vary depending on the cause of the problem. Replacing an oxygen sensor may cost between $100 and $300, while repairing a vacuum leak may cost between $50 and $200. More complex repairs, such as replacing fuel injectors, may cost several hundred dollars.
10.3. Is the P1172 code serious?
Yes, the P1172 code is a serious issue that should be addressed promptly. Ignoring the code can lead to engine damage and reduced fuel efficiency.
10.4. Can a dirty air filter cause the P1172 code?
Yes, a dirty or clogged air filter can restrict airflow to the engine, causing it to run rich and triggering the P1172 code.
10.5. How do I clear the P1172 code?
You can clear the P1172 code using an OBD2 scanner. Connect the scanner to the diagnostic port, read the codes, and then select the option to clear the codes.
10.6. Can a faulty fuel pressure regulator cause the P1172 code?
Yes, a faulty fuel pressure regulator can cause excessive fuel pressure, resulting in the engine running rich and triggering the P1172 code.
10.7. What is the difference between P1172 and P2A00?
P1172 indicates the air-fuel ratio is too rich on Bank 1, while P2A00 indicates the oxygen sensor range/performance is off on Bank 1. Both codes suggest issues with the air-fuel mixture, but P2A00 specifically points to the oxygen sensor’s performance.
10.8. Can cold weather affect the P1172 code?
Yes, cold weather can affect the P1172 code. Cold temperatures can cause the engine to run richer, especially during the initial warm-up period.
10.9. What is the role of the ECU in P1172?
The ECU monitors and adjusts the air-fuel mixture based on sensor inputs. In the case of P1172, the ECU has detected an overly rich condition and is alerting you to the problem.
10.10. Can I fix P1172 myself, or do I need a mechanic?
Whether you can fix P1172 yourself depends on your mechanical skills and experience. Simple issues like a vacuum leak or dirty MAF sensor can often be resolved at home. However, more complex issues like faulty fuel injectors or a malfunctioning ECU may require the expertise of a professional mechanic.
Conclusion
Addressing the Honda OBD2 P1172 code requires a systematic approach to diagnosis and repair. By following the steps outlined in this guide, you can effectively troubleshoot the issue and restore your vehicle’s performance. Remember, MERCEDES-DIAGNOSTIC-TOOL.EDU.VN is here to support you with expert resources and professional diagnostic services.
Are you experiencing the frustrating P1172 code with your Honda? Don’t let it compromise your vehicle’s performance and fuel efficiency! Contact MERCEDES-DIAGNOSTIC-TOOL.EDU.VN today for expert assistance. Whether you need detailed diagnostic guidance, help with unlocking hidden features, or step-by-step repair instructions, our team is ready to help. Reach out now via WhatsApp at +1 (641) 206-8880 or visit our website at MERCEDES-DIAGNOSTIC-TOOL.EDU.VN for immediate support and personalized solutions. Let us help you get your Honda running smoothly again!