Are you trying to determine if someone has recently cleared trouble codes on a vehicle using an OBD2 scanner? This comprehensive guide from MERCEDES-DIAGNOSTIC-TOOL.EDU.VN will provide you with the knowledge and techniques to identify potential code clearing and uncover hidden issues. By utilizing various OBD2 scanner functions and diagnostic strategies, you can confidently assess a vehicle’s true condition. Discover advanced scanning tools and techniques.
Contents
- 1. Why Knowing If Codes Were Cleared Matters
- 2. Essential Tools for Checking Codes
- 3. Step-by-Step Guide: Checking for Cleared Codes
- 3.1. Step 1: Connect Your Car Diagnostic Scanner
- 3.2. Step 2: Access Diagnostic Information
- 3.3. Step 3: Check Freeze Frame Data
- 3.4. Step 4: Review Readiness Monitors
- 3.5. Step 5: Examine Permanent Codes
- 3.6. Step 6: Investigate the Code History
- 4. Extra Tips for Accurate Diagnosis
- 4.1. Use a High-Quality Scanner
- 4.2. Pay Attention to the Symptoms
- 4.3. Be Careful When Buying a Used Car
- 5. Understanding Readiness Monitors in Detail
- 5.1. What are Readiness Monitors?
- 5.2. Types of Readiness Monitors
- 5.3. How Readiness Monitors Work
- 5.4. Interpreting Readiness Monitor Status
- 5.5. Why Readiness Monitors Matter When Checking for Cleared Codes
- 5.6. Using Readiness Monitors for Accurate Diagnosis
- 6. The Role of Freeze Frame Data in Diagnostics
- 6.1. What is Freeze Frame Data?
- 6.2. How to Access Freeze Frame Data
- 6.3. Interpreting Freeze Frame Data
- 6.4. How Freeze Frame Data Helps Detect Cleared Codes
- 6.5. Example Scenario
- 6.6. Limitations of Freeze Frame Data
- 7. Permanent Codes: The Unerasable Truth
- 7.1. What are Permanent Codes?
- 7.2. Why Were Permanent Codes Implemented?
- 7.3. How Do Permanent Codes Work?
- 7.4. How to Check for Permanent Codes
- 7.5. Interpreting Permanent Codes
- 7.6. What to Do If You Find Permanent Codes
- 8. Understanding Code History for Comprehensive Diagnostics
- 8.1. What is Code History?
- 8.2. Why is Code History Important?
- 8.3. How to Access Code History
- 8.4. Interpreting Code History
- 8.5. Using Code History to Detect Hidden Issues
- 8.6. Example Scenario
- 8.7. Limitations of Code History
- 9. Choosing the Right OBD2 Scanner
- 9.1. Understanding Your Needs
- 9.2. Types of OBD2 Scanners
- 9.3. Key Features to Look For
- 9.4. Recommended OBD2 Scanners
- 9.5. Tips for Choosing the Right Scanner
- 10. Conclusion: Empowering Your Vehicle Diagnostics
- 11. FAQs
- 11.1. How long should I drive after clearing codes before an inspection?
- 11.2. Can a dead battery clear diagnostic codes?
- 11.3. Does clearing codes remove all historical data from the ECU?
- 11.4. What does it mean if my OBD2 scanner shows “No Codes Found”?
- 11.5. Can I use any OBD2 scanner on my Mercedes-Benz?
- 11.6. How do I interpret freeze frame data on my scanner?
1. Why Knowing If Codes Were Cleared Matters
Understanding whether diagnostic trouble codes (DTCs) have been cleared is essential for several reasons. Whether you are evaluating a used car or diagnosing your own vehicle, this knowledge can reveal potential underlying problems. If codes were recently cleared, it could indicate an attempt to hide existing issues, leading to costly repairs down the line. For instance, consider a situation where you’re inspecting a used Mercedes-Benz. On the surface, the car seems flawless – no warning lights or unusual noises. However, the previous owner may have cleared the diagnostic codes just before your inspection. These cleared codes could be masking serious problems that you wouldn’t discover until the vehicle breaks down after you purchase it.
2. Essential Tools for Checking Codes
To effectively check if codes have been cleared, you will need an OBD2 scanner. An OBD2 scanner is a diagnostic tool designed to connect to your car’s onboard diagnostic system, giving you access to real-time and stored data about the vehicle’s health. The primary function of an OBD2 scanner is to read Diagnostic Trouble Codes (DTCs). These codes are generated by the vehicle’s computer when it detects a problem with any of the monitored systems, such as the engine, transmission, or emissions control. Some popular automotive scanners include:
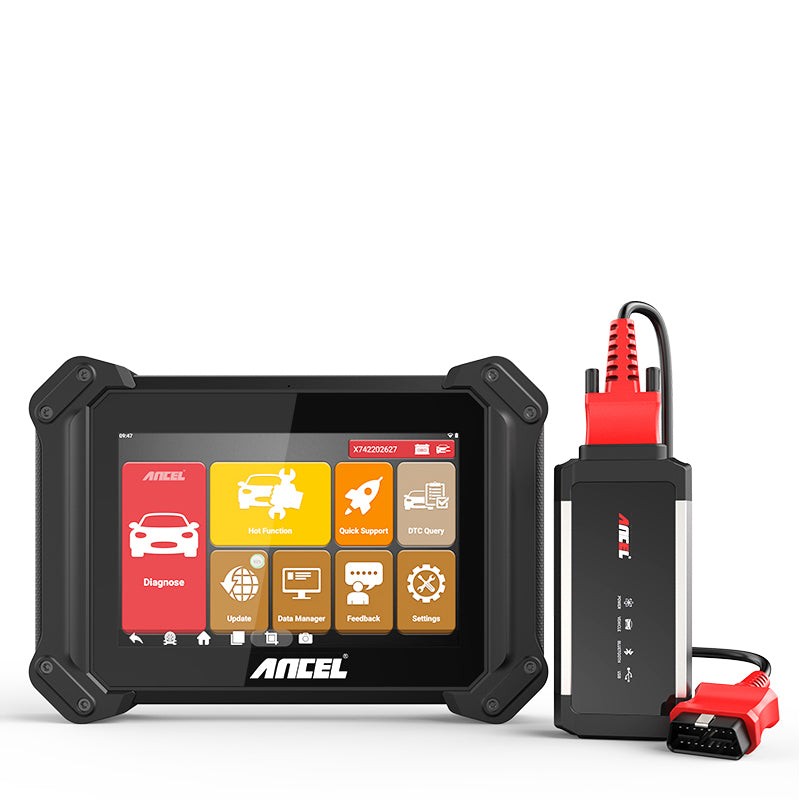
- ANCEL V6 Pro (Most Recommended)
- BlueDriver Bluetooth Pro OBD-II Scanner
- Innova 6100P OBD2 Scanner
- Autel MaxiCOM MK808
These scanners range from basic models suitable for simple code reading and clearing to advanced tools that provide detailed diagnostic information and capabilities. Make sure your OBD2 scanner can read freeze frame data and readiness monitors, as these features are key to checking for recently cleared codes. High-quality scanners provide access to manufacturer-specific codes and in-depth diagnostics.
3. Step-by-Step Guide: Checking for Cleared Codes
This section provides a detailed step-by-step guide to effectively check if diagnostic trouble codes (DTCs) have been cleared from a vehicle’s onboard computer. By following these steps, you can determine if a vehicle’s diagnostic system has been recently reset, potentially masking underlying issues.
3.1. Step 1: Connect Your Car Diagnostic Scanner
The first step is to connect your car diagnostic scanner to your vehicle. The OBD2 port is usually located under the dashboard, near the driver’s seat. This port allows the scanner to interface directly with the vehicle’s Engine Control Unit (ECU). When connecting your automotive diagnostic scanner, ensure that the vehicle is in the correct mode for the scanner to communicate with the ECU. Generally, this involves turning the ignition key to the “ON” position without starting the engine. In this mode, the ECU is active, and the scanner can retrieve diagnostic data. Some vehicles may require the engine to be running for certain diagnostic functions, but for most checks, including code retrieval and readiness monitor status, having the ignition on is sufficient. Once connected, the car scanner tool will automatically power on (if it’s connected directly to the OBD-II port) and begin communicating with the vehicle’s systems.
 OBD2 Scanner Connected to Car
3.2. Step 2: Access Diagnostic Information
After successfully connecting your scanner, the next step is to access the vehicle’s diagnostic information. Best OBD2 scanners for all cars come with a user-friendly interface that allows you to navigate through various menus. To determine if codes have been cleared recently, focus on the Diagnostic Trouble Codes (DTCs) section. This section displays both active and pending codes. Active codes indicate current issues detected by the ECU, while pending codes are potential problems that haven’t yet triggered a full alert. If the DTC section shows no codes, this could indicate that the system was recently cleared. However, a lack of codes isn’t always definitive proof that the system was tampered with; it could also mean that the vehicle is genuinely issue-free at that moment. It’s important to look at the number of codes and their nature. If the DTC section is entirely empty, and you’re aware that the vehicle recently had issues, this might suggest that the codes were manually cleared. Some advanced car scanners allow you to see when the last code was cleared or provide a history of recent diagnostic activities, which can give further clues about any recent code clearance.
3.3. Step 3: Check Freeze Frame Data
Freeze frame data is an invaluable tool in vehicle diagnostics. When a DTC is triggered, the ECU captures a snapshot of the vehicle’s operating conditions at that precise moment. This data includes crucial information such as the engine speed, throttle position, vehicle speed, engine load, coolant temperature, and more. Reviewing this data can provide significant insights into what was happening when the fault occurred. If the freeze frame data is missing, incomplete, or shows a time stamp that suggests recent activity, it’s a strong indicator that the codes were cleared to hide an issue. Typically, the freeze frame data should correlate with the DTCs displayed in the scanner. If you notice discrepancies, such as data that seems too recent or doesn’t match the vehicle’s operational history, it’s a red flag that someone might have cleared the codes to reset the system. Advanced car scan tools allow you to analyze multiple freeze frames if more than one code has been triggered.
3.4. Step 4: Review Readiness Monitors
Readiness Monitors play a critical role in vehicle diagnostics by running self-tests on various emission control systems. When a DTC is cleared, either manually or after a repair, these monitors reset and must complete a series of diagnostic self-tests to determine whether the vehicle’s systems are functioning properly. The process of resetting these monitors typically requires a specific number of driving cycles, which vary depending on the vehicle and the specific monitor. Monitors related to the catalytic converter, oxygen sensors, and evaporative emissions system might need different driving conditions to complete their tests. When you check the readiness monitors using your wireless Bluetooth OBD2 scanner, you’ll usually find this information under a section labeled I/M Readiness or something similar. The scanner will indicate whether each monitor is Complete, Incomplete, or Not Supported. Complete means that the monitor has successfully passed its self-tests, while Incomplete indicates that the monitor has not yet finished its tests since the last reset or code clearing. If you observe that multiple readiness monitors are incomplete, especially after the vehicle has been driven a reasonable distance, this strongly suggests that the codes were recently cleared. This is because these monitors would typically be complete under normal driving conditions. An incomplete status means that the vehicle has not yet gone through enough drive cycles to perform all necessary tests, likely because the codes were cleared recently.
3.5. Step 5: Examine Permanent Codes
Permanent codes, also known as Permanent DTCs, are a safeguard implemented in the OBD-II system to prevent tampering and ensure that emissions-related issues are properly addressed. Unlike regular DTCs that can be cleared manually with a car diagnostic tool, permanent codes cannot be erased by any manual means. They are stored in the ECU until the vehicle’s onboard diagnostic system confirms that the fault has been corrected and that the affected system is functioning correctly over a number of drive cycles. To check for permanent codes, navigate to the appropriate section in your scanner, which may be labeled as Permanent DTCs or similar. If any permanent codes are present, they indicate that the vehicle has experienced issues that have not been fully resolved, even if regular DTCs have been cleared. The presence of these codes suggests that someone may have attempted to clear regular codes to hide issues, but the underlying problems remain unresolved. Permanent codes are particularly valuable when buying a used car, as they provide a more accurate representation of the vehicle’s health, regardless of any recent code-clearing attempts. If your scanner detects permanent codes, it’s advisable to investigate further and ensure the necessary repairs have been made before considering the vehicle for purchase.
3.6. Step 6: Investigate the Code History
The code history is a powerful feature found in more advanced car diagnostic scanners, providing a detailed log of past diagnostic trouble codes and any related events. This historical data can reveal patterns, such as recurring issues that were cleared multiple times without proper resolution, or a sudden absence of codes that could indicate recent tampering. To access the code history, use your automotive scanner’s menu to navigate to the appropriate section, which may be labeled as DTC History, Diagnostic History, or similar. Here, you can review a list of previously detected codes, including those that were cleared. The car diagnostic tool may also display additional information, such as the frequency of each code, the specific conditions under which they were triggered, and whether they were manually cleared. Analyzing this history allows you to determine whether a vehicle has been experiencing ongoing issues or if there have been recent attempts to reset the system. If you notice that the same code appears multiple times in the history but is currently absent from the active DTCs, it could indicate that the code was cleared in an attempt to hide a persistent issue. By carefully reviewing the code history, you can gain a more comprehensive understanding of the vehicle’s diagnostic record and identify any potential red flags that might not be immediately obvious through a standard DTC scan.
4. Extra Tips for Accurate Diagnosis
This section outlines additional tips to help ensure accurate diagnosis when checking for cleared codes, emphasizing the importance of thoroughness and attention to detail.
4.1. Use a High-Quality Scanner
Investing in a high-quality OBD2 scanner can significantly improve the accuracy of your diagnostic efforts. Basic OBD-II scanners are great for simple checks, but if you need more detailed info, consider using a more advanced scanner. These advanced scanners often provide manufacturer-specific codes and more in-depth diagnostics, which can be crucial for identifying complex issues. Additionally, these scanners typically offer more features, such as live data streaming, bidirectional control, and enhanced reporting, making them an invaluable tool for comprehensive vehicle diagnostics. If you’re unsure about the results, it might be worth taking the car to a professional mechanic with a high-quality scanner.
4.2. Pay Attention to the Symptoms
Even if the scanner shows no active codes, it is crucial to pay attention to any symptoms the car is exhibiting. If your car is showing problems—like rough idling, poor fuel economy, or an intermittent warning light—but the scanner shows no codes, there’s a good chance the codes were cleared recently. Don’t ignore these symptoms just because the scanner says everything’s fine. These symptoms can provide valuable clues about underlying issues that may not be immediately apparent through a diagnostic scan. Investigate these symptoms further to uncover potential problems that may have been masked by recent code clearing.
4.3. Be Careful When Buying a Used Car
When buying a used car, it’s essential to exercise caution and thoroughly inspect the vehicle’s diagnostic data. Always check the readiness monitors and freeze frame data. If these look unusual, it’s possible the seller cleared the codes to hide a problem. It’s always a good idea to have a professional mechanic check the car too, especially if something doesn’t seem right.
5. Understanding Readiness Monitors in Detail
Readiness monitors are a critical component of a vehicle’s On-Board Diagnostics (OBD) system, designed to evaluate the performance of various emission-related components and systems. These monitors run self-tests to ensure that the vehicle is operating within acceptable emission standards. Here’s a detailed look at how readiness monitors function and how to interpret their status.
5.1. What are Readiness Monitors?
Readiness monitors, also known as Inspection/Maintenance (I/M) monitors, are diagnostic routines programmed into a vehicle’s Engine Control Unit (ECU) to check the functionality of emission control systems. These monitors continuously or periodically test components such as the oxygen sensors, catalytic converter, evaporative emission control system (EVAP), and other related systems.
5.2. Types of Readiness Monitors
There are several types of readiness monitors, each responsible for testing a specific system or component. Common types include:
- Catalyst Monitor: Evaluates the efficiency of the catalytic converter.
- Oxygen Sensor Monitor: Tests the performance of the oxygen sensors.
- EVAP System Monitor: Checks the evaporative emission control system for leaks.
- EGR System Monitor: Verifies the operation of the Exhaust Gas Recirculation (EGR) system.
- Secondary Air System Monitor: Tests the secondary air injection system.
- Fuel System Monitor: Assesses the fuel delivery system for proper operation.
5.3. How Readiness Monitors Work
When a vehicle’s ECU detects a potential issue, it stores a Diagnostic Trouble Code (DTC) and illuminates the Check Engine Light (CEL). However, before a vehicle can pass an emissions inspection, the readiness monitors must complete their self-tests and report a “ready” status. Each monitor requires specific driving conditions to run its tests, which may include a combination of highway and city driving. These conditions vary depending on the vehicle make and model.
5.4. Interpreting Readiness Monitor Status
OBD2 scanners display the status of readiness monitors as either “Complete” (Ready) or “Incomplete” (Not Ready).
- Complete (Ready): This status indicates that the monitor has successfully completed its self-test and the system is functioning correctly.
- Incomplete (Not Ready): This status means that the monitor has not yet completed its self-test since the last code clearing or battery disconnection. This could be due to insufficient driving, specific driving conditions not being met, or an underlying issue preventing the test from running.
5.5. Why Readiness Monitors Matter When Checking for Cleared Codes
If a vehicle has recently had its diagnostic codes cleared, the readiness monitors will reset to an “Incomplete” status. This is because the ECU needs to re-run all the self-tests to ensure that the emission systems are functioning properly. If you find that multiple monitors are incomplete, especially after the vehicle has been driven a considerable distance, it is a strong indication that the codes were recently cleared. This is a crucial piece of information when evaluating a used car or diagnosing your own vehicle, as it suggests that the previous owner may have been trying to hide underlying issues.
5.6. Using Readiness Monitors for Accurate Diagnosis
To use readiness monitors effectively, follow these steps:
- Connect an OBD2 Scanner: Plug an OBD2 scanner into the vehicle’s diagnostic port.
- Access I/M Readiness: Navigate to the I/M Readiness or Readiness Monitor section of the scanner.
- Review Monitor Status: Check the status of each monitor. Note any monitors that are incomplete.
- Consider Driving Conditions: Understand the specific driving conditions required for each monitor to complete its test. This information can often be found in the vehicle’s service manual or online forums.
- Drive the Vehicle: Drive the vehicle under the necessary conditions and recheck the monitor status.
- Interpret Results: If the monitors remain incomplete after driving the vehicle under the required conditions, it could indicate an underlying issue or recent code clearing.
By understanding and utilizing readiness monitors, you can gain valuable insights into the health and history of a vehicle’s emission control systems, helping you make informed decisions when purchasing a used car or diagnosing your own vehicle.
6. The Role of Freeze Frame Data in Diagnostics
Freeze frame data is an essential diagnostic tool that provides a snapshot of a vehicle’s operating conditions at the moment a Diagnostic Trouble Code (DTC) is triggered. This data is invaluable for diagnosing intermittent issues and understanding the circumstances surrounding a fault.
6.1. What is Freeze Frame Data?
When a DTC is set in a vehicle’s Engine Control Unit (ECU), the ECU captures a set of data parameters that describe the vehicle’s operating conditions at that precise moment. This snapshot is called freeze frame data. It includes critical information such as:
- Engine Speed (RPM): The rotational speed of the engine.
- Vehicle Speed: The speed at which the vehicle was traveling.
- Engine Load: The percentage of maximum load the engine was experiencing.
- Coolant Temperature: The temperature of the engine coolant.
- Fuel Trim: Adjustments made to the fuel mixture by the ECU.
- Intake Air Temperature: The temperature of the air entering the engine.
- Throttle Position: The position of the throttle plate.
- Fuel Pressure: The pressure of the fuel in the system.
6.2. How to Access Freeze Frame Data
To access freeze frame data, you will need an OBD2 scanner. Here’s how to do it:
- Connect the Scanner: Plug the OBD2 scanner into the vehicle’s diagnostic port.
- Navigate to DTCs: Go to the section that displays Diagnostic Trouble Codes (DTCs).
- Select the DTC: Choose the specific DTC you want to investigate.
- View Freeze Frame Data: Look for an option to view freeze frame data associated with that DTC.
The scanner will then display the snapshot of data captured when the code was triggered.
6.3. Interpreting Freeze Frame Data
Interpreting freeze frame data involves analyzing the values of the various parameters to understand what was happening when the fault occurred. Here are some tips:
- Correlate with the DTC: Make sure the freeze frame data makes sense in the context of the DTC. For example, if the DTC is related to a misfire, the freeze frame data should show conditions that could cause a misfire, such as low engine speed or high engine load.
- Look for Abnormal Values: Identify any parameters that are outside of their normal operating range. For example, an unusually high or low coolant temperature could indicate a problem with the cooling system.
- Consider the Vehicle Speed and Load: The vehicle speed and engine load can provide clues about the driving conditions at the time of the fault. For example, a code triggered at high speed and high load could indicate an issue with the fuel system or ignition system.
- Check Fuel Trim Values: Fuel trim values indicate how much the ECU is adjusting the fuel mixture to compensate for lean or rich conditions. Large positive or negative fuel trim values can indicate problems with the fuel system, air intake, or exhaust system.
6.4. How Freeze Frame Data Helps Detect Cleared Codes
Freeze frame data can be a valuable tool for detecting cleared codes because it provides a historical record of the conditions under which a fault occurred. If the freeze frame data is missing, incomplete, or shows a time stamp that suggests recent activity, it’s a strong indicator that the codes were cleared to hide an issue. If the data seems too recent or doesn’t match the vehicle’s operational history, it’s a red flag that someone might have cleared the codes to reset the system.
6.5. Example Scenario
Let’s say you are inspecting a used car and find a DTC for a faulty oxygen sensor. When you check the freeze frame data, you notice that the data was captured just a few miles before your inspection. This could indicate that the seller recently cleared the codes to hide the issue.
6.6. Limitations of Freeze Frame Data
While freeze frame data is a powerful diagnostic tool, it has some limitations:
- Limited Data Points: Freeze frame data only captures a snapshot of data at one moment in time. It does not provide a continuous record of the vehicle’s operating conditions.
- Not Available for All Codes: Not all DTCs have associated freeze frame data. Some codes are considered informational and do not trigger the capture of freeze frame data.
- Accuracy: The accuracy of freeze frame data depends on the accuracy of the sensors and systems providing the data.
Freeze frame data is an essential tool for diagnosing vehicle problems. By understanding how to access and interpret freeze frame data, you can gain valuable insights into the conditions under which faults occur, helping you make accurate diagnoses and avoid potential issues.
7. Permanent Codes: The Unerasable Truth
Permanent codes, also known as Permanent Diagnostic Trouble Codes (PDTCs), are a critical feature of the OBD-II system designed to prevent tampering and ensure that emissions-related issues are properly addressed. Unlike regular DTCs that can be cleared manually, permanent codes cannot be erased by any manual means, providing a more accurate representation of a vehicle’s health.
7.1. What are Permanent Codes?
Permanent codes are DTCs that are stored in the vehicle’s Engine Control Unit (ECU) and cannot be cleared using a scanner or by disconnecting the battery. They are specifically designed to remain in the ECU until the vehicle’s onboard diagnostic system confirms that the fault has been corrected and that the affected system is functioning correctly over a number of drive cycles.
7.2. Why Were Permanent Codes Implemented?
Permanent codes were introduced to address the issue of vehicle owners clearing DTCs to pass emissions inspections without actually fixing the underlying problems. By preventing the manual clearing of these codes, regulators aim to ensure that vehicles are properly repaired and comply with emissions standards.
7.3. How Do Permanent Codes Work?
When a vehicle’s ECU detects a fault that affects emissions, it stores both a regular DTC and a permanent code. The regular DTC can be cleared using a scanner, but the permanent code remains in the ECU. The permanent code will only be cleared automatically by the ECU after the following conditions are met:
- The Fault is Repaired: The underlying issue causing the code must be resolved.
- The System is Tested: The onboard diagnostic system must run and complete its self-tests to verify that the system is functioning correctly.
- Multiple Drive Cycles: The vehicle must be driven through a specific number of drive cycles (typically 40) without the fault reoccurring. A drive cycle is a period of driving that includes starting the engine, driving at various speeds, and then stopping the engine.
7.4. How to Check for Permanent Codes
To check for permanent codes, you will need an OBD2 scanner that supports the reading of PDTCs. Here’s how to do it:
- Connect the Scanner: Plug the OBD2 scanner into the vehicle’s diagnostic port.
- Navigate to DTCs: Go to the section that displays Diagnostic Trouble Codes (DTCs).
- Look for Permanent Codes: Check for a specific section labeled “Permanent DTCs” or similar.
If any permanent codes are present, they will be listed in this section.
7.5. Interpreting Permanent Codes
The presence of permanent codes indicates that the vehicle has experienced issues that have not been fully resolved, even if regular DTCs have been cleared. This suggests that someone may have attempted to hide issues, but the underlying problems remain unresolved. Permanent codes are particularly valuable when buying a used car, as they provide a more accurate representation of the vehicle’s health, regardless of any recent code-clearing attempts.
7.6. What to Do If You Find Permanent Codes
If your scanner detects permanent codes, it’s advisable to investigate further and ensure the necessary repairs have been made before considering the vehicle for purchase. Here are some steps to take:
- Identify the Code: Note the specific permanent code and its description.
- Research the Issue: Research the potential causes and solutions for the code.
- Inspect the Vehicle: Visually inspect the affected system for any obvious signs of damage or wear.
- Consult a Mechanic: Take the vehicle to a qualified mechanic for a thorough inspection and diagnosis.
- Repair the Issue: Have the necessary repairs performed to resolve the underlying issue.
- Verify the Repair: After the repairs are completed, ensure that the permanent code is cleared automatically by the ECU after driving the vehicle through the required number of drive cycles.
Permanent codes are a valuable tool for preventing tampering and ensuring that vehicles are properly repaired. By understanding how to check for and interpret permanent codes, you can make more informed decisions when purchasing a used car or diagnosing your own vehicle.
8. Understanding Code History for Comprehensive Diagnostics
The code history is a powerful feature found in more advanced car diagnostic scanners, providing a detailed log of past diagnostic trouble codes and related events. This historical data can reveal patterns and insights that a simple DTC scan might miss.
8.1. What is Code History?
Code history refers to the recorded list of past diagnostic trouble codes (DTCs) that a vehicle’s Engine Control Unit (ECU) has stored over time. This history includes not only the codes themselves but also related information such as the frequency of each code, the conditions under which they were triggered, and whether they were manually cleared or self-cleared by the system after a repair.
8.2. Why is Code History Important?
The code history is important for several reasons:
- Revealing Recurring Issues: It can reveal patterns of recurring issues that were cleared multiple times without proper resolution, indicating persistent problems that need attention.
- Detecting Tampering: A sudden absence of codes in the history, or a recent clearing of all codes, could indicate recent tampering or an attempt to hide underlying problems.
- Understanding Intermittent Problems: Code history can help diagnose intermittent problems that don’t always trigger a current DTC but have occurred in the past.
- Evaluating Vehicle Health: It provides a more comprehensive understanding of the vehicle’s overall diagnostic record, allowing for a more informed assessment of its health.
8.3. How to Access Code History
To access the code history, you will need an advanced car diagnostic scanner that supports this feature. Here’s how to do it:
- Connect the Scanner: Plug the diagnostic scanner into the vehicle’s OBD2 port.
- Navigate to Diagnostic History: Use the scanner’s menu to find the section labeled “DTC History,” “Diagnostic History,” or something similar.
- Review the Code History: Examine the list of previously detected codes, including those that were cleared.
8.4. Interpreting Code History
Interpreting code history involves analyzing the data to identify patterns and potential issues. Here are some tips for interpreting code history:
- Check for Recurring Codes: Look for codes that appear multiple times in the history. This indicates that the issue is recurring and has not been properly resolved.
- Note the Frequency of Codes: Pay attention to how often each code has been triggered. A code that has been triggered frequently may indicate a more serious underlying problem.
- Examine the Conditions Under Which Codes Were Triggered: If available, review the freeze frame data or other information about the conditions under which the codes were triggered. This can provide clues about the root cause of the issue.
- Look for Recent Clearing of Codes: A sudden clearing of all codes in the history could indicate recent tampering or an attempt to hide problems.
8.5. Using Code History to Detect Hidden Issues
Code history can be particularly useful for detecting hidden issues when buying a used car or diagnosing a vehicle with intermittent problems. Here are some scenarios:
- Used Car Purchase: If you are considering buying a used car, reviewing the code history can reveal whether the vehicle has been experiencing ongoing issues that the seller has not disclosed.
- Intermittent Problems: If your vehicle has intermittent problems that don’t always trigger a current DTC, reviewing the code history can help you identify the underlying cause.
- Post-Repair Verification: After a repair has been performed, reviewing the code history can help you verify that the issue has been properly resolved and that the codes are not recurring.
8.6. Example Scenario
Let’s say you are inspecting a used car and find that there are no current DTCs. However, when you review the code history, you find that the same code for a faulty oxygen sensor has been triggered multiple times in the past but was recently cleared. This could indicate that the seller is aware of the issue but has attempted to hide it by clearing the codes.
8.7. Limitations of Code History
While code history is a valuable diagnostic tool, it has some limitations:
- Not Available on All Scanners: Code history is only available on more advanced diagnostic scanners.
- Limited Storage Capacity: The ECU has limited storage capacity for code history, so older codes may be overwritten as new codes are triggered.
- Potential for Tampering: While code history can help detect tampering, it is also possible for sophisticated individuals to manipulate or erase the code history.
Code history is a powerful tool for comprehensive vehicle diagnostics. By understanding how to access and interpret code history, you can gain valuable insights into the health and history of a vehicle, helping you make more informed decisions and avoid potential issues.
9. Choosing the Right OBD2 Scanner
Selecting the appropriate OBD2 scanner is crucial for effective vehicle diagnostics. The market offers a variety of scanners, each with different capabilities and features. Here’s a guide to help you choose the right OBD2 scanner for your needs:
9.1. Understanding Your Needs
Before you start shopping for an OBD2 scanner, it’s important to understand your needs. Ask yourself the following questions:
- What Type of Vehicles Will You Be Working On? Some scanners are designed to work with specific makes and models, while others are universal and can be used on a wide range of vehicles.
- What Diagnostic Capabilities Do You Need? Basic scanners can read and clear DTCs, while more advanced scanners offer additional features such as live data streaming, bidirectional control, and advanced diagnostics.
- What Is Your Budget? OBD2 scanners range in price from inexpensive entry-level models to high-end professional tools.
9.2. Types of OBD2 Scanners
There are several types of OBD2 scanners, each with its own advantages and disadvantages:
- Basic Code Readers: These are the simplest and most affordable type of OBD2 scanner. They can read and clear DTCs, but they typically offer limited additional features.
- Enhanced Code Readers: These scanners offer more features than basic code readers, such as live data streaming, freeze frame data, and the ability to read manufacturer-specific codes.
- Professional Scan Tools: These are the most advanced and expensive type of OBD2 scanner. They offer a wide range of features, including bidirectional control, advanced diagnostics, and the ability to program ECUs.
- Smartphone-Based Scanners: These scanners consist of a Bluetooth or Wi-Fi adapter that plugs into the OBD2 port and an app that runs on your smartphone or tablet. They offer many of the same features as enhanced code readers and professional scan tools, but they are typically more affordable.
9.3. Key Features to Look For
When choosing an OBD2 scanner, there are several key features to look for:
- DTC Reading and Clearing: All OBD2 scanners should be able to read and clear Diagnostic Trouble Codes (DTCs).
- Live Data Streaming: This feature allows you to view real-time data from the vehicle’s sensors and systems.
- Freeze Frame Data: This feature captures a snapshot of the vehicle’s operating conditions at the moment a DTC is triggered.
- Readiness Monitors: This feature displays the status of the vehicle’s readiness monitors, indicating whether the emission control systems have completed their self-tests.
- Bidirectional Control: This feature allows you to send commands to the vehicle’s ECU to test various components and systems.
- Manufacturer-Specific Codes: Some scanners can read manufacturer-specific codes, which can provide more detailed diagnostic information.
- Software Updates: Make sure the scanner supports software updates to ensure that it remains compatible with the latest vehicles and diagnostic protocols.
- User-Friendly Interface: Choose a scanner with a user-friendly interface that is easy to navigate and understand.
9.4. Recommended OBD2 Scanners
Here are some recommended OBD2 scanners in different categories:
- ANCEL V6 Pro: ANCEL V6 Pro is a Bi-Directional diagnostic scanner, which can perform complete system diagnosis and ECU programming.
- BlueDriver Bluetooth Pro OBDII Scan Tool: The BlueDriver is a smartphone-based scanner that offers many of the same features as enhanced code readers and professional scan tools.
- Innova 6100p: This scanner offers many features, including live data streaming, freeze frame data, and the ability to read ABS and SRS codes.
9.5. Tips for Choosing the Right Scanner
Here are some additional tips for choosing the right OBD2 scanner:
- Read Reviews: Read reviews from other users to get an idea of the scanner’s performance and reliability.
- Check Compatibility: Make sure the scanner is compatible with the vehicles you will be working on.
- Consider the Warranty: Choose a scanner with a good warranty to protect your investment.
Choosing the right OBD2 scanner is an important decision that can impact your ability to diagnose and repair vehicles effectively. By understanding your needs, researching different types of scanners, and considering key features, you can choose the right OBD2 scanner for your needs.
10. Conclusion: Empowering Your Vehicle Diagnostics
Using an OBD2 scanner to check for DTCs, freeze frame data, readiness monitors, and code history can help you avoid hidden problems. It’s better to know what’s really happening with your car than to face a big repair bill later on. Remember, the team at MERCEDES-DIAGNOSTIC-TOOL.EDU.VN is here to assist you with any questions or concerns you may have. Contact us at 789 Oak Avenue, Miami, FL 33101, United States or via Whatsapp at +1 (641) 206-8880.
Don’t let uncertainty cloud your judgment. Contact MERCEDES-DIAGNOSTIC-TOOL.EDU.VN today for expert guidance on selecting the right diagnostic tools and unlocking the full potential of your Mercedes-Benz. Our team is ready to provide personalized recommendations, in-depth product support, and exclusive insights to help you take control of your vehicle’s health and performance. Reach out now via Whatsapp at +1 (641) 206-8880 or visit our website at MERCEDES-DIAGNOSTIC-TOOL.EDU.VN.
11. FAQs
11.1. How long should I drive after clearing codes before an inspection?
After clearing codes, you should drive your car for at least 50 to 100 miles under varied conditions (city and highway) to ensure that the readiness monitors reset and the car is ready for inspection.
11.2. Can a dead battery clear diagnostic codes?
Yes, a completely dead or disconnected battery can clear stored diagnostic codes, as it can reset the vehicle’s ECU. However, it will also reset all readiness monitors, which will need to be completed again.
11.3. Does clearing codes remove all historical data from the ECU?
Clearing codes will remove most active and pending DTCs, but some permanent codes or logs may remain in the ECU until the underlying issue is confirmed to be resolved by the car’s diagnostic system.
11.4. What does it mean if my OBD2 scanner shows “No Codes Found”?
If your OBD2 scanner displays “No Codes Found,” it indicates that the vehicle’s computer has not detected any current issues or faults. However, it does not guarantee that the vehicle is entirely problem-free. Potential reasons for this message include:
- No Active Issues: The vehicle may genuinely have no current problems, and all systems are functioning within normal parameters.
- Recently Cleared Codes: The codes may have been recently cleared, either intentionally or unintentionally (e.g., due to a dead battery). If this is the case, you should check the readiness monitors to see if they have been reset.
- Intermittent Issues: The problem may be intermittent and not currently present when the scan is performed. In such cases, reviewing the code history may provide insights into past issues.
- Scanner Limitations: A basic OBD2 scanner may not be able to detect all types of codes or issues. More advanced scanners may be needed to access deeper diagnostic information.
11.5. Can I use any OBD2 scanner on my Mercedes-Benz?
While OBD2 scanners are designed to be universally compatible, some scanners may not fully support all the features and diagnostic capabilities of your Mercedes-Benz. For optimal performance, it’s recommended to use a scanner that is specifically designed for or known to work well with Mercedes-Benz vehicles. These scanners often provide access to manufacturer-specific codes and advanced diagnostic functions.
11.6. How do I interpret freeze frame data on my scanner?
Freeze frame data provides a snapshot of the vehicle’s operating conditions at the moment a Diagnostic Trouble Code (DTC) is triggered. To interpret freeze frame data effectively, you should:
- Identify the DTC: Note the specific DTC that triggered the freeze