A J1939 9 Pin Deutsch To Obd2 Cable serves as a crucial interface, bridging the gap between heavy-duty vehicles using the J1939 communication protocol and standard OBD2 diagnostic tools; MERCEDES-DIAGNOSTIC-TOOL.EDU.VN provides in-depth solutions for your diagnostic requirements. This adapter cable enhances vehicle diagnostics, facilitates data access, and supports diverse applications. Explore how this cable can improve your automotive tasks with MERCEDES-DIAGNOSTIC-TOOL.EDU.VN, where detailed guidance and advanced diagnostic tools meet your needs, ensuring optimal vehicle performance and streamlined maintenance using interfaces and diagnostic solutions.
Contents
- 1. Understanding the J1939 9 Pin Deutsch to OBD2 Cable
- 1.1. Definition and Purpose
- 1.2. Key Features and Specifications
- 1.3. How It Works
- 1.4. Benefits of Using the Cable
- 1.5. Common Applications
- 2. Identifying the Need for a J1939 9 Pin Deutsch to OBD2 Cable
- 2.1. Vehicle Type and Diagnostic Port
- 2.2. Diagnostic Tool Compatibility
- 2.3. Symptoms and Issues Requiring Diagnostics
- 2.4. Fleet Maintenance and Management
- 2.5. Remote Diagnostics and Telematics
- 2.6. Regulatory Compliance and Emissions Testing
- 2.7. Upgrading Diagnostic Capabilities
- 3. Connecting a J1939 9 Pin Deutsch to OBD2 Cable: A Step-by-Step Guide
- 3.1. Gathering Necessary Tools and Equipment
- 3.2. Locating the Diagnostic Port
- 3.3. Connecting the J1939 End of the Cable
- 3.4. Connecting the OBD2 End of the Cable
- 3.5. Powering On the Diagnostic Tool
- 3.6. Starting the Vehicle (If Required)
- 3.7. Retrieving and Interpreting Data
- 3.8. Disconnecting the Cable
- 3.9. Storing the Cable Properly
- 4. Troubleshooting Common Issues with J1939 9 Pin Deutsch to OBD2 Cables
- 4.1. Connection Problems
- 4.2. Data Errors
- 4.3. Tool Incompatibility
- 4.4. Other Potential Issues
- 5. Choosing the Right J1939 9 Pin Deutsch to OBD2 Cable
- 5.1. Quality and Durability
- 5.2. Compatibility
- 5.3. Cable Length
- 5.4. Connector Type
- 5.5. Special Features
- 5.6. Brand and Reputation
- 5.7. Price
- 6. Maintaining Your J1939 9 Pin Deutsch to OBD2 Cable
- 6.1. Cleaning the Cable
- 6.2. Storing the Cable
- 6.3. Inspecting the Cable
- 6.4. Preventing Common Issues
- 6.5. Replacing the Cable
- 7. Benefits of Using High-Quality J1939 9 Pin Deutsch to OBD2 Cables
- 7.1. Enhanced Reliability
1. Understanding the J1939 9 Pin Deutsch to OBD2 Cable
The J1939 9 pin Deutsch to OBD2 cable is an essential tool for connecting heavy-duty vehicles that use the J1939 communication protocol to standard OBD2 diagnostic equipment. This cable allows technicians and vehicle owners to access critical vehicle data, perform diagnostics, and monitor performance parameters. In this section, we will delve into the purpose, functionality, and benefits of using this cable, highlighting its importance in modern vehicle maintenance and diagnostics.
1.1. Definition and Purpose
The J1939 9 pin Deutsch to OBD2 cable is an adapter that bridges the physical and communication gap between vehicles equipped with a J1939 diagnostic port and standard OBD2 (On-Board Diagnostics II) tools. The primary purpose of this cable is to enable diagnostic tools designed for passenger vehicles to interface with heavy-duty vehicles, such as trucks, buses, and construction equipment, which typically use the J1939 protocol for communication.
This adapter cable ensures that users can read diagnostic trouble codes (DTCs), monitor real-time data, and perform various diagnostic tests on heavy-duty vehicles without needing specialized J1939 diagnostic equipment. According to a study by the Society of Automotive Engineers (SAE), the J1939 standard is widely used in commercial vehicles for its robust communication capabilities.
1.2. Key Features and Specifications
The J1939 9 pin Deutsch to OBD2 cable has several key features that make it a valuable tool for automotive diagnostics:
-
Physical Compatibility: The cable features a 9 pin Deutsch connector on one end, which plugs into the diagnostic port of the heavy-duty vehicle, and an OBD2 connector on the other end, which connects to the diagnostic tool.
-
Wiring Configuration: The cable is wired to correctly map the J1939 communication pins to the corresponding OBD2 pins, ensuring proper data transmission.
-
Durability: High-quality cables are built to withstand the harsh conditions of automotive environments, featuring rugged connectors and durable sheathing to protect the wiring.
-
Compliance: The cable is designed to comply with both J1939 and OBD2 standards, ensuring compatibility and reliable performance.
-
Shielding: Many cables include shielding to minimize electromagnetic interference, which can disrupt data transmission.
1.3. How It Works
The J1939 9 pin Deutsch to OBD2 cable functions by converting the J1939 communication signals into a format that OBD2 diagnostic tools can understand. Here’s a step-by-step explanation of how it works:
-
Physical Connection: The 9 pin Deutsch connector is plugged into the diagnostic port of the heavy-duty vehicle. This port is typically located in the cab or engine compartment.
-
Signal Conversion: The cable routes the J1939 signals (such as CAN High and CAN Low) to the corresponding pins on the OBD2 connector. This ensures that the diagnostic tool receives the correct data.
-
Data Transmission: The OBD2 diagnostic tool reads the data transmitted through the cable, allowing technicians to view diagnostic trouble codes, live sensor data, and other vehicle information.
-
Diagnostic Testing: Technicians can then perform diagnostic tests, such as reading and clearing DTCs, monitoring engine parameters, and conducting component tests.
1.4. Benefits of Using the Cable
Using a J1939 9 pin Deutsch to OBD2 cable offers several benefits:
- Versatility: It allows technicians to use standard OBD2 diagnostic tools on a wide range of heavy-duty vehicles, reducing the need for specialized equipment.
- Cost-Effectiveness: By using a single diagnostic tool for both light-duty and heavy-duty vehicles, shops can save money on equipment costs.
- Efficiency: The cable streamlines the diagnostic process, making it faster and easier to diagnose issues on heavy-duty vehicles.
- Accessibility: It provides access to critical vehicle data, enabling technicians to quickly identify and address problems.
- Compliance: Using a compliant cable ensures that diagnostic procedures meet industry standards and regulations.
1.5. Common Applications
The J1939 9 pin Deutsch to OBD2 cable is used in various applications, including:
- Heavy-Duty Vehicle Diagnostics: Diagnosing engine, transmission, and other system issues on trucks, buses, and construction equipment.
- Fleet Maintenance: Monitoring the performance and health of vehicles in a fleet to ensure timely maintenance and prevent breakdowns.
- Remote Diagnostics: Connecting telematics devices to heavy-duty vehicles for remote monitoring and diagnostics.
- Emissions Testing: Performing emissions testing on heavy-duty vehicles to ensure compliance with environmental regulations.
- Performance Tuning: Accessing engine data for performance tuning and optimization.
By understanding the definition, key features, functionality, benefits, and applications of the J1939 9 pin Deutsch to OBD2 cable, technicians and vehicle owners can leverage this tool to improve vehicle maintenance, diagnostics, and overall performance. For more in-depth information and expert guidance, visit MERCEDES-DIAGNOSTIC-TOOL.EDU.VN, your trusted resource for automotive diagnostic solutions.
2. Identifying the Need for a J1939 9 Pin Deutsch to OBD2 Cable
Recognizing when you need a J1939 9 pin Deutsch to OBD2 cable is crucial for efficient vehicle diagnostics and maintenance. This cable serves as a bridge between heavy-duty vehicles using the J1939 protocol and standard OBD2 diagnostic tools. Knowing the specific scenarios where this cable is necessary can save time and resources, ensuring you have the right equipment for the job. This section will outline the key indicators and situations that signal the need for a J1939 9 pin Deutsch to OBD2 cable.
2.1. Vehicle Type and Diagnostic Port
The primary indicator for needing a J1939 9 pin Deutsch to OBD2 cable is the type of vehicle you are working with and the diagnostic port it uses. Heavy-duty vehicles, such as commercial trucks, buses, construction equipment, and some agricultural machinery, often utilize the J1939 communication protocol. These vehicles are typically equipped with a 9 pin Deutsch diagnostic connector.
If you need to diagnose or retrieve data from such a vehicle and you only have access to standard OBD2 diagnostic tools, then a J1939 9 pin Deutsch to OBD2 cable is essential. The cable allows you to connect the OBD2 tool to the J1939 port, enabling communication and data retrieval.
2.2. Diagnostic Tool Compatibility
Another key indicator is the type of diagnostic tool you intend to use. Standard OBD2 diagnostic scanners, code readers, and other diagnostic equipment are designed to connect to vehicles with an OBD2 port. If you attempt to use such a tool on a vehicle with a 9 pin Deutsch connector, you will quickly realize that the connectors are physically incompatible.
In this scenario, the J1939 9 pin Deutsch to OBD2 cable acts as an adapter, allowing you to use your existing OBD2 tools on heavy-duty vehicles. This eliminates the need to purchase specialized J1939 diagnostic equipment, saving you time and money.
2.3. Symptoms and Issues Requiring Diagnostics
Certain symptoms or issues with a heavy-duty vehicle may also indicate the need for a J1939 9 pin Deutsch to OBD2 cable. These can include:
-
Check Engine Light: If the check engine light is illuminated on the dashboard of a heavy-duty vehicle, it indicates that there is a problem with the engine or related systems. To diagnose the issue, you will need to connect a diagnostic tool to the vehicle’s diagnostic port.
-
Performance Issues: Problems such as reduced power, poor fuel economy, rough idling, or stalling can also necessitate a diagnostic check. These issues may be caused by faulty sensors, malfunctioning components, or other underlying problems that can be identified using a diagnostic tool.
-
Transmission Problems: Issues with the transmission, such as erratic shifting, slipping gears, or failure to shift, can also be diagnosed using a J1939 9 pin Deutsch to OBD2 cable and an OBD2 diagnostic tool.
-
ABS and Brake Issues: Problems with the anti-lock braking system (ABS) or other brake-related issues can also be diagnosed using this cable, allowing you to read ABS codes and monitor brake system parameters.
2.4. Fleet Maintenance and Management
For fleet managers and maintenance personnel, the J1939 9 pin Deutsch to OBD2 cable is an indispensable tool. It allows you to use standard OBD2 diagnostic tools to monitor the health and performance of your entire fleet of heavy-duty vehicles. This can help you identify potential problems early on, schedule maintenance proactively, and minimize downtime.
By regularly scanning your fleet vehicles for diagnostic trouble codes (DTCs) and monitoring live data, you can ensure that your vehicles are operating efficiently and reliably. This can also help you comply with industry regulations and safety standards.
2.5. Remote Diagnostics and Telematics
In some cases, you may need to perform remote diagnostics on a heavy-duty vehicle. This can be useful for troubleshooting issues remotely, monitoring vehicle performance in real-time, or providing support to drivers on the road.
A J1939 9 pin Deutsch to OBD2 cable can be used in conjunction with telematics devices to enable remote diagnostics. These devices connect to the vehicle’s diagnostic port and transmit data to a remote server, allowing you to monitor vehicle parameters, read DTCs, and perform other diagnostic functions from afar.
2.6. Regulatory Compliance and Emissions Testing
Many jurisdictions require heavy-duty vehicles to undergo regular emissions testing to ensure compliance with environmental regulations. A J1939 9 pin Deutsch to OBD2 cable can be used to connect the vehicle to an emissions testing machine, allowing you to retrieve the necessary data and perform the required tests.
By using this cable, you can ensure that your heavy-duty vehicles meet the necessary emissions standards and avoid costly fines or penalties.
2.7. Upgrading Diagnostic Capabilities
If you are a technician or vehicle owner looking to expand your diagnostic capabilities, a J1939 9 pin Deutsch to OBD2 cable can be a valuable addition to your toolkit. It allows you to work on a wider range of vehicles and perform more comprehensive diagnostics.
By investing in this cable, you can offer your customers a more complete range of services and stay ahead of the curve in the ever-evolving world of automotive diagnostics.
Identifying the need for a J1939 9 pin Deutsch to OBD2 cable involves considering the vehicle type, diagnostic tool compatibility, symptoms and issues, fleet maintenance requirements, remote diagnostic needs, regulatory compliance, and your desire to upgrade diagnostic capabilities. For expert advice and a wide selection of diagnostic tools, visit MERCEDES-DIAGNOSTIC-TOOL.EDU.VN, your trusted partner in automotive diagnostics.
3. Connecting a J1939 9 Pin Deutsch to OBD2 Cable: A Step-by-Step Guide
Connecting a J1939 9 pin Deutsch to OBD2 cable is a straightforward process that allows you to interface standard OBD2 diagnostic tools with heavy-duty vehicles. This step-by-step guide will walk you through the entire procedure, ensuring a successful connection and accurate data retrieval. Whether you’re a seasoned technician or a vehicle owner, following these instructions will help you confidently perform diagnostics on a wide range of vehicles.
3.1. Gathering Necessary Tools and Equipment
Before you begin, ensure you have the following tools and equipment:
- J1939 9 pin Deutsch to OBD2 Cable: This is the primary adapter that bridges the connection between the heavy-duty vehicle and the diagnostic tool. Ensure the cable is in good condition, with no visible damage to the connectors or wiring.
- OBD2 Diagnostic Tool: This can be a scan tool, code reader, or any other diagnostic device designed to connect to a standard OBD2 port. Make sure the tool is fully charged or has a reliable power source.
- Vehicle: The heavy-duty vehicle you intend to diagnose. Ensure the vehicle is parked in a safe location and the engine is turned off.
- Vehicle Manual (Optional): Having the vehicle’s manual can be helpful for locating the diagnostic port and understanding specific vehicle information.
- Personal Protective Equipment (PPE): Gloves and safety glasses can protect you from potential hazards in the vehicle’s environment.
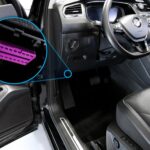
3.2. Locating the Diagnostic Port
The first step is to locate the diagnostic port on the heavy-duty vehicle. The location of this port can vary depending on the vehicle make and model, but it is typically found in one of the following locations:
- Under the Dashboard: Similar to passenger vehicles, some heavy-duty vehicles may have the diagnostic port located under the dashboard, near the steering column.
- In the Engine Compartment: The diagnostic port may be located in the engine compartment, near the engine control unit (ECU) or other major components.
- Inside the Cab: In some cases, the diagnostic port may be located inside the cab, often near the driver’s seat or in a central console.
Refer to the vehicle’s manual or consult a reliable online resource to pinpoint the exact location of the diagnostic port.
3.3. Connecting the J1939 End of the Cable
Once you have located the diagnostic port, take the J1939 end of the cable (the end with the 9 pin Deutsch connector) and carefully align it with the diagnostic port. Ensure that the connector is properly oriented before attempting to plug it in.
Push the connector firmly into the diagnostic port until it clicks or locks into place. This ensures a secure connection and prevents the cable from coming loose during the diagnostic process.
3.4. Connecting the OBD2 End of the Cable
Next, take the OBD2 end of the cable (the end with the standard OBD2 connector) and connect it to your OBD2 diagnostic tool. Again, ensure that the connector is properly aligned before attempting to plug it in.
Push the connector firmly into the OBD2 port on the diagnostic tool until it clicks or locks into place. This establishes a secure connection between the cable and the diagnostic tool.
3.5. Powering On the Diagnostic Tool
With both ends of the cable securely connected, power on your OBD2 diagnostic tool. The tool may require you to enter some basic information about the vehicle, such as the make, model, and year. Follow the tool’s instructions to complete the setup process.
3.6. Starting the Vehicle (If Required)
In some cases, the diagnostic tool may require you to start the vehicle’s engine in order to retrieve data or perform certain tests. Follow the tool’s instructions to determine whether or not you need to start the engine.
If the tool does require you to start the engine, ensure that the vehicle is in a well-ventilated area and that all safety precautions are followed.
3.7. Retrieving and Interpreting Data
Once the diagnostic tool is powered on and connected to the vehicle, you can begin retrieving and interpreting data. The tool will typically display a menu of options, such as reading diagnostic trouble codes (DTCs), viewing live data, performing component tests, and clearing codes.
Select the appropriate option from the menu and follow the tool’s instructions to retrieve the desired data. The tool will then display the data on its screen, allowing you to analyze and interpret the results.
3.8. Disconnecting the Cable
When you have finished retrieving and interpreting data, you can disconnect the cable from the vehicle and the diagnostic tool. First, power off the diagnostic tool and disconnect it from the OBD2 end of the cable.
Then, disconnect the J1939 end of the cable from the vehicle’s diagnostic port. Be careful not to pull on the cable itself, as this could damage the connectors or wiring. Instead, gently push the release mechanism on the connector (if there is one) and pull the connector straight out of the port.
3.9. Storing the Cable Properly
To ensure the longevity of your J1939 9 pin Deutsch to OBD2 cable, store it properly when not in use. Coil the cable loosely and secure it with a zip tie or Velcro strap. Avoid bending the cable sharply or exposing it to extreme temperatures or moisture.
By following these steps, you can successfully connect a J1939 9 pin Deutsch to OBD2 cable and perform diagnostics on heavy-duty vehicles using standard OBD2 tools. For expert guidance and a wide range of diagnostic solutions, visit MERCEDES-DIAGNOSTIC-TOOL.EDU.VN, your trusted resource for automotive diagnostics.
4. Troubleshooting Common Issues with J1939 9 Pin Deutsch to OBD2 Cables
Even with careful use, you may encounter issues when using a J1939 9 pin Deutsch to OBD2 cable. Troubleshooting these problems efficiently ensures you can perform accurate diagnostics and minimize downtime. This section outlines common issues, their potential causes, and practical solutions to help you get back on track. Whether you’re dealing with connection problems, data errors, or tool incompatibility, this guide will provide the troubleshooting steps you need.
4.1. Connection Problems
One of the most common issues is difficulty establishing a connection between the diagnostic tool and the vehicle. This can manifest as the tool not recognizing the vehicle, failing to retrieve data, or displaying a “connection error” message.
-
Possible Causes:
- Loose or Damaged Connectors: The connectors on the cable or the diagnostic port on the vehicle may be loose, corroded, or damaged.
- Incorrect Cable: You may be using the wrong type of cable or an incompatible adapter.
- Faulty Wiring: There may be a break or short in the wiring within the cable.
- Power Issues: The diagnostic tool may not be receiving enough power, or the vehicle’s battery may be weak.
-
Troubleshooting Steps:
- Inspect Connectors: Check the connectors on both ends of the cable and the diagnostic port on the vehicle for any signs of damage, corrosion, or loose pins. Clean the connectors with a contact cleaner if necessary.
- Verify Cable Compatibility: Ensure that you are using the correct type of J1939 9 pin Deutsch to OBD2 cable for your vehicle and diagnostic tool. Consult the vehicle’s manual or the tool’s documentation for compatibility information.
- Check Wiring: Inspect the cable for any signs of damage, such as cuts, abrasions, or exposed wires. If you suspect a break or short in the wiring, use a multimeter to test the continuity of each wire.
- Verify Power: Ensure that the diagnostic tool is receiving enough power from its power source (e.g., battery, cigarette lighter, or AC adapter). Check the vehicle’s battery voltage to ensure it is within the specified range.
- Try a Different Port: If possible, try connecting the cable to a different diagnostic port on the vehicle to rule out a problem with the port itself.
- Test with Another Vehicle: If you have access to another heavy-duty vehicle, try connecting the cable and diagnostic tool to that vehicle to see if the problem persists.
- Replace the Cable: If you have exhausted all other troubleshooting steps and the connection problem persists, the cable itself may be faulty and need to be replaced.
4.2. Data Errors
Another common issue is the diagnostic tool displaying incorrect or incomplete data. This can manifest as inaccurate sensor readings, missing diagnostic trouble codes (DTCs), or garbled information.
-
Possible Causes:
- Incorrect Protocol: The diagnostic tool may be using the wrong communication protocol for the vehicle.
- Software Glitches: The diagnostic tool’s software may have a glitch or bug that is causing it to misinterpret the data.
- Faulty Sensors: One or more of the vehicle’s sensors may be faulty, causing them to send incorrect data to the diagnostic tool.
- Electromagnetic Interference (EMI): EMI from nearby sources may be interfering with the data transmission.
-
Troubleshooting Steps:
- Verify Protocol: Ensure that the diagnostic tool is using the correct communication protocol for the vehicle. Consult the vehicle’s manual or the tool’s documentation for protocol information.
- Update Software: Check for software updates for your diagnostic tool and install them if available. Software updates often include bug fixes and improvements that can resolve data error issues.
- Check Sensors: Use the diagnostic tool to monitor the readings from the vehicle’s sensors. If you notice any readings that are out of range or inconsistent, the sensor may be faulty and need to be replaced.
- Minimize EMI: Move the diagnostic tool and cable away from potential sources of EMI, such as power lines, radio transmitters, and electric motors.
- Test with Another Tool: If possible, try connecting the cable to a different diagnostic tool to see if the data errors persist. This can help you determine whether the problem is with the cable or the tool itself.
- Consult a Professional: If you are unable to resolve the data errors, consult a qualified technician or diagnostic specialist for assistance.
4.3. Tool Incompatibility
In some cases, the diagnostic tool may simply be incompatible with the J1939 9 pin Deutsch to OBD2 cable or the vehicle’s communication protocol. This can manifest as the tool not recognizing the vehicle, displaying an “incompatible” message, or failing to retrieve any data at all.
-
Possible Causes:
- Limited Protocol Support: The diagnostic tool may not support the J1939 communication protocol or the specific protocol used by the vehicle.
- Outdated Software: The diagnostic tool’s software may be outdated and not recognize the J1939 9 pin Deutsch to OBD2 cable or the vehicle’s communication protocol.
- Hardware Limitations: The diagnostic tool’s hardware may not be capable of communicating with the J1939 protocol.
-
Troubleshooting Steps:
- Verify Compatibility: Before using a diagnostic tool with a J1939 9 pin Deutsch to OBD2 cable, ensure that the tool is compatible with the J1939 communication protocol and the specific protocol used by the vehicle. Consult the tool’s documentation or the manufacturer’s website for compatibility information.
- Update Software: Check for software updates for your diagnostic tool and install them if available. Software updates often include support for new protocols and adapters.
- Use a Compatible Tool: If your diagnostic tool is not compatible with the J1939 protocol, you may need to purchase a different tool that is specifically designed for heavy-duty vehicles and supports the J1939 protocol.
- Consult a Professional: If you are unsure whether a particular diagnostic tool is compatible with the J1939 9 pin Deutsch to OBD2 cable or the vehicle’s communication protocol, consult a qualified technician or diagnostic specialist for assistance.
4.4. Other Potential Issues
In addition to the common issues listed above, there are a few other potential problems that you may encounter when using a J1939 9 pin Deutsch to OBD2 cable:
- Intermittent Connection: The connection between the cable and the vehicle or diagnostic tool may be intermittent, causing the data to drop out or the tool to lose communication.
- Cable Length: The cable may be too long, causing signal degradation and data errors.
- Environmental Factors: Extreme temperatures, humidity, or exposure to chemicals may damage the cable or connectors.
To troubleshoot these issues, try the following steps:
- Check Cable Routing: Ensure that the cable is not routed near any sources of heat, chemicals, or sharp edges that could damage it.
- Use a Shorter Cable: If possible, try using a shorter cable to minimize signal degradation.
- Protect the Cable: Protect the cable from extreme temperatures, humidity, and exposure to chemicals.
- Replace the Cable: If the intermittent connection persists or the cable shows signs of damage, replace it with a new one.
By following these troubleshooting steps, you can quickly identify and resolve common issues with J1939 9 pin Deutsch to OBD2 cables, ensuring accurate and efficient vehicle diagnostics. For expert guidance and a wide range of diagnostic solutions, visit MERCEDES-DIAGNOSTIC-TOOL.EDU.VN, your trusted resource for automotive diagnostics.
5. Choosing the Right J1939 9 Pin Deutsch to OBD2 Cable
Selecting the appropriate J1939 9 pin Deutsch to OBD2 cable is crucial for ensuring seamless connectivity and accurate diagnostics. With various options available, understanding the key factors to consider will help you make an informed decision. This section will guide you through the essential aspects of choosing the right cable, including quality, compatibility, and specific application needs.
5.1. Quality and Durability
The quality and durability of the J1939 9 pin Deutsch to OBD2 cable are paramount, as they directly impact its reliability and longevity. A high-quality cable is constructed using durable materials and robust connectors that can withstand the harsh conditions of automotive environments.
-
Material: Look for cables made with high-quality copper wiring and rugged sheathing materials, such as polyurethane (PUR) or thermoplastic elastomer (TPE). These materials offer excellent resistance to abrasion, chemicals, and extreme temperatures.
-
Connectors: The connectors should be made from durable materials, such as brass or stainless steel, and feature a secure locking mechanism to prevent accidental disconnections. The pins should be gold-plated to resist corrosion and ensure reliable signal transmission.
-
Shielding: Choose a cable with shielding to minimize electromagnetic interference (EMI), which can disrupt data transmission and lead to inaccurate readings. The shielding should be effective at blocking out EMI from nearby sources, such as power lines, radio transmitters, and electric motors.
-
Construction: The cable should be constructed with a robust design that can withstand repeated bending, twisting, and pulling. Look for cables with reinforced strain relief at the connectors to prevent damage to the wiring.
5.2. Compatibility
Compatibility is another crucial factor to consider when choosing a J1939 9 pin Deutsch to OBD2 cable. The cable must be compatible with both the vehicle and the diagnostic tool that you intend to use.
-
Vehicle Compatibility: Ensure that the cable is compatible with the make, model, and year of the heavy-duty vehicle that you are working on. Some cables may only be compatible with certain vehicles or engine types.
-
Diagnostic Tool Compatibility: Verify that the cable is compatible with the diagnostic tool that you intend to use. Some tools may require specific cables or adapters to function properly.
-
Protocol Compatibility: Ensure that the cable supports the communication protocols used by the vehicle and the diagnostic tool. The J1939 protocol is widely used in heavy-duty vehicles, but some vehicles may also use other protocols, such as J1708 or CAN.
5.3. Cable Length
The length of the J1939 9 pin Deutsch to OBD2 cable is another important consideration. The ideal cable length will depend on the specific application and the distance between the vehicle’s diagnostic port and the diagnostic tool.
-
Shorter Cables: Shorter cables (e.g., 3 feet or less) are typically used for on-vehicle diagnostics, where the diagnostic tool is located close to the vehicle’s diagnostic port. Shorter cables are less prone to signal degradation and EMI.
-
Longer Cables: Longer cables (e.g., 6 feet or more) are used for remote diagnostics or when the diagnostic tool needs to be located further away from the vehicle. Longer cables may require shielding to minimize signal degradation and EMI.
Choose a cable length that is appropriate for your specific application. Avoid using excessively long cables, as they can increase the risk of signal degradation and data errors.
5.4. Connector Type
The J1939 9 pin Deutsch to OBD2 cable features two different connector types: a 9 pin Deutsch connector and an OBD2 connector. Ensure that the connectors are compatible with the ports on the vehicle and the diagnostic tool.
-
9 Pin Deutsch Connector: This connector is typically used on heavy-duty vehicles with a J1939 diagnostic port. The connector features a round, 9 pin design with a locking mechanism to ensure a secure connection.
-
OBD2 Connector: This connector is used on standard OBD2 diagnostic tools. The connector features a trapezoidal, 16 pin design that is compatible with most OBD2 scanners and code readers.
5.5. Special Features
Some J1939 9 pin Deutsch to OBD2 cables may offer special features that can enhance their functionality and ease of use.
-
LED Indicators: Some cables feature LED indicators that provide visual feedback on the connection status and data transmission.
-
Switchable Termination Resistors: Some cables offer switchable termination resistors that can be used to optimize the communication signal.
-
Overvoltage Protection: Some cables feature overvoltage protection to protect the diagnostic tool from damage in case of a voltage surge.
5.6. Brand and Reputation
When choosing a J1939 9 pin Deutsch to OBD2 cable, it is important to consider the brand and reputation of the manufacturer. Choose a cable from a reputable brand with a proven track record of producing high-quality, reliable products.
Read online reviews and consult with other technicians or vehicle owners to get their opinions on different brands and models of cables.
5.7. Price
The price of a J1939 9 pin Deutsch to OBD2 cable can vary depending on the quality, features, and brand. While it is important to stay within your budget, do not sacrifice quality for price. A cheap, poorly made cable may not function properly or may fail prematurely, costing you more money in the long run.
Invest in a high-quality cable from a reputable brand to ensure reliable performance and long-term durability.
By considering these factors, you can choose the right J1939 9 pin Deutsch to OBD2 cable for your specific needs and ensure seamless connectivity and accurate diagnostics. For expert guidance and a wide range of diagnostic solutions, visit MERCEDES-DIAGNOSTIC-TOOL.EDU.VN, your trusted resource for automotive diagnostics.
6. Maintaining Your J1939 9 Pin Deutsch to OBD2 Cable
Proper maintenance of your J1939 9 pin Deutsch to OBD2 cable is essential for ensuring its longevity and reliable performance. Regular care and attention can prevent damage, corrosion, and other issues that can compromise the cable’s functionality. This section provides a comprehensive guide to maintaining your cable, including cleaning, storage, and inspection tips.
6.1. Cleaning the Cable
Keeping your J1939 9 pin Deutsch to OBD2 cable clean is crucial for preventing corrosion and ensuring a good connection. Dust, dirt, and grime can accumulate on the connectors and wiring, leading to poor signal transmission and inaccurate readings.
-
Frequency: Clean the cable regularly, especially after use in dirty or dusty environments.
-
Materials: Use a soft, lint-free cloth and a mild cleaning solution, such as isopropyl alcohol or electronic contact cleaner. Avoid using harsh chemicals or abrasive cleaners, as they can damage the cable’s sheathing and connectors.
-
Procedure:
- Disconnect the cable from the vehicle and the diagnostic tool.
- Inspect the cable for any visible dirt, dust, or grime.
- Dampen the cloth with the cleaning solution and gently wipe down the cable and connectors.
- Pay special attention to the pins on the connectors, as these are critical for signal transmission.
- Use a cotton swab or a small brush to clean any hard-to-reach areas.
- Allow the cable to air dry completely before storing it.
6.2. Storing the Cable
Proper storage of your J1939 9 pin Deutsch to OBD2 cable is essential for preventing damage and prolonging its lifespan. Improper storage can lead to kinking, twisting, and other forms of damage that can compromise the cable’s functionality.
- Coiling: Coil the cable loosely, avoiding tight bends or sharp angles.
- Securing: Secure the coiled cable with a Velcro strap or zip tie to prevent it from unraveling.
- Location: Store the cable in a clean, dry place away from direct sunlight, extreme temperatures, and moisture. Avoid storing the cable in a toolbox or other location where it may be subjected to rough handling or abrasion.
- Protection: Consider storing the cable in a protective case or bag to prevent it from being damaged by other tools or equipment.
6.3. Inspecting the Cable
Regular inspection of your J1939 9 pin Deutsch to OBD2 cable is crucial for identifying potential problems before they lead to data errors or connection failures.
-
Frequency: Inspect the cable regularly, especially before each use.
-
Visual Inspection:
- Check the cable for any signs of damage, such as cuts, abrasions, or exposed wires.
- Inspect the connectors for any signs of damage, corrosion, or loose pins.
- Ensure that the cable’s sheathing is intact and not cracked or brittle.
- Look for any signs of kinking, twisting, or other forms of damage that could compromise the cable’s functionality.
-
Electrical Testing:
- Use a multimeter to test the continuity of each wire in the cable. This can help you identify any breaks or shorts in the wiring.
- Check the resistance of the termination resistors (if applicable) to ensure that they are within the specified range.
6.4. Preventing Common Issues
In addition to cleaning, storing, and inspecting your J1939 9 pin Deutsch to OBD2 cable, there are several other steps you can take to prevent common issues and prolong its lifespan:
- Avoid Overbending: Avoid bending the cable sharply or repeatedly, as this can damage the wiring and connectors.
- Use Strain Relief: Use strain relief devices, such as cable glands or tie wraps, to prevent the cable from being pulled or strained at the connectors.
- Protect from Chemicals: Protect the cable from exposure to harsh chemicals, such as solvents, acids, and alkalis, as these can damage the cable’s sheathing and connectors.
- Avoid Extreme Temperatures: Avoid exposing the cable to extreme temperatures, as this can cause the sheathing to crack or become brittle.
- Use a Surge Protector: Use a surge protector to protect the diagnostic tool from damage in case of a voltage surge.
6.5. Replacing the Cable
Even with proper maintenance, your J1939 9 pin Deutsch to OBD2 cable will eventually wear out and need to be replaced. The lifespan of a cable can vary depending on its quality, usage, and environmental conditions.
-
Signs of Wear:
- Frequent connection failures or data errors
- Visible damage to the cable or connectors
- Corrosion or loose pins on the connectors
- Cracked or brittle sheathing
- Intermittent continuity or resistance readings
-
Replacement: When replacing your J1939 9 pin Deutsch to OBD2 cable, choose a high-quality replacement from a reputable brand to ensure reliable performance and long-term durability.
By following these maintenance tips, you can keep your J1939 9 pin Deutsch to OBD2 cable in good condition and ensure reliable performance for years to come. For expert guidance and a wide range of diagnostic solutions, visit MERCEDES-DIAGNOSTIC-TOOL.EDU.VN, your trusted resource for automotive diagnostics.
7. Benefits of Using High-Quality J1939 9 Pin Deutsch to OBD2 Cables
Investing in a high-quality J1939 9 pin Deutsch to OBD2 cable offers numerous benefits that can significantly enhance your diagnostic capabilities and overall efficiency. While it may be tempting to opt for cheaper alternatives, the long-term advantages of a superior cable far outweigh the initial cost savings. This section explores the key benefits of using high-quality cables, including reliability, accuracy, durability, and safety.
7.1. Enhanced Reliability
One of the most significant benefits of using a high-quality J1939 9