Checking lighting systems (headlights, taillights) is crucial for road safety and can be easily done regularly. At MERCEDES-DIAGNOSTIC-TOOL.EDU.VN, we provide comprehensive guidance on maintaining your Mercedes-Benz lighting systems, ensuring optimal visibility and preventing potential hazards. Regular inspections can also reveal underlying electrical issues.
Contents
- 1. Understanding the Importance of Lighting System Checks
- 1.1. Why Regular Checks Are Essential
- 1.2. Components of a Vehicle Lighting System
- 2. Step-by-Step Guide on Checking Lighting Systems
- 2.1. Gathering Necessary Tools
- 2.2. Inspecting Headlights
- 2.3. Examining Taillights and Brake Lights
- 2.4. Testing Turn Signals and Hazard Lights
- 2.5. Checking Other Lights
- 3. Troubleshooting Common Lighting Issues
- 3.1. Replacing a Burnt-Out Bulb
- 3.2. Addressing Flickering Lights
- 3.3. Dealing with Dim Lights
- 3.4. Solving Issues with Lights Not Turning On
- 4. Upgrading to LED Headlights: Benefits and Considerations
- 4.1. Advantages of LED Headlights
- 4.2. Compatibility and Installation
- 4.3. Potential Issues and Solutions
- 5. Advanced Diagnostic Tools for Mercedes-Benz Lighting Systems
- 5.1. Overview of Diagnostic Tools
- 5.2. Key Features and Capabilities
- 5.3. Using Diagnostic Tools for Lighting System Checks
- 6. Regular Maintenance Tips for Mercedes-Benz Lighting Systems
- 6.1. Cleaning Headlight and Taillight Lenses
- 6.2. Inspecting Wiring and Connections
- 6.3. Monitoring Battery Health
- 6.4. Ensuring Proper Headlight Alignment
- 7. When to Seek Professional Help
- 7.1. Complex Electrical Issues
- 7.2. Aftermarket Modifications
- 7.3. Dashboard Warning Lights
- 8. Legal and Safety Considerations
- 8.1. Understanding Local Regulations
- 8.2. Safety Tips for Working with Electrical Systems
- 9. The Role of MERCEDES-DIAGNOSTIC-TOOL.EDU.VN in Maintaining Your Mercedes-Benz
- 9.1. Providing Expert Guidance
- 9.2. Offering Diagnostic Services
- 9.3. Resources and Support
- 10. Frequently Asked Questions (FAQ)
- 10.1. How Often Should I Check My Mercedes-Benz Lighting Systems?
- 10.2. What Are the Signs of a Failing Headlight Bulb?
- 10.3. Can I Replace Halogen Bulbs with LED Bulbs in My Mercedes-Benz?
- 10.4. What Should I Do If My Headlights Are Not Properly Aligned?
- 10.5. How Can I Prevent My Headlight Lenses from Becoming Cloudy?
- 10.6. What Is the Best Way to Clean Corrosion from Electrical Connections?
- 10.7. Why Are My Fuses Keep Blowing?
- 10.8. What Are Daytime Running Lights (DRLs) and Why Are They Important?
- 10.9. How Can I Test My Brake Lights?
- 10.10. What Diagnostic Tool Do You Recommend for Checking My Mercedes-Benz Lighting System?
1. Understanding the Importance of Lighting System Checks
Your vehicle’s lighting system, including headlights and taillights, is paramount for safe driving. These lights ensure visibility in various conditions and communicate your intentions to other drivers. Proper maintenance and regular checks are essential for preventing accidents and ensuring compliance with traffic laws.
According to the National Highway Traffic Safety Administration (NHTSA), faulty lighting is a contributing factor in a significant number of accidents each year. Regular checks can significantly reduce this risk.
1.1. Why Regular Checks Are Essential
Regular lighting checks are essential for several reasons:
- Safety: Ensures you can see and be seen by other drivers, reducing the risk of accidents.
- Legal Compliance: Many jurisdictions require all vehicle lights to be in working order.
- Early Issue Detection: Helps identify potential electrical problems before they escalate.
- Cost Savings: Prevents more extensive repairs by addressing minor issues promptly.
1.2. Components of a Vehicle Lighting System
A comprehensive understanding of the components that comprise your vehicle’s lighting system is essential for effective maintenance and troubleshooting. The primary components include:
- Headlights: Provide forward illumination for driving at night or in low-visibility conditions.
- Taillights: Signal the vehicle’s presence to drivers behind, particularly in low-light or adverse weather conditions.
- Brake Lights: Located within the taillight assembly, these illuminate when the brake pedal is engaged, alerting drivers behind of your intention to slow down or stop.
- Turn Signals: Communicate your intention to turn or change lanes, enhancing safety by providing clear signals to other drivers.
- Hazard Lights: Utilized to warn other drivers of potential hazards or emergency situations, increasing visibility and safety on the road.
- Daytime Running Lights (DRLs): Designed to automatically activate during the day, enhancing vehicle visibility and safety by ensuring the vehicle is easily seen by others.
- Fog Lights: Offer improved visibility in foggy or low-visibility conditions, contributing to safer driving in adverse weather.
- Interior Lights: Provide illumination inside the vehicle for passengers, enhancing convenience and safety during nighttime or low-light conditions.
Understanding the functions of each component ensures thorough inspections and timely maintenance, contributing to overall vehicle safety.
2. Step-by-Step Guide on Checking Lighting Systems
Regularly inspecting your vehicle’s lighting systems is a straightforward process that can significantly enhance safety. Follow these steps to ensure all lights are functioning correctly:
2.1. Gathering Necessary Tools
Before starting the inspection, gather the following tools:
- Gloves: Protect your hands from dirt and grease.
- Clean Cloth: For cleaning lenses and removing debris.
- Screwdriver Set: For accessing and replacing bulbs.
- Replacement Bulbs: Keep a set of spare bulbs on hand.
- Multimeter: For testing electrical connections (optional).
2.2. Inspecting Headlights
To inspect the headlights, follow these steps:
- Turn on the Headlights: Activate both low and high beams.
- Walk Around the Vehicle: Check the brightness and alignment of each headlight.
- Check for Cracks or Damage: Inspect the lenses for any visible damage.
- Test High Beams: Ensure high beams provide a broader, more intense light.
- Examine the Reflectors: Check for any signs of damage or discoloration.
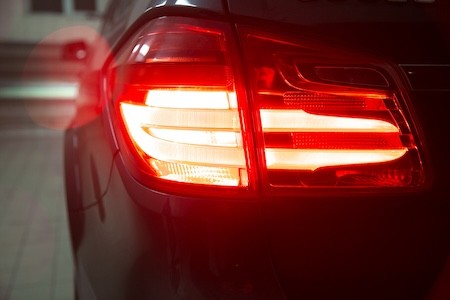
2.3. Examining Taillights and Brake Lights
Follow these steps to inspect the taillights and brake lights:
- Turn on the Taillights: Ensure they illuminate when the headlights are on.
- Engage the Brakes: Have someone press the brake pedal while you check the brake lights.
- Inspect for Dimness or Flickering: Look for any signs of malfunction.
- Check the Lenses: Ensure they are clean and free of cracks.
2.4. Testing Turn Signals and Hazard Lights
To test the turn signals and hazard lights, follow these steps:
- Activate Turn Signals: Check both left and right turn signals.
- Ensure Proper Blinking: Verify the signals blink at a consistent rate.
- Test Hazard Lights: Activate the hazard lights to ensure all lights flash simultaneously.
- Listen for the Relay Click: The relay should click at a steady pace.
2.5. Checking Other Lights
Don’t forget to check the following lights:
- License Plate Lights: Ensure the license plate is clearly illuminated.
- Parking Lights: Check that they function properly.
- Fog Lights: If equipped, test the fog lights for functionality.
- Interior Lights: Ensure all interior lights are working.
 Inspecting Mercedes-Benz headlights for proper function and brightness
3. Troubleshooting Common Lighting Issues
Addressing common lighting issues promptly can prevent more significant problems. Here are some troubleshooting tips:
3.1. Replacing a Burnt-Out Bulb
Replacing a burnt-out bulb is a simple task:
- Turn Off the Vehicle: Ensure the vehicle is turned off and the lights are cool.
- Access the Bulb: Remove any covers or panels to access the bulb.
- Remove the Old Bulb: Twist or unclip the old bulb, depending on the design.
- Insert the New Bulb: Insert the new bulb and secure it in place.
- Test the Light: Turn on the lights to ensure the new bulb is working.
3.2. Addressing Flickering Lights
Flickering lights can indicate several issues:
- Loose Connection: Check the bulb and wiring connections.
- Voltage Drop: Test the voltage at the bulb socket.
- Faulty Ground: Ensure the ground connection is secure and clean.
3.3. Dealing with Dim Lights
Dim lights can be caused by:
- Oxidation: Clean the bulb socket and contacts.
- Low Voltage: Check the battery and charging system.
- Faulty Bulb: Replace the bulb with a new one.
3.4. Solving Issues with Lights Not Turning On
If lights fail to turn on, check the following:
- Blown Fuse: Replace any blown fuses with the correct amperage.
- Faulty Switch: Test the switch for continuity.
- Wiring Issues: Inspect the wiring for damage or corrosion.
4. Upgrading to LED Headlights: Benefits and Considerations
Upgrading to LED headlights is a popular choice for improving visibility and aesthetics. However, it’s essential to consider the benefits and potential drawbacks.
4.1. Advantages of LED Headlights
- Enhanced Brightness: LEDs provide a brighter and clearer light.
- Energy Efficiency: LEDs consume less power than halogen bulbs.
- Extended Lifespan: LEDs last significantly longer than traditional bulbs.
- Modern Appearance: LEDs offer a sleek, modern look.
4.2. Compatibility and Installation
Before upgrading, consider the following:
- Vehicle Compatibility: Ensure the LED bulbs are compatible with your vehicle.
- Installation Requirements: Some vehicles may require additional components.
- Legal Compliance: Check local regulations regarding headlight modifications.
- Beam Pattern Alignment: Ensure the beam pattern is properly aligned to avoid blinding other drivers.
4.3. Potential Issues and Solutions
- Flickering: Use a CANbus adapter to prevent flickering.
- Error Codes: Ensure the LEDs are compatible with your vehicle’s computer system.
- Overheating: Use LED bulbs with built-in cooling systems or heat sinks.
| Factor | Halogen Bulbs | LED Bulbs |
|---|---|---|
| Brightness | Moderate | High |
| Energy Efficiency | Low | High |
| Lifespan | Short (around 1,000 hours) | Long (up to 20,000 hours or more) |
| Cost | Low | High |
| Installation | Simple | Can be complex, may require adapters |
| Aesthetic | Standard | Modern |
5. Advanced Diagnostic Tools for Mercedes-Benz Lighting Systems
For Mercedes-Benz vehicles, advanced diagnostic tools can provide detailed insights into the lighting system. These tools can help identify specific faults and streamline the troubleshooting process.
5.1. Overview of Diagnostic Tools
- Mercedes-Benz Star Diagnosis: Official diagnostic system for Mercedes-Benz vehicles.
- Autel MaxiSys Elite: Comprehensive diagnostic tool with advanced capabilities.
- iCarsoft MB V3.0: User-friendly tool for diagnosing Mercedes-Benz vehicles.
- Launch X431 V+: Versatile diagnostic tool with wide vehicle coverage.
5.2. Key Features and Capabilities
- Fault Code Reading: Identifies specific issues within the lighting system.
- Live Data Streaming: Provides real-time data on voltage, current, and sensor readings.
- Component Testing: Allows individual testing of lighting components.
- Adaptation and Coding: Enables coding and adaptation of new lighting components.
5.3. Using Diagnostic Tools for Lighting System Checks
- Connect the Tool: Connect the diagnostic tool to the vehicle’s OBD-II port.
- Select the Vehicle Model: Choose the correct Mercedes-Benz model and year.
- Access the Lighting System: Navigate to the lighting system menu.
- Read Fault Codes: Retrieve any stored fault codes.
- Interpret the Codes: Use the tool’s database to interpret the fault codes.
- Perform Component Testing: Test individual components as needed.
- Clear Fault Codes: Clear the fault codes after addressing the issues.
6. Regular Maintenance Tips for Mercedes-Benz Lighting Systems
Maintaining your Mercedes-Benz lighting systems extends their lifespan and ensures optimal performance.
6.1. Cleaning Headlight and Taillight Lenses
- Use a Soft Cloth: Clean the lenses with a soft, non-abrasive cloth.
- Mild Soap and Water: Use mild soap and water to remove dirt and debris.
- Avoid Harsh Chemicals: Avoid using harsh chemicals that can damage the lenses.
- Regular Cleaning: Clean the lenses regularly, especially after driving in dirty conditions.
6.2. Inspecting Wiring and Connections
- Check for Corrosion: Inspect wiring and connections for corrosion.
- Secure Connections: Ensure all connections are secure and tight.
- Replace Damaged Wires: Replace any damaged or frayed wires.
- Use Dielectric Grease: Apply dielectric grease to prevent corrosion.
6.3. Monitoring Battery Health
- Regular Testing: Test the battery regularly to ensure it is providing adequate voltage.
- Clean Terminals: Clean the battery terminals to prevent corrosion.
- Proper Charging: Ensure the battery is properly charged.
- Replace When Needed: Replace the battery when it is no longer holding a charge.
6.4. Ensuring Proper Headlight Alignment
Proper headlight alignment is crucial for visibility and safety.
- Check Alignment Regularly: Check the alignment periodically.
- Use a Headlight Aiming Tool: Use a headlight aiming tool for accurate alignment.
- Adjust as Needed: Adjust the headlights as needed to ensure proper alignment.
7. When to Seek Professional Help
While many lighting issues can be resolved with DIY methods, certain problems require professional attention.
7.1. Complex Electrical Issues
- Flickering or Dim Lights: Persistent flickering or dim lights.
- Lights Not Turning On: Lights that fail to turn on even after replacing bulbs.
- Burning Smell or Smoke: Any signs of burning smell or smoke.
- Repeatedly Blown Fuses: Fuses that blow repeatedly.
7.2. Aftermarket Modifications
- Installation Problems: Issues arising after installing aftermarket lighting components.
- Compatibility Issues: Problems with aftermarket components not working properly.
- Electrical Damage: Any electrical damage caused by aftermarket components.
7.3. Dashboard Warning Lights
- Lighting System Warnings: Any dashboard warning lights related to the lighting system.
- Electrical System Warnings: Warnings related to the electrical system.
8. Legal and Safety Considerations
Ensuring your vehicle’s lighting systems comply with legal and safety standards is crucial.
8.1. Understanding Local Regulations
- Headlight Requirements: Know the requirements for headlight brightness and alignment.
- Taillight Requirements: Understand the regulations for taillight visibility.
- Turn Signal Requirements: Be aware of the requirements for turn signal functionality.
- Inspection Requirements: Know the inspection requirements for lighting systems in your area.
8.2. Safety Tips for Working with Electrical Systems
- Disconnect the Battery: Always disconnect the battery before working on electrical systems.
- Use Proper Tools: Use insulated tools to prevent electrical shock.
- Follow Instructions: Follow all instructions and guidelines carefully.
- Seek Professional Help: If you are unsure about any step, seek professional help.
9. The Role of MERCEDES-DIAGNOSTIC-TOOL.EDU.VN in Maintaining Your Mercedes-Benz
MERCEDES-DIAGNOSTIC-TOOL.EDU.VN is committed to providing comprehensive information and resources for maintaining your Mercedes-Benz lighting systems.
9.1. Providing Expert Guidance
We offer expert guidance on:
- Diagnostic Tools: Selecting the right diagnostic tools for your Mercedes-Benz.
- Troubleshooting: Identifying and resolving common lighting issues.
- Maintenance Tips: Implementing regular maintenance practices.
- Upgrades: Evaluating and installing LED headlight upgrades.
9.2. Offering Diagnostic Services
We offer professional diagnostic services to help you identify and resolve complex lighting issues.
- Fault Code Reading: Accurate fault code reading and interpretation.
- Component Testing: Comprehensive component testing.
- System Analysis: Thorough system analysis to identify underlying problems.
- Repair Recommendations: Expert repair recommendations.
9.3. Resources and Support
We provide a wealth of resources and support to help you maintain your Mercedes-Benz lighting systems.
- Detailed Guides: Step-by-step guides on checking and maintaining lighting systems.
- Troubleshooting Tips: Practical troubleshooting tips for common issues.
- Product Reviews: Reviews of diagnostic tools and lighting upgrades.
- Expert Advice: Access to expert advice and support.
10. Frequently Asked Questions (FAQ)
10.1. How Often Should I Check My Mercedes-Benz Lighting Systems?
It is recommended to check your lighting systems at least once a month and before any long trips.
10.2. What Are the Signs of a Failing Headlight Bulb?
Signs include dimming, flickering, or complete failure of the bulb.
10.3. Can I Replace Halogen Bulbs with LED Bulbs in My Mercedes-Benz?
Yes, but ensure the LED bulbs are compatible with your vehicle and meet local regulations.
10.4. What Should I Do If My Headlights Are Not Properly Aligned?
Use a headlight aiming tool to realign them or seek professional help.
10.5. How Can I Prevent My Headlight Lenses from Becoming Cloudy?
Clean the lenses regularly with mild soap and water and avoid harsh chemicals.
10.6. What Is the Best Way to Clean Corrosion from Electrical Connections?
Disconnect the battery and use a wire brush to clean the terminals, then apply dielectric grease to prevent future corrosion.
10.7. Why Are My Fuses Keep Blowing?
This indicates an underlying electrical problem, such as a short circuit or an overloaded circuit. Seek professional help to diagnose and fix the issue.
10.8. What Are Daytime Running Lights (DRLs) and Why Are They Important?
DRLs are lights that automatically turn on during the day to enhance vehicle visibility, improving safety by making your car more noticeable to other drivers.
10.9. How Can I Test My Brake Lights?
Have someone press the brake pedal while you check the brake lights to ensure they illuminate properly.
10.10. What Diagnostic Tool Do You Recommend for Checking My Mercedes-Benz Lighting System?
The Mercedes-Benz Star Diagnosis is the official tool, but Autel MaxiSys Elite and iCarsoft MB V3.0 are also excellent options.
Maintaining your Mercedes-Benz lighting systems is crucial for safety and legal compliance. By following these guidelines and utilizing the resources at MERCEDES-DIAGNOSTIC-TOOL.EDU.VN, you can ensure your lighting systems are always in optimal condition.
Ready to ensure your Mercedes-Benz lighting systems are in top shape? Contact us at MERCEDES-DIAGNOSTIC-TOOL.EDU.VN for expert guidance and diagnostic services. Whether you need help with troubleshooting, maintenance tips, or selecting the right diagnostic tools, our team is here to assist you. Reach out today and let us help you keep your Mercedes-Benz safe and reliable.
Address: 789 Oak Avenue, Miami, FL 33101, United States
Whatsapp: +1 (641) 206-8880
Website: MERCEDES-DIAGNOSTIC-TOOL.EDU.VN