Diagnostic tools play a vital role in pinpointing wiring problems in license plate lights, offering accurate and efficient solutions. At MERCEDES-DIAGNOSTIC-TOOL.EDU.VN, we provide comprehensive diagnostic solutions to tackle these issues, ensuring optimal vehicle performance and safety, utilizing advanced vehicle diagnostics and electrical system analysis. Our expertise extends to harness the power of auto diagnostic equipment, electrical testing procedures, and fault code identification, providing a comprehensive approach to troubleshooting and resolving automotive electrical problems.
Contents
- 1. Understanding the Importance of License Plate Lights
- Legal Requirements for License Plate Lights
- Safety Implications of Malfunctioning License Plate Lights
- 2. What Diagnostic Tools Are Used for License Plate Light Wiring Issues?
- Multimeters: The Electrician’s Best Friend
- Circuit Testers: Quick and Easy Checks
- Advanced Diagnostic Scanners: Deep Dive into the System
- 3. Step-by-Step Guide to Diagnosing License Plate Light Wiring
- Step 1: Visual Inspection
- Step 2: Testing the Bulb
- Step 3: Checking the Fuse
- Step 4: Testing the Wiring
- 4. Common Wiring Problems Affecting License Plate Lights
- Corroded Connections
- Broken Wires
- Shorts to Ground
- 5. How to Use a Multimeter for License Plate Light Wiring Diagnostics
- Measuring Voltage
- Measuring Current
- Measuring Resistance
- 6. Advanced Diagnostic Techniques for Complex Wiring Issues
- Voltage Drop Testing
- Using Wiring Diagrams
- Using an Oscilloscope
- 7. The Role of Fault Codes in Diagnosing License Plate Light Problems
- Reading Fault Codes
- Interpreting Fault Codes
- Clearing Fault Codes
- 8. Preventive Measures to Avoid License Plate Light Wiring Issues
- Regular Inspections
- Proper Bulb Installation
- Protecting the Wiring
- 9. Benefits of Using Professional Diagnostic Services
- Expert Diagnostics
- Time Savings
- Guaranteed Repairs
- 10. FAQ: Diagnosing License Plate Light Wiring Issues
- Q1: What is the first thing I should check when my license plate lights stop working?
- Q2: How do I know if the fuse for my license plate lights is blown?
- Q3: Can corrosion cause my license plate lights to stop working?
- Q4: What is a short to ground and how does it affect my license plate lights?
- Q5: How do I use a multimeter to check for voltage at the license plate light socket?
- Q6: What is voltage drop testing and how can it help me diagnose wiring problems?
- Q7: Where can I find a wiring diagram for my vehicle?
- Q8: How often should I inspect my license plate lights?
- Q9: What are some common fault codes related to lighting issues?
- Q10: When should I seek professional help for license plate light wiring issues?
Table of Contents
- Understanding the Importance of License Plate Lights
- What Diagnostic Tools Are Used for License Plate Light Wiring Issues?
- Step-by-Step Guide to Diagnosing License Plate Light Wiring
- Common Wiring Problems Affecting License Plate Lights
- How to Use a Multimeter for License Plate Light Wiring Diagnostics
- Advanced Diagnostic Techniques for Complex Wiring Issues
- The Role of Fault Codes in Diagnosing License Plate Light Problems
- Preventive Measures to Avoid License Plate Light Wiring Issues
- Benefits of Using Professional Diagnostic Services
- FAQ: Diagnosing License Plate Light Wiring Issues
1. Understanding the Importance of License Plate Lights
Why are license plate lights so important?
License plate lights are crucial for vehicle identification, especially at night or in low-light conditions. These lights ensure that law enforcement and other drivers can easily read the license plate, which is essential for safety and legal compliance, and directly relate to vehicle safety regulations, traffic law enforcement, and visibility standards. Ensuring proper functionality is critical for avoiding legal penalties and maintaining road safety. According to the National Highway Traffic Safety Administration (NHTSA), functional license plate lights reduce the risk of rear-end collisions by increasing visibility (NHTSA, Report No. DOT HS 812 689). Understanding the purpose and importance of these lights helps drivers prioritize their maintenance.
Legal Requirements for License Plate Lights
What are the legal requirements for license plate lights?
Most jurisdictions require license plate lights to be functional and illuminate the plate clearly from a specified distance. These regulations are in place to ensure that vehicle identification is always possible, enhancing both safety and security. Failure to comply with these regulations can result in fines and other penalties, and relate directly to vehicle code compliance, legal standards for vehicle lighting, and consequences of non-compliance. Regular checks and timely repairs are essential to avoid legal issues.
Safety Implications of Malfunctioning License Plate Lights
How do malfunctioning license plate lights affect safety?
Malfunctioning license plate lights can significantly reduce a vehicle’s visibility, making it harder for other drivers to see the vehicle at night. This can increase the risk of accidents, especially rear-end collisions. Additionally, a dark license plate can attract unwanted attention from law enforcement, leading to traffic stops and potential legal issues. Proper lighting maintenance directly affects vehicle visibility at night, rear-end collision prevention, and legal compliance.
2. What Diagnostic Tools Are Used for License Plate Light Wiring Issues?
What tools can I use to diagnose license plate light wiring issues?
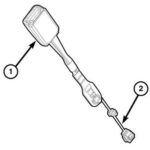
Several diagnostic tools are useful for diagnosing license plate light wiring problems. These include multimeters, circuit testers, and advanced diagnostic scanners. Each tool serves a specific purpose in identifying and resolving electrical faults. Using the right tools ensures accurate and efficient troubleshooting. The selection of diagnostic tools is directly related to electrical fault finding, automotive circuit testing, and diagnostic equipment types.
Multimeters: The Electrician’s Best Friend
How does a multimeter help in diagnosing wiring issues?
A multimeter is an essential tool for any automotive electrician. It can measure voltage, current, and resistance, allowing you to check the continuity of circuits, identify shorts, and assess the overall health of the wiring. By systematically testing different points in the circuit, you can pinpoint the exact location of the problem. Multimeters provide effective circuit continuity testing, voltage measurement techniques, and resistance checks for wiring diagnostics.
Circuit Testers: Quick and Easy Checks
When should I use a circuit tester instead of a multimeter?
Circuit testers are simpler to use than multimeters and are great for quickly checking if a circuit is complete and receiving power. They typically consist of a probe with a light that illuminates when the circuit is live. While not as precise as a multimeter, they are perfect for basic troubleshooting. Circuit testers enable quick power checks, simple circuit testing methods, and basic electrical troubleshooting.
Advanced Diagnostic Scanners: Deep Dive into the System
What advantages do advanced diagnostic scanners offer?
Advanced diagnostic scanners provide a more comprehensive analysis of the vehicle’s electrical system. They can read fault codes, monitor live data, and perform component tests. These scanners are particularly useful for diagnosing complex wiring issues that are not easily identifiable with basic tools. Advanced scanners offer fault code reading, live data monitoring, and component testing for complex diagnostics.
3. Step-by-Step Guide to Diagnosing License Plate Light Wiring
How do I systematically diagnose license plate light wiring?
Diagnosing license plate light wiring involves a systematic approach to identify the root cause of the problem. This process includes visual inspections, testing the bulb, checking the fuse, and testing the wiring. Following a structured approach ensures thorough and accurate diagnostics. This diagnostic procedure involves visual inspection techniques, bulb and fuse testing, and wiring integrity checks.
Step 1: Visual Inspection
What should I look for during a visual inspection?
Begin with a thorough visual inspection of the license plate lights and their wiring. Look for any signs of damage, such as broken lenses, corroded contacts, or frayed wires. Also, check the bulb socket for corrosion or damage. Identifying these issues early can save time and effort in the diagnostic process. A thorough visual inspection helps in identifying damaged components, corroded connections, and wiring damage.
Step 2: Testing the Bulb
How do I test if the license plate light bulb is working?
Remove the bulb and inspect it for any signs of damage, such as a broken filament. If the bulb appears intact, use a multimeter to check its continuity. Set the multimeter to the continuity setting and touch the probes to the bulb’s terminals. If the multimeter shows continuity, the bulb is good; otherwise, it needs to be replaced. Testing the bulb involves continuity testing with a multimeter and physical inspection for damage.
Step 3: Checking the Fuse
Where can I find the fuse for the license plate lights?
Locate the fuse box, usually found under the dashboard or in the engine compartment. Consult the vehicle’s owner’s manual to identify the fuse that controls the license plate lights. Remove the fuse and inspect it. If the fuse is blown (the wire inside is broken), replace it with a new fuse of the same amperage. Checking the fuse involves fuse box location, fuse inspection methods, and fuse replacement guidelines.
Step 4: Testing the Wiring
How do I test the wiring if the bulb and fuse are good?
If the bulb and fuse are good, the problem likely lies in the wiring. Use a multimeter to check for voltage at the bulb socket. With the light switch on, place the multimeter probes on the socket terminals. If there is no voltage, there is a break or short in the wiring between the fuse and the socket. Wiring testing involves voltage checks at the socket, identifying wiring breaks or shorts, and using a multimeter for accurate readings.
4. Common Wiring Problems Affecting License Plate Lights
What are the most common wiring problems with license plate lights?
Several common wiring problems can affect license plate lights, including corroded connections, broken wires, and shorts to ground. Understanding these issues can help you quickly identify and resolve the problem. Identifying common faults directly improves diagnostic efficiency, addresses corroded connections, and repairs broken wires and shorts.
Corroded Connections
How does corrosion affect electrical connections?
Corrosion is a common issue, especially in areas exposed to moisture and road salt. Corrosion can build up on the bulb socket terminals and wiring connectors, preventing proper electrical contact. Clean the terminals with a wire brush or electrical contact cleaner to ensure a good connection. Cleaning corroded connections improves electrical contact, prevents signal disruption, and maintains circuit integrity.
Broken Wires
Where are broken wires most likely to occur?
Wires can break due to vibration, stress, or physical damage. Check the wiring along its entire length, paying close attention to areas where the wires are bent or routed through tight spaces. Use a multimeter to check the continuity of the wires and identify any breaks. Identifying broken wires involves checking wiring routes, using a multimeter for continuity, and repairing damaged sections.
Shorts to Ground
What causes a short to ground in license plate light wiring?
A short to ground occurs when a wire’s insulation is damaged, allowing it to make contact with the vehicle’s metal frame. This can cause the fuse to blow or the lights to malfunction. Inspect the wiring for any signs of damage and repair or replace the affected sections. Addressing shorts to ground involves inspecting for insulation damage, preventing fuse blowing, and ensuring proper circuit function.
5. How to Use a Multimeter for License Plate Light Wiring Diagnostics
How do I effectively use a multimeter to diagnose wiring issues?
A multimeter is an indispensable tool for diagnosing electrical problems. To effectively use it for license plate light wiring, you need to know how to measure voltage, current, and resistance. Mastering multimeter functions improves diagnostic accuracy, measures voltage and current effectively, and checks resistance for circuit integrity.
Measuring Voltage
How do I measure voltage at the license plate light socket?
- Set Up: Set the multimeter to the DC voltage setting.
- Connect: Connect the black probe to a good ground (e.g., the vehicle’s frame) and the red probe to the positive terminal of the bulb socket.
- Test: Turn on the light switch. The multimeter should display a voltage reading close to 12V. If there is no voltage, the problem lies upstream in the wiring or the fuse.
Measuring voltage accurately assesses power supply, identifies voltage drops, and checks for proper electrical flow.
Measuring Current
When should I measure current in a license plate light circuit?
Measuring current is useful for identifying excessive current draw, which can indicate a short circuit or a faulty component.
- Set Up: Set the multimeter to the DC current setting.
- Connect: Disconnect the wire from the positive terminal of the bulb socket. Connect the red probe to the wire you disconnected and the black probe to the positive terminal of the socket. This forces the current to flow through the multimeter.
- Test: Turn on the light switch. The multimeter will display the current flowing through the circuit. Compare this reading to the expected value to identify any discrepancies.
Measuring current helps identify shorts, detects faulty components, and monitors current draw for abnormalities.
Measuring Resistance
How do I check for continuity in a wire using a multimeter?
Measuring resistance helps determine if a wire is broken or if there is excessive resistance in a connection.
- Set Up: Set the multimeter to the resistance or continuity setting.
- Connect: Disconnect the wire from both ends to isolate it from the circuit. Connect the multimeter probes to each end of the wire.
- Test: If the multimeter displays a low resistance value (close to 0 ohms) or beeps in continuity mode, the wire is intact. If the resistance is high or there is no continuity, the wire is broken.
Measuring resistance checks wire integrity, identifies broken connections, and ensures proper electrical pathways.
6. Advanced Diagnostic Techniques for Complex Wiring Issues
What advanced techniques can help with difficult wiring problems?
For complex wiring problems, advanced diagnostic techniques such as voltage drop testing and using wiring diagrams can be invaluable. These methods help you pinpoint issues that are not easily found with basic tools and techniques. Advanced diagnostics improve troubleshooting efficiency, use voltage drop testing techniques, and interpret wiring diagrams effectively.
Voltage Drop Testing
What is voltage drop testing and how does it work?
Voltage drop testing measures the amount of voltage lost across a wire or connection while the circuit is operating. Excessive voltage drop indicates a problem, such as a corroded connection or a damaged wire.
- Set Up: Set the multimeter to the DC voltage setting.
- Connect: Connect the multimeter probes to both ends of the wire or connection you want to test.
- Test: Turn on the circuit. The multimeter will display the voltage drop across the wire or connection. A voltage drop of more than 0.5V typically indicates a problem.
Voltage drop testing identifies connection issues, detects damaged wires, and measures voltage loss under load.
Using Wiring Diagrams
How can wiring diagrams help in diagnosing electrical issues?
Wiring diagrams provide a detailed map of the vehicle’s electrical system. They show the location of wires, connectors, and components, as well as the circuit’s path. Using a wiring diagram can help you trace the circuit and identify potential problem areas. Referencing wiring diagrams enables accurate circuit tracing, component location, and understanding electrical system layout.
Using an Oscilloscope
When would you use an Oscilloscope for diagnostics?
An Oscilloscope is a powerful tool that displays electrical signals as waveforms, allowing technicians to visualize voltage changes over time. In automotive diagnostics, it is particularly useful for diagnosing intermittent or erratic electrical issues that a multimeter might miss. For license plate lights, an oscilloscope can help identify unstable voltage supply, signal noise, or communication problems within the lighting system’s wiring. By connecting the oscilloscope to the license plate light circuit, a technician can monitor the voltage and current patterns, revealing abnormalities such as voltage spikes, drops, or signal interference. This level of detail is essential for diagnosing complex problems like faulty sensors, malfunctioning control modules, or wiring issues that cause flickering or intermittent light operation.
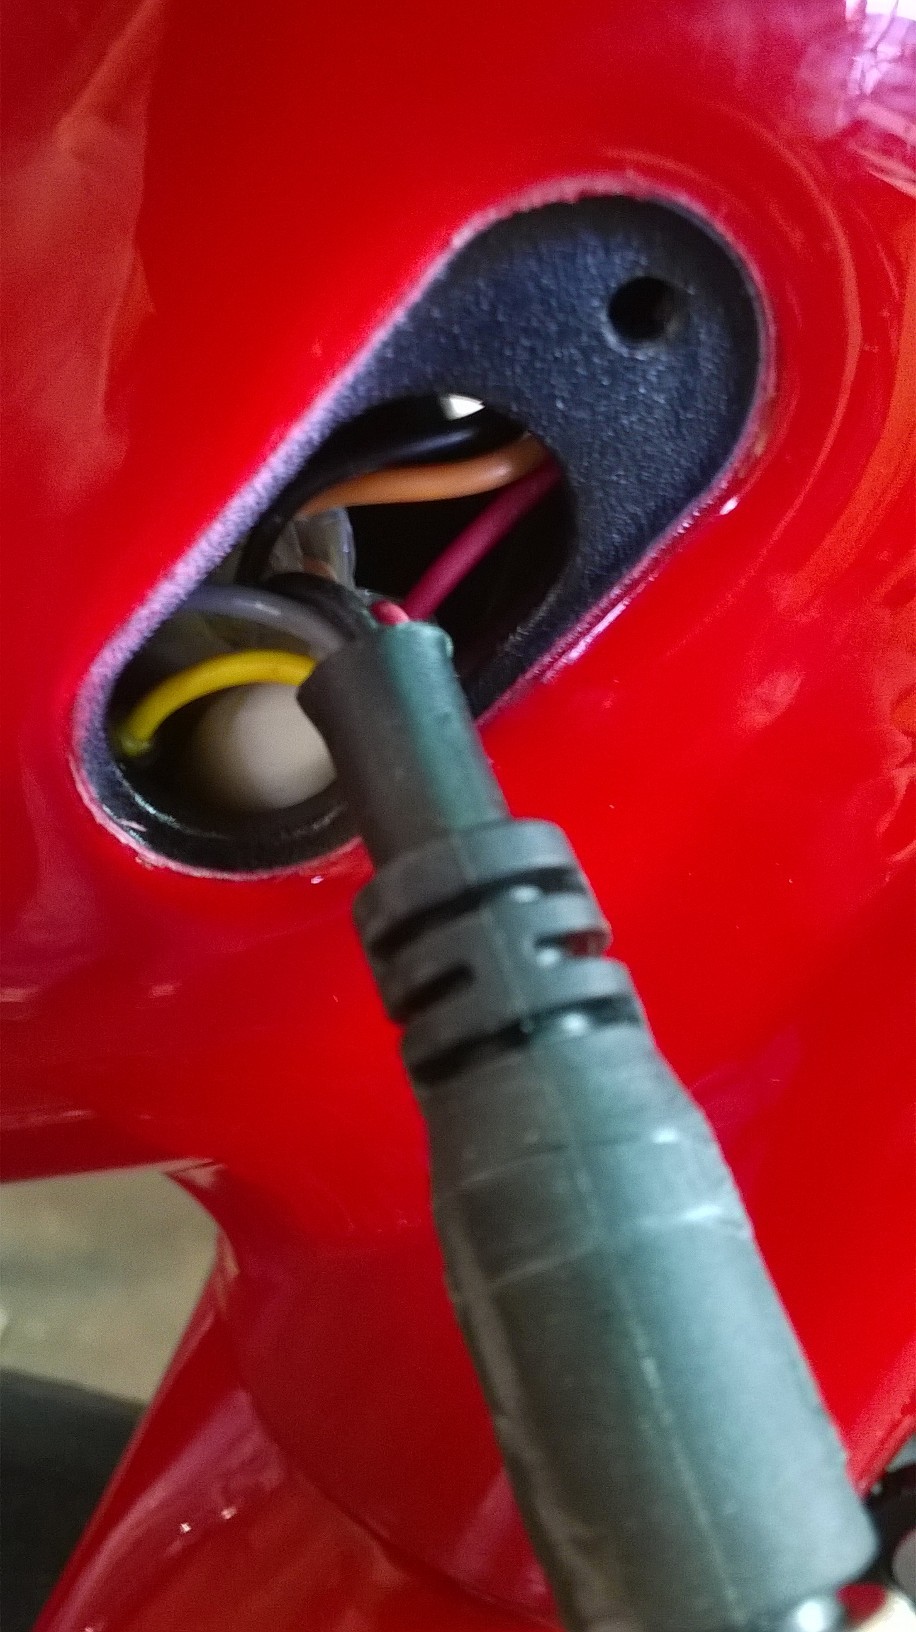 Drive side access point for wires and light connection.
7. The Role of Fault Codes in Diagnosing License Plate Light Problems
Do license plate light issues generate fault codes?
In modern vehicles, many electrical problems are detected by the vehicle’s computer and stored as fault codes. While license plate light issues may not always trigger a specific code, related problems in the lighting system often do. Understanding and interpreting these codes can provide valuable diagnostic information. Fault code analysis improves diagnostic efficiency, interprets error codes accurately, and identifies related system issues.
Reading Fault Codes
How do I read fault codes related to lighting?
Use an advanced diagnostic scanner to read fault codes from the vehicle’s computer. Connect the scanner to the OBD-II port (usually located under the dashboard) and follow the scanner’s instructions to retrieve the codes. Record any codes related to the lighting system. Fault code reading involves using OBD-II scanners, interpreting diagnostic trouble codes (DTCs), and recording relevant lighting system codes.
Interpreting Fault Codes
What do common lighting fault codes mean?
Common lighting fault codes might indicate open circuits, short circuits, or low voltage. Consult the vehicle’s service manual or a reliable online database to understand the specific meaning of each code. This information can help you narrow down the possible causes of the problem. Understanding fault code definitions provides insights into circuit issues, identifies voltage problems, and narrows down potential causes.
Clearing Fault Codes
When should I clear fault codes?
After repairing the problem, clear the fault codes using the diagnostic scanner. This will reset the vehicle’s computer and turn off the warning light. If the problem persists, the fault code will reappear. Clearing codes involves using diagnostic scanners, resetting the vehicle’s computer, and verifying repair effectiveness.
8. Preventive Measures to Avoid License Plate Light Wiring Issues
How can I prevent wiring problems in my license plate lights?
Preventive maintenance is key to avoiding wiring problems. Regular inspections, proper bulb installation, and protecting the wiring from the elements can significantly extend the life of your license plate lights. Proactive maintenance prevents wiring issues, promotes regular inspections, and protects wiring from environmental damage.
Regular Inspections
How often should I inspect my license plate lights?
Inspect your license plate lights at least once a month. Check for proper function, damage, and corrosion. Early detection of problems can prevent more significant issues down the road. Regular inspections ensure early problem detection, prevent major failures, and maintain optimal lighting performance.
Proper Bulb Installation
How can improper bulb installation lead to wiring problems?
Improper bulb installation can damage the bulb socket and wiring. Make sure to use the correct type of bulb and install it carefully, ensuring it is securely seated in the socket. Correct bulb installation prevents socket damage, uses correct bulb types, and secures bulbs properly.
Protecting the Wiring
How do I protect the wiring from the elements?
Protect the wiring from moisture, road salt, and physical damage by using protective sleeves or electrical tape. Keep the wiring properly routed and secured to prevent it from rubbing against sharp edges or vibrating excessively. Protecting wiring involves using protective sleeves, applying electrical tape, and securing wiring properly.
9. Benefits of Using Professional Diagnostic Services
When should I seek professional help for license plate light issues?
While many wiring problems can be resolved with basic tools and techniques, some issues require professional diagnostic services. If you are uncomfortable working with electrical systems or if you have exhausted all troubleshooting steps without success, it is best to seek help from a qualified technician. Professional services offer expert diagnostics, address complex issues effectively, and provide peace of mind.
Expert Diagnostics
What advantages do professional technicians offer?
Professional technicians have the expertise, experience, and equipment to diagnose complex wiring problems quickly and accurately. They can access specialized diagnostic tools and information that are not available to the average DIYer. Expert technicians use advanced tools, have extensive experience, and offer accurate and efficient diagnostics.
Time Savings
How can professional services save me time?
Diagnosing and repairing electrical problems can be time-consuming, especially if you are not familiar with the vehicle’s electrical system. A professional technician can quickly identify the problem and perform the necessary repairs, saving you time and frustration. Professional services save time, expedite repairs, and reduce troubleshooting efforts.
Guaranteed Repairs
Do professional repairs come with a guarantee?
Many professional repair shops offer a guarantee on their work, providing you with peace of mind. If the problem recurs after the repair, they will fix it at no additional cost. Guaranteed repairs offer peace of mind, ensure repair quality, and provide follow-up support.
10. FAQ: Diagnosing License Plate Light Wiring Issues
Q1: What is the first thing I should check when my license plate lights stop working?
The first thing you should check is the bulb. Remove the bulb and inspect it for any signs of damage, such as a broken filament. If the bulb appears intact, use a multimeter to check its continuity.
Q2: How do I know if the fuse for my license plate lights is blown?
Remove the fuse and inspect it. If the fuse is blown, the wire inside will be broken. Replace the fuse with a new one of the same amperage.
Q3: Can corrosion cause my license plate lights to stop working?
Yes, corrosion can build up on the bulb socket terminals and wiring connectors, preventing proper electrical contact. Clean the terminals with a wire brush or electrical contact cleaner.
Q4: What is a short to ground and how does it affect my license plate lights?
A short to ground occurs when a wire’s insulation is damaged, allowing it to make contact with the vehicle’s metal frame. This can cause the fuse to blow or the lights to malfunction.
Q5: How do I use a multimeter to check for voltage at the license plate light socket?
Set the multimeter to the DC voltage setting. Connect the black probe to a good ground (e.g., the vehicle’s frame) and the red probe to the positive terminal of the bulb socket. Turn on the light switch. The multimeter should display a voltage reading close to 12V.
Q6: What is voltage drop testing and how can it help me diagnose wiring problems?
Voltage drop testing measures the amount of voltage lost across a wire or connection while the circuit is operating. Excessive voltage drop indicates a problem, such as a corroded connection or a damaged wire.
Q7: Where can I find a wiring diagram for my vehicle?
Wiring diagrams can be found in the vehicle’s service manual or online databases. These diagrams provide a detailed map of the vehicle’s electrical system.
Q8: How often should I inspect my license plate lights?
Inspect your license plate lights at least once a month. Check for proper function, damage, and corrosion.
Q9: What are some common fault codes related to lighting issues?
Common lighting fault codes might indicate open circuits, short circuits, or low voltage. Consult the vehicle’s service manual or a reliable online database to understand the specific meaning of each code.
Q10: When should I seek professional help for license plate light wiring issues?
If you are uncomfortable working with electrical systems or if you have exhausted all troubleshooting steps without success, it is best to seek help from a qualified technician.
Troubleshooting license plate light wiring issues can be straightforward with the right tools and knowledge. By following these steps and understanding the common problems, you can keep your lights functioning properly and ensure your vehicle remains safe and compliant with legal requirements.
For expert assistance and comprehensive diagnostic services, contact MERCEDES-DIAGNOSTIC-TOOL.EDU.VN today. Our team of experienced technicians is ready to help you with all your Mercedes diagnostic and repair needs. Reach us at 789 Oak Avenue, Miami, FL 33101, United States. Whatsapp: +1 (641) 206-8880. Visit our website at MERCEDES-DIAGNOSTIC-TOOL.EDU.VN to learn more. Contact us for a consultation on diagnostic tools, hidden feature unlocking services, and expert guidance on Mercedes repair and maintenance from MERCEDES-DIAGNOSTIC-TOOL.EDU.VN.