Having headlight malfunction indicators lit up can be a real headache. This comprehensive guide from MERCEDES-DIAGNOSTIC-TOOL.EDU.VN clearly defines the diagnostic procedures for vehicles with headlight malfunction indicators illuminated, offering tailored solutions for Mercedes-Benz owners and automotive technicians alike. Delve into our in-depth analysis of headlight diagnostics, troubleshooting methods, and advanced repair solutions.
1. Understanding the Headlight Malfunction Indicator
The headlight malfunction indicator in your Mercedes-Benz serves as an essential alert, signaling issues within the headlight system. It’s crucial to know why this indicator lights up and what steps you should take.
-
What Does the Indicator Mean?
The headlight malfunction indicator signifies that the vehicle’s onboard diagnostic system has detected a problem within the headlight circuitry. This can range from a simple burnt-out bulb to a more complex issue within the control modules or wiring. The Society of Automotive Engineers (SAE) provides standardized diagnostic codes, but Mercedes-Benz often has specific codes that require specialized tools.
-
Common Causes of Headlight Malfunctions
- Burnt-Out Bulb: The most common reason for the indicator to light up. Halogen, Xenon, and LED bulbs can fail over time.
- Faulty Ballast/Igniter: High-Intensity Discharge (HID) headlights use a ballast to regulate voltage. A faulty ballast can cause the headlight to fail.
- Wiring Issues: Damaged, corroded, or loose wiring can interrupt the electrical circuit.
- Control Module Failure: The headlight control module manages various headlight functions. If it fails, it can trigger the malfunction indicator.
- Sensor Problems: Some advanced headlight systems use sensors to adjust the beam. Malfunctioning sensors can cause errors.
- Voltage Problems: Over or undervoltage can damage the headlight system components.
-
Initial Steps When the Indicator Lights Up
When the headlight malfunction indicator illuminates, take these immediate steps:
- Visual Inspection: Check all headlight bulbs to see if any are visibly burnt out.
- Test the Lights: Turn on all headlight functions (low beam, high beam, turn signals, fog lights) to identify which lights are not working.
- Consult the Owner’s Manual: Refer to your Mercedes-Benz owner’s manual for specific information about the headlight system and troubleshooting steps.
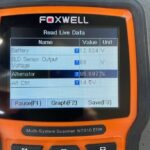
- Use a Diagnostic Tool: Connect a diagnostic tool to your vehicle’s OBD-II port to read the fault codes.
2. Essential Diagnostic Tools for Mercedes-Benz Headlights
To accurately diagnose headlight issues, you’ll need specific tools. These tools will help you identify the root cause of the problem and ensure proper repairs.
-
OBD-II Scanners
An On-Board Diagnostics II (OBD-II) scanner is essential for reading fault codes stored in your vehicle’s computer. According to a study by Bosch Automotive, using an OBD-II scanner can reduce diagnostic time by up to 60%. Here are some recommended OBD-II scanners:
- Basic OBD-II Scanner: Reads and clears generic OBD-II codes. Suitable for identifying basic headlight faults.
- Advanced OBD-II Scanner: Reads manufacturer-specific codes, providing more detailed information about the headlight system.
- Mercedes-Specific Scanners: Tools like the iCarsoft MB II or Autel MaxiCOM MK808 are designed specifically for Mercedes-Benz vehicles, offering advanced diagnostic capabilities.
-
Multimeter
A multimeter is used to measure voltage, current, and resistance in electrical circuits. It’s crucial for testing the headlight system’s wiring and components. Key multimeter functions include:
- Voltage Testing: Check the voltage at the headlight connector to ensure it matches the specified voltage.
- Continuity Testing: Test the continuity of wires to identify breaks or shorts in the circuit.
- Resistance Testing: Measure the resistance of headlight components, such as bulbs and ballasts, to check for faults.
-
Wiring Diagrams
A wiring diagram provides a detailed layout of the headlight system’s electrical connections. It’s essential for tracing wires and identifying potential wiring issues.
- Where to Find Wiring Diagrams: Wiring diagrams can be found in the Mercedes-Benz service manual or through online subscription services like AllData and Mitchell OnDemand.
- How to Use Wiring Diagrams: Follow the diagram to trace the wires from the headlight to the control module, checking for breaks, shorts, and corrosion.
-
Specialized Diagnostic Software
Mercedes-Benz vehicles often require specialized diagnostic software for in-depth analysis and troubleshooting.
- Mercedes XENTRY/DAS: This is the official diagnostic software used by Mercedes-Benz dealerships. It offers comprehensive diagnostic and programming capabilities.
- Vediamo: An engineering software used for advanced diagnostics and modifications. It requires extensive knowledge of Mercedes-Benz systems.
- Launch X431: A versatile diagnostic tool that supports a wide range of Mercedes-Benz models and provides advanced diagnostic functions.
3. Step-by-Step Diagnostic Procedures
Once you have the necessary tools, follow these steps to diagnose headlight malfunctions:
-
Reading Fault Codes
- Connect the OBD-II Scanner: Plug the scanner into the OBD-II port, typically located under the dashboard.
- Turn On the Ignition: Turn the ignition to the “ON” position without starting the engine.
- Read Fault Codes: Follow the scanner’s instructions to read the stored fault codes.
- Record the Codes: Write down all fault codes and their descriptions for further analysis.
-
Interpreting Fault Codes
Fault codes provide valuable information about the nature of the headlight malfunction. Here are some common fault codes related to headlight issues:
Code Description Possible Cause B1419 Headlamp Control Module Fault Defective control module, wiring issue, power supply problem B1420 Left Headlamp Malfunction Burnt-out bulb, faulty ballast, wiring issue B1421 Right Headlamp Malfunction Burnt-out bulb, faulty ballast, wiring issue B1422 Headlamp Aiming Control Fault Defective aiming motor, sensor problem, control module issue B1423 Headlamp Power Supply Voltage Too Low/Too High Voltage regulator problem, wiring issue, battery problem -
Checking the Bulbs
- Visual Inspection: Check the bulbs for any signs of damage, such as a broken filament or burnt glass.
- Testing with a Multimeter: Use a multimeter to test the bulb’s continuity. Set the multimeter to the continuity setting and touch the probes to the bulb’s terminals. A reading of “0” or a beep indicates continuity, while an open circuit indicates a faulty bulb.
- Replacing the Bulb: If the bulb is faulty, replace it with a new one that matches the vehicle’s specifications.
-
Testing the Ballast/Igniter
- Location: The ballast is typically located near the headlight assembly.
- Voltage Test: Use a multimeter to check the voltage at the ballast connector. Ensure that the ballast is receiving the correct voltage from the vehicle’s electrical system.
- Continuity Test: Test the continuity of the ballast’s wiring to identify any breaks or shorts.
- Replacement: If the ballast is faulty, replace it with a new one that matches the vehicle’s specifications.
-
Inspecting the Wiring
- Visual Inspection: Check the wiring for any signs of damage, such as frayed insulation, corrosion, or loose connections.
- Continuity Test: Use a multimeter to test the continuity of the wiring. Disconnect the battery before testing. Touch the probes to each end of the wire to check for continuity.
- Voltage Drop Test: Perform a voltage drop test to identify excessive resistance in the wiring. Connect the multimeter to both ends of the wire while the circuit is active. A voltage drop of more than 0.5 volts indicates a problem.
- Repairing Wiring Issues: Repair any damaged wiring by splicing in new wire sections or replacing the entire wiring harness.
-
Checking the Control Module
- Location: The headlight control module is typically located under the dashboard or in the engine compartment.
- Voltage Test: Use a multimeter to check the voltage at the control module’s power and ground connections.
- Signal Test: Use an oscilloscope or advanced diagnostic tool to check the control module’s input and output signals.
- Replacement: If the control module is faulty, it may need to be replaced and programmed. This often requires specialized diagnostic software and knowledge.
-
Verifying Sensor Functionality
- Location: Sensors are typically located near the headlights or suspension components.
- Testing: Use a diagnostic tool to read the sensor values and compare them to the specified values.
- Calibration: Some sensors may need to be calibrated after replacement. Follow the manufacturer’s instructions for calibration.
4. Advanced Troubleshooting Techniques
For complex headlight issues, advanced troubleshooting techniques may be necessary. These techniques require specialized knowledge and equipment.
-
Using Oscilloscopes
An oscilloscope is a powerful tool for analyzing electrical signals in the headlight system. It can help identify intermittent problems and signal distortions that a multimeter may miss.
- How to Use an Oscilloscope: Connect the oscilloscope probes to the circuit being tested. Set the oscilloscope to the appropriate voltage and time scales. Analyze the waveform to identify any abnormalities.
- Interpreting Waveforms: A normal waveform should be clean and consistent. Distortions, such as spikes or drops, can indicate wiring issues or component failures.
-
Performing Component-Level Diagnostics
Component-level diagnostics involves testing individual components within the headlight system, such as transistors, resistors, and capacitors. This requires advanced knowledge of electronics and soldering skills.
- How to Perform Component-Level Diagnostics: Use a multimeter to test the components. Desolder and replace any faulty components.
- Safety Precautions: Always disconnect the battery before performing component-level diagnostics. Use proper soldering techniques to avoid damaging the circuit board.
-
Software Recoding and Flashing
In some cases, the headlight control module may need to be recoded or flashed with new software to resolve issues. This requires specialized diagnostic software and knowledge.
- How to Recode/Flash: Connect the diagnostic tool to the vehicle. Follow the tool’s instructions to recode or flash the control module.
- Precautions: Ensure that the battery is fully charged and stable during the recoding/flashing process. Use the correct software version for your vehicle.
-
Checking for CAN Bus Communication Issues
Modern Mercedes-Benz vehicles use a Controller Area Network (CAN) bus to communicate between different control modules. Problems with the CAN bus can cause headlight malfunctions.
- How to Check for CAN Bus Issues: Use a diagnostic tool to monitor the CAN bus communication. Check for error messages related to the CAN bus.
- Troubleshooting CAN Bus Issues: Check the CAN bus wiring for shorts, opens, and corrosion. Use an oscilloscope to analyze the CAN bus signals.
5. Common Headlight Problems and Solutions
Here’s a closer look at common headlight issues and how to fix them.
-
Headlights Not Turning On
- Possible Causes:
- Burnt-out bulbs
- Faulty ballast
- Wiring issues
- Faulty headlight switch
- Blown fuse
- Troubleshooting Steps:
- Check the bulbs and replace if necessary.
- Test the ballast with a multimeter.
- Inspect the wiring for damage.
- Test the headlight switch with a multimeter.
- Check the fuse and replace if blown.
- Possible Causes:
-
Headlights Flicker On and Off
- Possible Causes:
- Loose wiring connections
- Faulty ballast
- Voltage fluctuations
- Troubleshooting Steps:
- Check the wiring connections and tighten if necessary.
- Test the ballast with a multimeter.
- Check the vehicle’s voltage regulator and battery.
- Possible Causes:
-
Headlights Dim or Weak
- Possible Causes:
- Old bulbs
- Corroded wiring
- Voltage drop
- Troubleshooting Steps:
- Replace the bulbs with new ones.
- Clean any corroded wiring connections.
- Perform a voltage drop test to identify wiring issues.
- Possible Causes:
-
One Headlight Working, the Other Not
- Possible Causes:
- Burnt-out bulb
- Faulty ballast
- Wiring issue on one side
- Troubleshooting Steps:
- Check the bulb on the non-working side and replace if necessary.
- Test the ballast on the non-working side.
- Inspect the wiring on the non-working side for damage.
- Possible Causes:
-
Headlights Aiming Incorrectly
- Possible Causes:
- Defective aiming motor
- Sensor problem
- Control module issue
- Troubleshooting Steps:
- Test the aiming motor with a multimeter.
- Check the sensor values with a diagnostic tool.
- Check the control module for fault codes.
- Possible Causes:
6. Preventive Maintenance Tips for Headlights
Regular maintenance can prevent headlight malfunctions and extend the life of your headlight system.
-
Regular Inspections
- Frequency: Inspect your headlights at least once a month.
- What to Look For: Check for burnt-out bulbs, damaged wiring, and corroded connections.
-
Cleaning Headlights
- Why Clean Headlights: Dirty headlights can reduce visibility, especially at night.
- How to Clean Headlights: Use a headlight cleaning kit or a mixture of soap and water. Avoid using abrasive cleaners that can damage the lens.
-
Replacing Bulbs in Pairs
- Why Replace in Pairs: If one bulb burns out, the other is likely to fail soon. Replacing both bulbs ensures consistent brightness and color.
- Recommended Bulbs: Use high-quality bulbs that match the vehicle’s specifications.
-
Checking and Cleaning Connections
- Why Check Connections: Loose or corroded connections can cause headlight malfunctions.
- How to Check Connections: Disconnect the connections and inspect them for corrosion. Clean the connections with a wire brush and apply dielectric grease to prevent future corrosion.
-
Monitoring Voltage
- Why Monitor Voltage: Over or undervoltage can damage the headlight system components.
- How to Monitor Voltage: Use a multimeter to check the voltage at the battery and headlight connectors. Ensure that the voltage is within the specified range.
7. Real-World Case Studies
Let’s consider a few case studies to illustrate the diagnostic procedures in action.
-
Case Study 1: 2016 Mercedes-Benz C-Class – Headlight Malfunction
- Problem: The headlight malfunction indicator was illuminated, and the left headlight was not working.
- Diagnostic Steps:
- Read fault codes: B1420 (Left Headlamp Malfunction)
- Visual inspection: The left headlight bulb appeared to be burnt out.
- Continuity test: The bulb had no continuity.
- Solution: Replaced the left headlight bulb, and the malfunction indicator turned off.
-
Case Study 2: 2018 Mercedes-Benz E-Class – Headlights Flickering
- Problem: The headlights were flickering on and off intermittently.
- Diagnostic Steps:
- Read fault codes: No fault codes were stored.
- Visual inspection: The wiring connections appeared to be loose.
- Voltage test: The voltage at the ballast was fluctuating.
- Solution: Tightened the wiring connections and replaced the faulty ballast. The flickering stopped.
-
Case Study 3: 2020 Mercedes-Benz S-Class – Headlights Aiming Incorrectly
- Problem: The headlights were aiming too low, reducing visibility.
- Diagnostic Steps:
- Read fault codes: B1422 (Headlamp Aiming Control Fault)
- Sensor test: The ride height sensors were not providing accurate readings.
- Solution: Replaced and calibrated the ride height sensors. The headlights were now aiming correctly.
8. Understanding Advanced Headlight Technologies in Mercedes-Benz Vehicles
Mercedes-Benz vehicles often feature advanced headlight technologies that require specialized diagnostic procedures.
-
LED Headlights
- How They Work: LED headlights use light-emitting diodes (LEDs) to produce light. They are more energy-efficient and longer-lasting than traditional halogen bulbs.
- Diagnostic Procedures:
- Use a diagnostic tool to check the LED control module for fault codes.
- Test the voltage and current at the LED module.
- Inspect the LED module for damage.
-
Xenon (HID) Headlights
- How They Work: Xenon headlights use a high-voltage electrical arc to produce light. They are brighter and more efficient than halogen bulbs.
- Diagnostic Procedures:
- Use a diagnostic tool to check the ballast for fault codes.
- Test the voltage and current at the ballast.
- Inspect the ballast for damage.
-
Adaptive Headlights
- How They Work: Adaptive headlights adjust the beam based on driving conditions, such as speed, steering angle, and road conditions.
- Diagnostic Procedures:
- Use a diagnostic tool to check the adaptive headlight control module for fault codes.
- Test the sensors that provide input to the control module, such as the steering angle sensor and vehicle speed sensor.
- Inspect the aiming motors for proper function.
-
Intelligent Light System (ILS)
- How It Works: The Intelligent Light System (ILS) is an advanced headlight system that combines multiple technologies to provide optimal visibility in all driving conditions.
- Diagnostic Procedures:
- Use a diagnostic tool to check the ILS control module for fault codes.
- Test all the components of the system, including the LED modules, ballasts, sensors, and aiming motors.
- Calibrate the system after replacing any components.
9. Utilizing MERCEDES-DIAGNOSTIC-TOOL.EDU.VN for Headlight Diagnostics
MERCEDES-DIAGNOSTIC-TOOL.EDU.VN is your premier resource for comprehensive headlight diagnostic information, offering detailed guidance and support for all Mercedes-Benz models.
-
Comprehensive Diagnostic Guides
- Access Detailed Information: Find step-by-step guides for diagnosing headlight issues in various Mercedes-Benz models.
- Troubleshooting Tips: Access expert troubleshooting tips and common problem solutions.
-
Expert Advice and Support
- Professional Technicians: Get advice from experienced Mercedes-Benz technicians.
- Community Forum: Engage with other Mercedes-Benz owners and share your experiences.
-
Tool Recommendations
- Recommended Tools: Find a list of recommended diagnostic tools for Mercedes-Benz headlights.
- Where to Buy: Get information on where to purchase the tools at competitive prices.
-
Software and Updates
- Latest Software: Access the latest diagnostic software and updates for Mercedes-Benz vehicles.
- Download Instructions: Get step-by-step instructions on how to download and install the software.
10. Frequently Asked Questions (FAQs)
-
What does the headlight malfunction indicator mean on my Mercedes-Benz?
The headlight malfunction indicator means the vehicle has detected a problem with the headlight system, such as a burnt-out bulb, faulty ballast, or wiring issue.
-
Can I diagnose headlight problems myself, or do I need a professional?
You can diagnose simple headlight problems yourself with basic tools like an OBD-II scanner and multimeter. However, complex issues may require professional diagnostic equipment and expertise.
-
What is the most common cause of headlight malfunctions in Mercedes-Benz vehicles?
The most common cause is a burnt-out bulb. Other common causes include faulty ballasts, wiring issues, and control module problems.
-
How do I check if my headlight bulb is burnt out?
Visually inspect the bulb for any signs of damage, such as a broken filament or burnt glass. You can also use a multimeter to test the bulb’s continuity.
-
What is a ballast, and how do I test it?
A ballast is a device that regulates the voltage to the headlight bulb. You can test it by checking the voltage and continuity at the ballast connector with a multimeter.
-
How do I find wiring diagrams for my Mercedes-Benz headlights?
Wiring diagrams can be found in the Mercedes-Benz service manual or through online subscription services like AllData and Mitchell OnDemand.
-
What is an OBD-II scanner, and how do I use it to diagnose headlight problems?
An OBD-II scanner is a tool that reads fault codes stored in your vehicle’s computer. To use it, plug the scanner into the OBD-II port, turn on the ignition, and follow the scanner’s instructions to read the codes.
-
What are adaptive headlights, and how do they work?
Adaptive headlights adjust the beam based on driving conditions, such as speed, steering angle, and road conditions. They use sensors and control modules to adjust the headlight aim.
-
How often should I inspect my headlights?
You should inspect your headlights at least once a month to check for burnt-out bulbs, damaged wiring, and corroded connections.
-
Where can I find reliable information and support for diagnosing headlight problems on my Mercedes-Benz?
MERCEDES-DIAGNOSTIC-TOOL.EDU.VN provides comprehensive diagnostic guides, expert advice, tool recommendations, and software updates for Mercedes-Benz vehicles.
Take Action Now
Experiencing headlight malfunctions? Don’t wait until it compromises your safety. Contact MERCEDES-DIAGNOSTIC-TOOL.EDU.VN today for expert assistance. Whether you need help diagnosing the issue, finding the right tools, or understanding advanced headlight technologies, our team is here to support you. Reach out to us at 789 Oak Avenue, Miami, FL 33101, United States, Whatsapp: +1 (641) 206-8880, or visit our website at MERCEDES-DIAGNOSTIC-TOOL.EDU.VN. Let us help you restore your Mercedes-Benz headlights to their optimal performance.
By following these diagnostic procedures and utilizing the resources available at MERCEDES-DIAGNOSTIC-TOOL.EDU.VN, you can effectively troubleshoot and resolve headlight malfunctions in your Mercedes-Benz, ensuring safe and reliable driving. Remember, proper maintenance and timely repairs are essential for maintaining the performance and safety of your vehicle.