The steps involved in repairing or replacing the seatbelt buckle are straightforward, ensuring your safety and compliance with traffic laws. At MERCEDES-DIAGNOSTIC-TOOL.EDU.VN, we can guide you through this essential maintenance task, helping you understand the underlying mechanism, troubleshooting common issues, and executing repairs with confidence, including fixing a stuck seatbelt buckle. This guide covers seatbelt maintenance, auto safety, and vehicle repair.
Contents
- 1. Understanding Seat Belt Buckle Mechanics
- 1.1. Common Seat Belt Buckle Issues
- 1.2. Importance of Functional Seat Belts
- 2. Preliminary Steps for Seat Belt Buckle Repair
- 2.1. Clean the Seat Belt Tongue
- 2.2. Inspect the Buckle for Obstructions
- 3. No-Disassembly Repair Techniques
- 3.1. Using Compressed Air
- 3.2. Applying Lubricants
- 4. Disassembly and Detailed Cleaning of the Seat Belt Buckle
- 4.1. Removing the Buckle
- 4.2. Disassembling the Buckle
- 4.3. Cleaning Internal Components
- 5. Addressing a Stuck Seat Belt Buckle
- 5.1. Immediate Release Techniques
- 5.2. Manual Unlocking
- 6. Step-by-Step Guide to Repairing a Seat Belt Buckle
- 6.1. Assessing the Damage
- 6.2. Gathering Tools and Materials
- 6.3. Performing the Repair
- 7. Replacing a Seat Belt Buckle: A Comprehensive Guide
- 7.1. Selecting a Replacement Buckle
- 7.2. Removing the Old Buckle
- 7.3. Installing the New Buckle
- 7.4. Testing the New Buckle
- 8. Safety Precautions and Considerations
- 8.1. Disconnecting the Battery
- 8.2. Using Proper Tools
- 8.3. Following Instructions
- 9. Diagnosing Common Seat Belt Problems
- 9.1. Seat Belt Won’t Retract
- 9.2. Seat Belt is Too Loose
- 9.3. Seat Belt Light is On
- 10. Understanding the Legal Requirements for Seat Belt Use
- 10.1. State Laws
- 10.2. Penalties for Non-Compliance
- 11. Maintaining Your Seat Belts
- 11.1. Regular Cleaning
- 11.2. Inspecting for Wear and Tear
- 11.3. Professional Inspections
- 12. Benefits of Professional Seat Belt Services
- 12.1. Expertise and Experience
- 12.2. Quality Parts
- 12.3. Warranty and Guarantee
- 13. How MERCEDES-DIAGNOSTIC-TOOL.EDU.VN Can Help
- 13.1. Diagnostic Tools
- 13.2. Expert Guidance
- 13.3. Comprehensive Services
- 14. Step-by-Step: Using a Diagnostic Tool for Seat Belt Issues
- 14.1. Connecting the Tool
- 14.2. Running a Scan
- 14.3. Interpreting the Results
- 14.4. Clearing Codes
- 15. Common Tools Needed for Seat Belt Repair
- 15.1. Screwdrivers
- 15.2. Pliers
- 15.3. Socket Set
- 15.4. Compressed Air
- 15.5. Lubricant
- 16. Seat Belt Extenders: When and How to Use Them
- 16.1. Who Needs an Extender?
- 16.2. Choosing the Right Extender
- 16.3. Installing the Extender
- 16.4. Safety Considerations
- 17. Exploring Advanced Seat Belt Technologies
- 17.1. Pre-Tensioners
- 17.2. Load Limiters
- 17.3. Active Buckles
- 18. DIY vs. Professional Repair: Making the Right Choice
- 18.1. Complexity of the Issue
- 18.2. Skill Level
- 18.3. Availability of Tools
- 19. Cost Analysis: Repair vs. Replacement
- 19.1. Repair Costs
- 19.2. Replacement Costs
- 19.3. Factors Affecting Cost
- 20. Upgrading Your Seat Belts for Enhanced Safety
- 20.1. Aftermarket Options
- 20.2. Performance Belts
- 20.3. Custom Designs
- 21. Step-by-Step: Verifying Proper Seat Belt Function
- 21.1. Visual Inspection
- 21.2. Retraction Test
- 21.3. Locking Test
- 21.4. Buckle Test
- 22. Understanding Force and Seat Belt Effectiveness
- 22.1. Force Distribution
- 22.2. Injury Reduction
- 22.3. Importance of Proper Fit
- 23. Seat Belt Safety for Children and Infants
- 23.1. Child Seats
- 23.2. Booster Seats
- 23.3. Seat Belt Positioning
- 24. The Seat Belt’s Role in Airbag Systems
- 24.1. Complementary Systems
- 24.2. Airbag Deployment
- 24.3. Importance of Both
- 25. Recycling Old Seat Belts: Environmentally Friendly Disposal
- 25.1. Recycling Programs
- 25.2. Benefits of Recycling
- 25.3. Finding a Recycling Center
- 26. Case Studies: Successful Seat Belt Repairs
- 26.1. Common Issues
- 26.2. Repair Techniques
- 26.3. Lessons Learned
- 27. Emerging Trends in Seat Belt Technology
- 27.1. Smart Buckles
- 27.2. Adaptive Systems
- 27.3. Integration with ADAS
- 28. FAQ: Common Questions About Seat Belts
- 28.1. How Often Should I Replace My Seat Belts?
- 28.2. Can I Repair a Damaged Seat Belt Myself?
- 28.3. Are Seat Belt Extenders Safe to Use?
- 29. Resources for Further Learning
- 29.1. NHTSA
- 29.2. IIHS
- 29.3. Vehicle Owner’s Manual
- 30. Conclusion: Prioritizing Seat Belt Safety
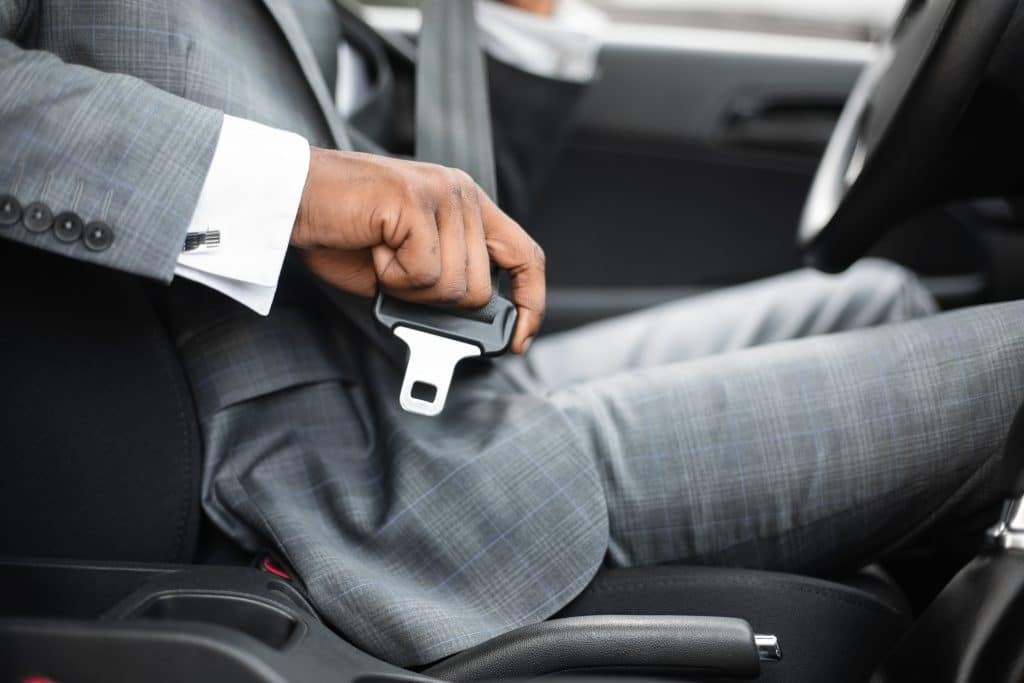
1. Understanding Seat Belt Buckle Mechanics
Seat belt buckles function by securely locking the seatbelt retractor into place. The tongue engages a spring-loaded tab within the buckle. This tab compresses springs until the tongue is fully inserted, at which point the tab springs back up, securing the tongue. Pressing the release button compresses the tab again, allowing the tongue to disengage.
1.1. Common Seat Belt Buckle Issues
Several issues can disrupt this process. The spring tab may become stuck, preventing it from locking the tongue. Alternatively, the springs may jam, resisting compression. Release button malfunctions can also prevent unbuckling. Addressing these issues immediately is crucial for your safety.
 Seatbelt Buckle Mechanism
1.2. Importance of Functional Seat Belts
According to the National Highway Traffic Safety Administration (NHTSA), seat belts significantly reduce the risk of fatal injury to front seat passengers in passenger cars by 45%, and light-truck occupants by 60%. A malfunctioning seat belt renders this critical safety feature ineffective.
2. Preliminary Steps for Seat Belt Buckle Repair
Before diving into more complex repairs, start with these simple steps.
2.1. Clean the Seat Belt Tongue
Begin by cleaning the seat belt tongue to remove any accumulated dirt or debris. Use a clean cloth and warm, soapy water to dissolve sticky or hardened grime. Ensure the tongue is completely dry before proceeding.
2.2. Inspect the Buckle for Obstructions
Examine the seat belt buckle for visible obstructions. Use a small tool, like a butter knife, to dislodge any debris. Follow this with compressed air to clear out any remaining particles.
3. No-Disassembly Repair Techniques
Attempting repairs without disassembling the buckle can save time and effort.
3.1. Using Compressed Air
Direct a stream of compressed air into the buckle mechanism to dislodge any internal debris. This can often resolve minor obstructions without requiring disassembly.
3.2. Applying Lubricants
Apply a small amount of lubricant, such as WD-40, inside the buckle to help the tongue slide in smoothly. Ensure the lubricant doesn’t interfere with the locking mechanism.
4. Disassembly and Detailed Cleaning of the Seat Belt Buckle
If the previous steps fail, disassembling the buckle for a thorough cleaning may be necessary.
4.1. Removing the Buckle
Consult your vehicle’s owner’s manual for instructions on removing the seat belt buckle. The process can range from simply unscrewing the buckle to removing the entire seat.
4.2. Disassembling the Buckle
Once removed, disassemble the buckle by removing visible screws. Use a thin tool, like a flathead screwdriver, to gently pry the buckle open. Take care to avoid damaging the internal components.
4.3. Cleaning Internal Components
Inspect the internal components for obstructions. The spring tab should compress and rebound freely, and the springs at the bottom should compress when pressed. Use small pliers or compressed air to remove any debris. Apply WD-40 as needed to ensure smooth operation.
 Cleaning Seat Belt Buckle
5. Addressing a Stuck Seat Belt Buckle
A stuck seat belt buckle that won’t release requires immediate attention.
5.1. Immediate Release Techniques
Use a thin screwdriver or butter knife to dislodge any obstructions. Apply WD-40 or compressed air to the opening. If these methods fail, unscrew the buckle to release the passenger.
5.2. Manual Unlocking
Once the passenger is free, manually open the buckle to examine the internal mechanisms. Clean and repair as needed to prevent future occurrences.
6. Step-by-Step Guide to Repairing a Seat Belt Buckle
Repairing a seat belt buckle involves a systematic approach.
6.1. Assessing the Damage
Evaluate the extent of the damage. Check for broken springs, bent tabs, or other visible issues.
6.2. Gathering Tools and Materials
Gather the necessary tools, including screwdrivers, pliers, compressed air, and lubricant.
6.3. Performing the Repair
Follow these steps to repair the seat belt buckle:
- Remove the buckle from the vehicle following the instructions in your owner’s manual.
- Disassemble the buckle by removing all visible screws.
- Inspect each component for damage and clean thoroughly.
- Replace any broken or worn parts.
- Reassemble the buckle carefully.
- Reinstall the buckle in the vehicle.
7. Replacing a Seat Belt Buckle: A Comprehensive Guide
In some cases, the seat belt buckle may be beyond repair, necessitating a replacement.
7.1. Selecting a Replacement Buckle
Choose a replacement buckle that is compatible with your vehicle model. Ensure it meets all safety standards.
7.2. Removing the Old Buckle
Remove the old buckle following the instructions in your vehicle’s manual. This may involve disconnecting electrical connectors or removing the seat.
7.3. Installing the New Buckle
Install the new buckle in the reverse order of removal. Ensure all connections are secure and functioning properly.
7.4. Testing the New Buckle
Test the new buckle thoroughly to ensure it locks and releases smoothly. Check that the seat belt retracts properly and that all safety features are functional.
8. Safety Precautions and Considerations
Working with seat belts requires adherence to strict safety protocols.
8.1. Disconnecting the Battery
Disconnect the vehicle’s battery to prevent accidental deployment of airbags or other safety systems.
8.2. Using Proper Tools
Use the correct tools for each task to avoid damaging components.
8.3. Following Instructions
Follow all instructions carefully to ensure the repair or replacement is performed correctly.
9. Diagnosing Common Seat Belt Problems
Accurate diagnosis is crucial for effective seat belt repair.
9.1. Seat Belt Won’t Retract
If the seat belt won’t retract, check for obstructions in the retractor mechanism. Clean and lubricate as necessary.
9.2. Seat Belt is Too Loose
If the seat belt is too loose, inspect the tensioning mechanism. Adjust or replace as needed.
9.3. Seat Belt Light is On
If the seat belt light is on, check the seat belt sensors and connections. Repair or replace any faulty components.
10. Understanding the Legal Requirements for Seat Belt Use
Seat belt use is mandated by law in almost every U.S. state.
10.1. State Laws
Familiarize yourself with your state’s seat belt laws. In many states, both drivers and passengers are required to wear seat belts.
10.2. Penalties for Non-Compliance
Failure to wear a seat belt can result in fines and other penalties.
11. Maintaining Your Seat Belts
Regular maintenance can extend the life of your seat belts and ensure their effectiveness.
11.1. Regular Cleaning
Clean your seat belts regularly to remove dirt and grime. Use a mild detergent and warm water.
11.2. Inspecting for Wear and Tear
Inspect your seat belts regularly for signs of wear and tear. Check for fraying, cuts, or other damage.
11.3. Professional Inspections
Have your seat belts professionally inspected at regular intervals to ensure they are functioning properly.
12. Benefits of Professional Seat Belt Services
Professional seat belt services offer numerous advantages.
12.1. Expertise and Experience
Professional technicians have the expertise and experience to diagnose and repair seat belt issues effectively.
12.2. Quality Parts
Professional services use high-quality replacement parts that meet safety standards.
12.3. Warranty and Guarantee
Many professional services offer warranties and guarantees on their work, providing peace of mind.
13. How MERCEDES-DIAGNOSTIC-TOOL.EDU.VN Can Help
At MERCEDES-DIAGNOSTIC-TOOL.EDU.VN, we offer comprehensive diagnostic tools and services to help you maintain your Mercedes-Benz.
13.1. Diagnostic Tools
Our diagnostic tools can identify seat belt issues quickly and accurately.
13.2. Expert Guidance
Our expert technicians can provide guidance on repairing or replacing your seat belt buckle.
13.3. Comprehensive Services
We offer a range of services, including seat belt repair, replacement, and maintenance.
14. Step-by-Step: Using a Diagnostic Tool for Seat Belt Issues
A diagnostic tool can pinpoint the exact problem with your seat belt system.
14.1. Connecting the Tool
Connect the diagnostic tool to your vehicle’s OBD-II port.
14.2. Running a Scan
Run a scan to identify any error codes related to the seat belt system.
14.3. Interpreting the Results
Interpret the results to determine the cause of the problem. Common codes may indicate issues with the seat belt sensor, buckle, or retractor.
14.4. Clearing Codes
After addressing the issue, clear the error codes to reset the system.
15. Common Tools Needed for Seat Belt Repair
Having the right tools on hand can make seat belt repair easier and more efficient.
15.1. Screwdrivers
A set of screwdrivers in various sizes is essential for removing and disassembling the seat belt buckle.
15.2. Pliers
Pliers are useful for gripping and manipulating small components.
15.3. Socket Set
A socket set is necessary for removing and reinstalling the seat belt buckle.
15.4. Compressed Air
Compressed air is helpful for cleaning debris from the buckle mechanism.
15.5. Lubricant
A lubricant, such as WD-40, can help the buckle mechanism operate smoothly.
16. Seat Belt Extenders: When and How to Use Them
Seat belt extenders can provide additional comfort and safety for certain individuals.
16.1. Who Needs an Extender?
Seat belt extenders are often used by individuals who are larger in size or who have difficulty reaching the seat belt buckle.
16.2. Choosing the Right Extender
Choose an extender that is compatible with your vehicle model and meets safety standards.
16.3. Installing the Extender
Install the extender by attaching it to the existing seat belt buckle.
16.4. Safety Considerations
Ensure the extender is securely attached and does not interfere with the proper functioning of the seat belt.
17. Exploring Advanced Seat Belt Technologies
Modern vehicles incorporate advanced seat belt technologies to enhance safety.
17.1. Pre-Tensioners
Pre-tensioners automatically tighten the seat belt in the event of a collision.
17.2. Load Limiters
Load limiters reduce the force exerted on the occupant’s chest during a collision.
17.3. Active Buckles
Active buckles automatically position themselves for easier access.
18. DIY vs. Professional Repair: Making the Right Choice
Deciding whether to repair or replace a seat belt buckle yourself or seek professional help depends on several factors.
18.1. Complexity of the Issue
Simple issues, such as a stuck buckle or minor debris, can often be resolved with DIY methods. More complex issues, such as a broken retractor or damaged pre-tensioner, may require professional attention.
18.2. Skill Level
If you are comfortable working on vehicles and have experience with basic repairs, you may be able to handle the repair yourself. If you are not confident in your abilities, it is best to seek professional help.
18.3. Availability of Tools
If you have the necessary tools and equipment, you may be able to perform the repair yourself. If you do not have the tools, you will need to purchase them or seek professional help.
19. Cost Analysis: Repair vs. Replacement
The cost of repairing or replacing a seat belt buckle can vary depending on the vehicle model and the extent of the damage.
19.1. Repair Costs
Repairing a seat belt buckle can range from a few dollars for simple cleaning and lubrication to several hundred dollars for more complex repairs.
19.2. Replacement Costs
Replacing a seat belt buckle can range from a few hundred dollars to over a thousand dollars, depending on the vehicle model and the cost of the replacement part.
19.3. Factors Affecting Cost
Factors that can affect the cost of repair or replacement include the vehicle model, the extent of the damage, and the availability of replacement parts.
20. Upgrading Your Seat Belts for Enhanced Safety
Consider upgrading your seat belts for enhanced safety and comfort.
20.1. Aftermarket Options
Numerous aftermarket options are available, including seat belts with improved materials, enhanced features, and custom designs.
20.2. Performance Belts
Performance belts offer increased strength and durability for high-performance vehicles.
20.3. Custom Designs
Custom designs allow you to personalize your seat belts to match your vehicle’s interior.
21. Step-by-Step: Verifying Proper Seat Belt Function
Ensuring your seat belt is functioning correctly is crucial for your safety.
21.1. Visual Inspection
Visually inspect the seat belt for signs of wear and tear, such as fraying, cuts, or other damage.
21.2. Retraction Test
Test the seat belt retraction by pulling the belt out and releasing it. The belt should retract smoothly and completely.
21.3. Locking Test
Test the seat belt locking mechanism by pulling the belt out quickly. The belt should lock securely.
21.4. Buckle Test
Test the buckle by inserting and releasing the seat belt tongue. The buckle should lock and release smoothly.
22. Understanding Force and Seat Belt Effectiveness
Seat belts play a critical role in distributing the forces experienced during a collision.
22.1. Force Distribution
Seat belts distribute the forces of a collision across the stronger parts of your body, such as your chest and hips.
22.2. Injury Reduction
By distributing the forces, seat belts reduce the risk of serious injury or death.
22.3. Importance of Proper Fit
A properly fitted seat belt is essential for maximizing its effectiveness.
23. Seat Belt Safety for Children and Infants
Proper seat belt safety is especially important for children and infants.
23.1. Child Seats
Use appropriate child seats for children who are too small to use seat belts safely.
23.2. Booster Seats
Use booster seats for children who are too short to use seat belts properly.
23.3. Seat Belt Positioning
Ensure seat belts are properly positioned across the child’s chest and hips.
24. The Seat Belt’s Role in Airbag Systems
Seat belts and airbags work together to provide maximum protection in a collision.
24.1. Complementary Systems
Seat belts and airbags are complementary systems that work together to reduce the risk of injury.
24.2. Airbag Deployment
Airbags deploy in conjunction with seat belts to provide a cushion of protection.
24.3. Importance of Both
Both seat belts and airbags are essential for maximum safety in a collision.
25. Recycling Old Seat Belts: Environmentally Friendly Disposal
Recycling old seat belts is an environmentally friendly way to dispose of them.
25.1. Recycling Programs
Numerous recycling programs accept old seat belts for recycling.
25.2. Benefits of Recycling
Recycling old seat belts reduces waste and conserves resources.
25.3. Finding a Recycling Center
Find a recycling center near you that accepts old seat belts.
26. Case Studies: Successful Seat Belt Repairs
Examining case studies can provide valuable insights into successful seat belt repairs.
26.1. Common Issues
Common issues include stuck buckles, damaged retractors, and worn belts.
26.2. Repair Techniques
Successful repair techniques include cleaning, lubrication, and component replacement.
26.3. Lessons Learned
Lessons learned include the importance of proper diagnosis, using the right tools, and following instructions carefully.
27. Emerging Trends in Seat Belt Technology
Seat belt technology continues to evolve with new innovations and features.
27.1. Smart Buckles
Smart buckles incorporate sensors to detect whether the seat belt is properly fastened.
27.2. Adaptive Systems
Adaptive systems adjust seat belt tension based on the occupant’s size and weight.
27.3. Integration with ADAS
Integration with advanced driver-assistance systems (ADAS) allows seat belts to work in conjunction with other safety features.
28. FAQ: Common Questions About Seat Belts
Answering frequently asked questions can help clarify common misconceptions about seat belts.
28.1. How Often Should I Replace My Seat Belts?
Replace your seat belts if they show signs of wear and tear or if they have been involved in a collision.
28.2. Can I Repair a Damaged Seat Belt Myself?
Simple issues, such as a stuck buckle, can often be resolved with DIY methods. More complex issues may require professional attention.
28.3. Are Seat Belt Extenders Safe to Use?
Seat belt extenders are safe to use if they are compatible with your vehicle model and meet safety standards.
29. Resources for Further Learning
Numerous resources are available for further learning about seat belts.
29.1. NHTSA
The National Highway Traffic Safety Administration (NHTSA) provides information on seat belt safety and regulations.
29.2. IIHS
The Insurance Institute for Highway Safety (IIHS) conducts research and testing on seat belt effectiveness.
29.3. Vehicle Owner’s Manual
Your vehicle owner’s manual provides detailed information on seat belt operation and maintenance.
30. Conclusion: Prioritizing Seat Belt Safety
Prioritizing seat belt safety is essential for protecting yourself and your passengers. Whether repairing, replacing, or maintaining your seat belts, taking the necessary steps to ensure they are functioning properly can make a life-saving difference. Remember to consult with professionals at MERCEDES-DIAGNOSTIC-TOOL.EDU.VN for expert guidance and services.
Ensuring your seat belt buckle is functioning correctly is more than just a matter of compliance; it’s about prioritizing your safety and the safety of those around you. Regular maintenance, timely repairs, and, when necessary, replacements are crucial.
Ready to ensure your Mercedes-Benz seat belt system is in top condition? Contact MERCEDES-DIAGNOSTIC-TOOL.EDU.VN today for expert guidance, diagnostic tools, and comprehensive services. Our team is here to help you navigate seat belt maintenance, repairs, and upgrades with ease. Reach out to us at 789 Oak Avenue, Miami, FL 33101, United States, or connect via WhatsApp at +1 (641) 206-8880. Visit our website at MERCEDES-DIAGNOSTIC-TOOL.EDU.VN for more information. Don’t wait; your safety is our priority. Contact us now for a consultation. Key LSI keywords include vehicle safety systems, auto repair services, and Mercedes-Benz maintenance.